When you work on your own bike, you start wanting to do all sorts of things: blasting, painting, welding and more.
But buying all the equipment for all of them is more than I can afford, at least.
This time I tried baking soda blasting with a Karcher pressure washer, so here is how it went.
It was a first trial, so it didn't go very well.
I plan to keep experimenting until I can use it properly, and I will post about it when it works.
The main caution with baking soda blasting using a Karcher
This is important, so I'll put it first.
Baking soda blasting with a Karcher sprays baking soda over a wide area!
I did it in my small garden with no precautions at all, and it went all over the house walls, windows, fence, and the motorcycle and bicycle parked nearby. Cleaning up afterwards was hard work.
Of course, my trousers, socks, glasses and hair were also covered in baking soda from the spray and splash-back.
So the biggest caution is this: do it in an enclosed space, and wear safety glasses, wellington boots (rubber boots) and a rain suit.
How much dirt does baking soda blasting with a Karcher remove?
First, here are the results of baking soda blasting the crankcase of a 250 cc single-cylinder motorcycle with a Karcher.
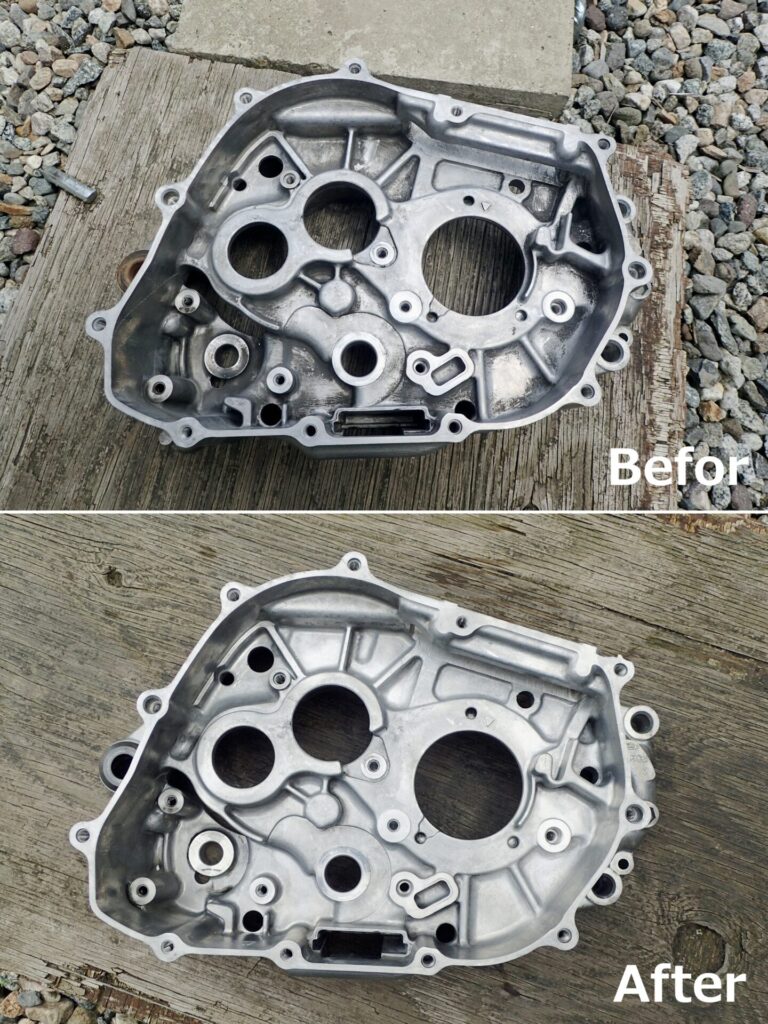
This is the inside of the crankcase.
The top photo shows it after cleaning with a hot alkaline cleaner and a brass brush: black dirt remains where the brush couldn't reach.
The bottom photo shows it after baking soda blasting with the Karcher this time.
Can you see how clean it is?
Next is a close-up of the lower left part of the inside of the crankcase in the photo above.
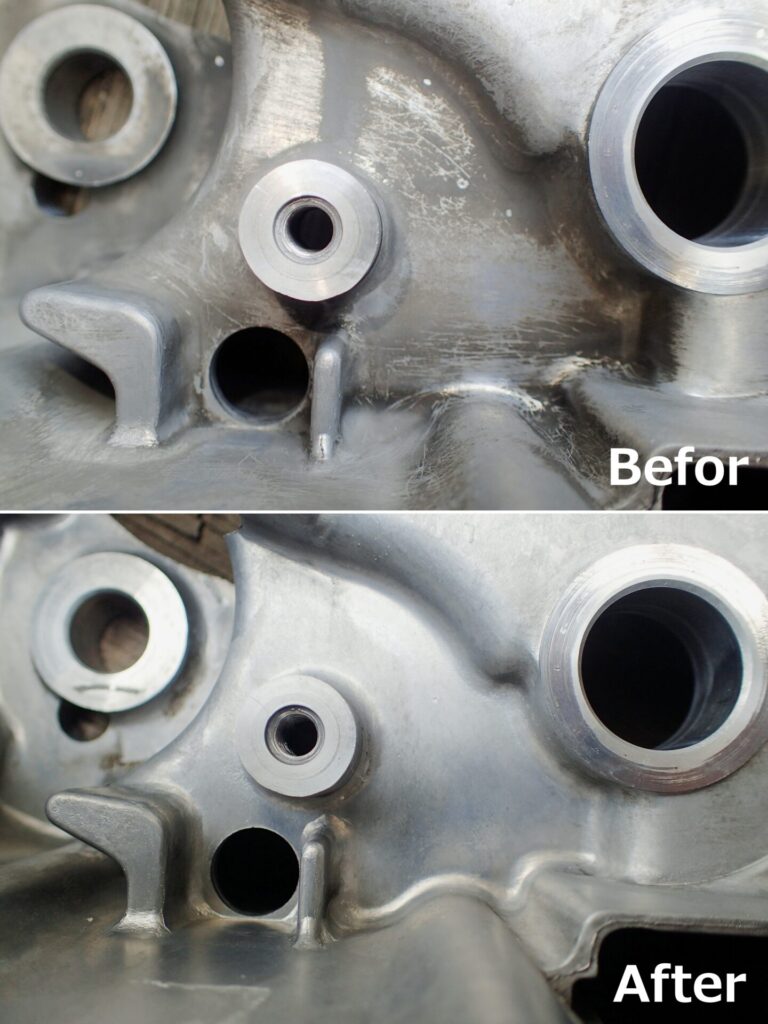
In the top photo you can see black dirt left in narrow spots; in the bottom photo it has all come off.
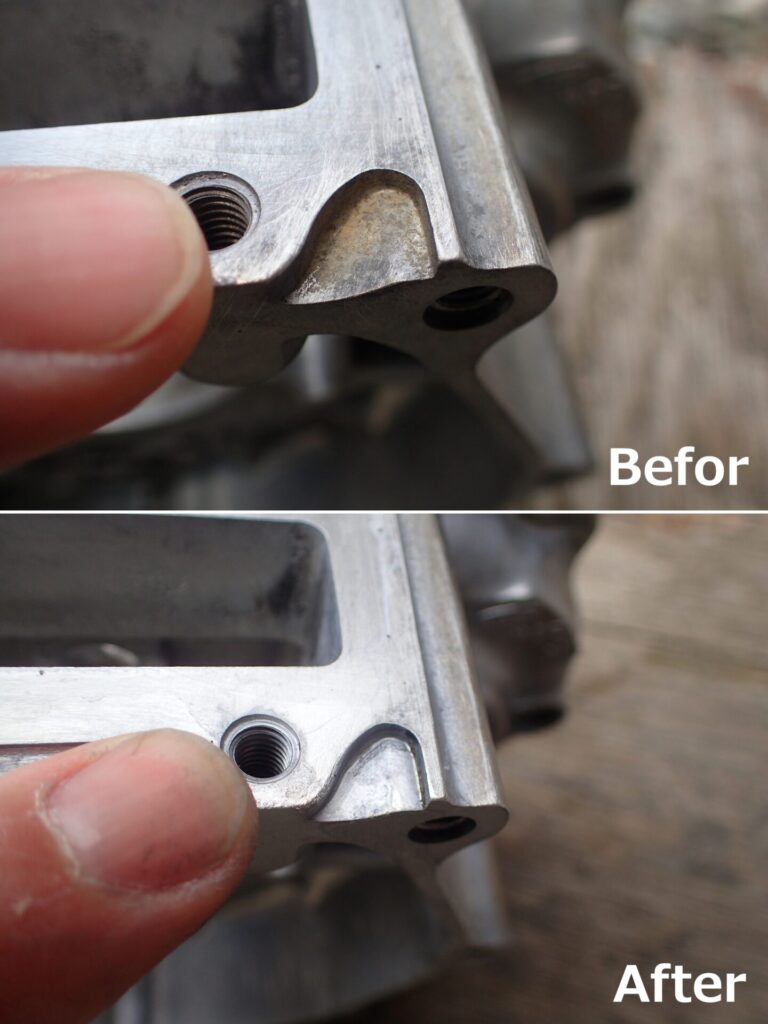
This is the same crankcase.
Where my finger is pointing, the shape is small and complicated, so the brass brush couldn't remove the dirt.
But after baking soda blasting with the Karcher, the dirt is gone.
The counterbore of the threaded hole near my finger is clean too, and so are the threads.
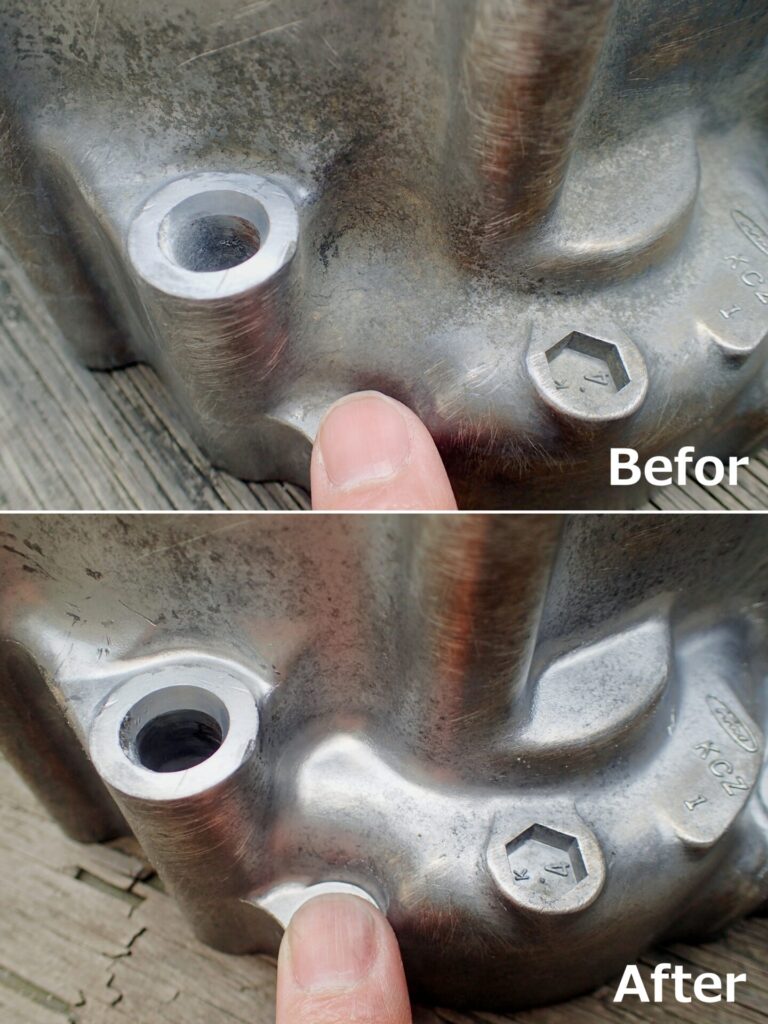
This photo shows the part of the crankcase near the front wheel.
Gravel and mud thrown up by the front tyre stick to the hot crankcase here, so the dirt is stubborn, and the complicated shape makes it hard to clean.
So the brass brush and alkaline cleaner couldn't remove it.
But baking soda blasting with the Karcher got it clean.
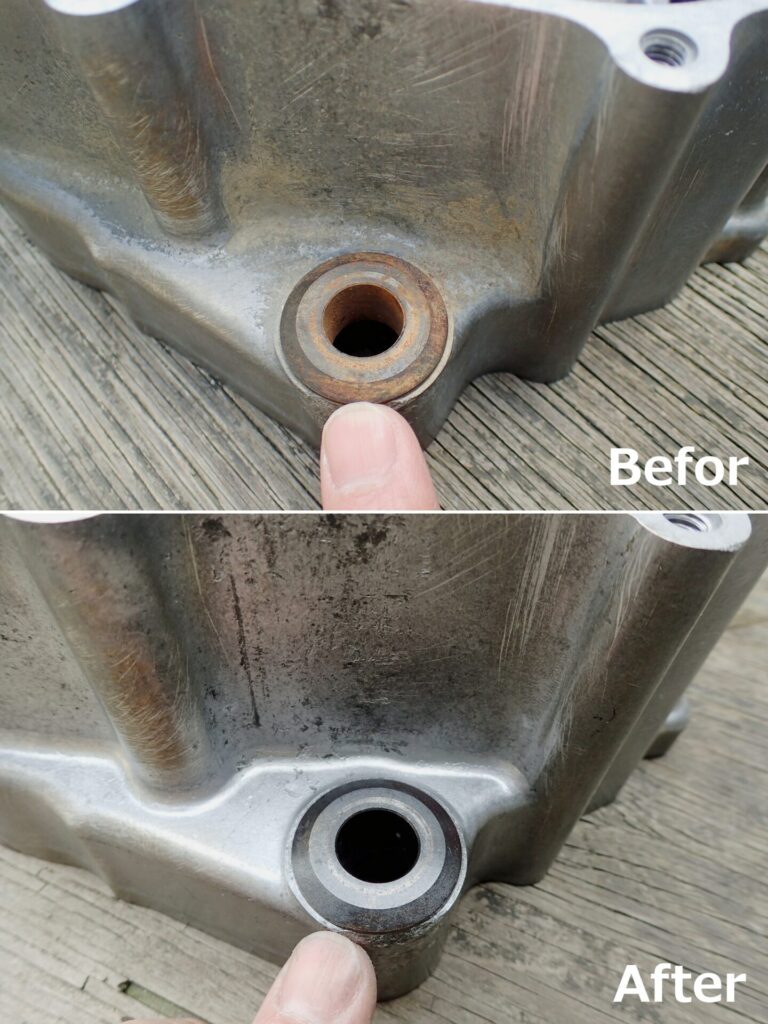
This is the hole at the back of the crankcase where the swingarm pivot shaft goes through.
The crankcase is aluminium, but the part that supports the pivot shaft is made of a metal that rusts.
As in the previous photo, the complicated shape meant the alkaline cleaner and brass brush couldn't remove the gravel and mud.
But baking soda blasting with the Karcher removed both the dirt and the rust.
This showed me that blasting with a Karcher is very useful.
Baking soda blasting with a Karcher is really good!!
What I used for baking soda blasting with a Karcher
This is what I used:
- Karcher (pressure washer)
- A blasting (sandblasting) kit for Karcher (bought on Amazon Japan for about 3,000 to 4,000 yen)
- Baking soda (ARES Health Care baking soda, 5 kg, bought on Amazon Japan for about 1,500 yen)
- Interlocking artificial grass tiles from Daiso, a Japanese 100-yen shop (to reduce splashing)
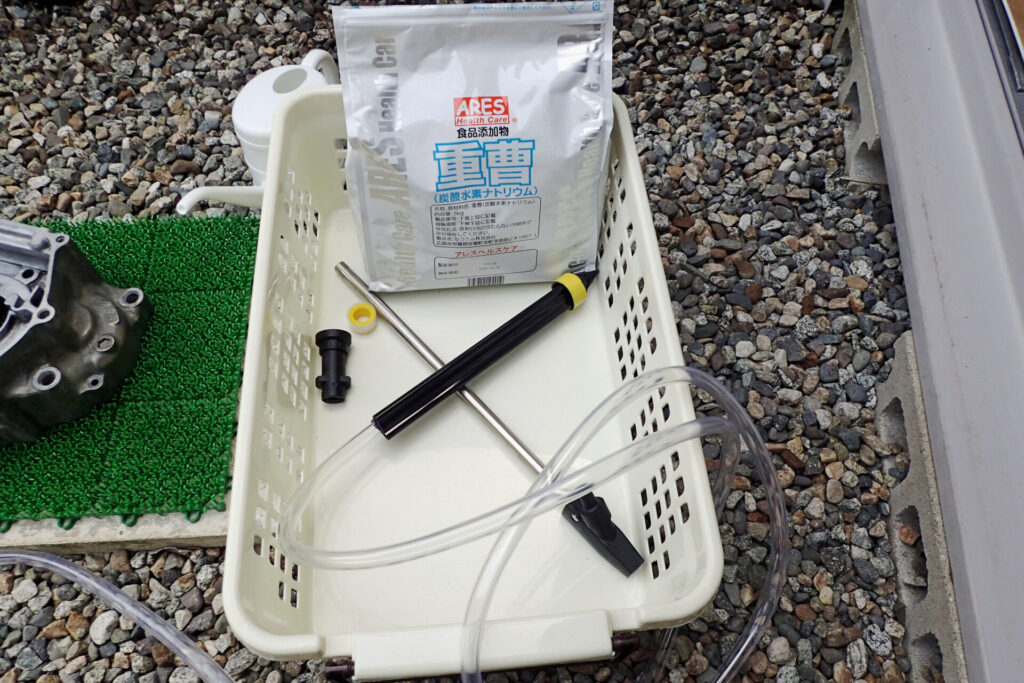
The photo above shows everything I used apart from the Karcher itself.
Problems with baking soda blasting with a Karcher
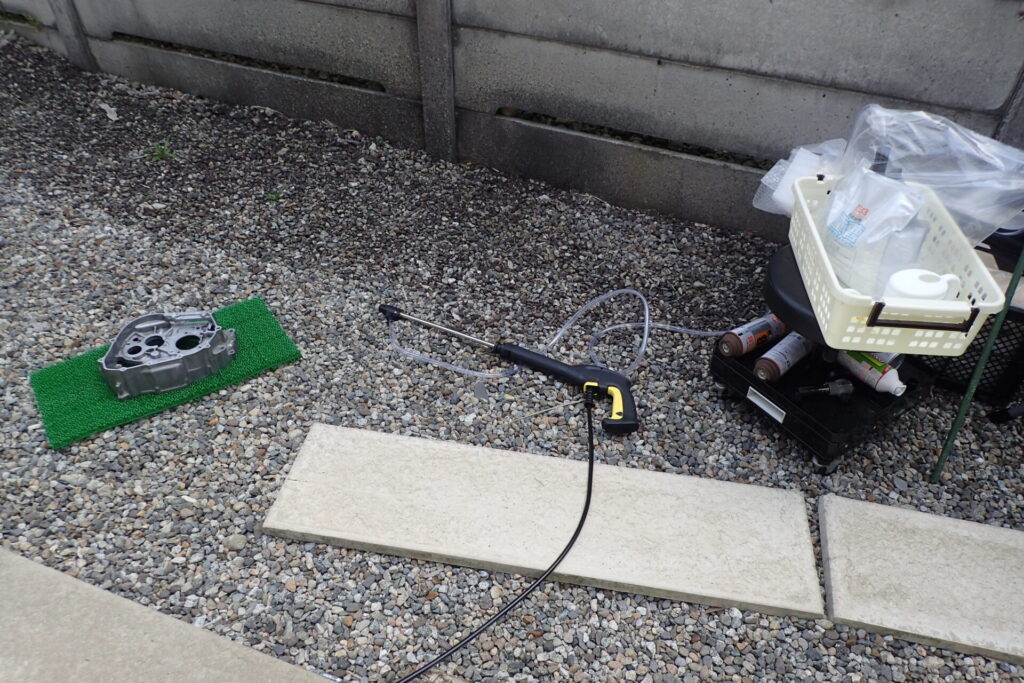
The photo above shows me actually doing the baking soda blasting.
I fitted the blasting nozzle and hose to the end of the Karcher's lance, and put the other end of the hose into the baking soda container.
With this method, the hose sometimes sucked up baking soda and sometimes didn't, so the flow of baking soda was very unstable.
To keep the flow steady, I had to shake the bag of baking soda with my right hand while holding the Karcher gun in my left.
This was very tiring, and with only my left hand I couldn't aim at the spot I wanted.
So I was very happy with the results of baking soda blasting, but the method needs improving.
Improving baking soda blasting with a Karcher
Next, I want to improve these points to make baking soda blasting with a Karcher easier:
- A place where it doesn't matter if baking soda sprays around (work inside an enclosure, and have wellington boots, safety glasses and a rain suit ready)
- A way to make the baking soda flow smoothly to the Karcher nozzle (hang the baking soda up high so gravity helps? Make the container a downward-pointing funnel shape?)
Wearing wellington boots and a rain suit isn't very realistic in hot weather, so I would like to build a large blasting booth without spending much money.
My Karcher blasting series
These are my notes from building a DIY baking soda (wet) blaster with a Karcher pressure washer. The set-up, tools and cautions that finally worked are summarised in my DIY guide.
- First try: baking soda blasting with a Karcher (this post)
- Part 1: a funnel-shaped baking soda container
- Part 2: a splash cabinet, and baking soda that won't feed
- Part 3: feeding the soda from below
- Part 4: clogs and air leaks
- Part 5 (final): what worked
- Baking soda blasting a carburettor
- Wet blasting with glass beads (fork axle holders)
- Wet blasting a rear brake caliper
- Removing blast media thoroughly afterwards
- Does baking soda blasting strip anodising?
- A traffic cone as the media container
- DIY guide: what finally worked