Hello everyone!
Lately, we’ve been focusing heavily on comprehensive chassis maintenance, covering topics like extreme summer garage heat management and routine oil changes. This time, we’re switching gears to focus on the cockpit—specifically, the dashboard meter display, which is the single area riders look at most frequently while on the road.
When you buy a brand-new motorcycle, the factory covers the meter screen with a cheap, temporary protective sheet. However, leaving that sheet on severely hampers visibility, completely wasting the potential of a high-definition liquid crystal display.
Thinking, "I need to peel off this factory sheet and apply a proper, dedicated screen protector as soon as possible," I finally sourced and installed a dashboard screen protection film from Speedo Angels, a highly acclaimed premium British brand.
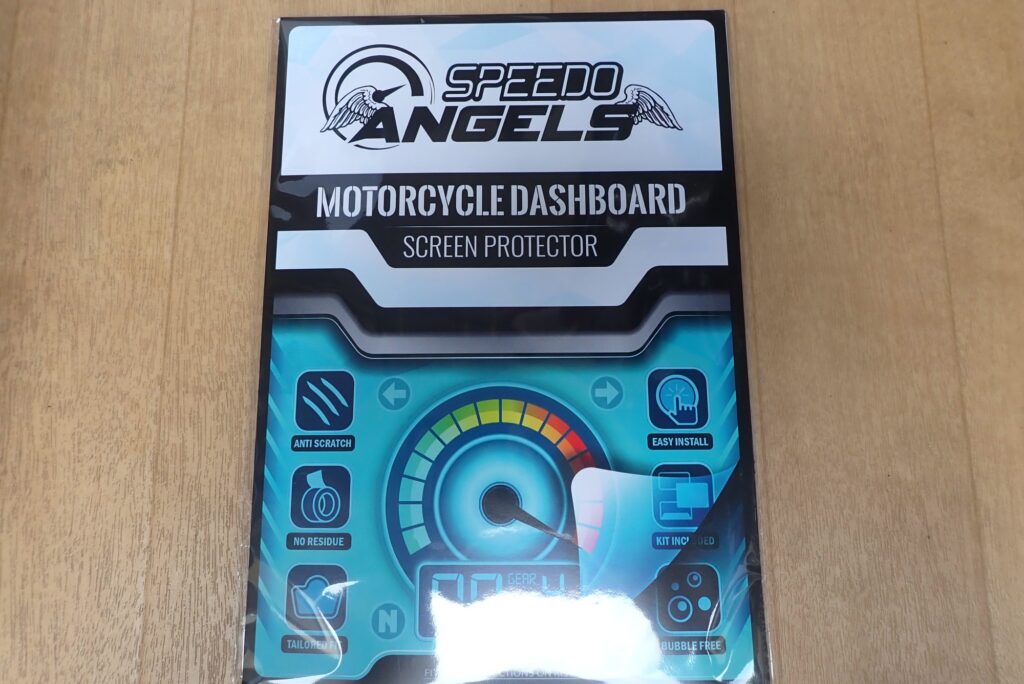
Interestingly, the instrument cluster unit on my X-ADV (2025–2026 model) shares the exact same hardware component (the TFT display unit) with many of Honda's other latest popular models.
Consequently, this post isn't just an exclusive guide for X-ADV owners. It serves as a universal walkthrough for owners of various modern Honda models utilizing the same dashboard architecture.
In this article, I will fully break down my first-hand experience, including a foolproof "wet fit" (water-applied) method using a handy item sourced from a local budget 100-yen shop, and detail the unique film characteristics that set it apart from standard smartphone glass. If you want to shield your vital TFT screen from deep scratches and harsh UV degradation, read on to the end!
[Incredible Component Sharing] CB1000 Hornet, Transalp, Rebel, and Forza Covered! Complete Compatibility List
First, let's verify just how widely shared this specific instrument cluster is across Honda’s model lineup by checking the compatibility label provided by the official Japanese distributor (Peitzmeier Co.) on the back of the packaging.
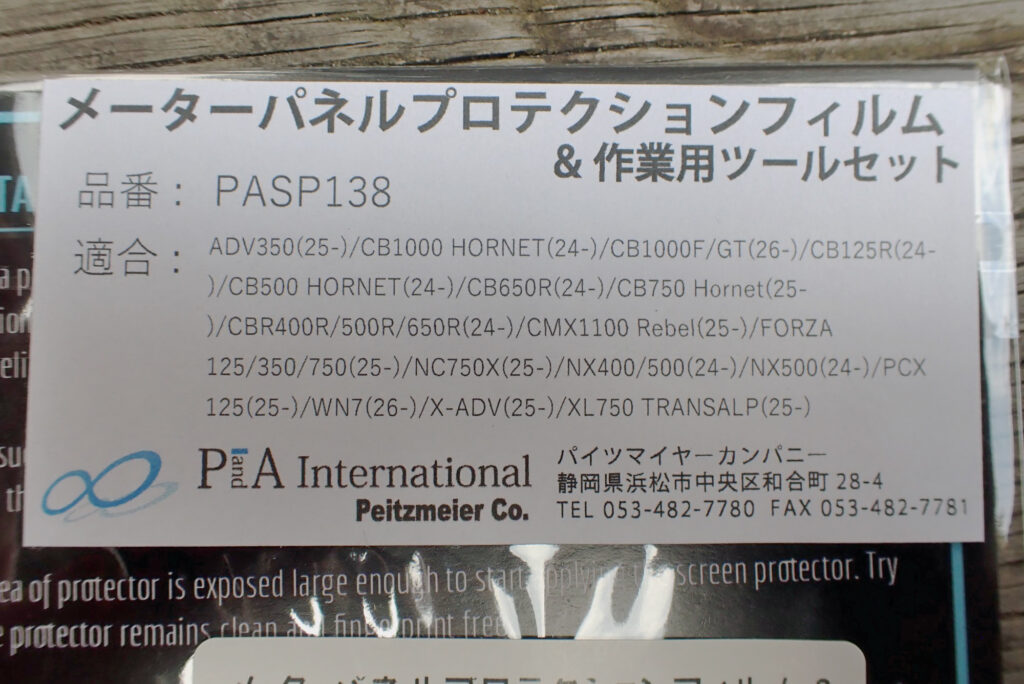
According to the official specs, this protection film kit (Part Number: PASP138) is completely compatible with the following machines:
Main Compatibility Lineup
- X-ADV (2025 model onward)
- CB1000 HORNET / CB750 Hornet
- XL750 TRANSALP
- CMX1100 Rebel (2025 model onward)
- FORZA 125 / 350 / 750 (2025 model onward)
- CBR400R / CBR500R / CBR650R (2024 model onward)
- NX400 / NX500 (2024 model onward)
(Note: I always recommend double-checking your specific model and year variance before purchasing parts.)
As you can see, this dashboard is deployed across a massive spectrum of Honda's mid-to-large capacity machines, ranging from nakeds and adventures to cruisers and maxi-scooters. If you ride any of these motorcycles, this exact installation workflow applies to your machine 100%.
[Product Features] Ultra-Clear and Anti-Glare Dual Set: Thin, Flexible Film Dynamics
Let's unbox the Speedo Angels kit and look over the contents.
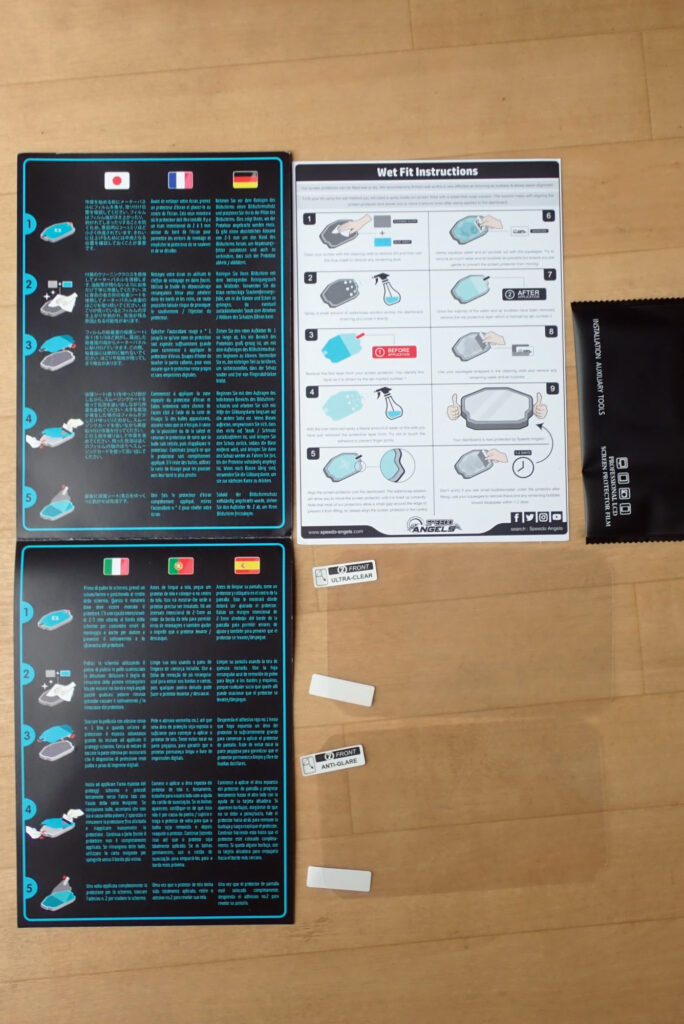
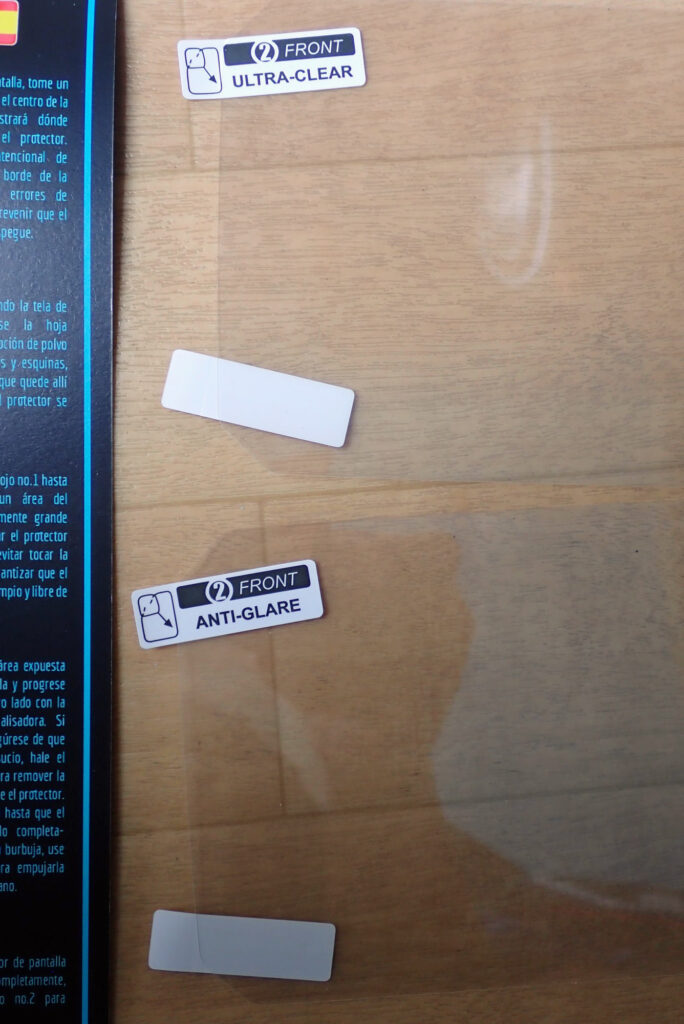
A fantastic highlight of this kit is that it includes two completely different types of film right out of the box, letting you choose the characteristic that best matches your riding environment:
- ULTRA-CLEAR: Offers exceptionally high light transmission, perfectly preserving the factory vivid color reproduction and sharp brightness of the original TFT display.
- ANTI-GLARE: Features a matte finish texture designed to diffuse direct sunlight reflections and eliminate harsh glare for optimal readability in bright conditions.
Since my top priority was maintaining absolute screen sharpness and screen beauty, I selected the Ultra-Clear variant for this installation.
Shifting Away from Hard Glass: The Thin, Flexible Advantage
The texture of this film is fundamentally different from the rigid, brittle tempered glass commonly used on smartphones. It is manufactured from an exceptionally thin, highly flexible plastic compound (such as specialized TPU or PET acrylic resin).
This flexible composition allows the film to flawlessly track and conform to the subtle curvatures built into motorcycle instrument displays. It provides superior long-term durability, ensuring the edges won’t lift or peel away even when subjected to heavy chassis vibrations, high wind pressure, and direct exposure to severe rainstorms.
[Installation Guide] Deploying a Budget Mist Bottle for a Foolproof "Wet Fit" Procedure
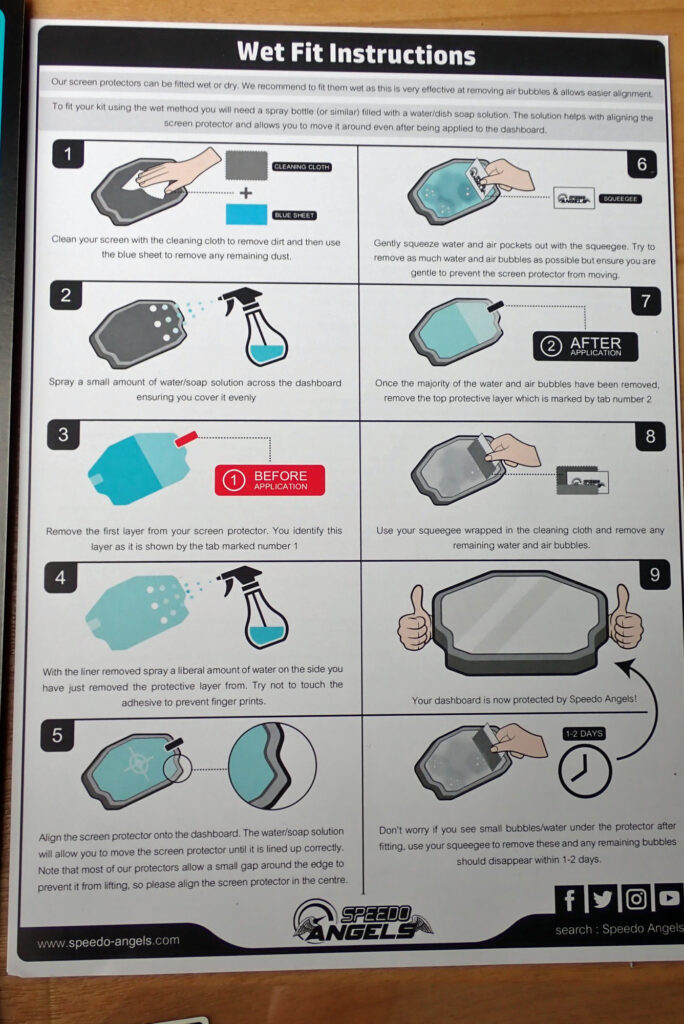
To position this thin, flexible film with a perfect 100-point finish—completely free of trapped air bubbles or microscopic dust motes—you must execute a "wet fit" (water application). This methodology is heavily prioritized in the official instructions.
Here is the secret weapon I prepared for the job:
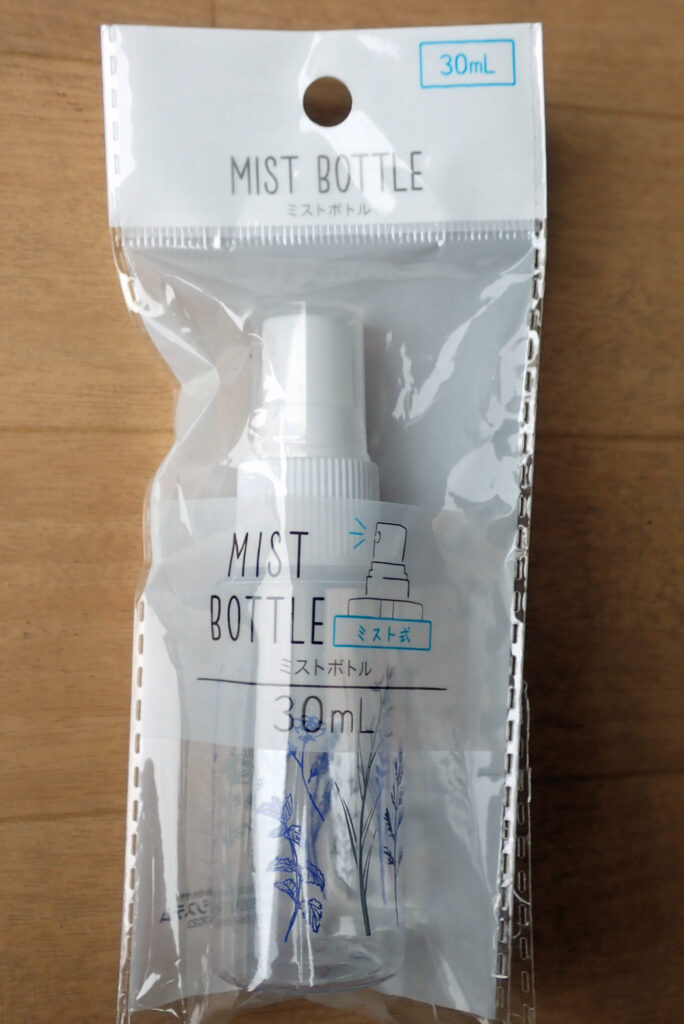
I headed to the cosmetics section of a local 100-yen shop (dollar store equivalent) and grabbed this small plastic spray bottle, which delivers an exceptionally fine, uniform mist.
Fill the bottle with clean water and add exactly one single drop of mild dish soap (neutral detergent) to mix your dedicated wet-fit solution. The soap drop breaks the surface tension, allowing you to slide and adjust the film over the glass with absolute precision.
Step 1: Spray a Fine Mist Across the Screen
Thoroughly clean the TFT surface to remove all dust particles. Next, deploy your mist bottle to apply a generous layer of wet-fit solution across the entire display screen and onto the adhesive side of the film as you peel it away from its protective backing.
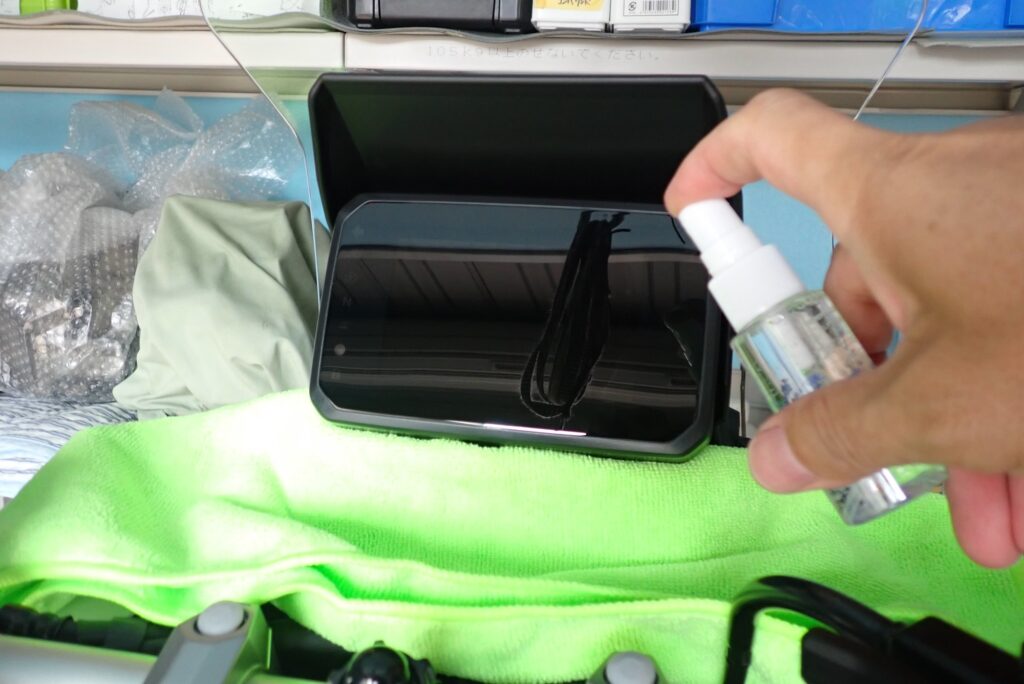
While the surfaces are completely wet, the film will glide effortlessly across the display surface. This completely eliminates the high-stakes "one-shot alignment trap" found in standard dry phone screen installations. Take your time to align the borders perfectly to the absolute center of the unit.
Step 2: Use the Squeegee to Drive Out Water and Air Bubbles
Once the alignment is perfectly centered, grab the white card squeegee included in the kit. Working from the absolute center outward to the edges, use firm, gentle pressure to sweep out the trapped water and air bubbles.
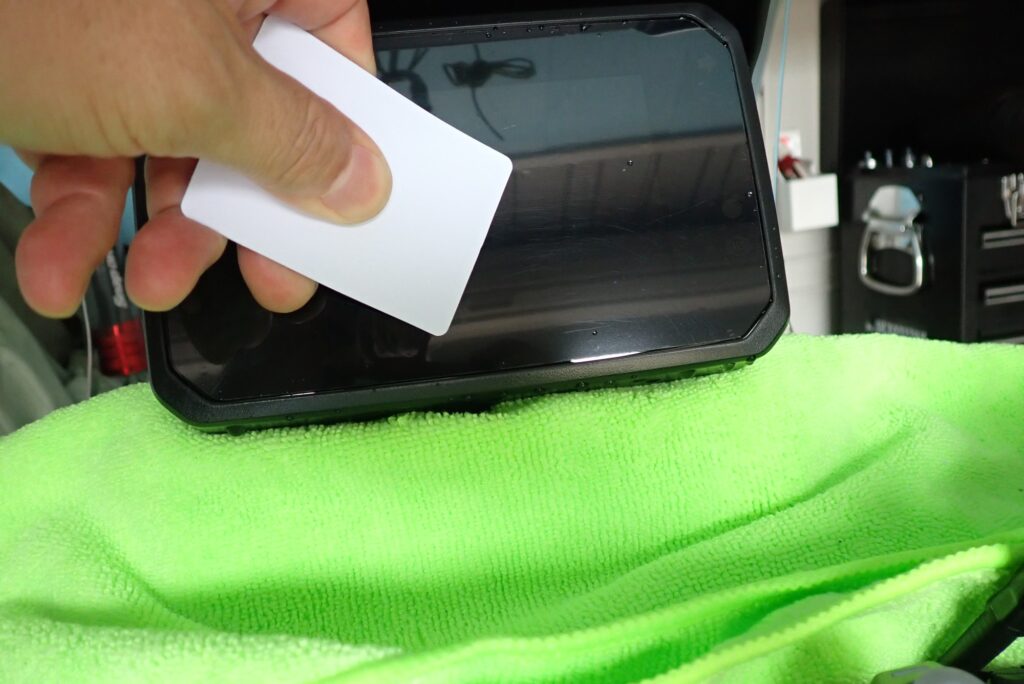
Make sure to place a microfiber cloth beneath the dashboard cluster before starting this step to instantly absorb the water runoff, preventing fluid from finding its way into your bike's sensitive internal electrical harness.
[Initial Impressions] Clear as Glass: Restoring Cockpit Transparency
Once all the fluid is pushed out, carefully peel away the top protective liner film from the surface, allow the assembly to dry completely, and the project is wrapped up. Let's look over the finished display:
Take a look at the completed setup. While it looks beautifully clear in the photos, I must be honest: I unfortunately allowed two tiny air bubbles to remain trapped beneath the film.
To ensure you don’t replicate this minor blunder, the key trick is to apply an even more generous amount of the wet-fit solution during Step 1. You need a sufficient layer of fluid beneath the plastic to smoothly slide air bubbles out past the borders.
That minor installation hiccup aside, the dimensional accuracy of this Speedo Angels film is spectacular—the cutlines match the four corners of the Honda display with absolute precision, making it an excellent product.
By executing this quick upgrade, your expensive instrument cluster is permanently shielded from fine flying sand kicked up by leading vehicles, surface scratches caused by gloved fingertips, and harsh ultraviolet (UV) clouding. Because replacing a damaged factory TFT assembly can easily cost hundreds of dollars, executing this defense routine on a fresh machine delivers immense value.
Essential Gear to Maximize Your Dashboard Customization Success
To protect your display and maximize your DIY execution quality, make sure to stock your garage with these three essential items:
- Speedo Angels Dashboard Screen Protection Film Kit The premier model-specific protection kit utilized in today's X-ADV project. Including both Ultra-Clear and Anti-Glare variants in a single package provides excellent peace of mind, giving you a backup sheet if you make a mistake or want to alter your cockpit aesthetics down the road.
- Fine Mist Spray Bottle A small atomizing spray bottle mandatory for applying a wide, uniform layer of micro-droplets across the screen. Sourcing a compact bottle from a local budget or cosmetics shop works perfectly.
- High-Absorbency Microfiber Cloth Essential for instantly trapping fluid runoff as it squeezes past the display borders, protecting your internal electronics. It’s also an invaluable staple item to keep on hand for cleaning parts and executing general workshop maintenance.
Conclusion: Strip the Factory Temporary Sheet and Lock Down Premium TFT Protection
That wraps up my review and installation guide for the Speedo Angels protection film on Honda's universal TFT cluster. Let's look at the core takeaways:
- Universal Fit: This dashboard setup is completely identical across a massive fleet of modern Honda machines, including the CB1000 Hornet, Transalp, Rebel 1100, and Forza lines.
- Wet Fit Method: Utilizing a budget mist spray bottle to execute a water-applied fit completely eliminates alignment failure.
- Ultra-Clear Performance: The clear variant maintains absolute transparency, making it look as though nothing is installed on the glass.
Peeling off that cheap, flimsy factory delivery sheet and locking down a premium, dedicated protection layer drastically elevates the premium ownership feel of the cockpit and gives you total peace of mind on long-distance tours.
Before your high-contrast liquid crystal display suffers permanent abrasion damage, use this wet-fit guide to install a bulletproof layer of defensive armor on your machine!
Ride safe, and enjoy the ultimate motorcycle life!