Hello everyone!
Today, I’m bringing you a critical DIY project for any rider: combating extreme summer heat waves and protecting yourself from heatstroke inside your motorcycle storage garage.
While a metal bike garage does a fantastic job of shielding your prize machine from rain and wind, it transforms into a scorching, oven-like hellscape when baked under the merciless summer sun. Extreme temperature swings inside a garage don't just ruin your wrenching environment—they drastically accelerate the hardening and cracking of your bike's plastics, degrade rubber seals, and oxidize vital fluids and lubricants.
To combat this, I tracked a full week of temperature data inside my garage using a TANITA graph thermometer and resolved to deploy a serious insulation upgrade to protect my machine. In this post, I will provide a comprehensive guide on my DIY process, lining the inner walls and ceiling with high-performance building insulation: 50mm (5cm / 2-inch) thick Styrofoam IB sheets.
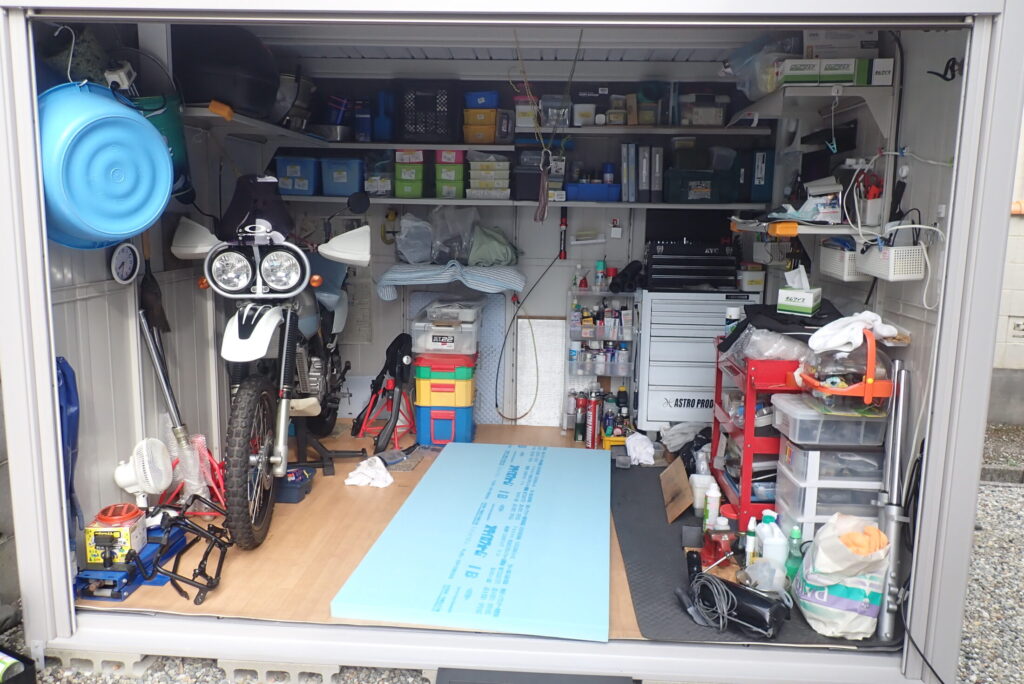
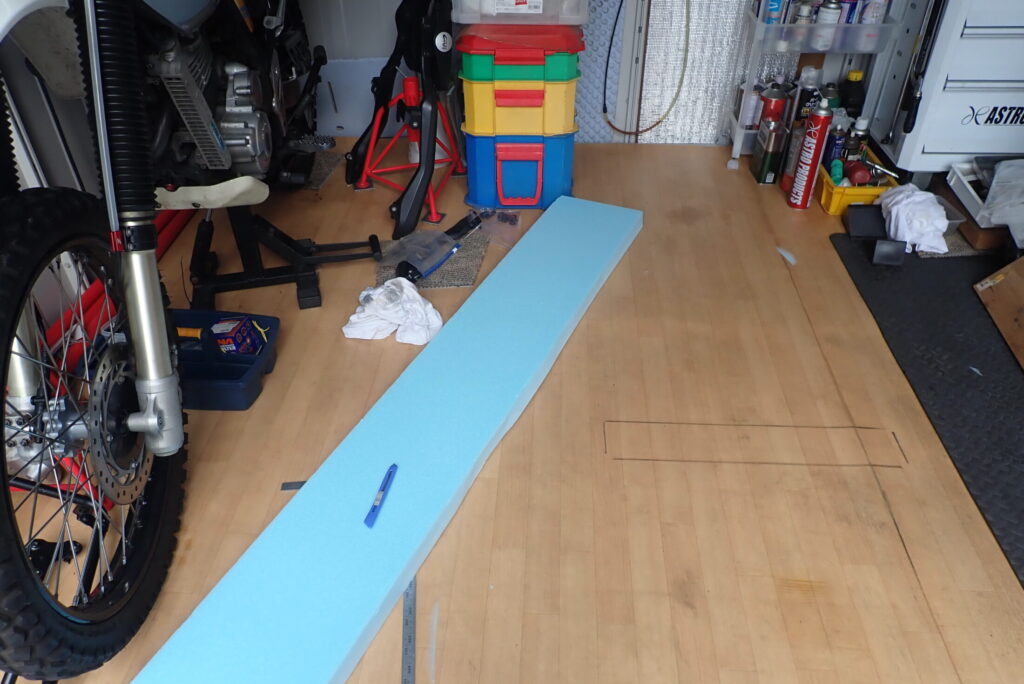
[Image 1: Inside the garage where my favorite XR BAJA is parked, right before starting the cutting work on the bright blue Styrofoam sheets]
This project involves friction-fitting thick insulation panels seamlessly into a static garage frame. By actually putting blade to foam and tackling these ultra-thick 5cm sheets myself, I uncovered some invaluable first-hand pitfalls, difficulties, and DIY blunders that you would never expect on paper.
If you want to shield your beloved motorcycle and optimize your garage environment against punishing summer heat, read on to the end!
[Assessing the Situation] The Harsh Reality of July Garage Temperatures Proven by a TANITA Graph Thermometer
Before diving into the insulation install, let’s look at the baseline data from my garage's TANITA thermometer to understand the exact climate profile we are up against. This specific thermometer is incredibly handy because its LCD display generates an hourly graph tracking temperature trends over the last 7 days.
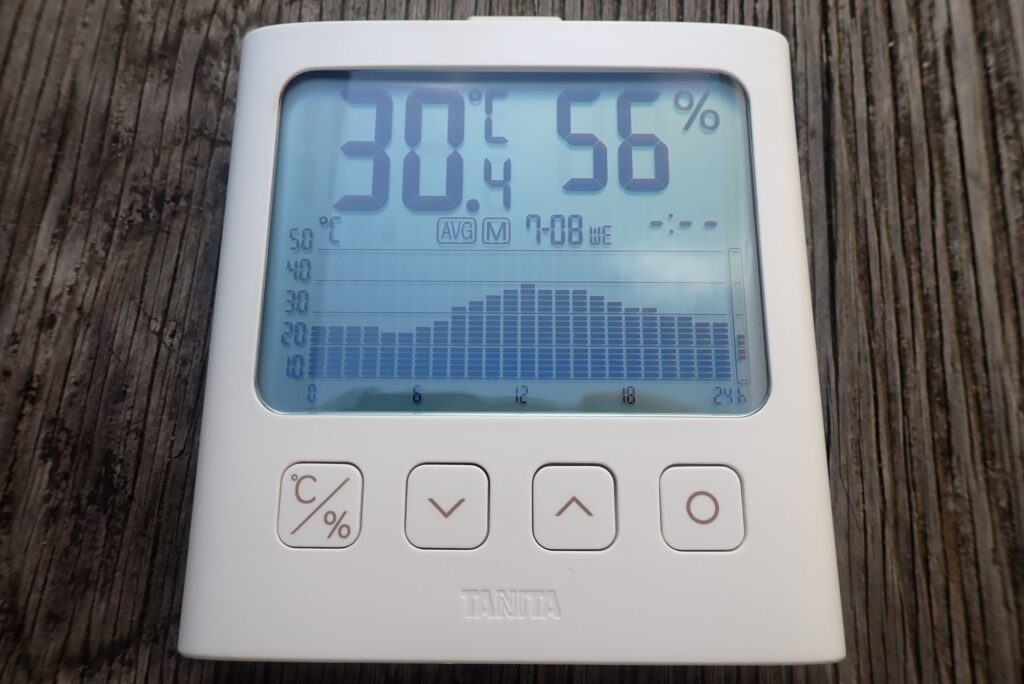
[Image 2: Data from Wednesday, July 8th: Peak temperature hits 40°C (104°F), average is 30.4°C (86.7°F), humidity at 56%, displaying a distinct bell-shaped curve from late morning through evening]
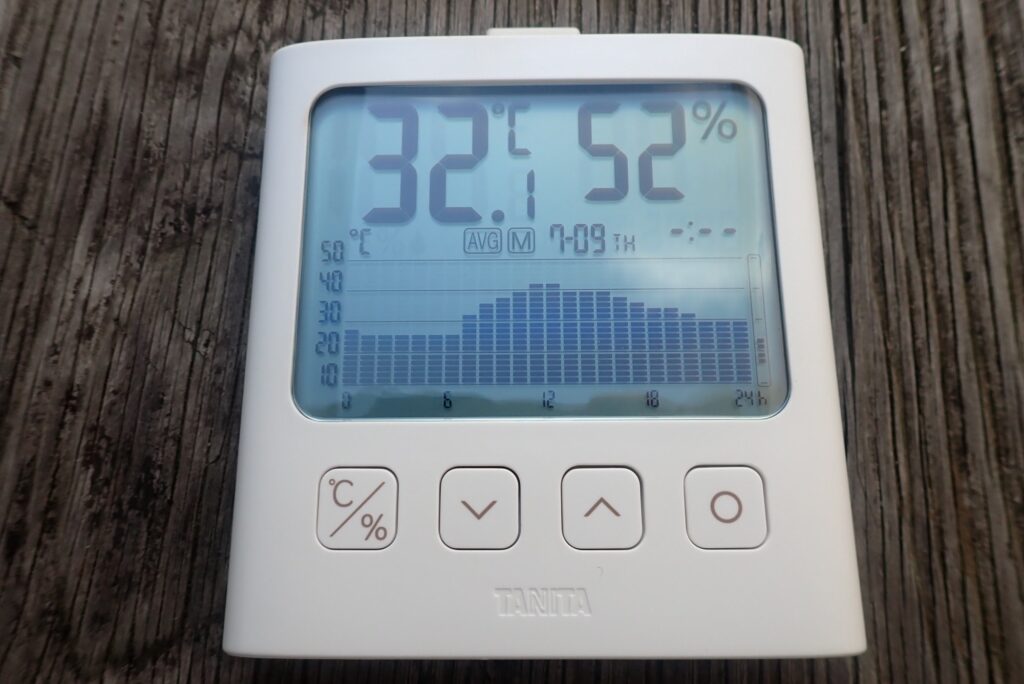
[Image 3: Data from Thursday, July 9th: Peak temperature climbs to 42°C (107.6°F), average is 32.1°C (89.8°F), humidity at 52%, showing the entire graph shifting even higher than the previous day]
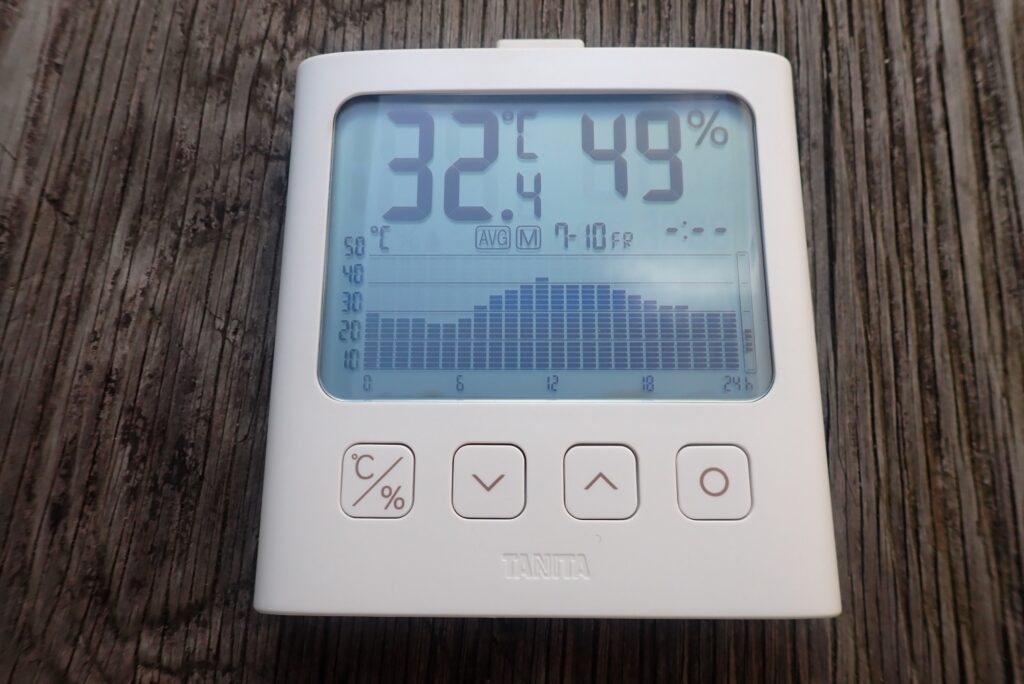
[Image 4: Data from Friday, July 10th: Peak temperature holds at 42°C (107.6°F), average is 32.4°C (90.3°F), humidity at 49%, tracking a dangerous extended plateau well above 30°C peaking around noon]
As this multi-day data proves, even in early July right before the official end of the rainy season, the internal garage environment effortlessly breaches the 40°C (104°F) mark.
Once peak summer arrives, the metal walls act as direct conductors, radiating intense thermal energy inward. It's easy to see how internal temperatures can skyrocket close to 50°C (122°F). This relentless thermal stress constantly cooks your motorcycle's delicate running gear rubber boots and oils, making an immediate intervention non-negotiable.
The Star of Garage Insulation: Why I Chose 50mm (2-Inch) Thick Styrofoam IB
Here is the premium insulation material I sourced to execute this extreme heat defense upgrade:
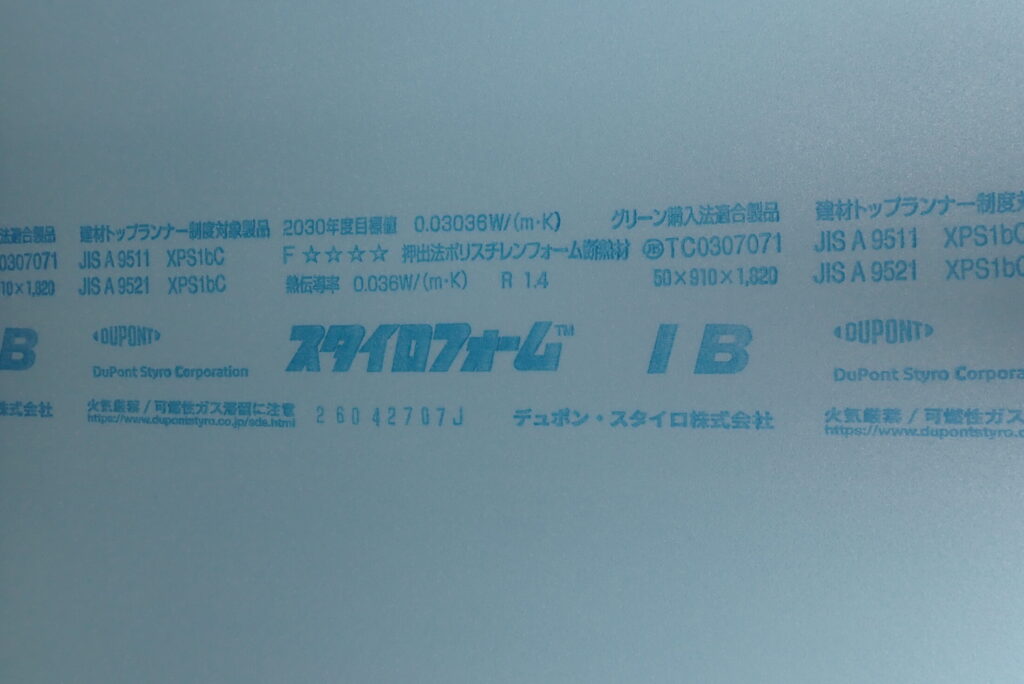
[Image 5: The factory logo stamped on the surface of the Styrofoam IB extruded polystyrene insulation sheet used for this project]
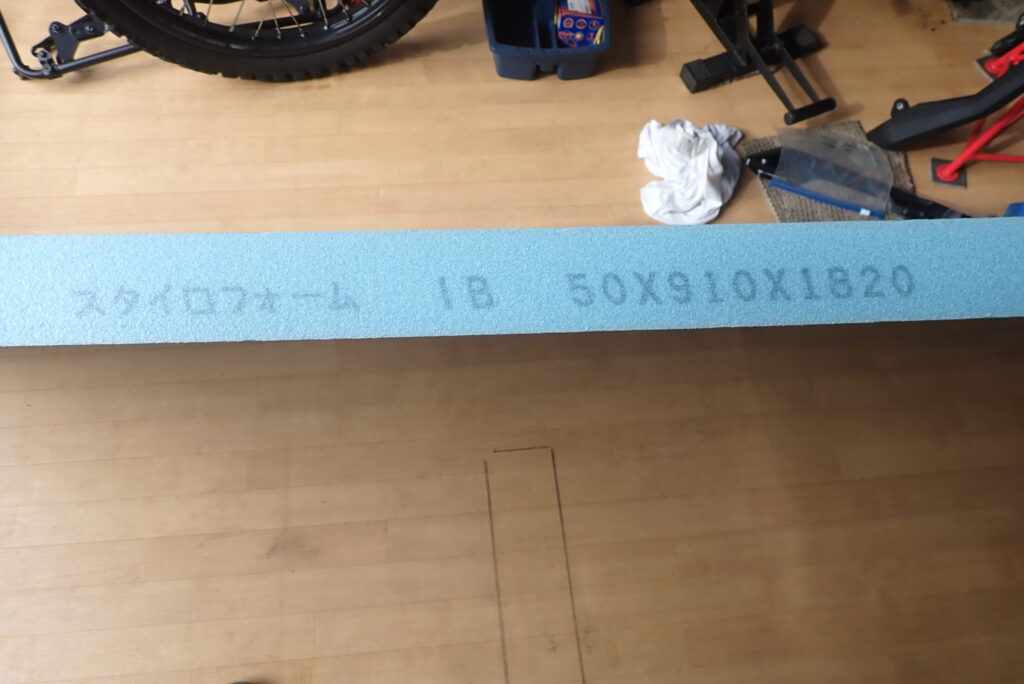
[Image 6: Size specification printed on the side of the panel, showing an ultra-thick layout measuring 50 x 910 x 1820 mm]
This is "Styrofoam IB," famous for its signature bright blue hue and readily available at local home improvement centers. While it looks similar to standard expanded polystyrene (Styrofoam), it features an extruded, closed-cell structure. This tight cell density makes it highly resistant to heat transfer and completely moisture-resistant—the perfect characteristics for a motorcycle garage setup.
Making the Uncompromising Choice: 50mm Thickness
The key spec here is the depth. While most DIY garage insulation projects opt for thinner 20mm or 30mm sheets to save money, I selected the ultra-thick 50mm (5cm) variant to unlock maximum thermal resistance. The thicker the material, the higher its R-value (thermal resistance), making this the ideal specification to repel intense, direct solar radiation.
[Installation Steps] Custom Cutting and Fitting Into the Garage Frame
The installation methodology relies on custom-cutting the Styrofoam panels and friction-fitting them directly between the garage’s metal studs and ceiling joists.
Step 1: Check Baseline Conditions and Clear Out Cargo
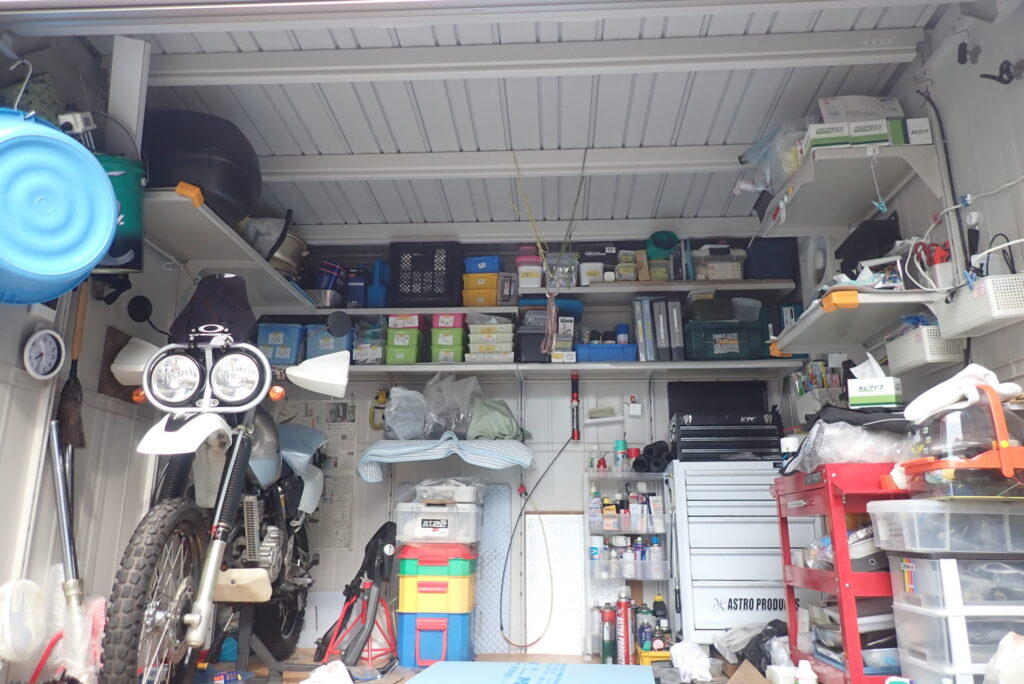
[Image 7: Upper section of the garage before installation, showing the exposed corrugated metal roof panels and square steel framing]
- Inspect the framing: Look over the exposed steel frame supporting the ceiling.
- Clear the workspace: Stage all chemicals, spray cans, and toolboxes away from the walls and shelves to create a wide, clean workspace.
Step 2: Measure and Cut to Size Using a Straightedge and Utility Knife
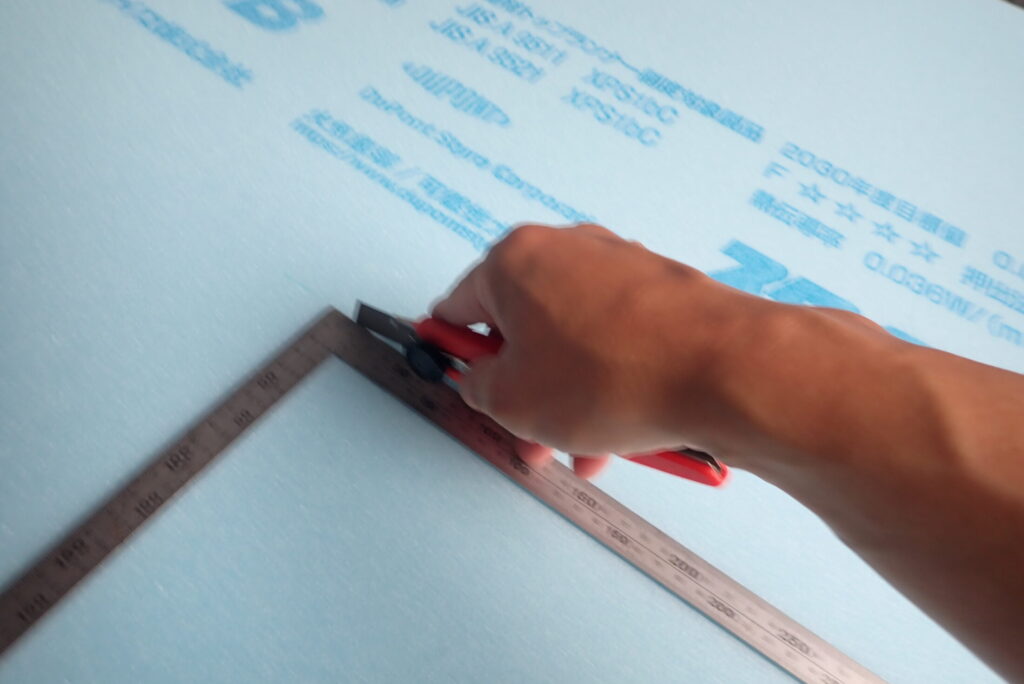
[Image 8: Using a long straightedge ruler and a heavy-duty blue utility knife to cut the Styrofoam sheet to match the garage frame width]
- Measure precisely: Use a tape measure to map out the exact vertical and horizontal dimensions between the garage frame studs.
- Mark and score: Transfer those dimensions onto the Styrofoam panel.
- Execute the cut: Place a long straightedge guide along your line and draw a heavy-duty utility knife firmly through the material to slice your panel to shape.
[Lessons Learned] The 50mm Cutting Trap: Wavy Edges and Gap Fixes
Here is the single biggest pitfall and first-hand lesson I encountered by actually grabbing the tools and doing the work myself. If you are planning this upgrade, take note:
[Image 9: Cross-section of a cut Styrofoam sheet where the knife blade drifted diagonally, creating a wavy, uneven edge instead of a straight line]
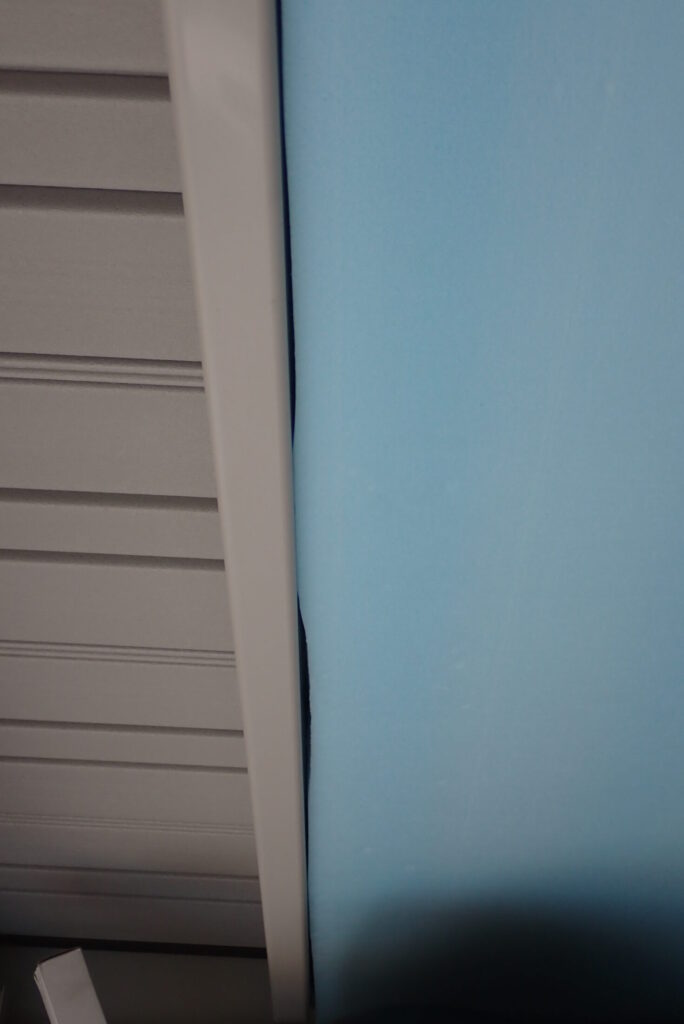
[Image 10: Close-up of a panel fitted into the ceiling frame, revealing a few millimeters of open gap against the metal stud due to the wavy edge]
A thickness of 50mm (2 inches) is massive. Even if you extend a standard utility knife blade to its absolute maximum length, it is physically impossible to cleanly sever the entire depth in a single pass.
Consequently, you are forced to make multiple scoring passes through the same line. As shown in the photo, the flexible blade naturally drifts and deflects diagonally on subsequent passes, leaving a jagged, wavy cross-section.
Because of these uneven edges, when I went to friction-fit the panels into the metal framing, they failed to seat flush. This left annoying, multi-millimeter gaps (visible black lines) against the steel studs, as you can see in the close-up shot.
💡 Pro-Tips for Delivering a Flawless, Straight Cut
To cut 50mm insulation panels with a razor-sharp, professional finish, bypass standard utility knives entirely. Instead, deploy a specialized long-blade insulation saw or invest in an electric hot-wire foam cutter.
If you must use a utility knife, do not try to force the blade through the depth all at once. The secret to a straight edge is making several light, effortless passes, deepening the groove by exactly 1cm each time without flexing the blade.
[Post-Installation Review] Ultimate Peace of Mind: A Custom Garage Shielded by Blue Insulation Walls
Despite battling the thick foam cuts, I successfully tailored and fit every panel into the framework. Let's look at the completed setup:
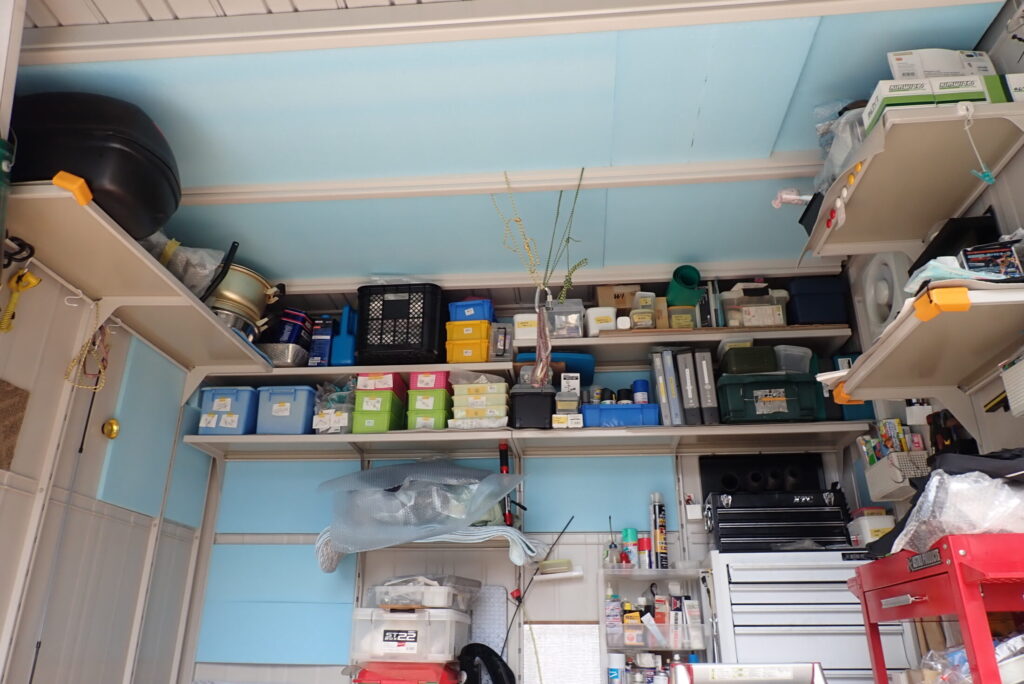
[Image 11: Comprehensive view of the completed garage overhaul, showing the vivid blue Styrofoam sheets seamlessly lining the entire ceiling and rear wall]
As the photo shows, the bright blue Styrofoam insulation now neatly fills the spaces from the ceiling down the entire rear wall. I even made sure to back-fill the hidden zones behind the storage shelves.
*5 cm-thick Styrofoam was used for the ceiling. For the walls, 2 cm-thick Styrofoam was used.
The moment I stepped into the newly insulated garage, the difference was night and day. The intense, stifling radiant heat (that oppressive wave of hot air) that used to beam down from the bare metal roof was completely blocked at a tangible, physical level!
Even during peak summer heatwaves, this barrier will drastically suppress rapid internal temperature spikes. It creates a stabilized environment that protects against fuel vaporization, prevents electrical system degradation, and shields your delicate plastics and fairings from thermal wear.
3 Essential Items to Ensure a Successful and Safe Garage Insulation DIY
To maximize your workflow and execution quality, consider adding these proven tools and components to your garage inventory:
- TANITA Digital Graph Thermohygrometer The high-performance meter featured in today's project. It automatically generates hourly trend graphs over a rolling 7-day period. It is an invaluable gadget for visually audit-checking and managing your motorcycle's long-term storage environment.
- Tajima Heavy-Duty Utility Knife (Ultra-Sharp Black Blade) An exceptionally rigid, heavy-duty utility knife mandatory for slicing thick foam. The robust handle minimises blade drift, allowing you to deliver cleaner, straighter cuts through deep insulation panels.
- Styrofoam IB Panels While you can easily source these panels at major brick-and-mortar home improvement stores, transporting them requires a large truck or van. If you don't have access to a large utility vehicle, sourcing them online with direct residential delivery is the smartest play.
Conclusion: Preventing Hidden Heat Damage Is the Secret to Keeping Your Bike Pristine for the Next Decade
That wraps up my DIY guide on deploying 50mm Styrofoam IB insulation to defend a bike garage from extreme summer heat.
Taking the time to stabilize and optimize your vehicle's stationary storage climate (temperature and humidity) is the ultimate secret to keeping your motorcycle looking brand-new for the next ten years.
While cutting ultra-thick insulation serves as a classic DIY baptism of patience, the resulting thermal barrier and peace of mind are worth every bit of effort. Before the worst of the summer heatwave strikes, take charge of your workspace and build a premium, insulated sanctuary for your machine!
Ride safe, and enjoy the ultimate motorcycle life!