Boo


2026/10/11
Removing the TERAMOTO T-REV from my BMW G650GS to return it to standard: Clic R clips, emulsion inside after six months, and the rougher feel without it.

2026/10/11
Rebuilding the TERAMOTO T-REV from my BMW G650GS with the full overhaul kit: new gaskets, 0.07 mm reeds and O-ring, and why you should follow the maker's interval.

2026/10/11
Removing and taking apart the TERAMOTO T-REV on my BMW G650GS: emulsion inside, lifting reeds, distorted gaskets, and a dent from not using the special tool.

2026/10/11
My impressions of a TERAMOTO T-REV crankcase pressure reducing valve on a BMW G650GS: five changes on the road, a gear-range graph, maintenance and downsides.

2026/10/11
How I fitted a TERAMOTO T-REV (9 mm, 0.07 mm shim) to my BMW G650GS using a separate breather hose, so the original hose stays uncut.

2026/10/11
I had been holding my Tohnichi QL25N-MH click torque wrench wrongly. Where to hold the grip, the angle to pull at, and stopping at the click.

2026/10/11
Why you disconnect the negative terminal first, the tools you need, and step-by-step photos of removing and charging the battery on a BMW G650GS.
2026/10/11
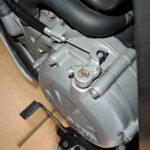
Hello everyone. Today I'm writing about replacing the clutch cable on my G650GS. I replaced the cable to make the clutch lever even a little lighter to pull, so that I would get less tired on long tours. There are several ways to make a clutch lever lighter (so that it takes less force to pull): greasing the lever pivot, lubricating the cable, and rethinking the cable routing. This time, as well as greasing the clutch lever, I replaced the clutch cable itself. The new cable is a Venhill Featherlight clutch cable. I bought it new on Yahoo! Auctions (a ...

2026/10/18
Honda's air-cooled off-roaders, the XR250 and XR BAJA. The MD30 generation arrived in 1995, and Honda kept updating it over the years. In 2003, for example, the XR250 got upside-down forks. If you are buying one secondhand, which model year should you choose? In this article I cover the RFVC engine, the equipment that only the BAJA has, the differences between conventional and upside-down forks, the changes in each model year (based on Honda's press releases), and the points to check when choosing a used bike. It is a long article, so feel free to read only the parts you ...

2026/10/24
Hello everyone.Today I'd like to share a mistake I made: running XR250R (ME08) front fork springs on my XR250 Baja.First, please note that this article is just my personal impression. I don't expect it to apply to everyone. Many owners of the XR Baja or the XR250 (MD30, the Japanese-market model) consider fitting parts from the ME08, the XR250R racer, to improve off-road performance. Swapping the front fork springs comes up often, but on my Baja, forks with ME08 springs inside were not a good match. In this article, I describe how forks with ME08 springs felt on my Baja, ...

2026/10/11
Does your BMW G650GS feel jerky when pulling away or at very low speeds? Does it knock or stall easily at low revs? In short, a BoosterPlug is a plug-in (connector-to-connector) part that takes about 30 minutes to fit. On my G650GS, low-speed rideability improved noticeably. I fitted one to my own G650GS. In this article, I show how to unplug the connector, where I put the sensor and module, and what I noticed while doing the job. ItemDetailsNotesBikeBMW G650GSSingle-cylinder model (may also apply to bikes with the same engine)Difficulty★★☆☆☆ (beginner to intermediate)Plug-in only. Take care when fixing the sensorTimeAbout ...

2026/10/11
Does your BMW G650GS feel jerky and hard to ride when pulling away or at very low speeds? Are you worried about knocking or stalling? In short, after just 20 km with a BoosterPlug fitted, the bike was noticeably easier to ride when pulling away and at very low speeds. More than a year later, the effect is still there (added October 2026). Here is my honest review from my own G650GS: changes in low-speed torque and usable rev range, exhaust note and vibration, and the downside of fuel economy. ItemDetailsNotesBikeBMW G650GSSingle-cylinder 650 cc enginePart testedBoosterPlugPlug-in intake air temperature correction ...

2026/10/11
Hi everyone. This time, I’ll show you how I replaced the swingarm pivot shaft on my BMW G650GS. What is a swingarm pivot shaft? The pivot shaft is the thick shaft (bolt) that holds the swingarm to the frame. It runs through the front end of the swingarm (the swingarm pivot), and when the rear wheel moves up and down over bumps, the swingarm swings around this shaft. On most bikes, it sits near the footrests, where the frame and the front of the swingarm overlap. You can see the head of the shaft and the nut from the side ...

2026/10/14
Hi everyone, it’s Boo. This time, I removed the swingarm pivot shaft from my BMW G650GS. This job gave me a lot of trouble. I couldn’t finish it in one day, and it took me two days in total. First, I checked the socket sizes needed to remove the pivot shaft. On the front sprocket side, there is a 21 mm nut. On the rear brake side, there is a 22 mm bolt head. I thought it would be better to take all the load off the swingarm before removing the pivot shaft, so I also decided to remove the ...

2026/10/10
Hi everyone, Boo here.Today's topic is the difference between two versions of the Honda XR250: the MD30 (the Japan-market road bike, sold as the XR250 / XR250 BAJA) and the ME08 (the competition-only model, the XR250R). I have already written about the differences between the MD30 and ME08 front forks. This time, I look inside the engine, at the crankshaft bearings in particular.(This post simply shows that the crankshaft bearings differ in these ways. It is just a quick comparison, not a repair guide.)If you own an XR250R (ME08), this is what your crankshaft bearing looks like next to the ...

2026/10/24
Hi everyone. This is my suspension series, where I strip down a secondhand set of front forks that I bought on Yahoo! Auctions (Japan) for my Honda XR250 BAJA (MD30). [Part 1: Teardown and First Clues] (From the outer shape and the bottom adjuster, I guessed that the forks were ME08 parts.) [Part 2: Full Teardown and Parts Comparison] (I stripped the forks completely with a special tool and confirmed that they had aluminium cylinders.) https://motorcyclelifeboo.com/en/finding-a-hidden-racer-setup-honda-xr-baja-md30-front-fork-teardown-part-1/ https://motorcyclelifeboo.com/en/xr250r-me08-fork-teardown-part-2-md30-comparison/ This is Part 3, the final part of the series: a close look at the cylinders and the damping parts. This time, I ...

2026/10/24
Hi everyone. In Part 1 of this series, I stripped a secondhand set of front forks that I had bought on Yahoo! Auctions (Japan) for my Honda XR250 BAJA (MD30). From their outer shape and the adjuster at the bottom, I became convinced that they actually came from the enduro racer, the XR250R (model code: ME08). https://motorcyclelifeboo.com/en/finding-a-hidden-racer-setup-honda-xr-baja-md30-front-fork-teardown-part-1/ This is Part 2: the full teardown and parts comparison. To turn that hunch into a proven fact, I used a special tool to strip a fork leg down completely. I then laid the parts next to the stock internal parts from an ...

2026/9/17
Note: This article documents a personal trial and setup plan on my own modified Honda XR BAJA (MD30). Because carb settings depend heavily on individual intake and exhaust modifications, this does not guarantee identical results on other XR250 series motorcycles. "Can I sharpen throttle response and low-end torque while keeping the stock carburettor?" "Is there a way to achieve cleaner fuel combustion when jetting an older vintage bike?" Few things match the visceral single-cylinder pulse of my beloved Honda XR BAJA (MD30). At present, my BAJA features significant intake and exhaust upgrades, running the following setup: Air Cleaner: K&N high-flow ...

2026/10/6
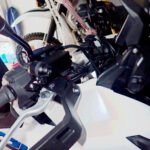
You've fitted a dashcam to your bike — but is it really capturing clear footage? Then, checking the footage on my computer for the first time in a while, I found the picture had turned strangely hazy and white… It's been about a month since I fitted the Daytona Mio MiVue M820WD — a proper front-and-rear twin-camera dashcam — to my Honda X-ADV. *My previous instalment covering the installation is here: https://motorcyclelifeboo.com/en/x-adv-dashcam-front-camera-mount/ https://motorcyclelifeboo.com/en/honda-xadv-rear-dashcam-plot-bracket-install-guide/ That earlier post focused mainly on close-up shots of the cameras themselves, and a few of you told me it was hard to picture how everything sits ...
2026/10/6
A motorcycle dashcam has become essential kit these days — for peace of mind in the event of an accident, and as protection against tailgating and road rage incidents. When fitting the hugely popular Daytona Mio MiVue M820WD — prized for its picture quality and features — to a Honda X-ADV (2026 model, RH21), most riders run into the same two headaches: where to mount the front camera, and how to deal with the cable length. "I don't want to drill into the expensive original fairing..." "I'm worried double-sided tape will fail in the summer heat or rain, and take ...