Hi everyone.
In Part 1 of this series, I took the front forks off my secondhand Honda XR250 (the Japan-market XR250 BAJA / MD30). From their outer shape and the adjuster at the bottom, I became convinced that they actually came from the enduro racer, the XR250R (model code: ME08).
This is Part 2: the full teardown and parts comparison. To turn that hunch into a proven fact, I used a special tool to strip a fork leg down completely. I then laid the parts next to the stock internal parts from an MD30 (the Japanese road-legal model) that I had on hand, and compared their materials and construction.
If you own an XR250R (ME08), these are the same type of forks as yours. If you ride an MD30, this shows you how different the racer's internals are. I didn't expect the gap between the racer and the road bike to be this obvious. Here is a detailed look inside, with plenty of photos.
1. Separating the Damper Rod and Removing the Spring
I had already drained the oil from the fork in Part 1. The first job now is to separate the top cap from the damper rod (inner rod) inside.
This is the first tricky step when you strip a Honda cartridge-type conventional (right-way-up) fork.

Push the spring down a little to make a gap, and fit a 17 mm spanner (wrench) on the lock nut on the rod. Then fit a socket wrench on the top cap and turn the two tools against each other to loosen the cap.
If you don't hold the lock nut firmly, the whole rod will spin with the cap. The key is to get both tools seated properly.

Once the top cap is off, the thread of the inner rod and the lock nut are exposed. Now you can pull the internal parts, such as the spring and the collar, out from the top.

Here are the fork spring and inner rod after I pulled them out. I laid them carefully on a rag in my work area so they wouldn't get scratched.
2. Using a Special Tool (Cylinder Holder) and Measuring Its Size
Next, I removed the damper cartridge (cylinder), which sits deeper inside. The cylinder is held by a bolt in the bottom of the lower leg (slider). If you just turn that bolt, the cylinder spins inside the fork and the bolt won't come undone. So you need a special tool (a fork cylinder holder) that holds the cylinder from the inside.
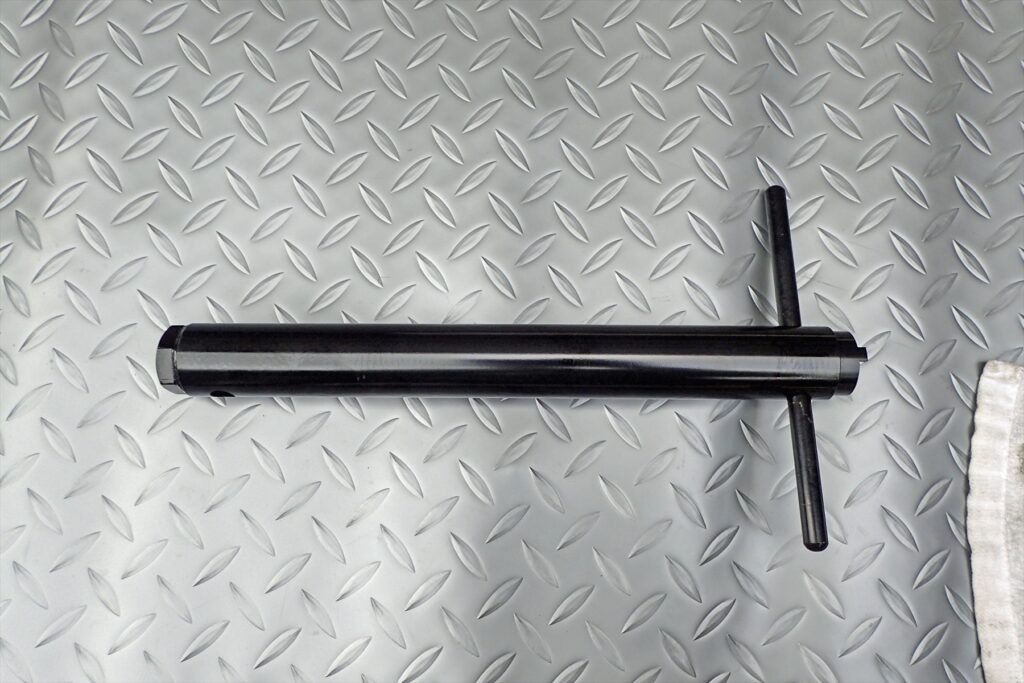
The tool I used is a tube-shaped special tool with a T-handle. Its tip locks into the anti-rotation part of the cylinder, deep inside the inner tube. With the cylinder held this way, you can undo the bolt at the bottom.
At this point, I measured the hex end of the tool that engages with the cylinder, using a digital caliper. I wanted to keep a record for choosing parts and for fitting parts from other models in the future.
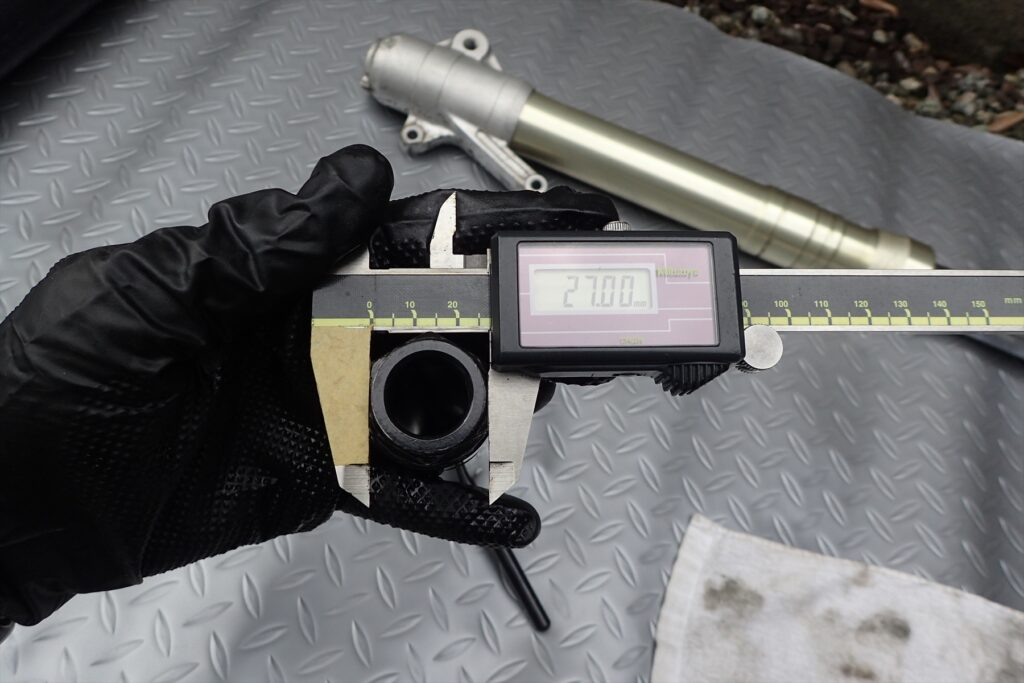
The hex measured 27.00 mm across the flats. If you know the exact figure, it is much easier to find a tool or part that fits when you do this job yourself.
After checking the size, I pushed the special tool into the inner tube and got a firm hold on the cylinder inside.

This stops the cylinder from spinning, so you can safely undo the bolt in the bottom of the lower leg.
3. Removing the Bottom Valve and Stripping the Fork Completely
Once the cylinder bolt is undone, you can pull the bottom valve (base valve) unit out of the lowest part of the fork.
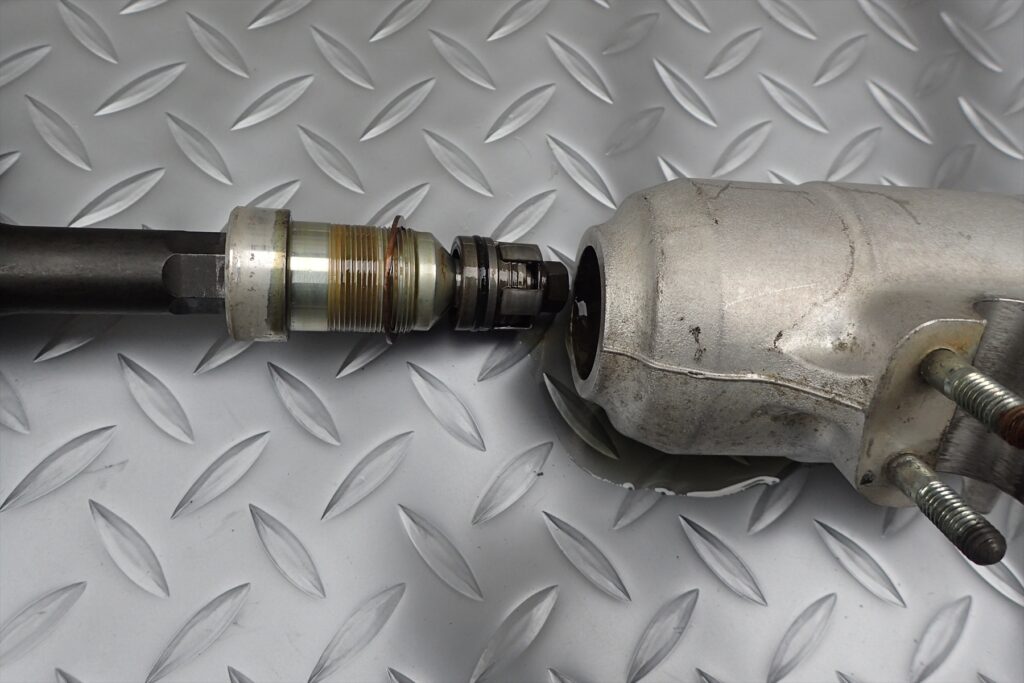
When you pull the valve out, the fork oil left inside will drip, so put down a rag or a tray first. Pull the valve straight out, slowly, so you don't damage the O-rings or the shims (thin discs that create the damping force).
With that, every part of one fork leg was apart!

I cleaned all the parts and laid them out in order in my work area. If you also keep the tools organised (ratchet, sockets, 17 mm spanner, special tool, Allen keys and so on), reassembly goes much faster.
4. The Result: XR250 MD30 (Road Bike) vs XR250R ME08 (Racer) Fork Internals
Now for the main part. I laid the internal parts of the stripped fork next to the stock parts from an MD30 (the Japanese road-legal model) that I had on hand.
It turned out that this was not a matter of small differences in appearance. The construction itself was completely different.

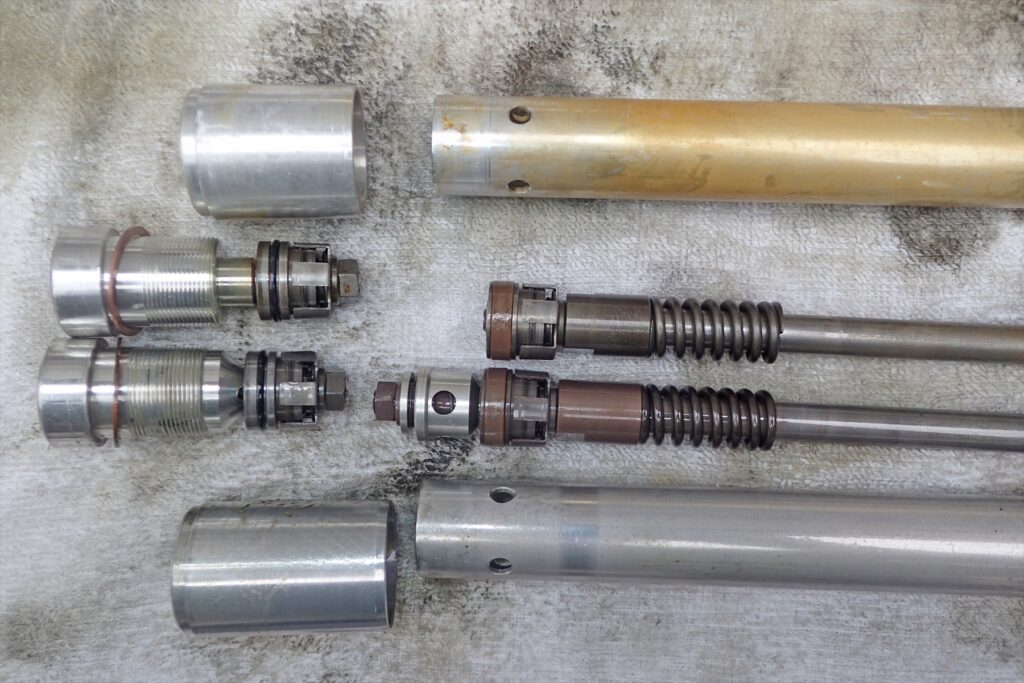
Take a look at the photo above. The top row is the MD30 parts, and the bottom row is the ME08 parts I took apart this time.
The difference you can see at a glance is at the end of the damper rod.
- MD30 (top): There is nothing fitted to the end of the damper rod.
- ME08 (bottom): There is a mechanism fitted to the end of the damper rod, which (I believe) adjusts the damping.
It is hard to see in the photo above, but the length of each part is also different.
When you zoom in on the area near the end of the damper rod (near the bottom of the fork), the difference in design thinking becomes even clearer.
The ME08 bottom valve (bottom) includes a machined part, and it has its own oil passage (port) sizes and a mechanism that controls the damping force.
This proved beyond doubt that these front forks are 100% ME08 (XR250R) racer forks, not only on the outside but right down to the core components inside!
Summary: The Potential of Racer Suspension and the Next Challenge
I bought a road-legal MD30 secondhand, and I never imagined it would have genuine racer (ME08) front forks fitted, with aluminium internal cylinders and all. As an off-road fan, I couldn't have asked for a better surprise — a real lucky find. This light suspension, with its rich damping characteristics, should make a big difference to how the bike performs off-road.
Recommended Tools and Consumables I Used for This Job
These items are essential for stripping your suspension completely.
- Fork cylinder holder (cartridge holding tool): Without this, the bottom bolt just spins and you can't remove it. If you want to take your DIY fork overhaul a step further, this is a special tool worth having.
- High-precision combination spanner set (17 mm, etc.): Choose accurate tools so that you can hold the lock nut securely and protect the precious thread on the inner rod.