Hello everyone, Boo here.
This post is about fitting a crankcase pressure reducing valve to my G650GS.
Single-cylinder bikes are known for strong vibration and strong engine braking.
I like singles because they run cooler, the engine can be light, and the bike can be compact.
But the strong vibration of a single has its downsides too, such as numb hands and a numb backside.
One way to reduce vibration is to fit a crankcase pressure reducing valve.
Here I show how I fitted one to my G650GS.
There are various reducing valves on the market, but I chose the T-REV from TERAMOTO (a Japanese maker).
To decide where to fit the T-REV on the G650GS, I used its sister model, the F650GS, as a reference. TERAMOTO's website (https://www.teramoto.biz/trev_fit.html, in Japanese) does not show a fitting location for the G650GS, but it does show one for the F650GS.
The two bikes have almost the same engine, so I followed that.
What I used
[Tools]
- Hose clamp pliers for Clic R clips
- Hacksaw (not needed if you use the bike's original breather hose)
- Metal file (not needed if you use the bike's original breather hose)
[Parts]
- T-REV (for a 9 mm breather hose, 0.07 mm shim)
- Cable ties
- *If you cut the bike's original breather hose and fit the T-REV into it, you don't need the parts below.
I wanted to be able to return the bike to standard later, so I bought a separate breather hose. - KIJIMA breather hose, 9 mm (part number: 105-0879)
- POSH spare indicator (turn signal) stay bolt, M8 × 30 mm (part number: 010201-30)
Steps
Check where the hose runs
First, find the breather hose.
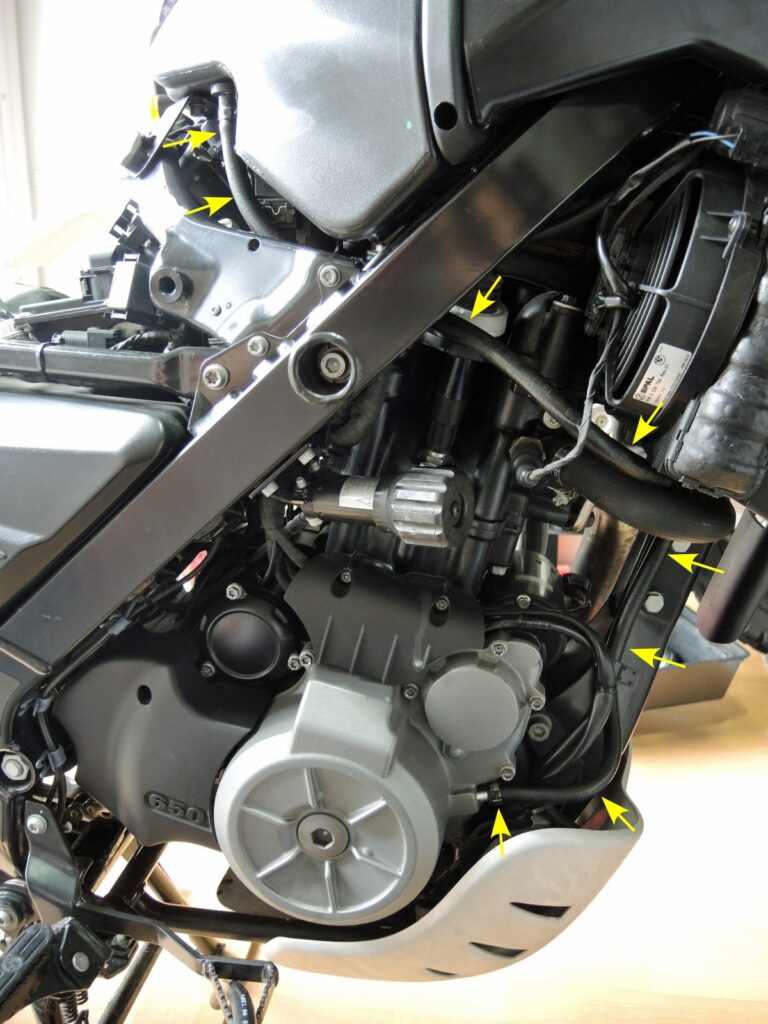
The breather hose is marked with yellow arrows in the photo. It comes out of the right-hand side of the crankcase, runs near the frame and the radiator hose, and connects to the airbox.
Decide where to fit the T-REV
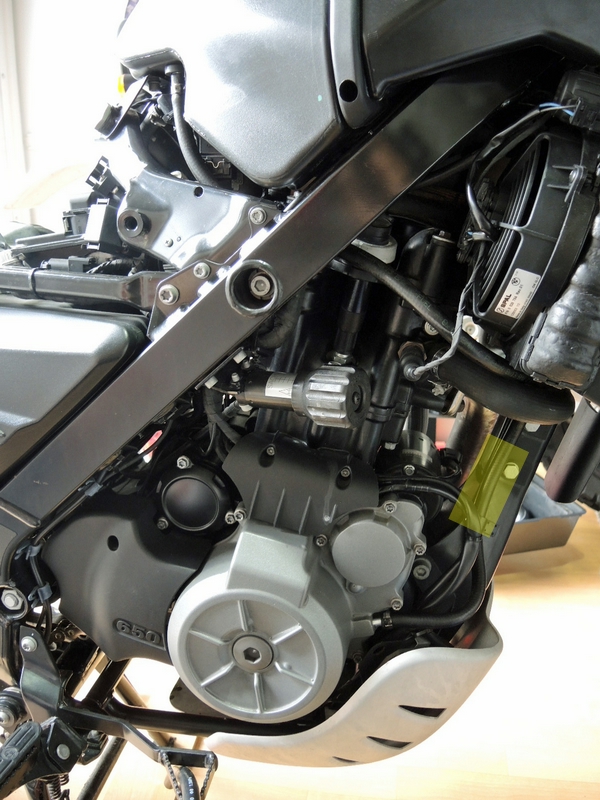
I decided to fit the T-REV close to the crankcase, around the spot where I could fix it to the frame with cable ties (the yellow area below).
Remove the breather hose
Disconnect the crankcase end first. (There is a reason for this, explained below.)
At the crankcase end, the breather hose is held by a clip called a Clic R. Remove the clip and pull the hose off.
I'm a bit of a worrier, so after pulling the hose off I covered the opening with a plastic bag to stop dirt getting into the crankcase.
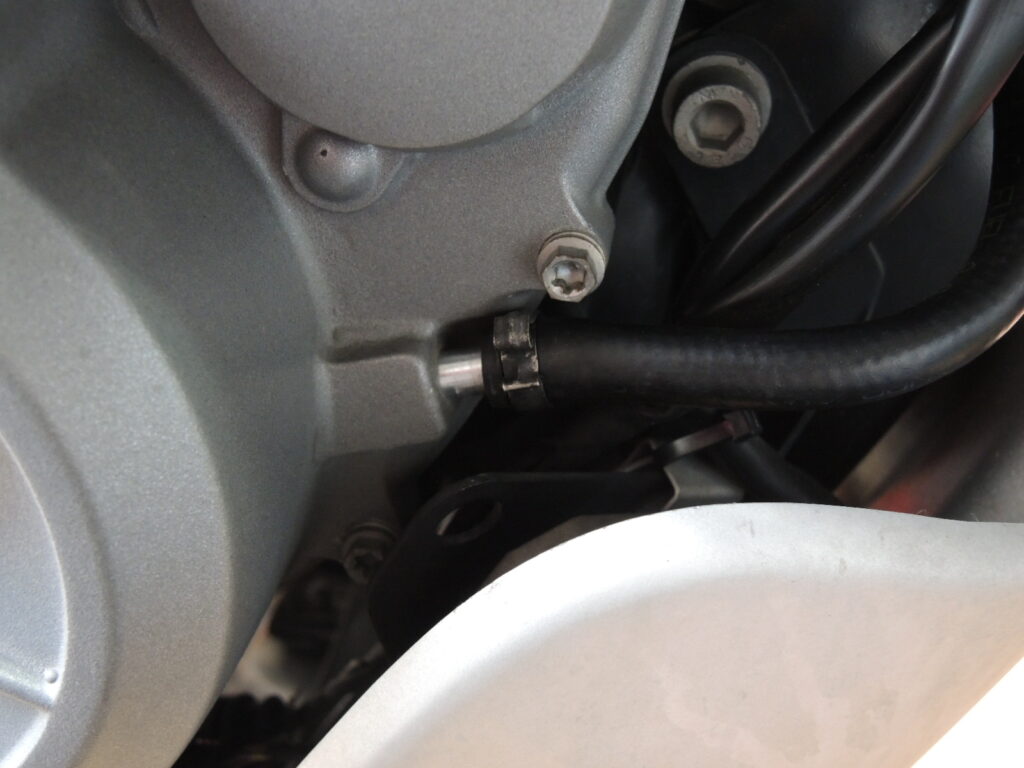
At the crankcase end, the breather hose is held with a Clic R clip
These clips, fitted at both ends of the hose, are called Clic R clips.
You can just about remove them with a flat-blade screwdriver and pliers, but there is a special tool for them, and it is easier and quicker to use that.
Next, disconnect the airbox end.
The airbox end is screwed in, so you have to turn the breather hose to remove it.
That is why I disconnected the crankcase end first: so that the hose was free to turn.
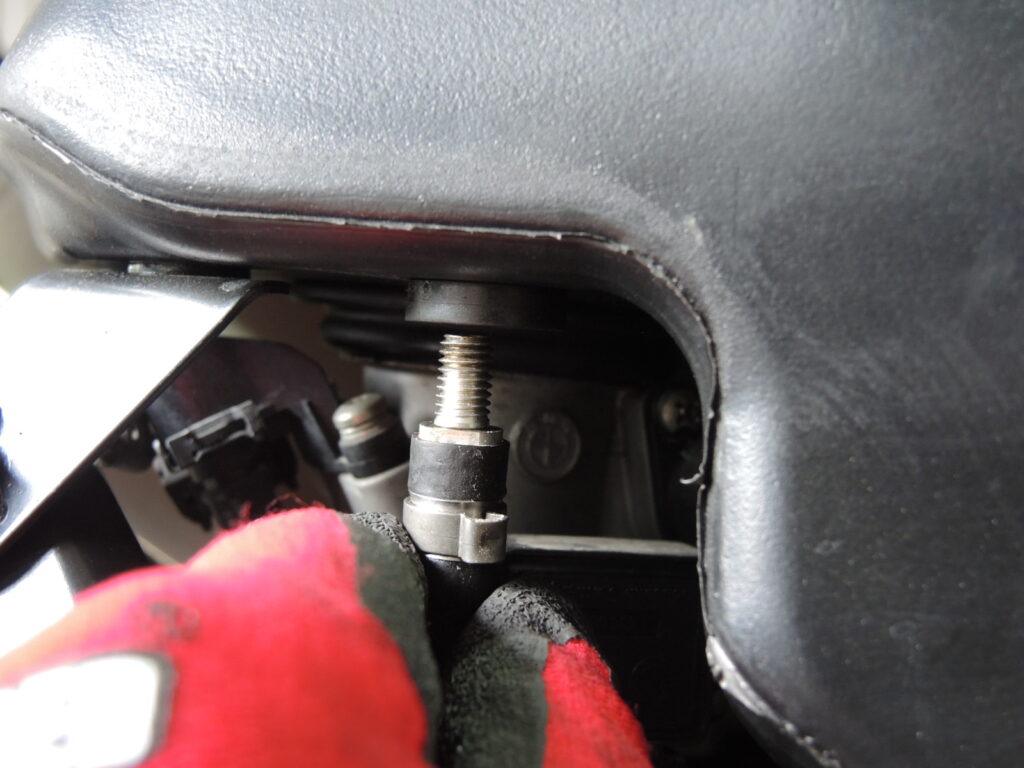
At the airbox end, the breather hose is screwed in
Prepare the new breather hose
(Not needed if you reuse the bike's original breather hose)
Fit a hollow bolt to the airbox end of the breather hose.
For the hollow bolt, I used a POSH spare indicator stay bolt, M8 × 30 mm.
Cut the head off the indicator stay bolt with a hacksaw, and file off the burrs.

Cut off the hexagon head of the hollow bolt
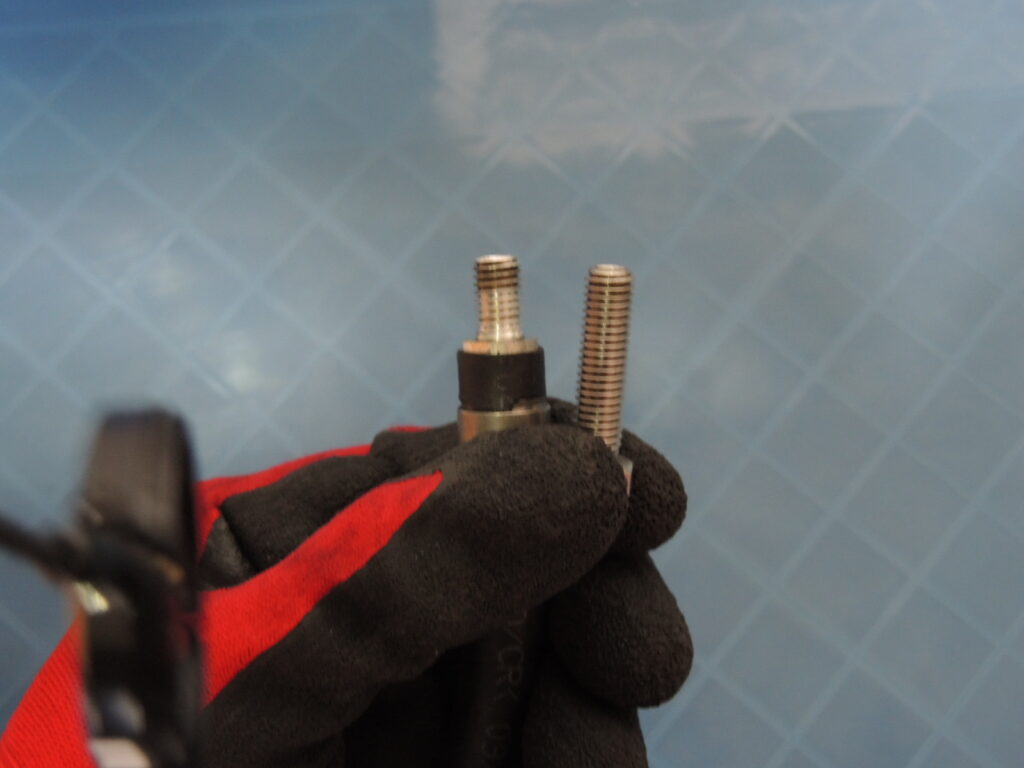
Check that the hollow bolt matches the end of the original breather hose.
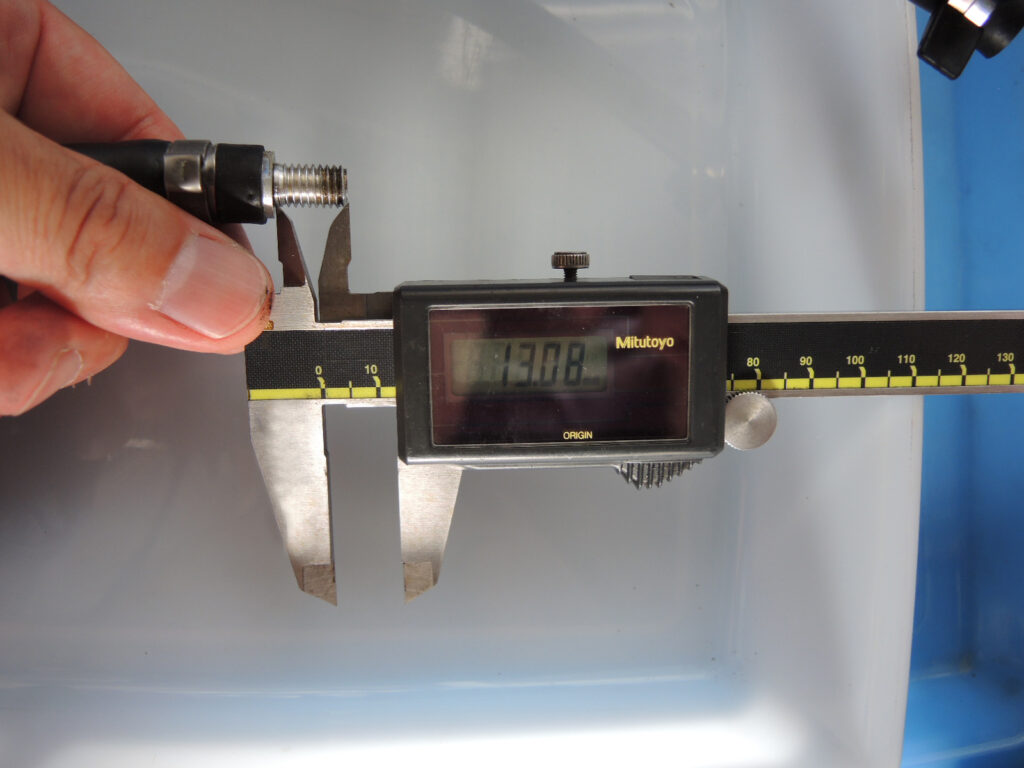
Check how far the bolt sticks out (I matched it to the end of the original hose)
I pushed the cut hollow bolt into the new breather hose and secured it with a clip.
With the bolt secured, screw the breather hose into the airbox.
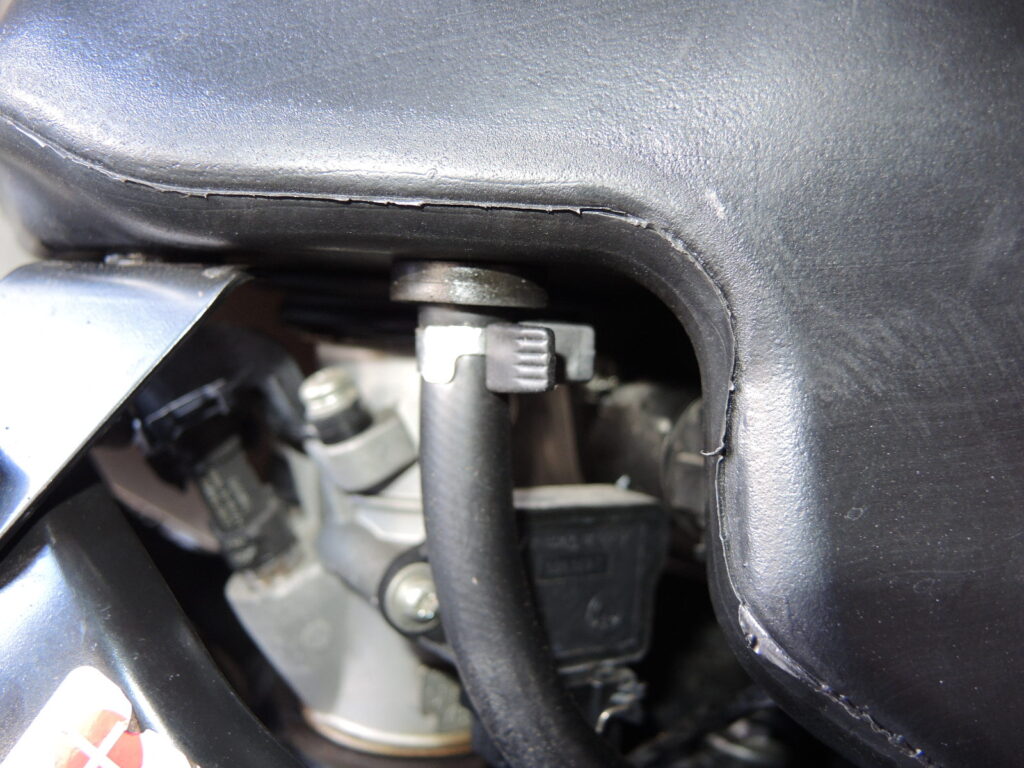
The cut hollow bolt pushed into the breather hose, secured with a metal clip, and screwed into the airbox.
Cut the breather hose and fit the T-REV
Once the airbox end of the breather hose is secured, cut the hose where you want to fit the T-REV.
Fit the T-REV into the cut.
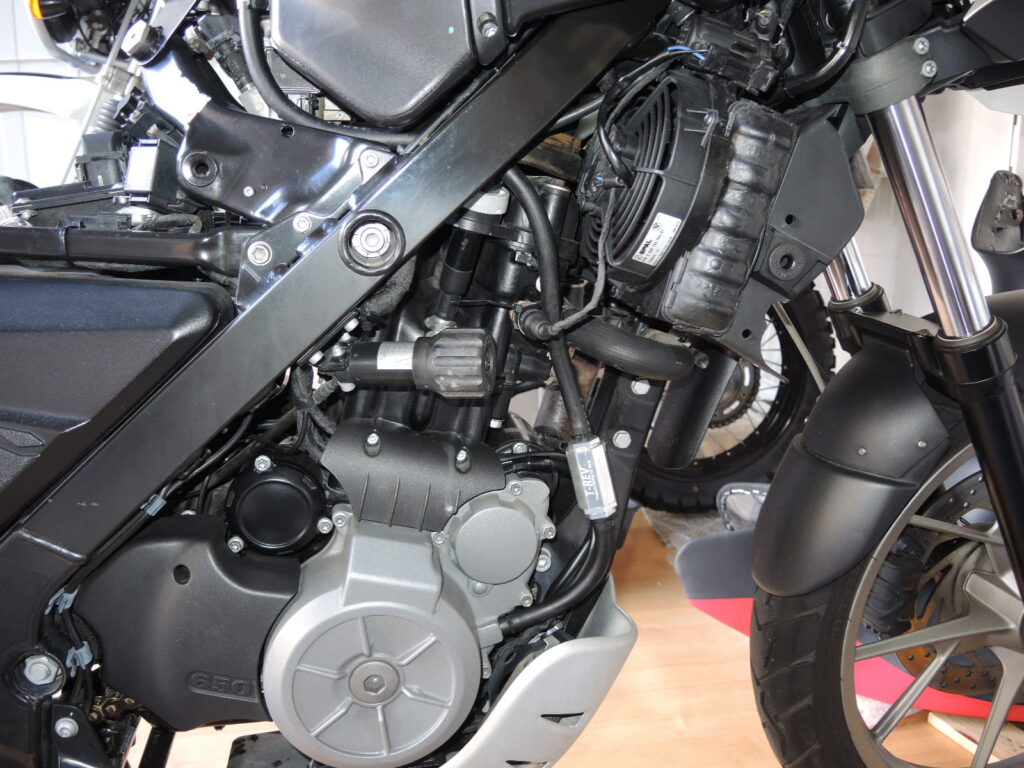
Finished!
I fixed it with cable ties in several places so that the weight of the T-REV does not make it swing about.
After fitting the T-REV, fix the breather hose and the T-REV to the frame and so on with cable ties.
I also used cable ties to join the breather hose to the T-REV.
The T-REV body is aluminium, so I thought a metal clip might clamp it too tightly.
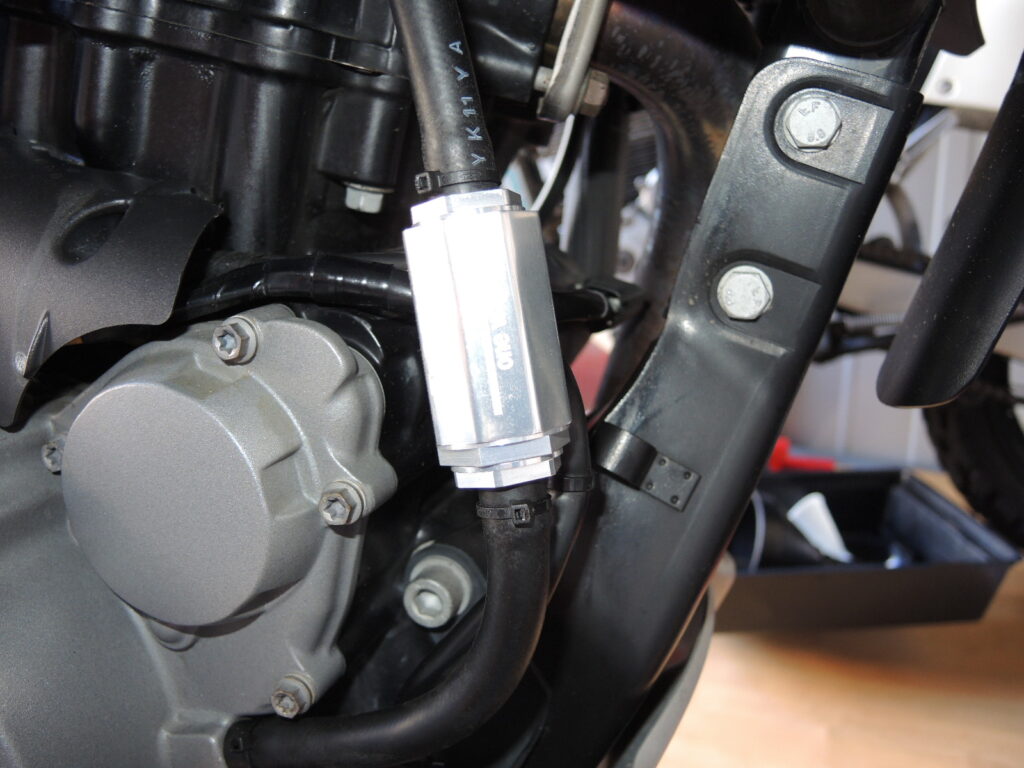
The T-REV is aluminium, so I used cable ties instead of metal clips
And that's the job done!
The fitting itself was not particularly difficult.
After fitting it, all I can say is: I'm glad I did.
I used this T-REV for about three years. Before I sold the G650GS, I removed it to return the bike to standard. It gave me no trouble in that time, but it did need regular maintenance.
For my impressions, see the article below.
My T-REV series on the BMW G650GS: