Hello everyone.
I have spent a lot of trial and error trying to build a DIY baking soda blaster (wet blaster) using a Karcher home pressure washer. In this post I bring those notes together and show the set-up that finally worked, the tools I used, and the cautions I learned from my failures.
Conclusion: the keys were "a short hose" and "no air leaks"
- Connect a blasting kit to the Karcher and let it suck baking soda through a hose from a container
- Shortening the hose from the baking soda container to the blasting gun to about 1.5 m made the biggest difference
- Seal the joint between the hose and the container with caulk so that it doesn't suck in air (if it does, the suction weakens and it stops picking up baking soda)
- Even so, the baking soda feed sometimes stops partway (I am still improving it)
- Anodising comes off even with baking soda blasting, so choose which parts you blast
What is baking soda blasting (soda blasting)?
It is blasting that uses baking soda as the media. I chose baking soda for these reasons:
- Baking soda dissolves in water, so even if particles are left after blasting, you can wash them away with water
- It is soft and less likely to damage aluminium parts
- It is also used in food, so it is easy to handle
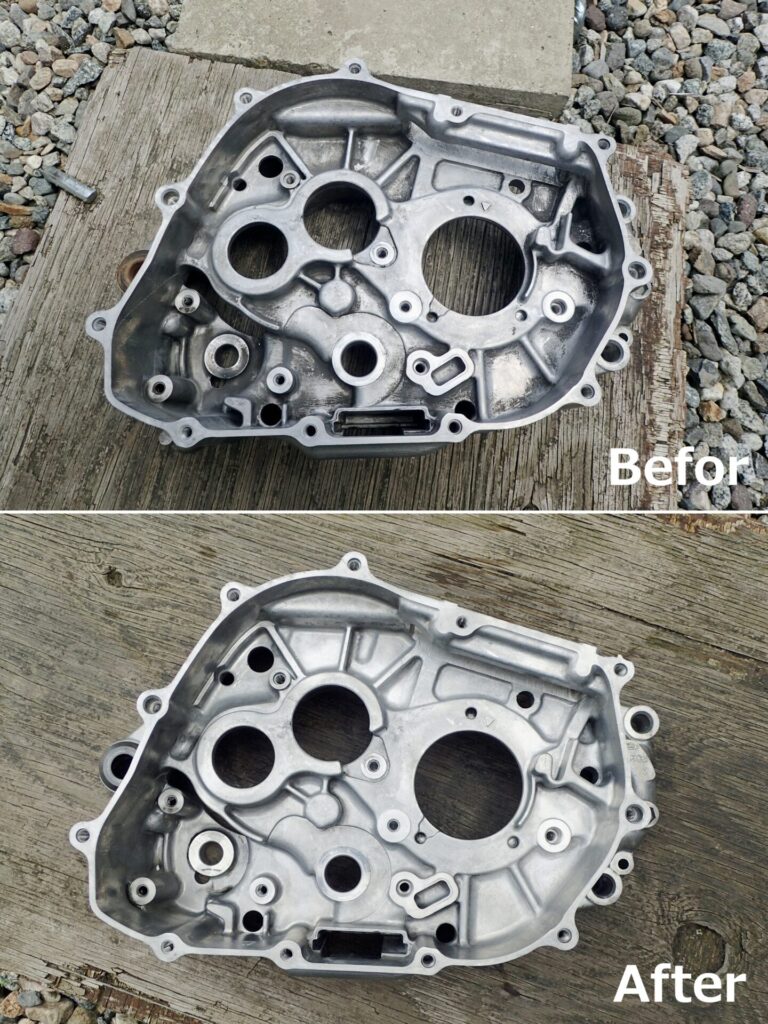
I showed the effect of baking soda blasting with before-and-after photos of a crankcase in my first post (First try: baking soda blasting with a Karcher).
The set-up that finally worked
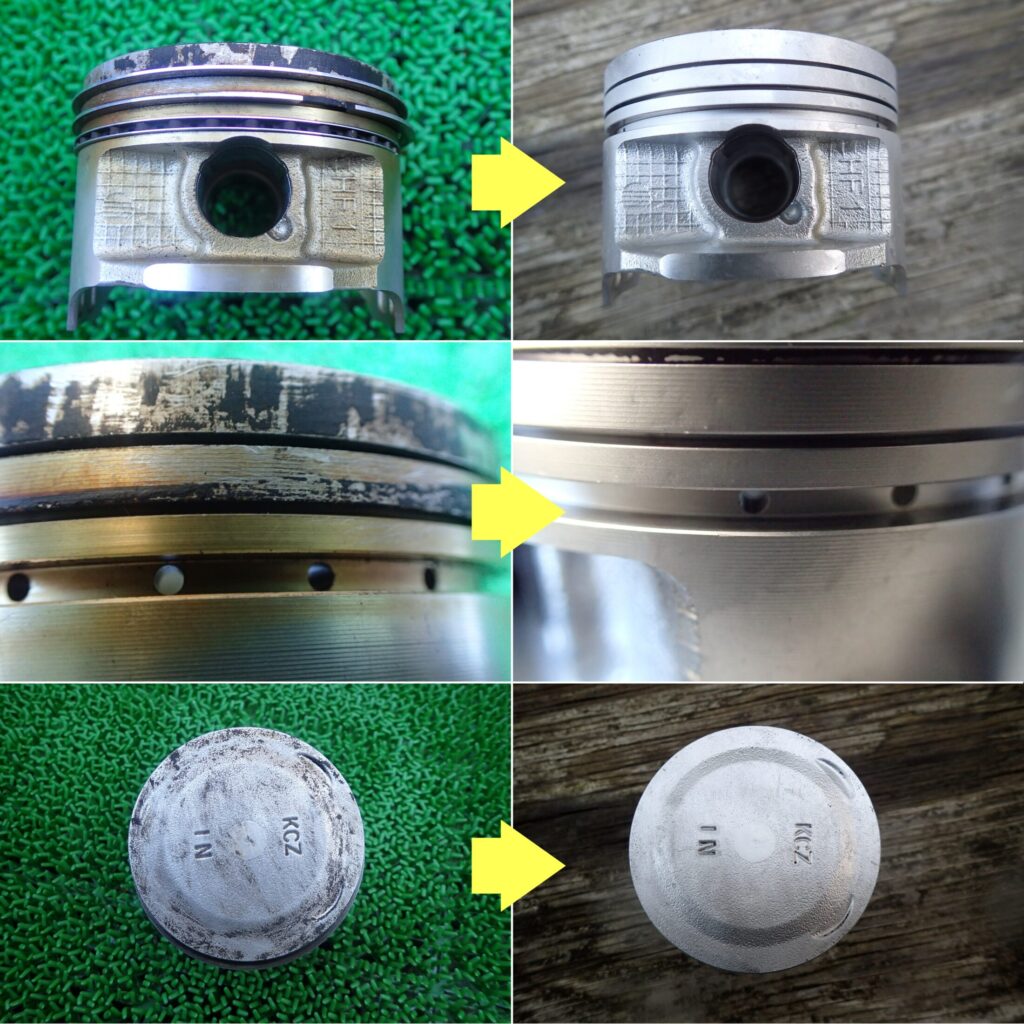
In "Trial and error, part 5 (final)" (in Japanese), I arrived at a set-up that could remove the carbon from an XR250 piston. Compared with before, I changed three things:
- The PVC pipe holding the baking soda was too long, so I cut it to about half the length
- I filled the gap at the joint between the clear hose to the Karcher and the PVC pipe with caulk
- I made the clear hose from the PVC pipe to the blasting gun about 1.5 m long (I think this improvement made the biggest difference)
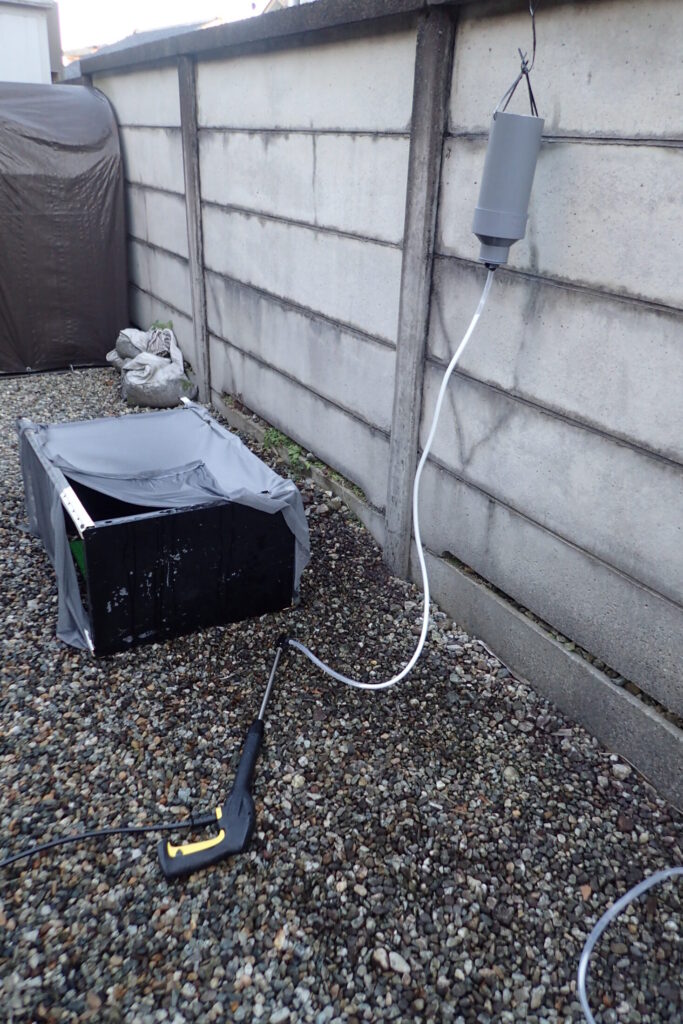
However, the baking soda feed still sometimes stops partway, or the baking soda stops dropping down inside the PVC pipe.
So I made a funnel-shaped baking soda container from a traffic cone (Making a media container from a traffic cone, in Japanese).
What didn't work (cautions learned from failures)
- Just pushing the suction pickup into the bag of baking soda: the pickup floats up and stops sucking baking soda (part 1, in Japanese)
- The baking soda gets damp where it meets the water, and the pipe clogs (part 2)
- Mixing the baking soda with water from the start worked, but you have to keep stirring with one hand. A ratio of about 1:5 to 10 (baking soda to water) looks about right (part 2)
- Air and baking soda were sucked in through gaps around the divider (corrugated plastic sheet) I used to adjust the suction, wasting the suction (part 4, in Japanese)
Protecting against splashing
Baking soda blasting sprays baking soda and water around quite a lot. I made a simple blasting booth by clipping fine-mesh insect screen onto a steel shelf unit I had spare at home, using bulldog clips. The only new cost was about 700 yen for the screen mesh (part 2).
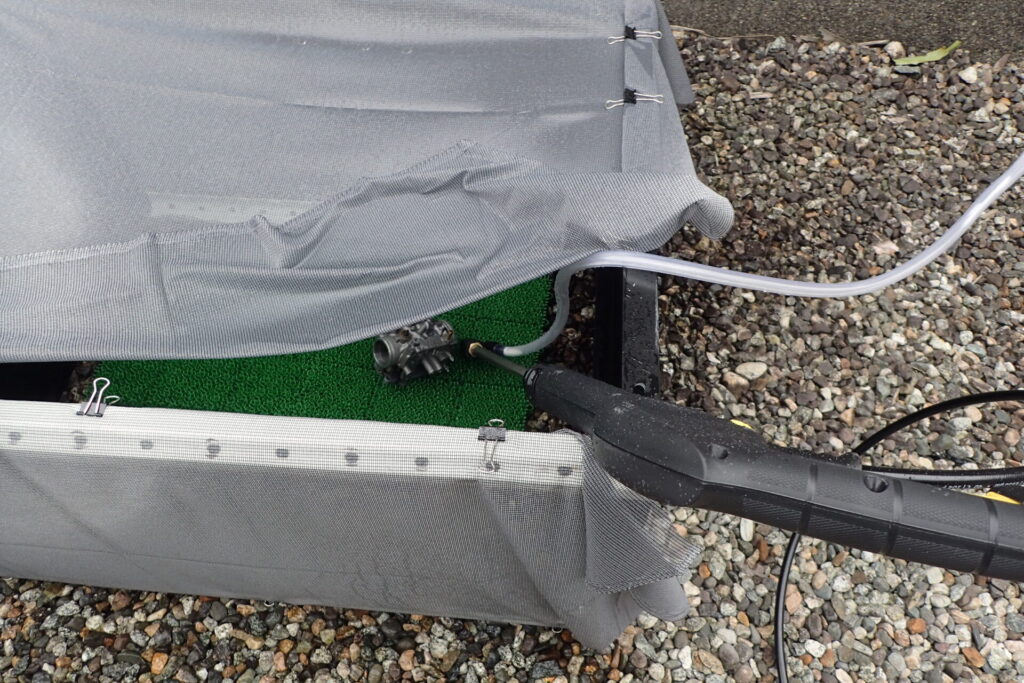
When working, safety glasses, a rain suit and wellington boots (rubber boots) give peace of mind.
What I blasted, and things to watch out for
What came out clean
- An engine crankcase (my first post)
- Carbon on an XR250 piston (part 5, final, in Japanese)
- An XR250 carburettor (Baking soda blasting a carburettor)
Things to watch out for
- Anodising comes off. Even with baking soda blasting, the anodising (or paint) came off (Does baking soda blasting remove anodising?, in Japanese)
- Wet blasting with glass beads (#120) gives a shiny, clean finish, but collecting the scattered beads and cleaning up afterwards is hard work (Wet blasting with glass beads)
- Even with vinyl tape and bin bags for masking, media got into the outer tube. Remove all the media thoroughly after blasting (Removing media thoroughly, in Japanese)
Tools I used
Besides the Karcher itself, I used a blasting kit and baking soda. I bought the PVC pipe at a DIY store.
My Karcher blasting series
These are my notes from building a DIY baking soda (wet) blaster with a Karcher pressure washer.
- First try: baking soda blasting with a Karcher
- Part 1: a funnel-shaped baking soda container
- Part 2: a splash cabinet, and baking soda that won't feed
- Part 3: feeding the soda from below
- Part 4: clogs and air leaks
- Part 5 (final): what worked
- Baking soda blasting a carburettor
- Wet blasting with glass beads (fork axle holders)
- Wet blasting a rear brake caliper
- Removing blast media thoroughly afterwards
- Does baking soda blasting strip anodising?
- A traffic cone as the media container
- DIY guide: what finally worked (this post)
*This is a summary of what I, the author (18 years of doing my own maintenance, no mechanic qualification), tried at home. Follow your pressure washer's instruction manual, wear safety glasses and other protection, and work somewhere you won't bother others.