Hello everyone.
So far I have been trying baking soda wet blasting with a Karcher, but now I wanted to try wet blasting with glass beads.
So here is how I wet blasted the axle holders (the lower part of the outer tubes) of the front forks from my Honda XR250 (the Japan-market XR250 BAJA / MD30) with glass beads (#120) using a Karcher.
To give you the conclusion first: "Very good!! But I don't really want to do it again."
The reasons are:
After blasting, the parts are shiny and very clean
You need a box or similar to stop the media (glass beads) spraying around and to collect it
Cleaning the media off afterwards is hard work
You have to be careful where the media hits (masking is needed)
You need protective gear (glasses, a mask, a rain suit, wellington boots (rubber boots) and so on)
The biggest problem is needing a box to stop the media spraying around and to collect it.
I could make a box myself, but then I need somewhere to keep it, and the collected media has to be dried and so on.
So for the time being I will stick with baking soda blasting.
But the parts came out very clean, so here are the results.
First, the parts to be blasted.

These are the outer tubes of the XR250 front forks. I want to finish the axle holders at the bottom with glass beads.
They look clean in the photo, but they are as dirty as you would expect for their age.

I didn't know what glass bead wet blasting would do to the anodised parts, so I masked them.
First, the most important part: I masked the boundary between the axle holder and the anodised part with vinyl tape.

Then I masked the anodised part with bin bags.

I cleaned these axle holders a few years ago with alkaline cleaner and a brush.

Dirt where the brush can't reach doesn't come off.

I couldn't clean the complicated shapes either.
But baking soda blasting is really impressive.
Before the glass bead wet blasting, here are the results of baking soda blasting.
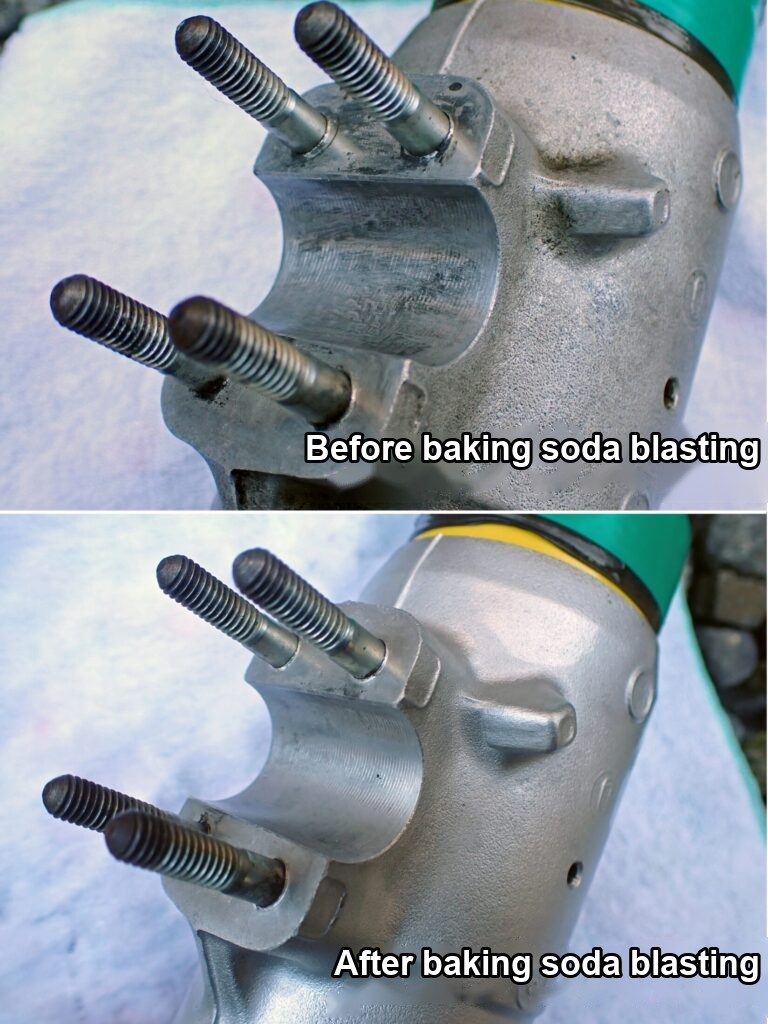
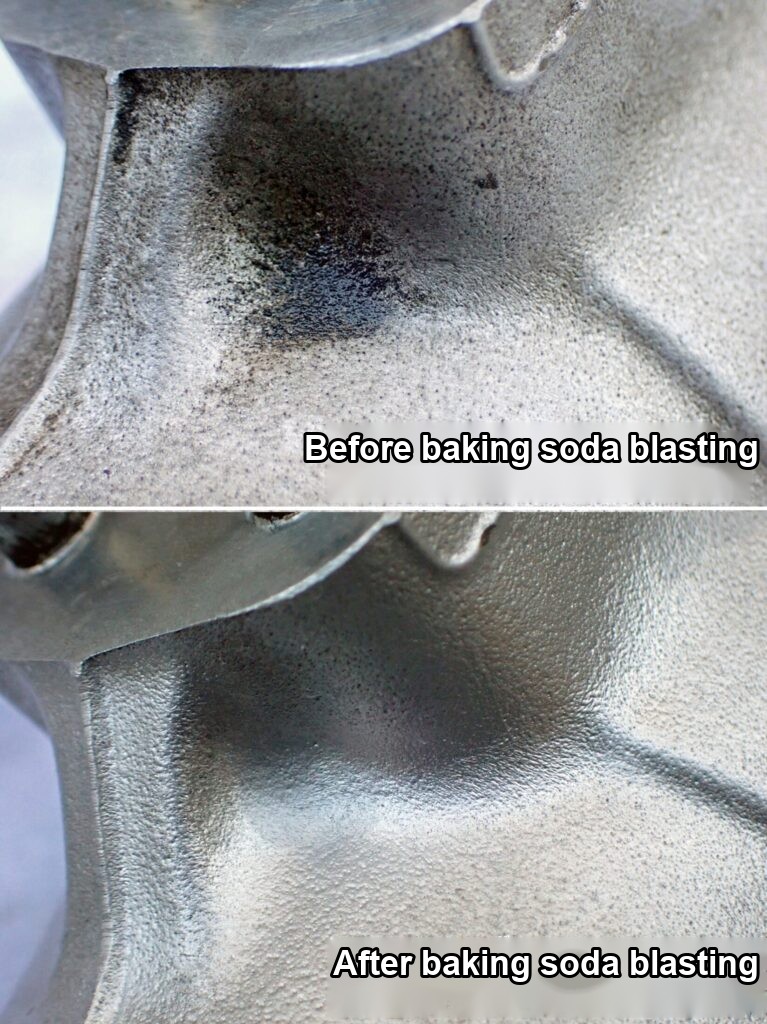
Now for the wet blasting with glass beads (#120).
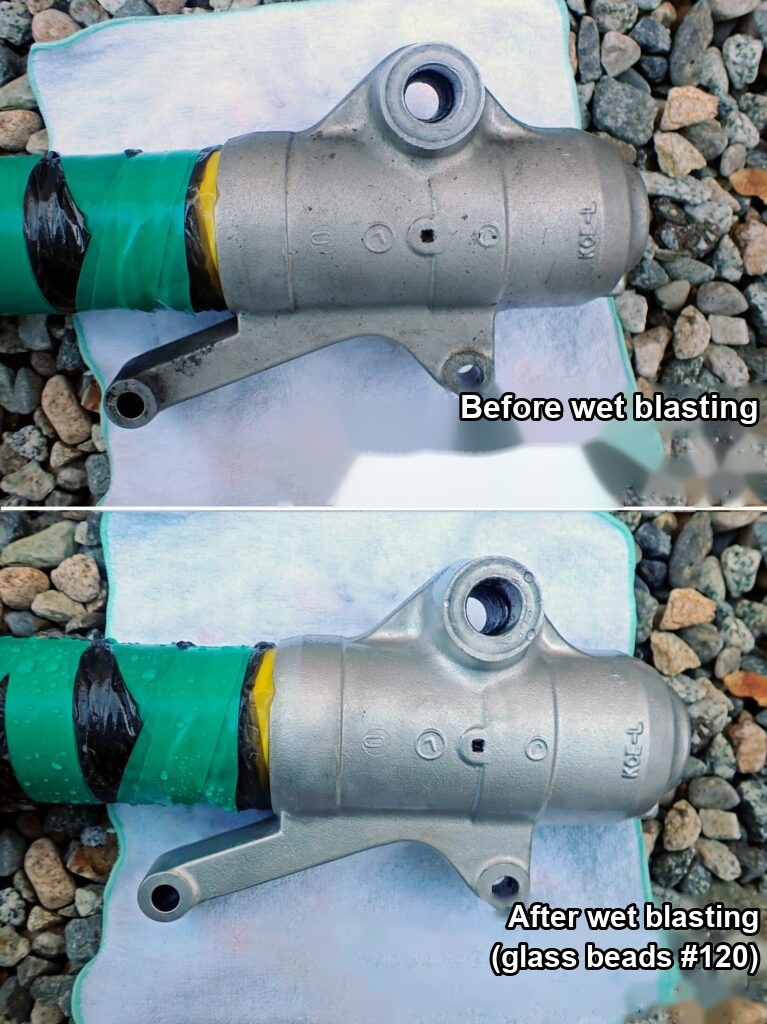
It doesn't show well in the photo, but it gets very clean. However, you can see a difference between areas that got enough blasting and areas that didn't. In the after-wet-blasting photo above, there are some darker areas around the "L" mark on the axle holder. Those are areas that didn't get enough blasting.
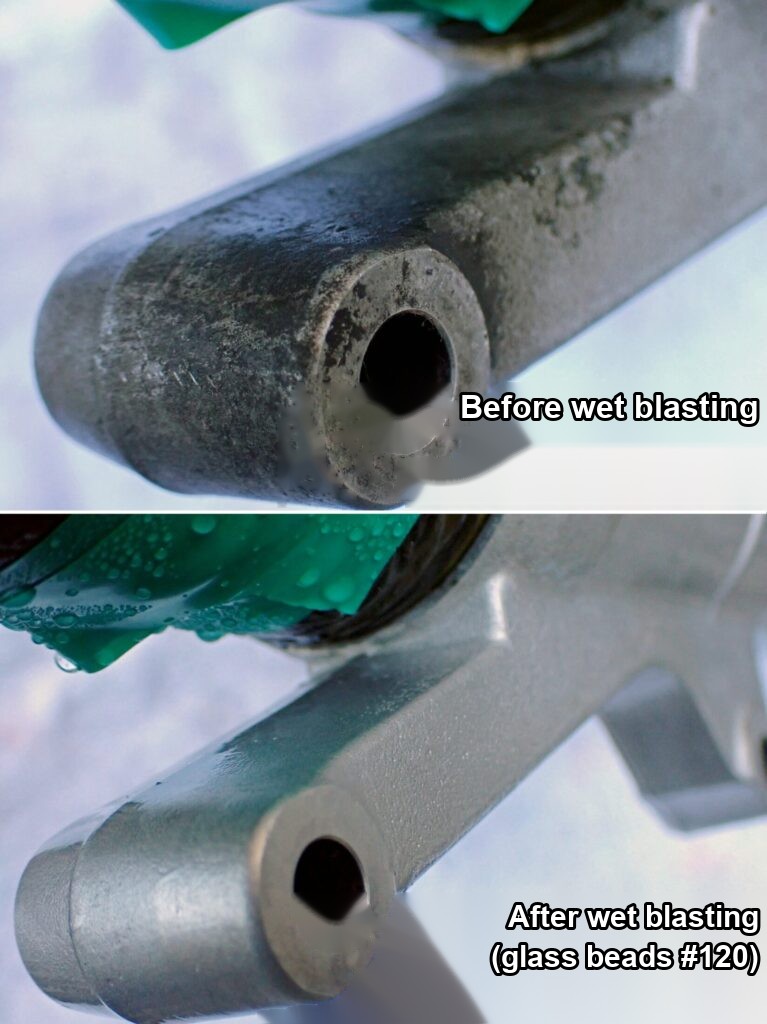
This photo shows wet blasting without baking soda blasting first.
It came out so clean you'd hardly believe it's the same part!
When I cleaned it with alkaline cleaner, the brush couldn't reach this spot, so it was still dirty, but now it is beautifully clean!

I don't have a photo from before wet blasting, but this is after.
It has a beautiful aluminium shine!
At the start I wrote "I don't want to do glass bead wet blasting again", but seeing this makes me want to build a box and do more wet blasting.
Here are the glass beads I used.


The contents are dry and free-flowing.
Next time I wet blast, #100 might be fine too. It's a matter of taste, but I found #120 gave too much shine.
[Added on 29 December 2025]
I photographed it next to the axle holder of the fork on the bike, which looks its age.
The new-bike shine is nice, but when everything else looks tired, it feels a little out of balance.

My Karcher blasting series
These are my notes from building a DIY baking soda (wet) blaster with a Karcher pressure washer. The set-up, tools and cautions that finally worked are summarised in my DIY guide.
- First try: baking soda blasting with a Karcher
- Part 1: a funnel-shaped baking soda container
- Part 2: a splash cabinet, and baking soda that won't feed
- Part 3: feeding the soda from below
- Part 4: clogs and air leaks
- Part 5 (final): what worked
- Baking soda blasting a carburettor
- Wet blasting with glass beads (fork axle holders) (this post)
- Wet blasting a rear brake caliper
- Removing blast media thoroughly afterwards
- Does baking soda blasting strip anodising?
- A traffic cone as the media container
- DIY guide: what finally worked