Hello everyone.
Stubborn dirt and rust on a motorcycle carburettor sometimes won't come off with just a brush and cleaner. So I tried baking soda blasting with a Karcher pressure washer. In this post I show the results of baking soda blasting the carburettor from my Honda XR250 (the Japan-market XR250 BAJA / MD30).
Baking soda dissolves in water, so even if particles are left after blasting, they are easy to wash away. But they can still get into narrow passages and jets, so I think it is important to rinse thoroughly after blasting.
1. Why use Karcher baking soda blasting on a carburettor
Baking soda blasting is less likely to remove too much metal
Baking soda blasting (soda blasting) uses baking soda as the blasting media. Baking soda is softer than sand or glass beads, so it is said to remove caked-on dirt without eating too much into aluminium surfaces. And since baking soda dissolves in water, rinsing with water after blasting leaves few particles behind.
Even so, a carburettor has narrow fuel passages and jets. As you can see in the photos, I blasted the outside of the carburettor fully assembled, without taking it apart. Baking soda and water could get inside, so I think it is safer to strip, clean and dry it after blasting (this is my own view).
The pressure washer's jet reaches where a brush can't
Mixing baking soda into the jet of a pressure washer such as a Karcher lets you hit complicated shapes that a brush can't reach. A carburettor blackened by years of dirt came out much cleaner, as you can see in the photos below.
However, sucking up baking soda with a Karcher blasting kit tends to give an unstable feed, and I went through a lot of trial and error (see the posts in the series list below). The method that finally worked is in my DIY guide.
2. Results of baking soda blasting with a Karcher
Results of baking soda blasting with a Karcher
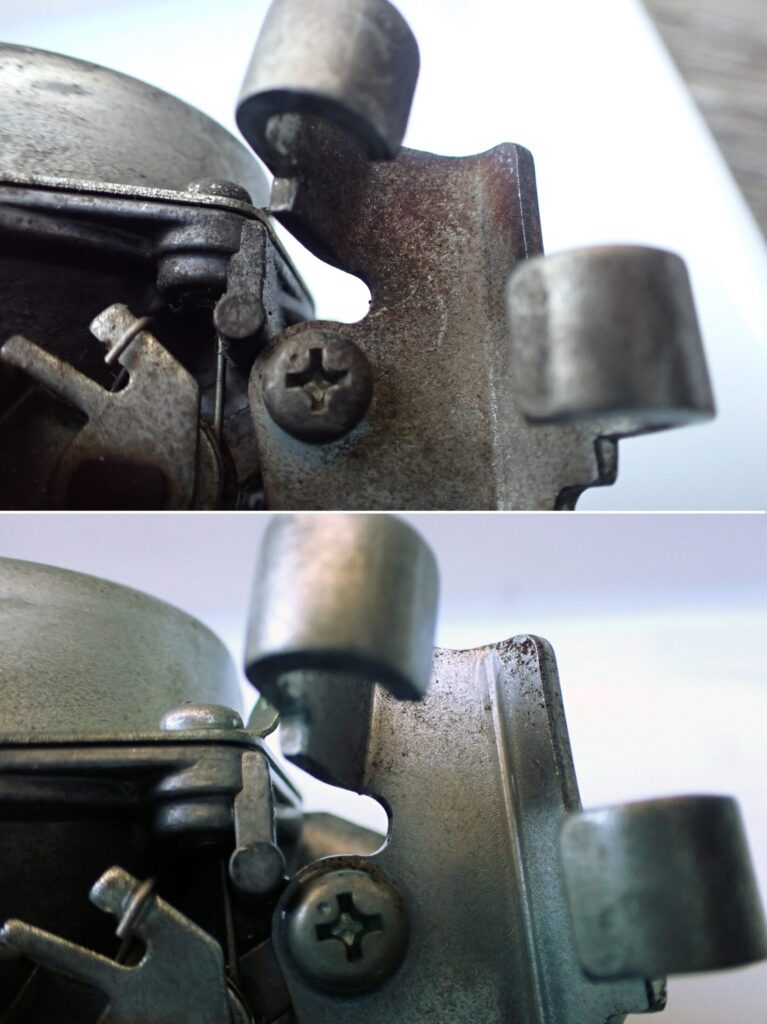
In all the photos in this post,
top: before baking soda blasting
bottom: after baking soda blasting
.
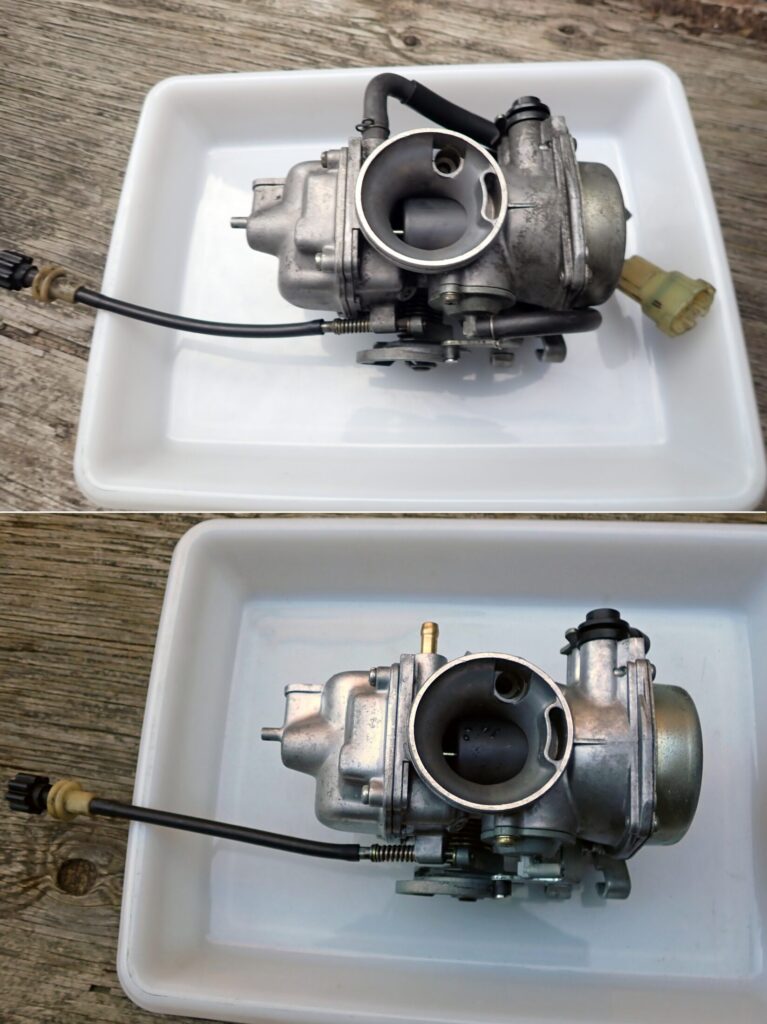
The carburettor I blasted is from a Honda XR250.
First, the whole carburettor.
You can see in the photo that it is a bit cleaner.
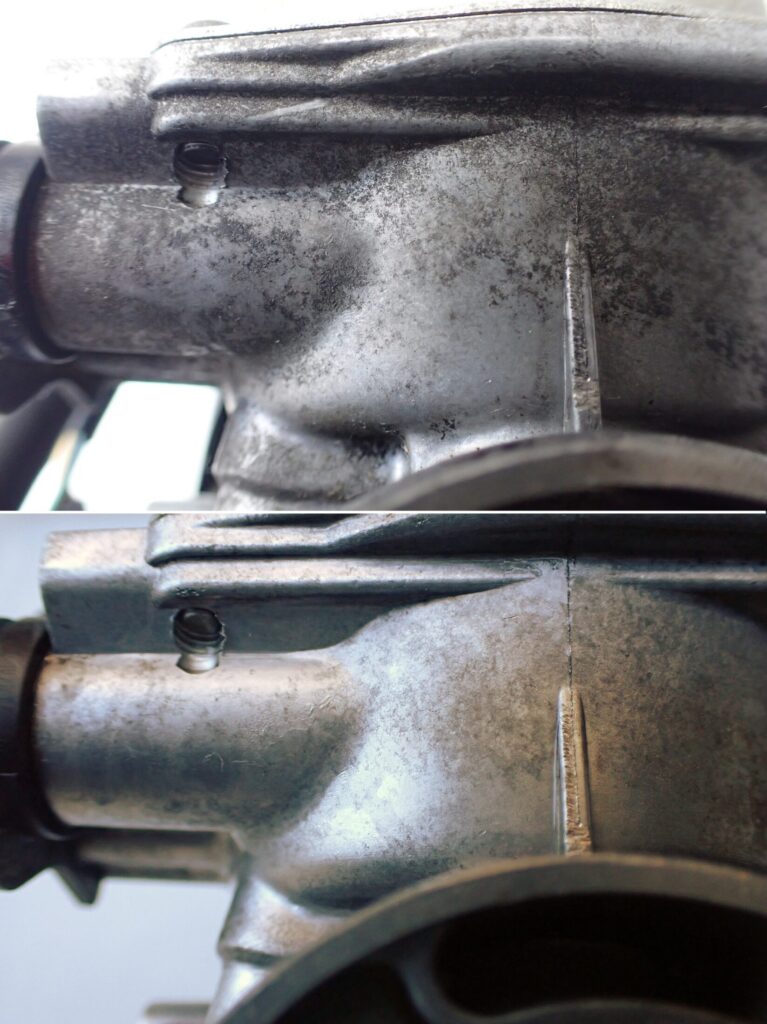
Next, a close-up of the top of the carburettor.
You can see the dirt has come off.
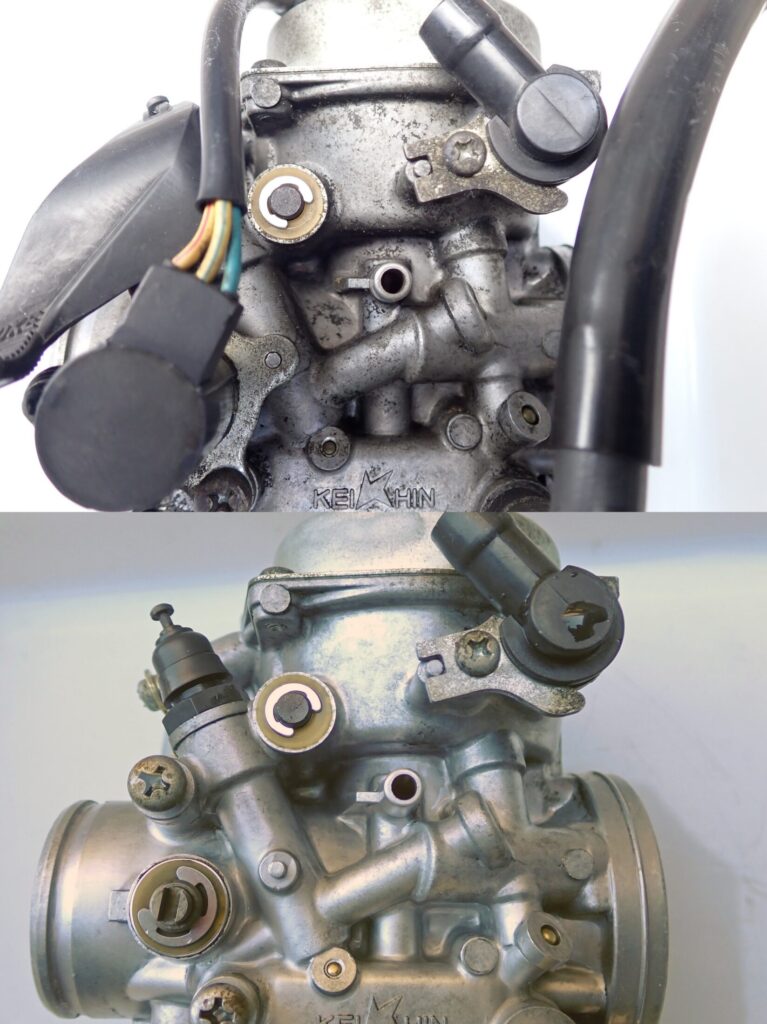
This is the side of the carburettor.
Different parts are fitted in the top and bottom photos, but I think you can see that it has come out clean.
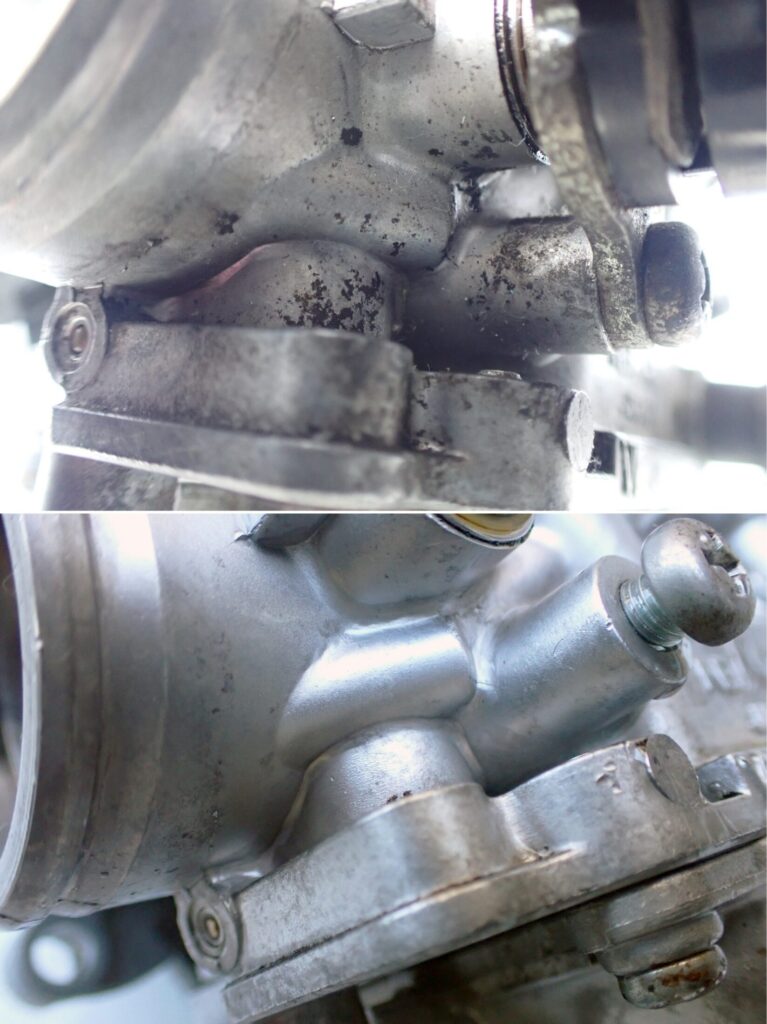
The photo above is the part that came out best from this baking soda blasting.
It shines as if it were new.
Up to now the photos were of aluminium parts, but the one above is a part made of steel(?) that has rusted.
I tried to see how well baking soda blasting works on rust.
The result: baking soda blasting works on rust too.
The rust hasn't all come off, but that is because I ran out of time. With more time I think I could have removed the rest.
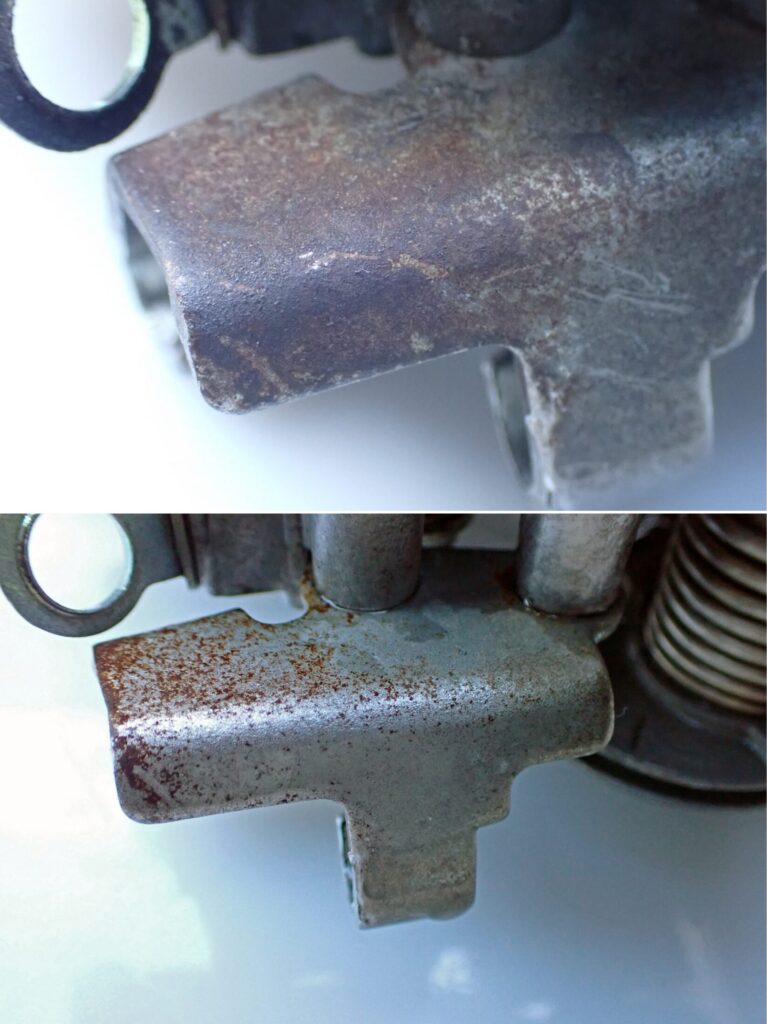
And this is the spot with the worst rust.
Again I didn't have time to blast it enough, but with enough time I think the rest of the rust would come off too.
3. Care after blasting
After blasting, rinse well, dry it and protect it from rust
After baking soda blasting, the surface film comes off along with the dirt, so I think steel parts will rust quickly if you leave them. After blasting, it is important to rinse well with water and dry it straight away.
Once it is dry, a light coat of rust-preventive spray on the steel parts gives peace of mind. Oiling moving parts and threads also keeps things moving smoothly after reassembly. Note that carburettor cleaner is for removing dirt; it does not prevent rust.
Rather than stopping at washing, I think it is best to treat drying and rust prevention as part of the job.
From now on I want to clean all sorts of things, while keeping an eye on how long blasting takes and how much baking soda it uses.
I'm looking forward to it.
My Karcher blasting series
These are my notes from building a DIY baking soda (wet) blaster with a Karcher pressure washer. The set-up, tools and cautions that finally worked are summarised in my DIY guide.
- First try: baking soda blasting with a Karcher
- Part 1: a funnel-shaped baking soda container
- Part 2: a splash cabinet, and baking soda that won't feed
- Part 3: feeding the soda from below
- Part 4: clogs and air leaks
- Part 5 (final): what worked
- Baking soda blasting a carburettor (this post)
- Wet blasting with glass beads (fork axle holders)
- Wet blasting a rear brake caliper
- Removing blast media thoroughly afterwards
- Does baking soda blasting strip anodising?
- A traffic cone as the media container
- DIY guide: what finally worked