Hello everyone!
A front fender extender (fender flap) is a handy custom accessory that shields the front of your engine and exhaust headers from mud and pebbles flung up by the front tire. For adventure bikes that frequently see action on unpaved tracks, it is an absolute staple upgrade.
However, if you make a mistake during the installation process, this part will not only fail to perform as intended but can also trigger unexpected negative effects on your bike's handling.
Recently, while performing a routine inspection on the front running gear of my BMW G650GS, I noticed that the fender extender installed by the previous owner was conspicuously misaligned and mounted crookedly.
Thinking, "This looks sloppy, I should pull it off and realign it properly," I casually began the disassembly. But the moment I peered into the gap between the plastics, I was utterly shocked.
[Image 1: Inside the gap where the front fender and extender overlap, packed tight with a massive accumulation of gravel, sand, and mud]
A mountain of sand, mud, and small pebbles was tightly wedged directly into the seam between the two components!
In this post, I will report on my journey realigning this crooked extender and break down a massive blind spot that this trapped grime creates: an increase in unsprung weight (unsprung load).
If you are planning to install a fender extender on your ride, this is critical knowledge you absolutely cannot afford to ignore. Let's get right into it!
[Current Condition Check] Misalignment and Mounting Setup of the Fender Extender by the Previous Owner
First, let's verify the baseline condition of the front fender on my BMW G650GS before starting the correction work.
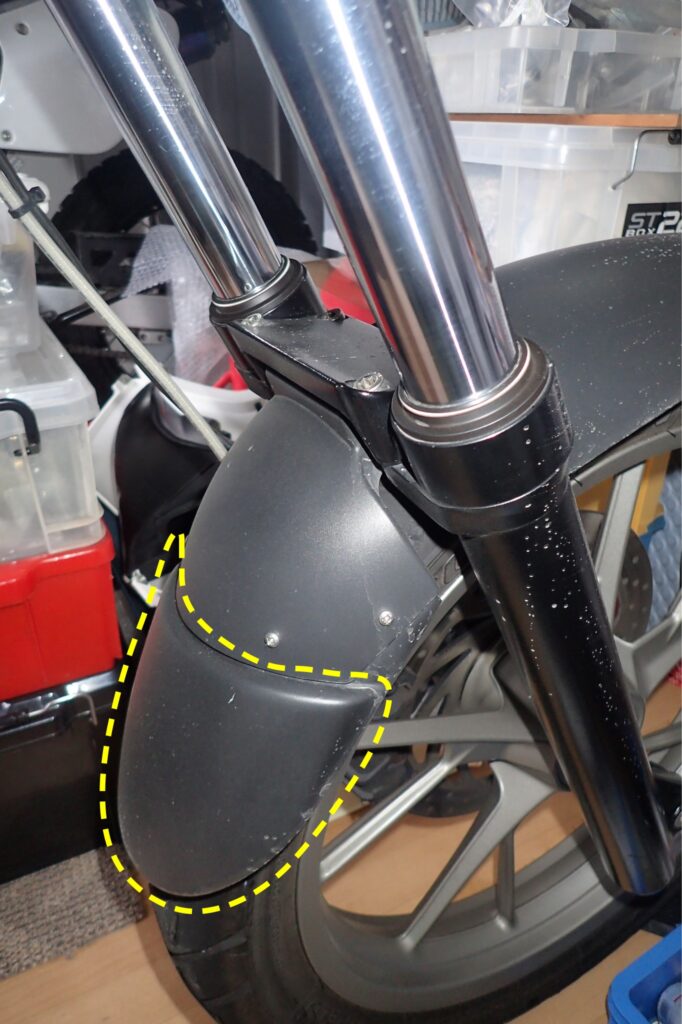
[Image 2: Front fender sandwiched between the front forks, showing the attachment section (indicated by yellow dotted lines) significantly misaligned and crooked to one side]
As you can see in the photo, the extender was screwed onto the tip of the stock front fender, but the centerline was completely skewed. Mounted at this angle, it cannot deflect wind and mud evenly. To square it up perfectly, I decided to unbolt the entire front fender assembly from the chassis to work on it comfortably.
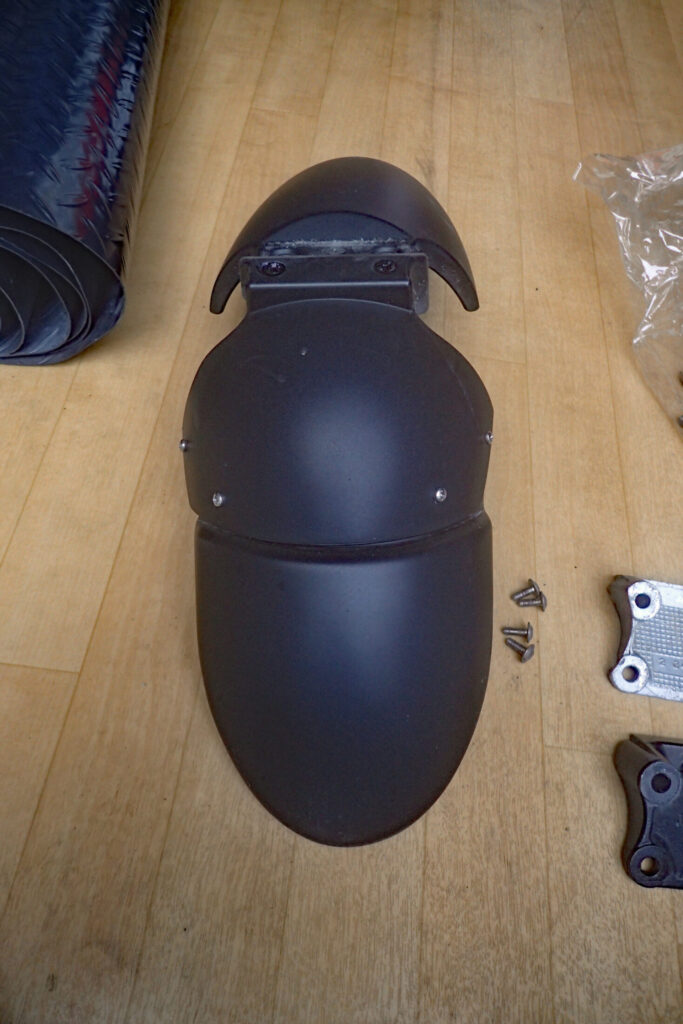
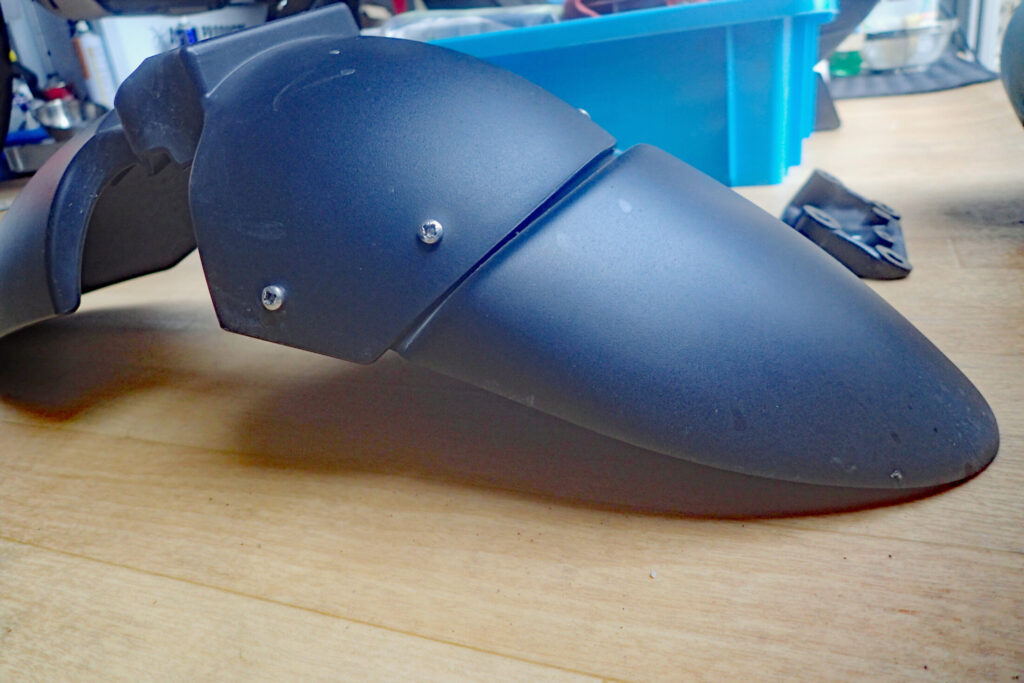
[Image 3: Comprehensive view of the BMW G650GS OEM front fender removed and placed on the garage floor]
[Image 4: Right side view of the front fender, showing distortion along the joint line between the fender and the attachment]
[Image 5: Left side view of the front fender, highlighting an uneven overlap balance between the two sides]
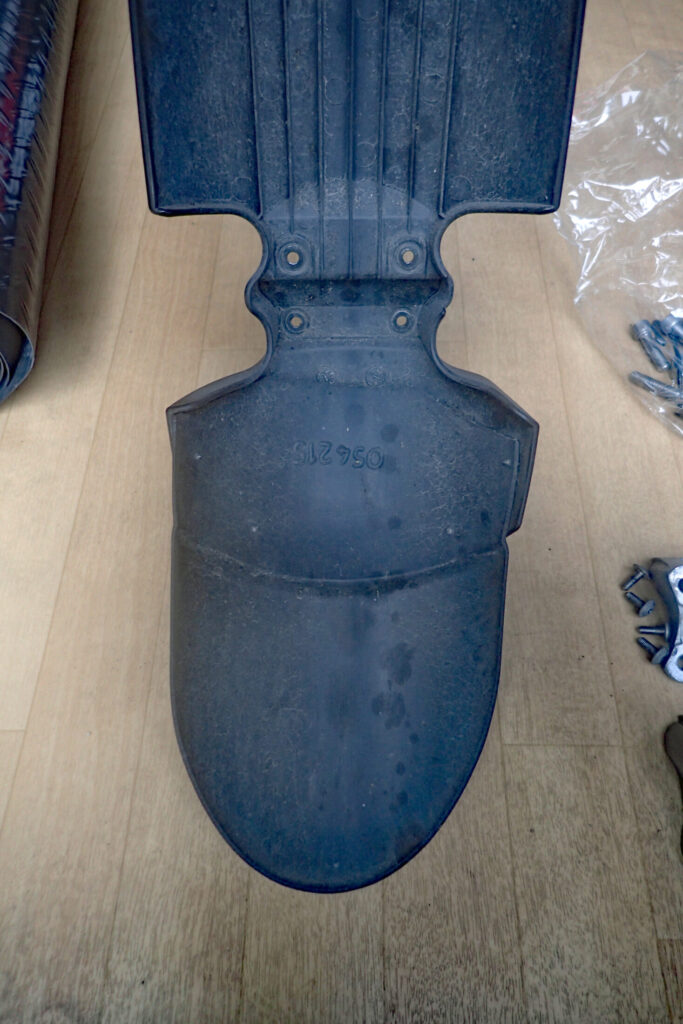
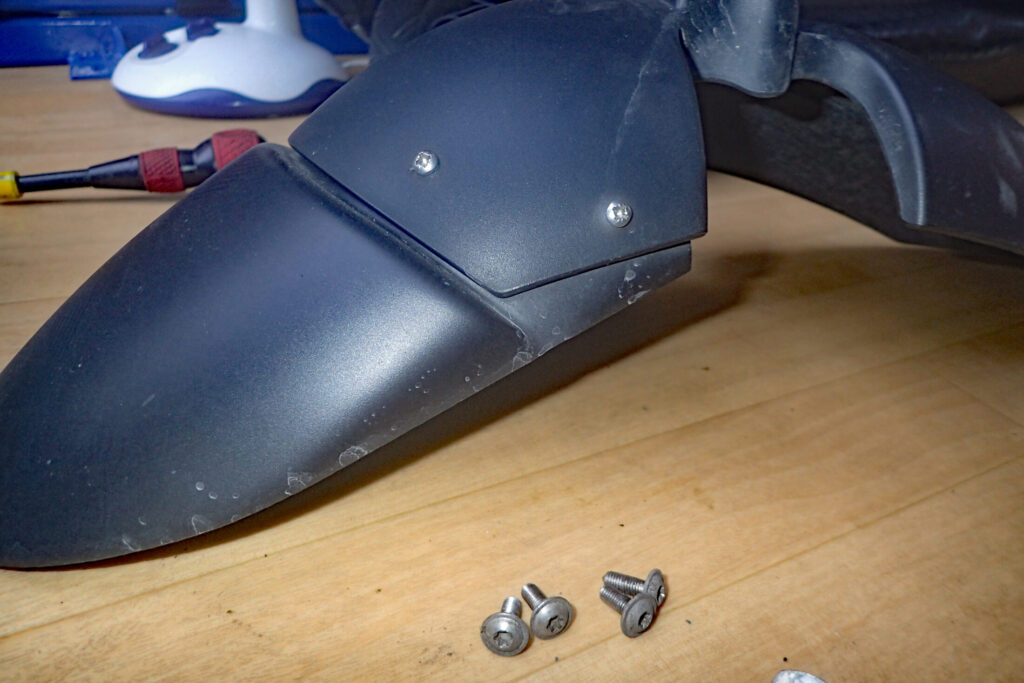
[Image 6: Underside view of the front fender, revealing that the previous owner used four screws in addition to double-sided tape for mounting]
Inspecting the underside, I found that the previous owner had drilled directly into the OEM BMW plastics and secured the extension with four self-tapping screws. However, whether due to a sloppy double-sided tape application or tightening down the screws while the alignment was off, the entire setup ended up completely warped.
[Shocked Upon Disassembly] A Massive Accumulation of Gravel and Mud Packed Inside the Overlapping Gap
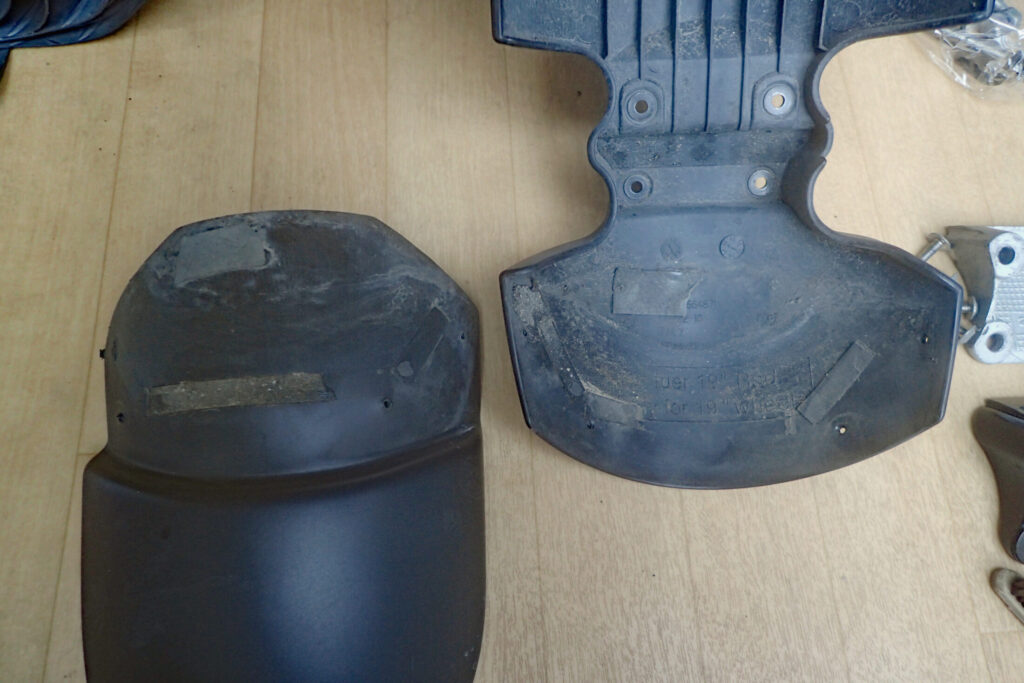
To correct the alignment, I backed out the four screws, peeled away the old double-sided tape, and completely separated the two components. The moment the parts came apart, a massive heap of dried dirt and gravel came tumbling out onto the floor.

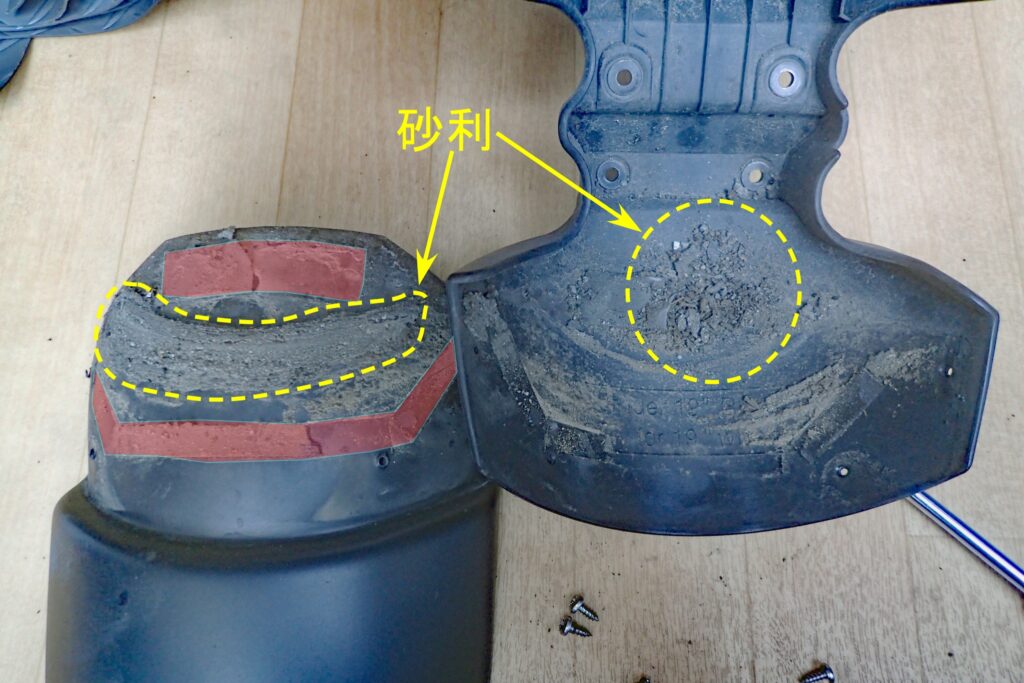
[Image 7: Separated front fender and extender, showing a thick, layered build-up of mud caked onto the overlapping surfaces]
[Image 8: Annotated version of the previous shot, indicating old double-sided tape residue with red shading and a large buildup of gravel and sand outlined by a yellow dotted box]
The previous owner had only run a thin strip of double-sided tape along the outer perimeter, leaving an open, tapeless "void (gap)" near the top.
Over a long period of riding, the high-pressure muddy water and fine gravel flung upward by the front tire slowly migrated directly into this pocket. With nowhere to escape, the trapped road grime compacted into a solid, layered crust.
Unknowingly Increasing Unsprung Weight? How Debris Trapped in Gaps Impacts Motorcycle Performance
This teardown made me realize a critical engineering truth: the rider was unknowingly adding a significant amount of unsprung weight to the front running gear.
Any component located below your motorcycle's suspension springs (tires, wheels, brake calipers, lower fork legs, and the fender) constitutes unsprung weight.
Unsprung weight is an incredibly sensitive factor when it comes to motorcycle dynamics. As a general mechanical rule of thumb, shedding 1 kg of unsprung weight impacts suspension responsiveness and handling characteristics just as dramatically as shedding several kilograms from above the springs (sprung mass).
The packed gravel and moisture-laden mud trapped in this plastic seam could easily have weighed anywhere from dozens of grams to nearly 100 grams.
Even if you meticulously source lightweight plastic parts to keep your front steering assembly agile, allowing mud to accumulate inside an installation gap completely defeats the purpose. It is a major blind spot that silently spoils the supple, compliant performance of your front suspension when tracking over road ripples and mid-corner bumps.
[Countermeasures and Lessons] Advice for Anyone Installing a Fender Extender
After knocking away the heavy mud crust with a brush, I gave both plastics a thorough wash and completely stripped away the old double-sided tape adhesive using parts cleaner.
[Image 9: Underside view of the front fender and extender after lightly brushing away the caked-on mud]
Based on this installation failure and the resulting gravel accumulation, I have two crucial pieces of advice for anyone planning to mount a fender extender on their bike:
Lesson 1: Seal the Entire Surface with Heavy-Duty Tape to Eliminate Gaps
If you only apply double-sided tape along the edges or in patches, muddy water will inevitably drive its way into the unsealed voids. When mounting, line the entire mating surface seamlessly with premium, automotive-grade ultra-strong double-sided tape (such as 3M) to engineer a solid barrier that makes it physically impossible for water or sand to penetrate between the plastics.
Lesson 2: Seal the Overlapping Edges with Silicone Caulking
After securing the part with double-sided tape, run a thin bead of waterproof silicone caulking sealant (bathroom/tile sealant) right along the exposed joint line to create a visible, airtight seal. This completely cuts off the intrusion path for road grime, preventing an accidental buildup of unsprung weight and ensuring long-term structural integrity.
For step-by-step sealing techniques, check out my detailed walkthroughs here:
Essential Gear: Proven Chemicals and Tools for a Proper Fender Extender Installation
To guarantee a bulletproof, long-lasting installation in your own garage, make sure to stock up on these essential maintenance supplies:
- 3M Automotive Exterior Heavy-Duty Double-Sided Tape An acrylic foam tape featuring excellent weatherability and aggressive bonding strength. Apply this across the entire mating surface to solidly block out muddy water.
- Konishi Bond Bath Bond Q (Black) A highly flexible silicone sealant that won't crack under the heavy chassis vibrations experienced by a front mudguard. Choosing "Black" allows the compound to blend invisibly with raw black motorcycle plastics for a professional finish.
Conclusion: Caring for Hidden Gaps is the Secret to Maintaining Top-Tier Handling
That wraps up my correction report on the BMW G650GS front fender extender.
What started as a simple project to fix a purely aesthetic misalignment turned into a massive lesson on how trapped road debris can quietly increase unsprung weight and compromise suspension tracking.
By thoroughly washing the plastics, executing flawless surface prep (degreasing), and remounting the extender using a gap-free technique, I have successfully preserved the light, agile, and supple handling characteristics that the G650GS platform is famous for.
When you get around to installing an extender on your machine, learn from this case study: take your time, prep thoroughly, and seal that gap completely!
Ride safe, and enjoy the ultimate motorcycle life!