Hello everyone!
The Honda X-ADV is a brilliant machine boasting a rugged adventure style and incredible go-anywhere capability. Because of its versatile nature, it frequently sees action on unpaved off-road tracks and wet, rainy asphalt.
However, as you clock up the miles, you will inevitably encounter one specific headache: heavy mud and gravel spray flung up by the front tire.
The OEM front fender on the X-ADV is styled a bit too short. Consequently, dirty water, thick mud, and sharp pebbles kicked up by the front wheel strike directly against the front of the engine and the vulnerable radiator area.
(Note: For this project, I am working on my 2026 Matte Pearl Glare White X-ADV.)

[Image 1: Engine and exhaust header area covered in mud and water splashes immediately after riding on a wet road]
This doesn't just make your machine look filthy; it can also cause premature component deterioration or costly impact damage over time.
To solve this factory oversight, I installed a front fender extender (fender flap) to give the front plastics some much-needed length!
[Image 2: Close-up of the front fender extender newly installed and extending the factory front fender]
For this modification, instead of buying a pricey premium component from a big-name brand, I opted for a highly affordable, budget-friendly part found on Amazon.
Don't let the low price fool you, though. By combining a meticulous degreasing process with a pro-tip from my mechanical experience—using bathroom silicone caulking to seal the overlapping seams—I achieved a top-tier fit, finish, and rock-solid durability.
If you are wondering why caulking is an absolute game-changer for fender extenders, check out my deep-dive explanation in this article:
If you want to shield your engine from nasty mud build-up and keep your machine looking immaculate, keep scrolling!
A Flaw in the X-ADV's Armor? How Front Wheel Spray Devastates the Engine Bay
First, let's look at the factory layout before the modification. Because the stock front fender cuts short, this specific area is highly susceptible to severe contamination:
The Exhaust Header Area: A Magnet for Caked-On Mud
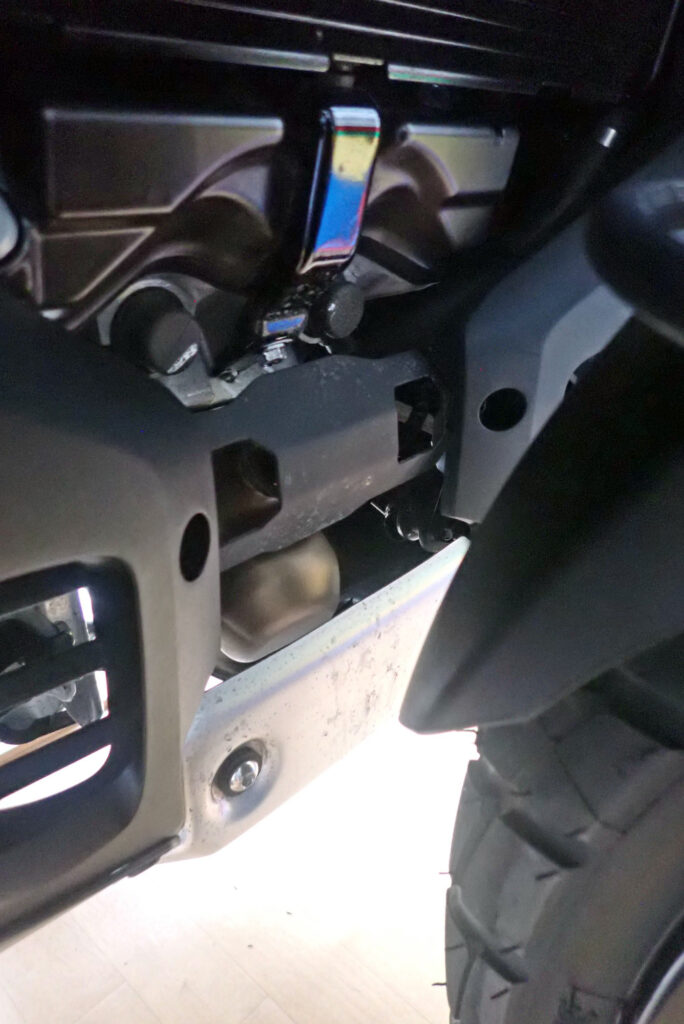
[Image 3: Engine and exhaust pipe area behind the front tire, highly susceptible to mud and water spray due to the short factory fender]
Positioned directly behind the front tire are the main engine case, the exhaust headers (the base of the exhaust system), and your vital radiator.
With the stock fender configuration, the spinning tire flings dirty water and road grime directly onto these components. Once mud bakes onto scorching hot exhaust headers, scrubbing it off becomes an absolute nightmare. A preemptive shield here is non-negotiable.
Maximizing Cost-Efficiency: Deploying a Budget-Friendly Amazon Fender Extender
To counter this mud-splatter issue, I sourced an aftermarket fender extension kit.
Choosing Budget Parts Over High-End Brands
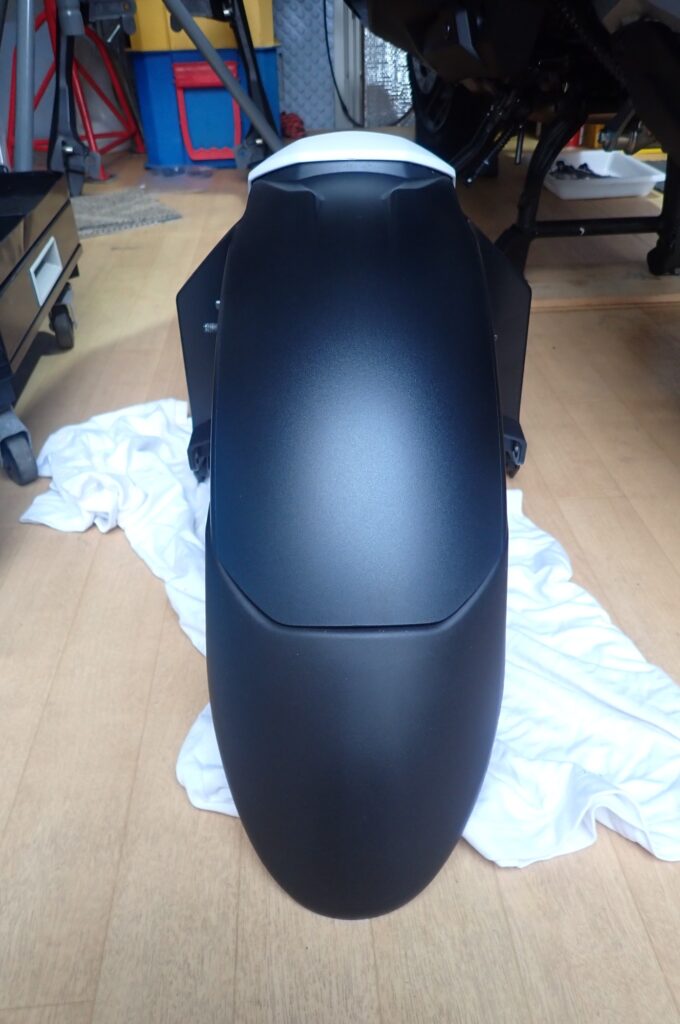
[Image 4: Removed OEM front fender placed next to the budget Amazon front fender extender before installation]
While several famous European accessory brands offer similar extensions, their price tags are quite steep. Since the functional purpose of this part is simply acting as a "plastic shield to block dirt," I selected a reasonably priced overseas version from Amazon.
Inspecting the texture upon arrival, the color and matte finish blend seamlessly with the X-ADV's factory black resin plastics, offering an integrated, OEM-plus look.
[Installation Guide] Foolproof Mounting Using Heavy-Duty Double-Sided Tape
These types of add-on plastics are notorious for flinging off mid-ride due to intense wind pressure and road vibrations. Here is the foolproof installation workflow to ensure your budget part stays permanently locked down.
Step 1: Execute a Meticulous Degreasing Process
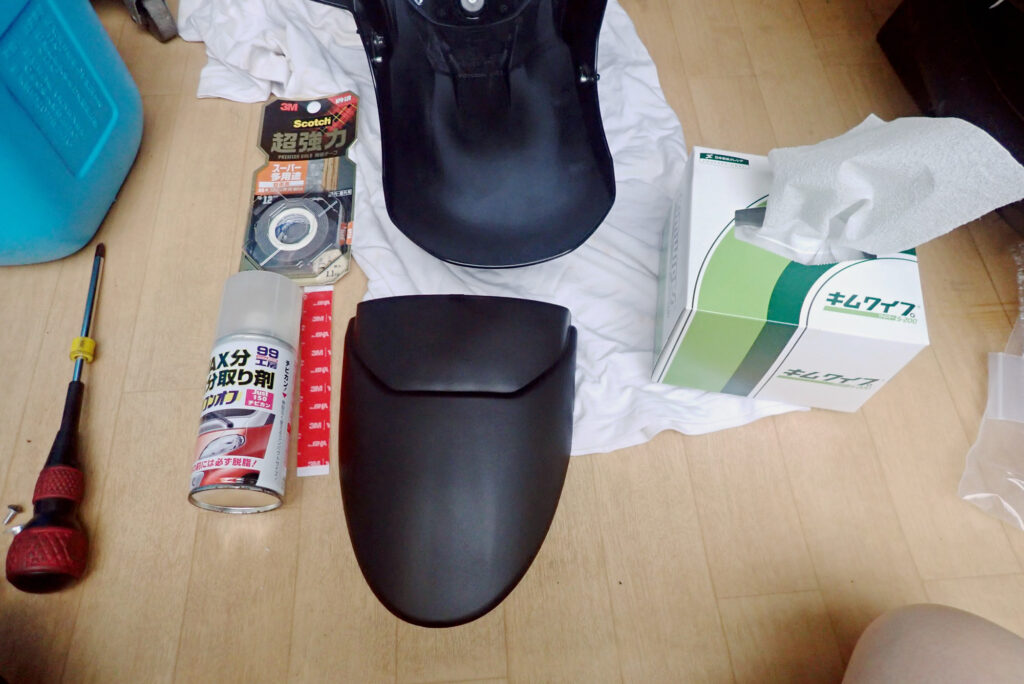
[Image 5: Required tools and supplies for the job: heavy-duty double-sided tape, silicone off degreaser, and Kimwipes]
The absolute silver bullet for a successful install is thorough degreasing. If even a microscopic layer of oil, road film, or detailing wax remains on the plastics, the adhesive tape's bonding strength drops to zero.
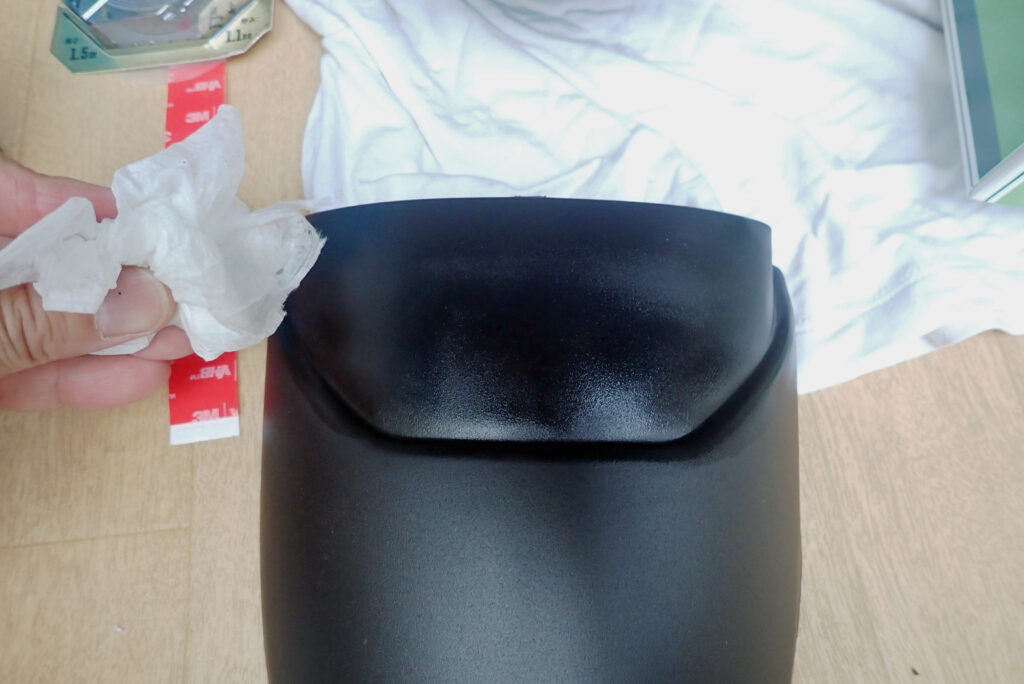
[Image 6: Spraying silicone off onto the bonding surface of the fender extender and wiping it down with a Kimwipe]
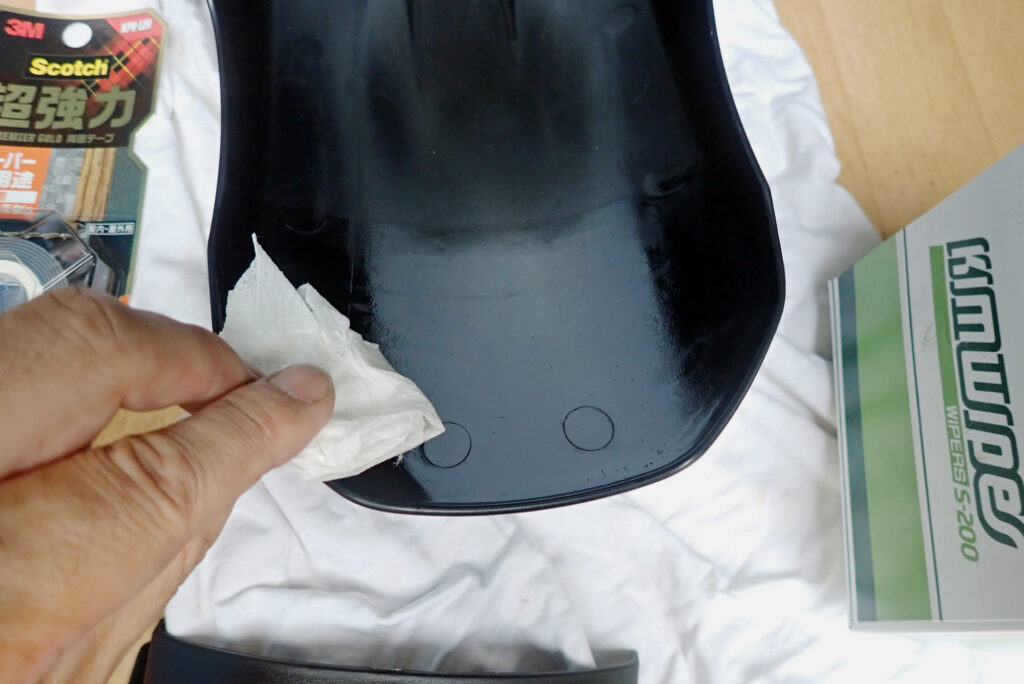
[Image 7: Thoroughly degreasing the inner overlap section of the factory front fender]
- Prep the surfaces: Spray a high-quality degreaser (silicone off) generously onto both bonding faces.
- Wipe cleanly: Wipe the surfaces down completely using industrial paper wipes (Kimwipes). Avoid standard rags or tissues, as they leave behind fine lint and fibers that ruin the bond. Ensure both mating surfaces are perfectly clean.
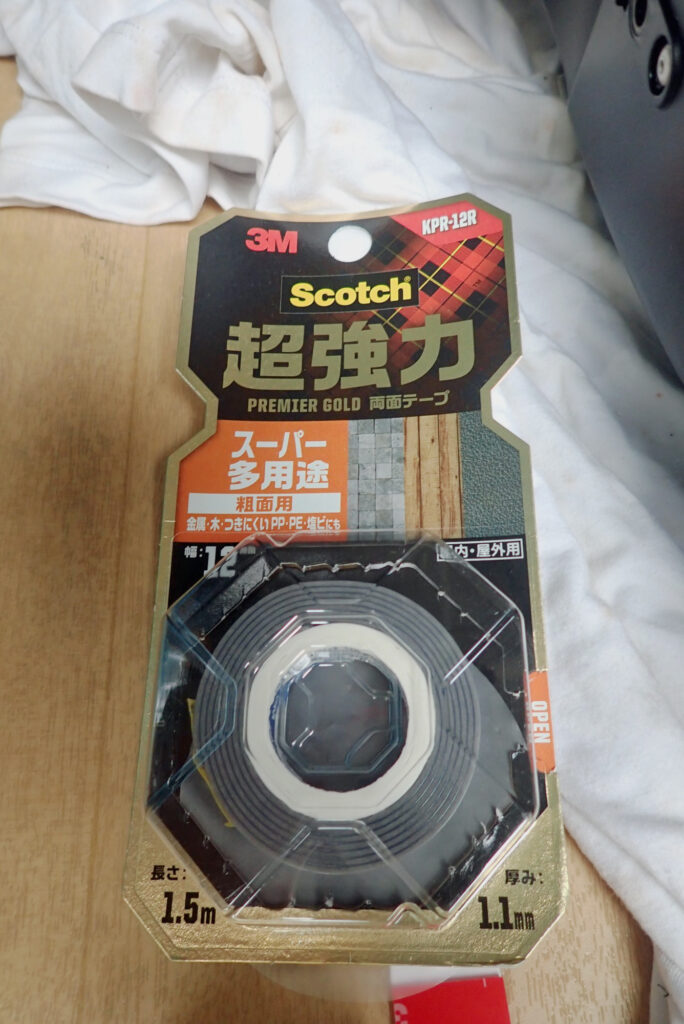
Step 2: Apply and Press 3M Ultra-Strong Double-Sided Tape
[Image 8: High-quality 3M automotive double-sided tape applied precisely to the inner surface of the fender extender]
- Lay down the tape: Line the inner surface of the extender smoothly with premium 3M automotive exterior double-sided tape and Scotch Super Multipurpose heavy-duty tape, leaving no open gaps.
- Bond the components: Carefully align the extender with the factory front fender and press them together. Apply heavy, uniform pressure with your fingertips across the entire bonding zone to activate the adhesive.
- Crucial Warning: These automotive acrylic foam tapes grip instantly and aggressively. You must get your alignment spot-on on the very first try. I allowed the part to slip slightly out of alignment during mock-up, and the tape locked down so hard it was impossible to pull apart for repositioning!
[Pro-Tip from Experience] Sealing Seams with Bathroom Caulking to Lock Out Grime
If you stop after applying the double-sided tape, your installation is only half finished. Here is the vital extra step to guarantee years of trouble-free service.
Why You Must Seal the Overlap Seams
Where the factory fender and the aftermarket extension plate overlap on the underside, a small mechanical "step" or gap is created. As you ride, high-pressure water, fine sand, and gravel get driven into this seam. Over time, these wedge-like contaminants slowly pry the double-sided tape away from the plastic, eventually causing the entire component to fly off on the highway.
Masking the Seams and Selecting the Sealant
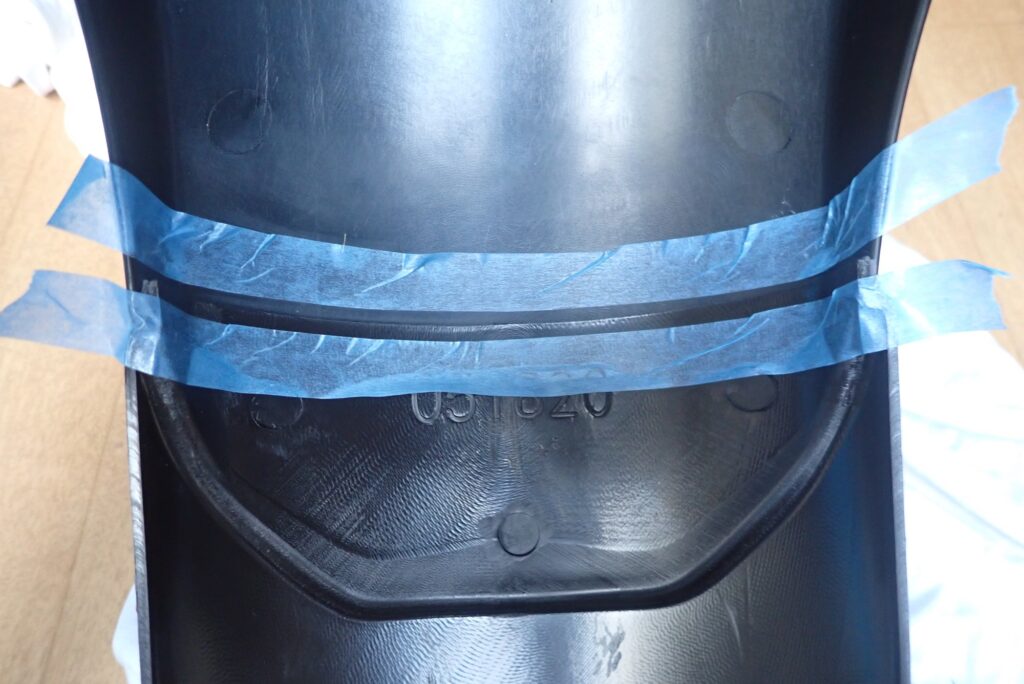
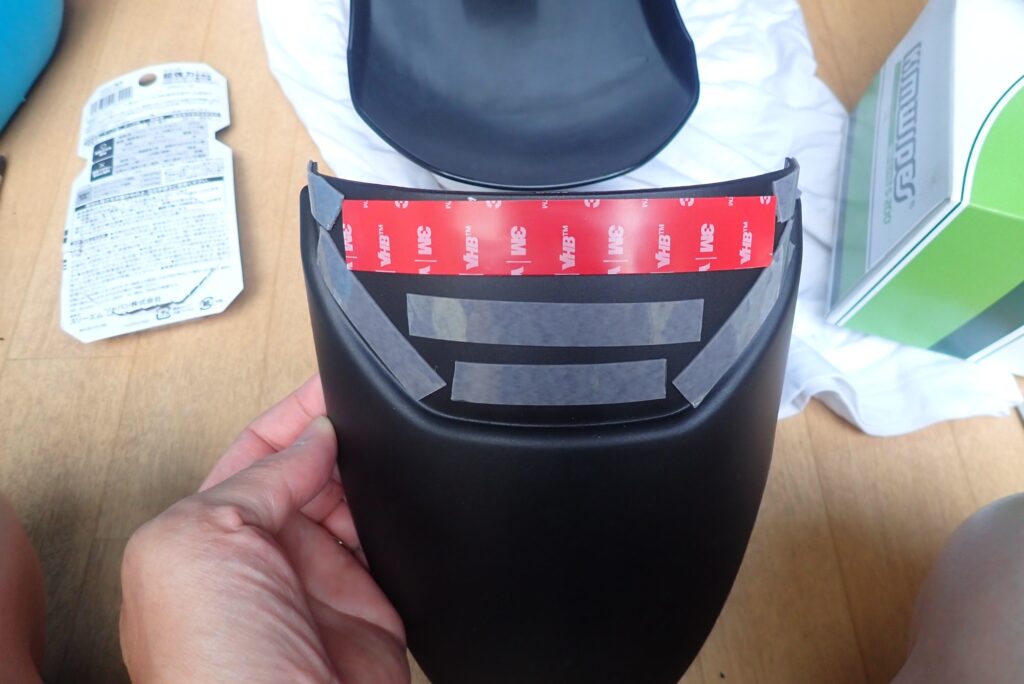
[Image 9: Masking tape applied neatly along both sides of the joint line on the underside of the fender]

[Image 10: Konishi Bath Bond Q black silicone caulking sealant used for sealing the gaps]
To permanently seal this gap, use a highly flexible, waterproof, and vibration-resistant silicone bathroom/tile caulking sealant (Black formulation).
- Apply masking tape: Apply masking tape cleanly along both borders of the joint line to protect the surrounding plastic and ensure a professional, razor-sharp finish.
Injecting and Finishing the Sealing Compound
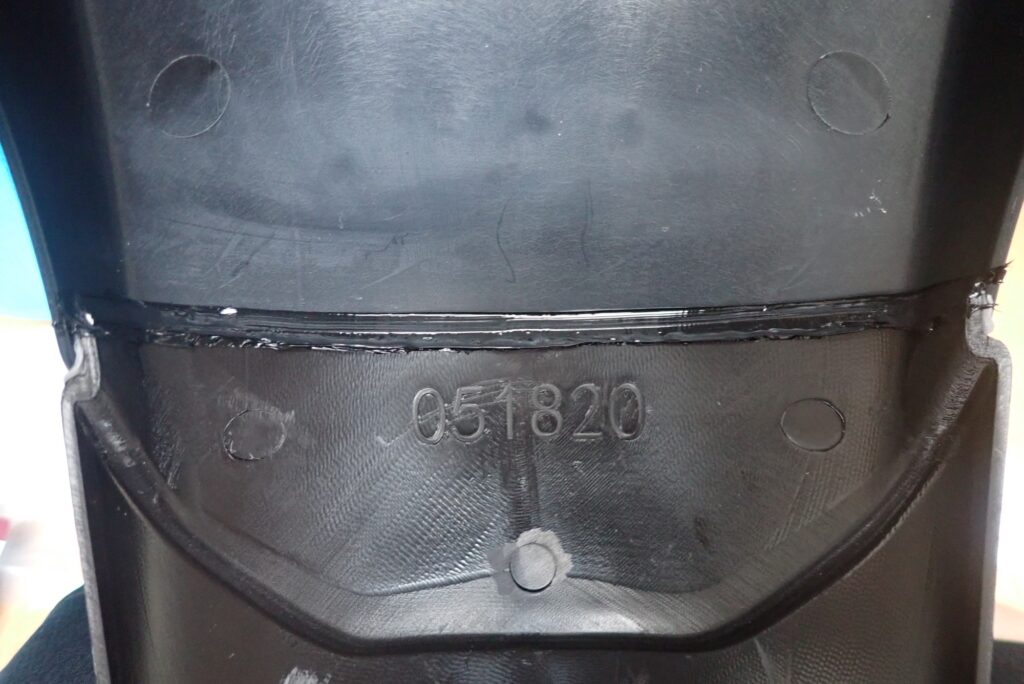
[Image 11: Finished underside of the fender with black caulking injected uniformly into the gap and masking tape removed]
- Fill the gap: Force the black silicone caulking deep into the overlapping seam, then smooth the bead down evenly with your finger.
- Peel the tape: Strip away the masking tape while the sealant is still wet.
This creates a 100% waterproof and dirt-proof barrier, completely preventing water or road grit from ever compromising your double-sided tape!
Essential Chemicals and Supplies Used for This DIY Job
To maximize the longevity of your exterior modifications, keep these proven garage supplies stocked in your inventory:
- 3M Automotive Exterior Heavy-Duty Double-Sided Tape The gold standard for securing motorcycle plastics exposed to high-speed wind blast and downpours. Its acrylic foam core offers professional-grade weather resistance and shear strength.
- Konishi Bond Bath Bond Q (Black) A highly flexible silicone sealant that absorbs chassis vibrations without cracking. Choosing the "Black" variant ensures it visually integrates perfectly with raw motorcycle plastic trim.
- Crecia Kimwipes S-200 (Lint-Free Industrial Wipes) Unlike standard workshop paper towels or microfiber rags, these leave absolutely zero lint or fiber residue behind. They elevate your degreasing prep work to a professional standard.
Conclusion: Upgrading Budget Accessories with Smart Prep Yields OEM Quality
That concludes my installation review of the front fender extender on the Honda X-ADV.
While it started as a highly affordable budget part from Amazon, executing a meticulous degreasing routine and adding a protective silicone caulking seal delivered premium durability and an integrated look that rivals high-end aftermarket brands.
Since completing the installation, the amount of road sludge and dirty water hitting my exhaust headers and front engine case has dropped dramatically. Washing the bike after a long tour is now a breeze!
If you are tired of road grime ruining your engine bay, I highly recommend tackling this high-reward DIY upgrade yourself.
Ride safe, and enjoy the ultimate motorcycle life!