Hello everyone!
Have you ever experienced that heart-stopping moment when parking your bike on unpaved campground ground (gravel or dirt) or hot summer asphalt, and the side stand starts sinking into the ground? Especially with a heavy, open-class motorcycle, a sinking stand is a major recipe for a tip-over.
So this time, I installed a custom "side stand end (wide base plate)" to expand the footprint of my X-ADV's side stand.

[Image 1: Top view of the newly installed custom side stand enlarger plate firmly bolted onto the Honda X-ADV side stand foot]
To be honest, I didn't have any major complaints about the bike's lean angle when using the factory side stand. Therefore, my primary goals for installing this part were two-fold:
- Increase the surface area to prevent sinking on unpaved ground.
- Slightly reduce the lean angle of the bike when parked.
In this post, I will thoroughly explain everything from critical selection points for on-road safety, rust-proofing the pre-scratched bottom of the factory stand (touch-up painting), and the foolproof installation steps required to prevent the plate from flinging off due to road vibrations. If you want to upgrade your running gear to be tougher and safer, keep scrolling to the end!
Verifying the X-ADV Side Stand Enlarger Plate (Shape, Size, and Weight)
First, let's verify the shape, dimensions, and—most importantly—the weight of the purchased aftermarket part.
Checking Component Size and Thickness
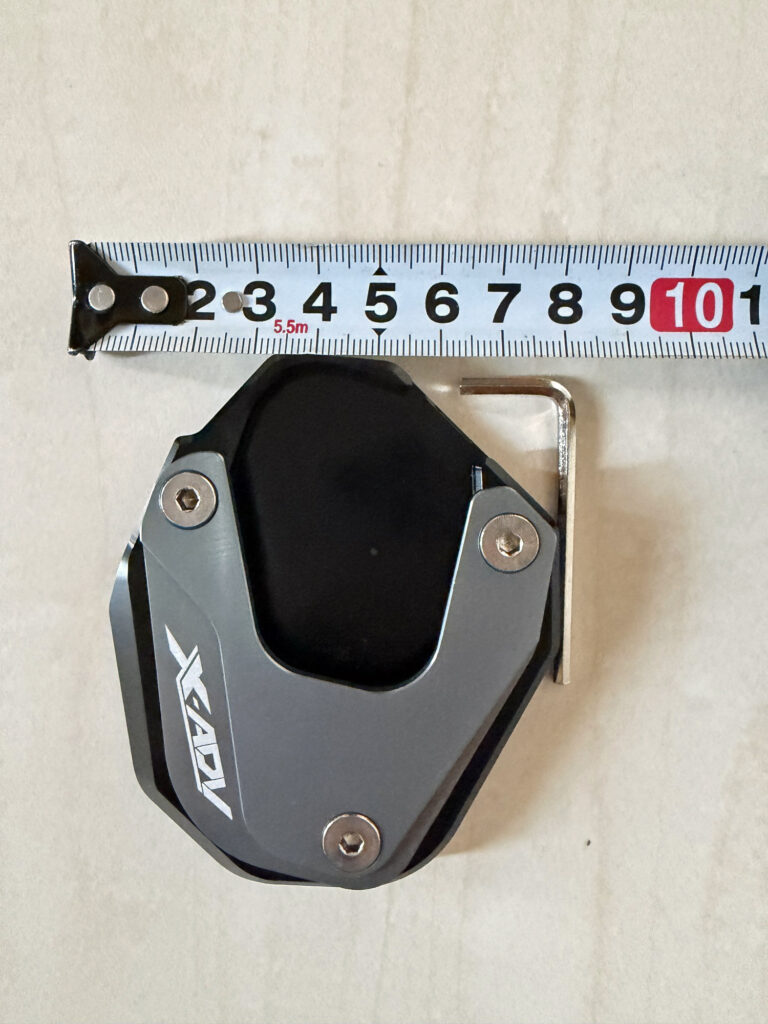
[Image 2: Top view of the enlarger plate being measured with a tape measure, showing a width of approximately 7.5 cm]
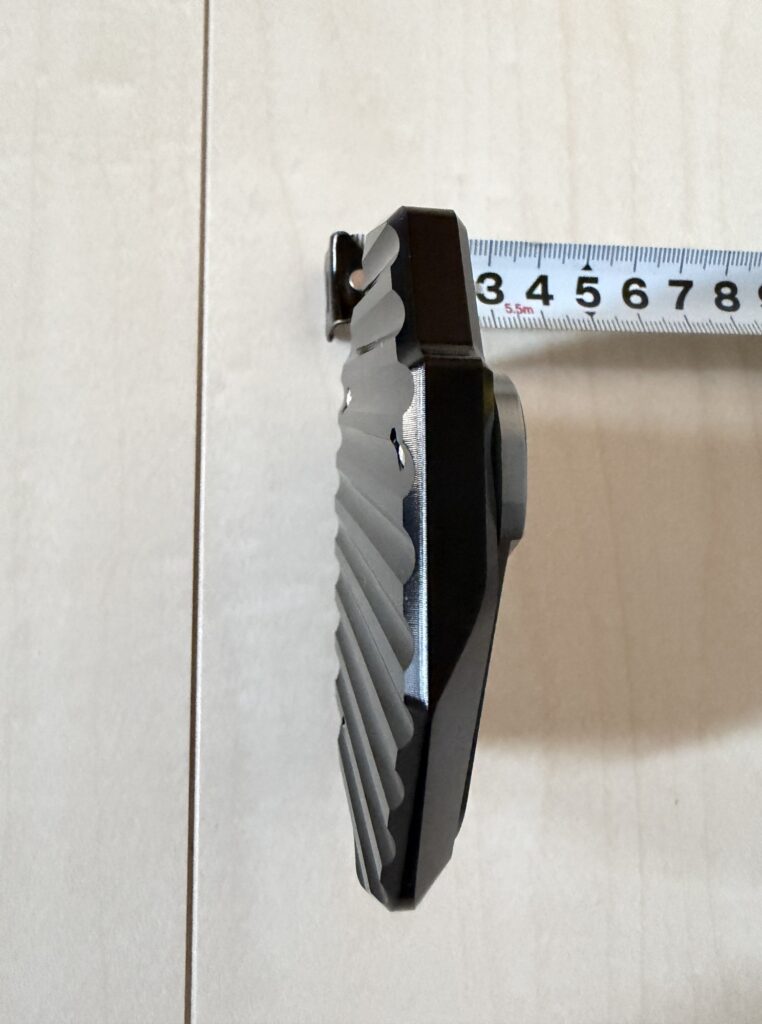
[Image 3: Side view of the plate showing a thickness of about 1.0 cm with a grooved, wavy pattern machined onto the bottom face]
By installing this part, the footprint increases dramatically compared to the stock side stand. This allows you to park with peace of mind even on soft ground. The thickness is about 1.0 cm, which slightly reduces the bike's lean angle and boosts stability when parked.
(Note: Since the area where the stock stand sits is recessed, the actual height increase is closer to 0.8 cm. Also, the bottom surface features a machined, wavy non-slip pattern.)
The Crucial Importance of "Lightweight" Selection for Riding Safety
When choosing a side stand shoe, selecting one based purely on aesthetics or size is dangerous. If the part is too heavy, the added weight can cause the side stand to bounce or drop down unexpectedly when encountering heavy vibrations or road shocks while riding. For this reason, I carefully scouted for the absolute lightest component possible.
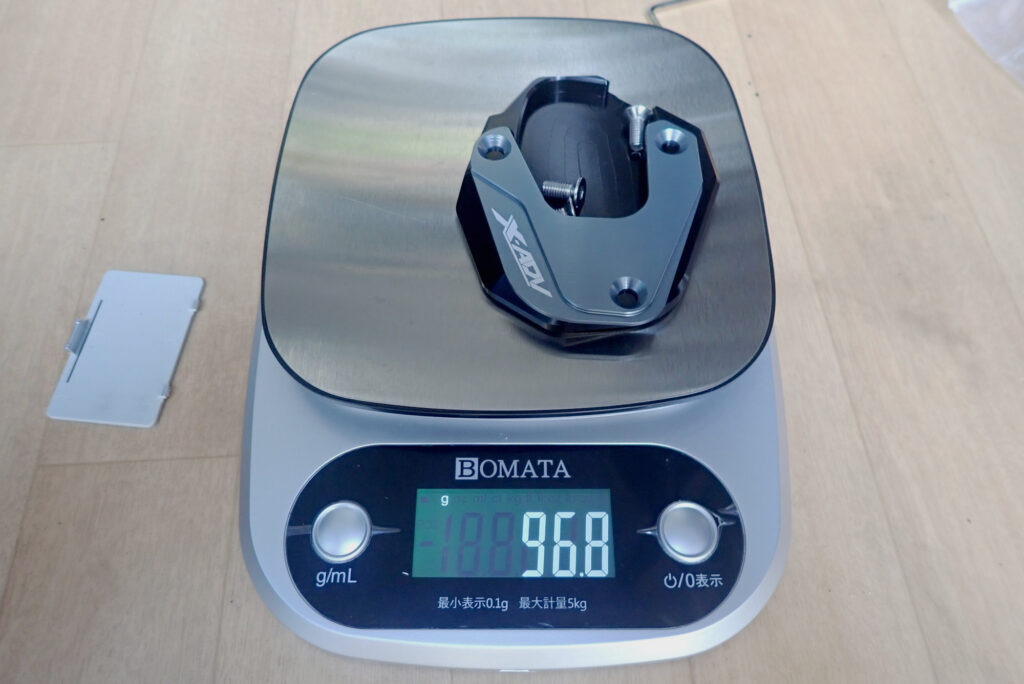
[Image 4: Weighing the base plate and its mounting bolts on a kitchen scale, displaying a total weight of 96.8g]
The scale revealed a total weight of 96.8 grams—sub-100g territory! Thanks to this ultra-lightweight design, the risk of the stand dropping down mid-ride is minimized.
Prep Work is Everything! Repairing and Rust-Proofing the Scratched Stand Bottom
Before bolting the plate on, check the current condition of your side stand foot. It is a hidden area, but skipping this step allows rust to fester invisibly beneath the plate.
Current Condition Check: Exposed Metal on the Stand Base
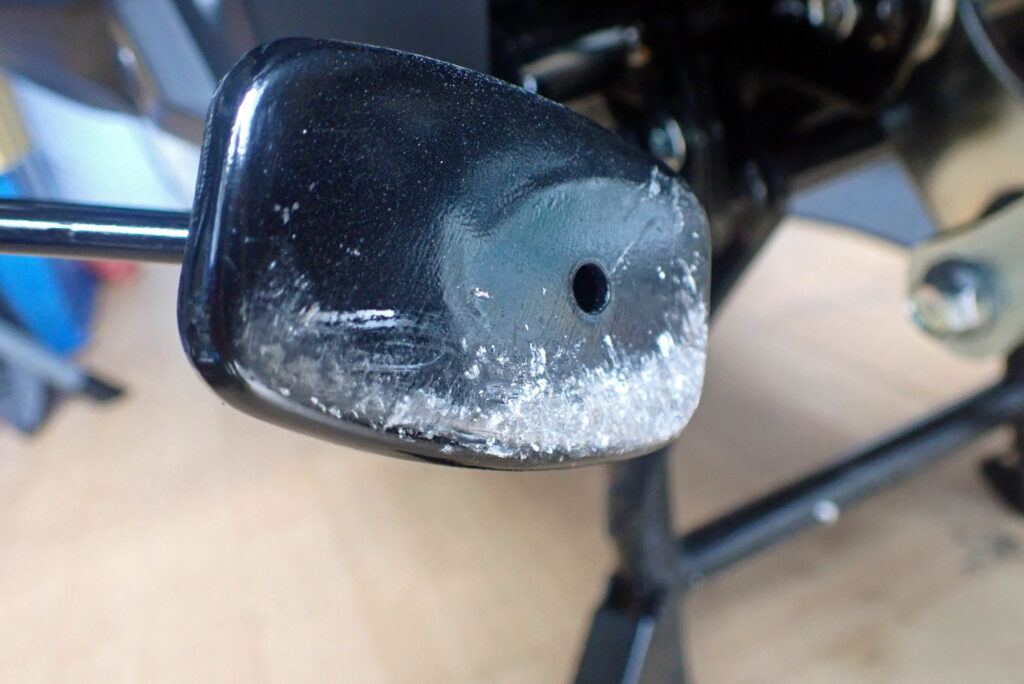
[Image 5: Close-up shot of the bottom of the X-ADV side stand showing the factory black paint scraped off, exposing bare silver metal]
Despite taking delivery just recently, a few uses were all it took to scrape the factory black paint right off the bottom from ground friction. If you slap the wide plate straight over this, trapped rainwater will cause rust to accelerate rapidly underneath.
Clean with a Brass Wire Brush and Apply Matte Black Touch-Up Paint
Time for proper surface prep and rust prevention. Implement the following steps:
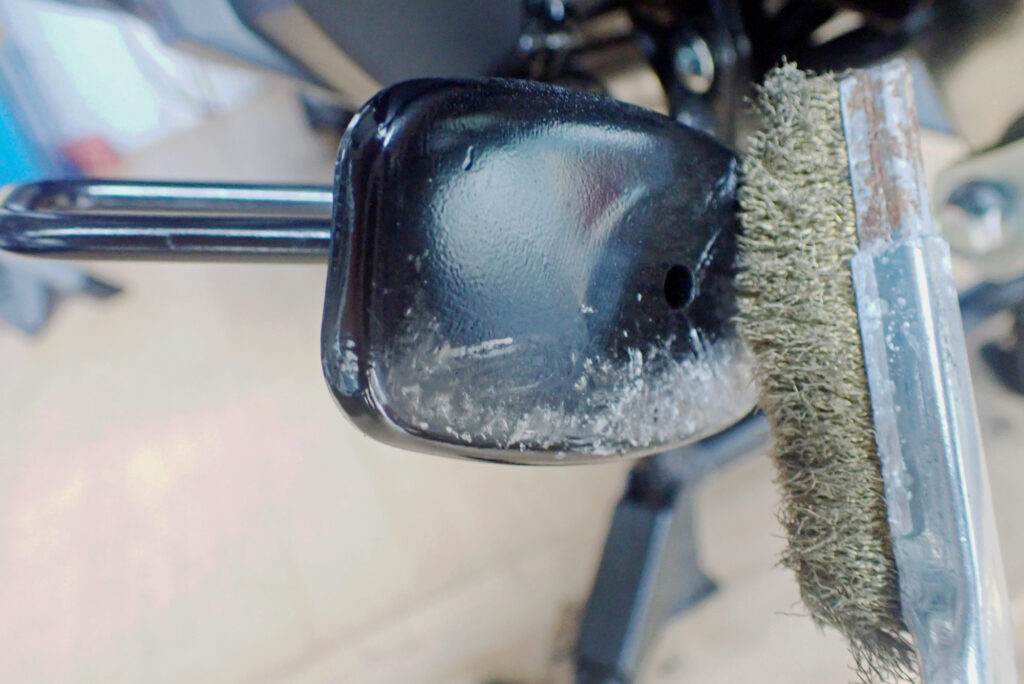
[Image 6: Thoroughly scrubbing the bottom of the side stand with a brass wire brush to remove dirt and microscopic surface rust]
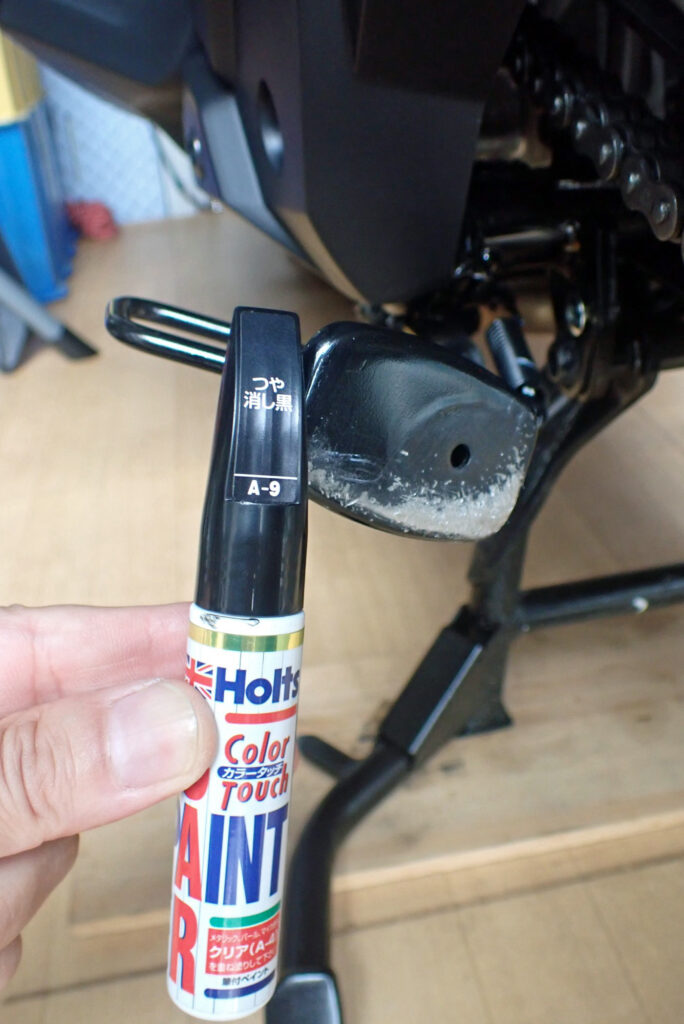
[Image 7: A bottle of automotive matte black touch-up paint used for repairing the scratched metal]
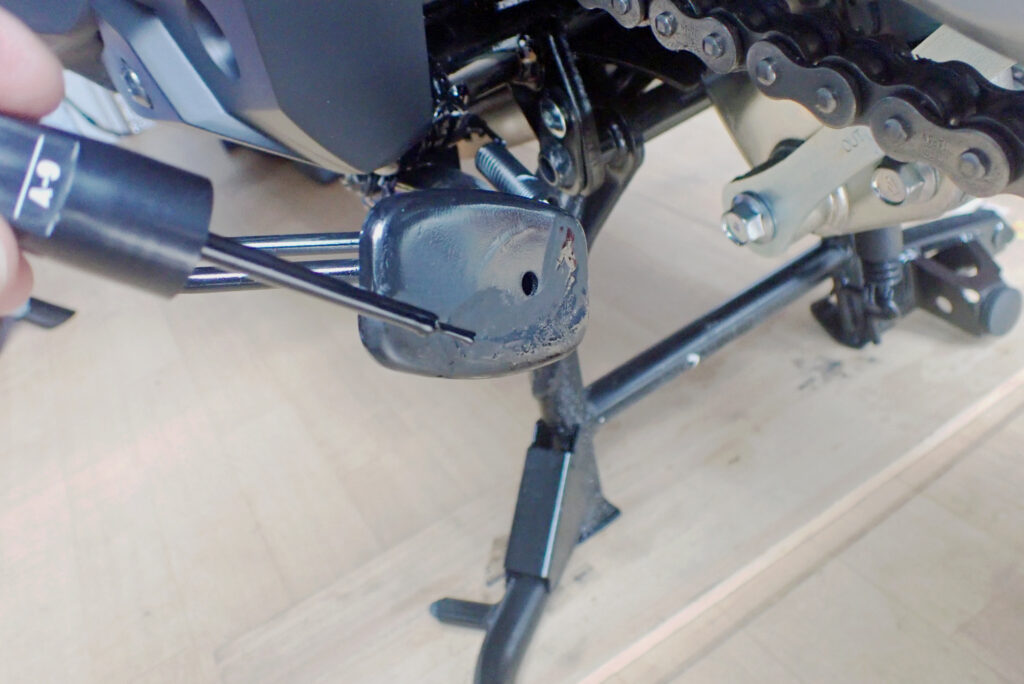
[Image 8: Carefully dabbing matte black touch-up paint onto the exposed bare metal using the fine brush tip after degreasing]
- Scrub the surface: Use a brass wire brush to break down and scrape away dirt and microscopic surface rust from the base of the stand.
- Degrease thoroughly: Clean the area with a grease remover (silicone off) and a lint-free wipe (Kimwipe) to strip away all oils and residue.
- Apply touch-up paint: Carefully dab automotive matte black touch-up paint onto the exposed bare metal sections to seal them from the elements.
- Allow to cure: Let the paint dry completely for a full 24 hours to ensure the protective film cures rock hard.
[Installation Steps] Deploying Threadlocker and Alignment Marks to Prevent Loss
Once the paint is fully cured, move on to final assembly. Motorcycle running gear is constantly exposed to heavy vibrations, making thread-locking and anti-loosening measures mandatory.
Foolproof Bolt Securing Using LOCTITE 243
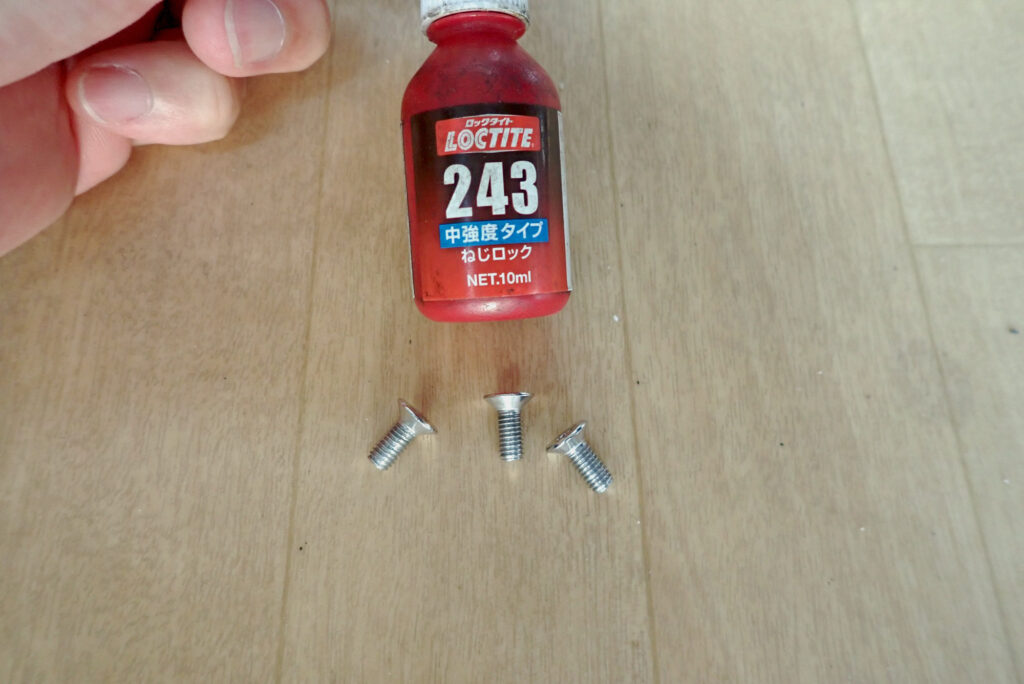
[Image 9: Three stainless steel mounting bolts placed next to a bottle of LOCTITE 243 medium-strength threadlocker]
To prevent the bolts from backing out due to road vibrations and causing the plate to drop off, always apply threadlocker during assembly.
- Apply Threadlocker: Drip a small amount of medium-strength threadlocker (LOCTITE 243) onto the threads of the three stainless steel bolts. This formula secures them tightly but still allows disassembly during future maintenance.
- Torque Down Evenly: Tighten the three bolts down in a gradual, alternating crisscross pattern to ensure even clamping pressure across the plate.
Marking Alignment Lines for Quick Visual Inspection
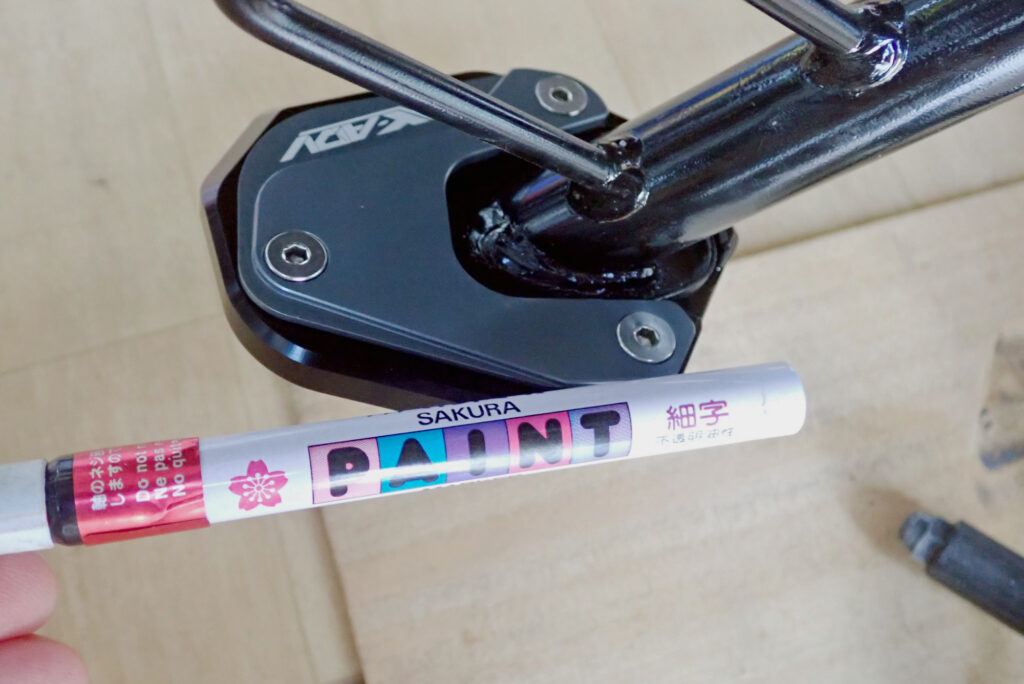
[Image 10: Using a pink paint marker to draw clear alignment lines across the bolt heads and onto the adapter plate]
- Draw Alignment Marks: Draw a distinct line stretching across each bolt head onto the plate using a paint marker (witness marks) once fully torqued down.
Adding these lines turns daily inspections into a breeze. You can verify if a bolt has loosened in a split second just by checking if the pink lines are still aligned. It’s an essential pro-tip for maximum safety.
Essential Chemicals and Tools Used for This Side Stand Upgrade
Here is the foolproof maintenance gear used for this installation. Keeping these items stocked in your garage makes installing other accessories and managing daily rust prevention incredibly easy:
- LOCTITE 243 Medium-Strength Threadlocker An absolute must-have chemical to protect bolts from backing out under motorcycle vibrations. It’s incredibly useful not just for side stand shoes, but also when swapping out smartphone mounts, levers, and engine guards.
- Holts Touch-Up Paint (Matte Black) The perfect touch-up paint used in today's photos to seal exposed metal. It is ideal for instantly sealing paint chips on the frame or stand caused by flying gravel before rust can start.
- Sakura Color Products Solid Marker / Paint Marker An industrial-grade, waterproof, and heat-resistant paint marker perfect for drawing crisp alignment lines for hassle-free bolt checks.
Conclusion: Small Accessory, Massive Peace of Mind on Unpaved Roads
That wraps up my installation review of the side stand enlarger plate on the Honda X-ADV.
While I didn't mind the factory lean angle initially, the level of stability gained from expanding the stand's footprint is immense. Whether parking on scorching summer asphalt that feels ready to melt or at a gravel-packed campground, I am completely liberated from the fear of the bike sinking and tipping over.
By combining proper rust prevention (touch-up painting) with threadlocker and alignment marks to eliminate the risk of part loss, I’ve completed a secure, trouble-free upgrade to the running gear.
Because the X-ADV boasts such incredible factory build quality, taking a meticulous, professional approach to installing aftermarket accessories further elevates the bike's overall value and pride of ownership.
I highly recommend tackling this simple yet highly effective chassis upgrade yourself!
Ride safe, and enjoy the ultimate motorcycle life!