"Does highway wind buffeting against your helmet leave your neck and ears exhausted after a long ride?"
"Have you adjusted the stock windscreen to its highest setting, only to find the wind protection still falls short?"
If you ride a Honda X-ADV, chances are you've experienced this exact frustration.
As detailed in my previous review, while the X-ADV's OEM windscreen features a handy 5-position height adjustment, even at the highest setting, turbulent air blasts directly into the top of your helmet, creating persistent wind roar and buffeting.
Note: For the full breakdown of the stock adjustment mechanism and road impressions, check out my previous post:
👉 Actual Riding Impression: The Effect of Adjusting the Stock Screen on the X-ADV
To solve this issue and kick the airflow cleanly up and over my helmet, I acquired an aftermarket windscreen with a flipped-up (re-curved) top lip and performed a DIY swap!
Although the exact manufacturer is unknown because I bought it secondhand, it maintains the compact, sporty proportions of the OEM screen while adding an aggressive flip at the top edge to optimize aerodynamics.
In this guide, I’ll walk you through a detailed side-by-side shape comparison with the OEM screen and the step-by-step DIY installation process!
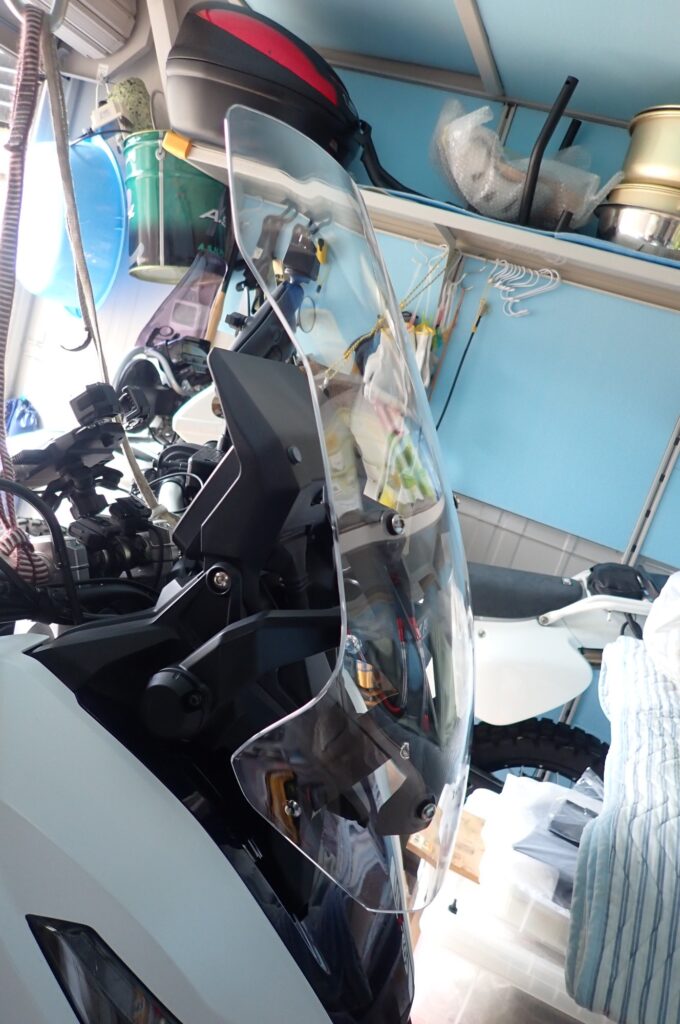
1. Removing the OEM Stock Windscreen & Hardware Layout
Replacing the windscreen on the Honda X-ADV is one of the easiest DIY mods you can tackle—there is no need to dismantle fairings or body panels.
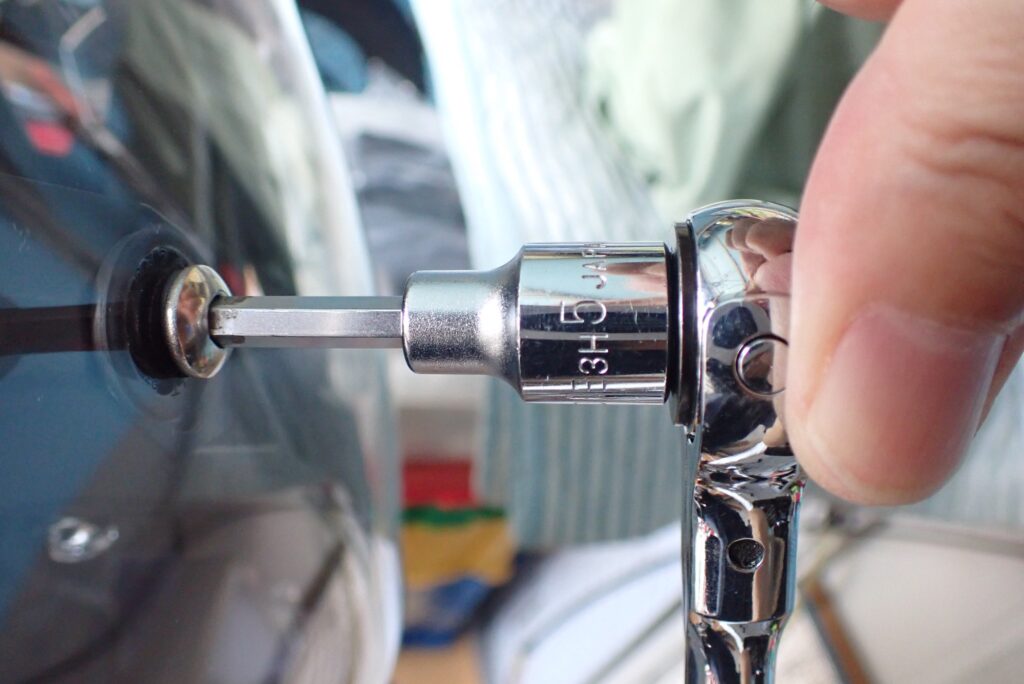
The only tool required is a 5mm hex (Allen) wrench or hex socket bit.
Loosen and remove the four mounting bolts (two on each side), and the windscreen lifts right off the adjustment bracket.
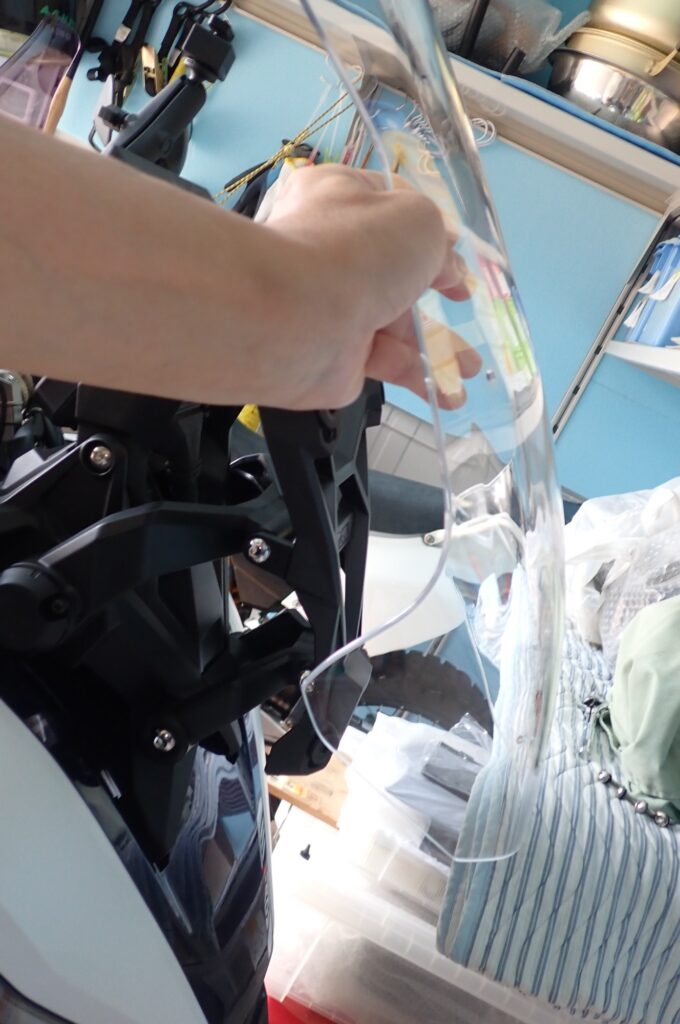
2. OEM Stock vs. Aftermarket Windscreen: Detailed Shape Comparison
Let's line up the stock windscreen next to the aftermarket screen to examine the subtle differences in contour, width, and dimensions.
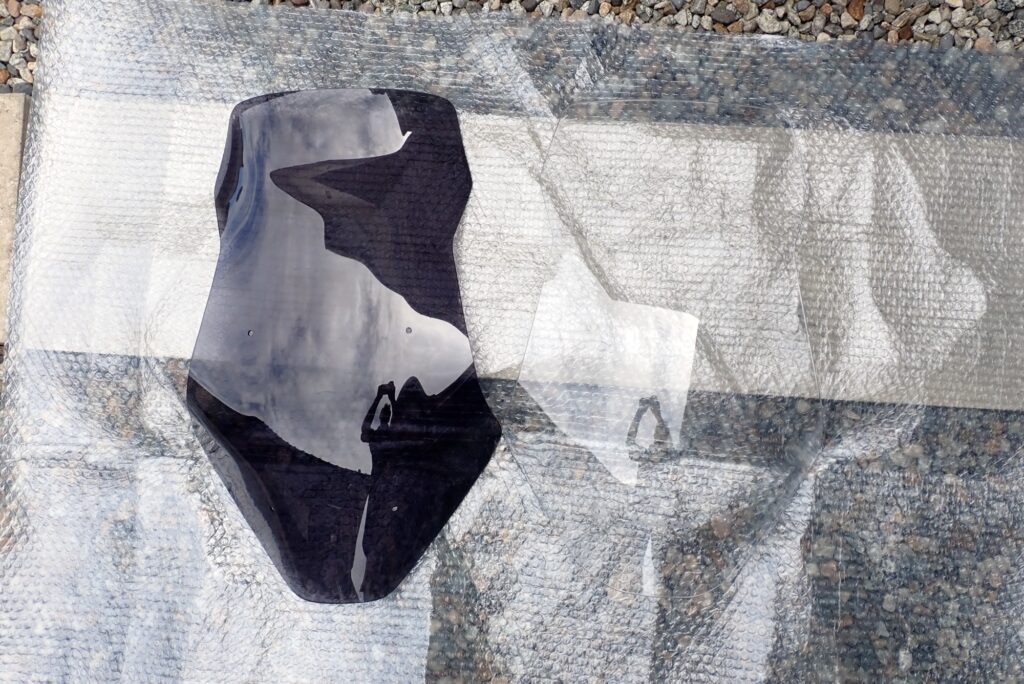
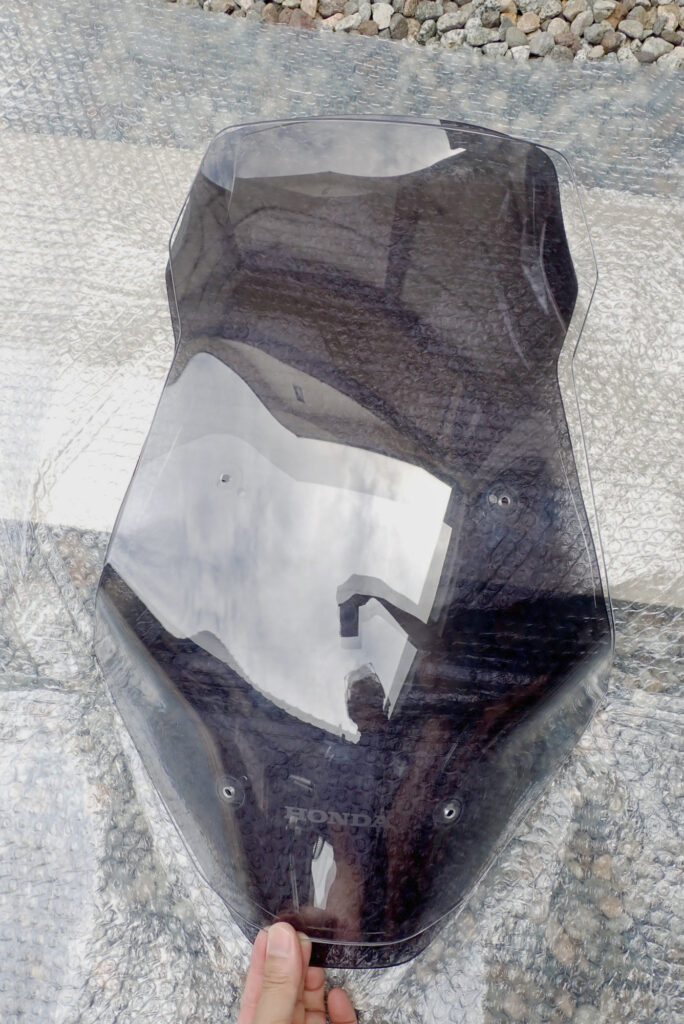
Two Major Differences Discovered by Aligning Bolt Holes
- Extended Lower Flanges (Bottom Coverage)When stacking the stock screen directly over the aftermarket unit with bolt holes aligned, the aftermarket screen extends noticeably lower at the bottom. This extra coverage shields the cockpit and instrument cluster area, reducing dirty turbulent air swirling up toward your chest.
- Flipped-Up Top Lip (Spoiler Aerodynamics)The most critical difference lies at the top edge. While the OEM windscreen features a straight, flat profile all the way to the top, the aftermarket screen flips sharply forward and upward into a pronounced spoiler lip.
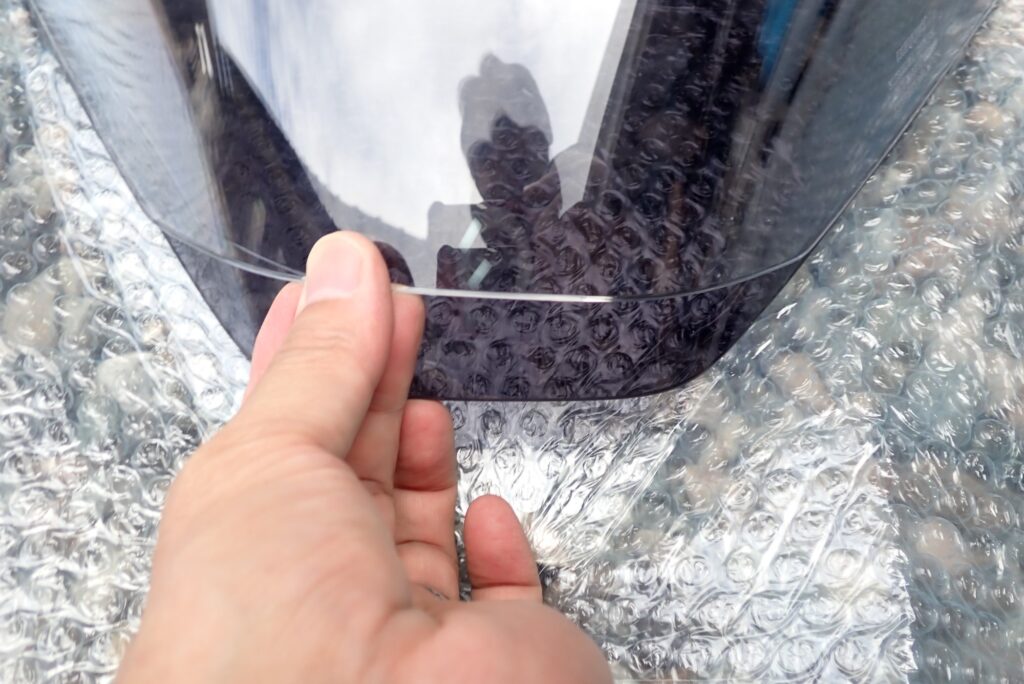
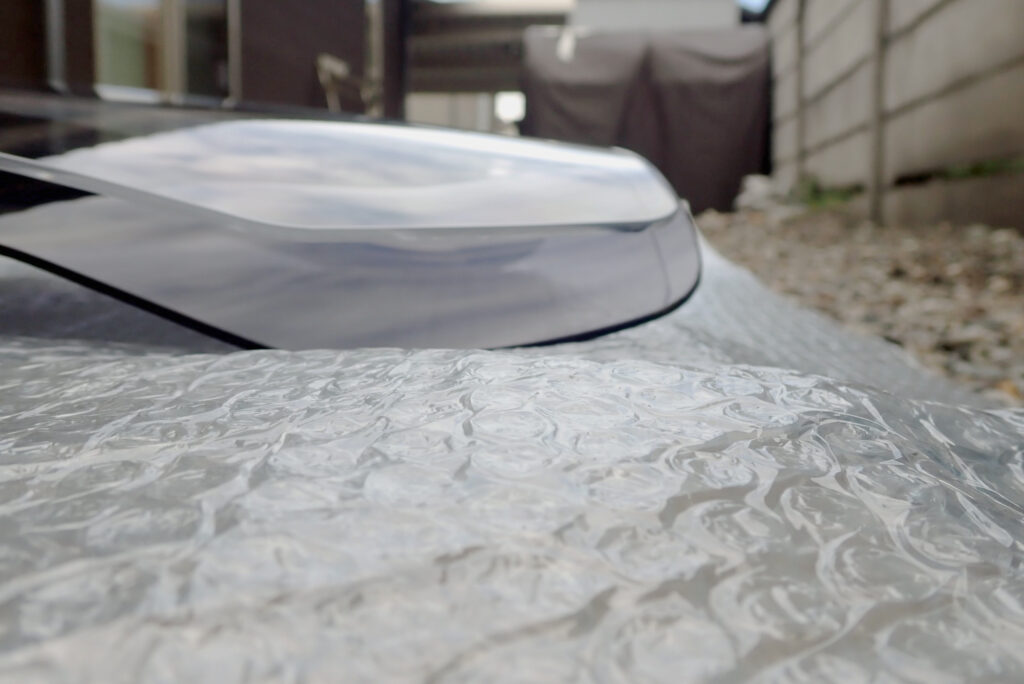
This flipped lip creates an aerodynamic spoiler effect, deflecting high-speed airflow high above your helmet without requiring an excessively tall "barn-door" touring screen. It delivers optimal wind protection while preserving the sharp, aggressive adventure styling of the X-ADV.
3. Pre-Installation Prep with Plexus & Crucial Washer Stacking Order
Before bolting the new screen to the bike, treat the acrylic surface with Plexus Plastic Cleaner & Polish to buff out light swirl marks, maximize optical clarity, and add anti-static protection.
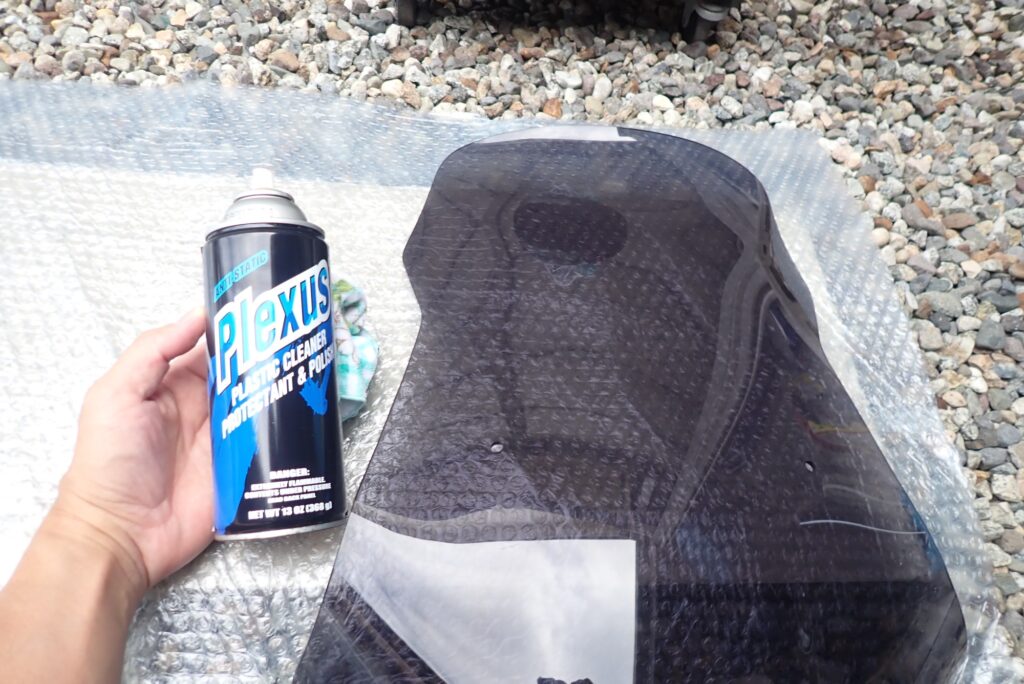
Applying a protective polymer layer beforehand helps repel rain, road grime, and insect splatter, ensuring a crystal-clear field of vision on long tours.
[Tip] Pay Attention to the Washer Stacking Order!
The mounting hardware on the X-ADV utilizes dedicated cushioning washers to absorb chassis vibration and prevent stress cracks in the screen.
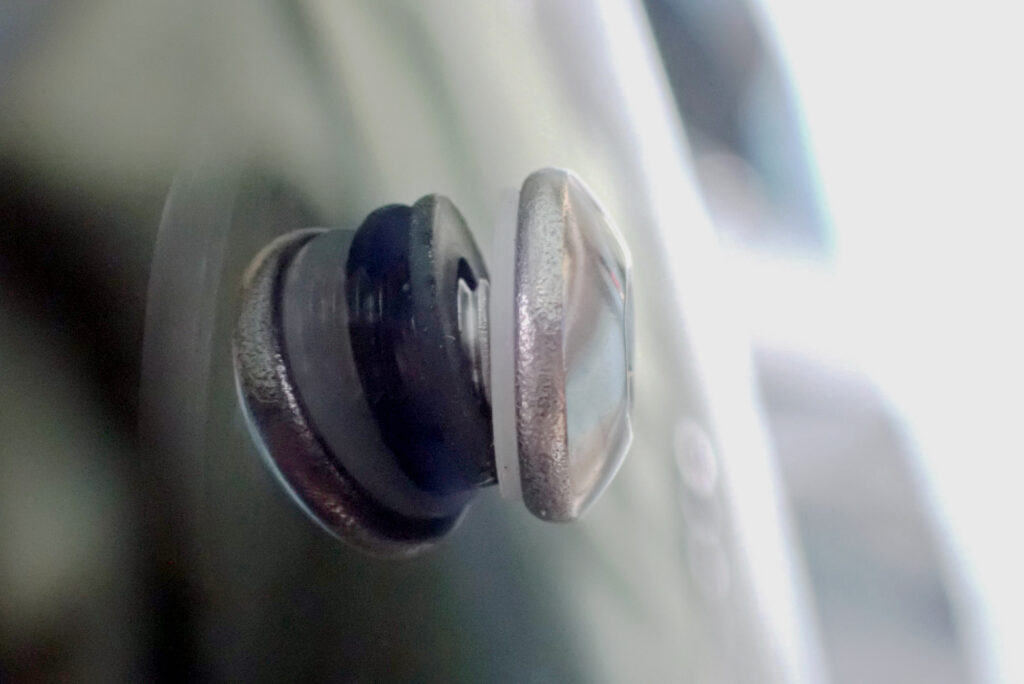
Between the bolt head and the windscreen, stack the hardware in the following exact sequence:
[Bolt Head] → [White Plastic / Nylon Washer] → [Black Rubber Washer] → [Windscreen Surface]
- White Plastic Washer: Reduces friction between the bolt head and rubber when torquing down.
- Black Rubber Washer: Acts as a vibration damper and cushions the screen against overtightening cracks.
When installing your aftermarket screen, always transfer these OEM rubber and plastic washers over, and tighten the four bolts down evenly. Avoid overtightening to prevent cracking the acrylic around the mounting holes.
4. Completed Installation & Side Profile Aesthetics
With all four bolts torqued down evenly, installation is complete.
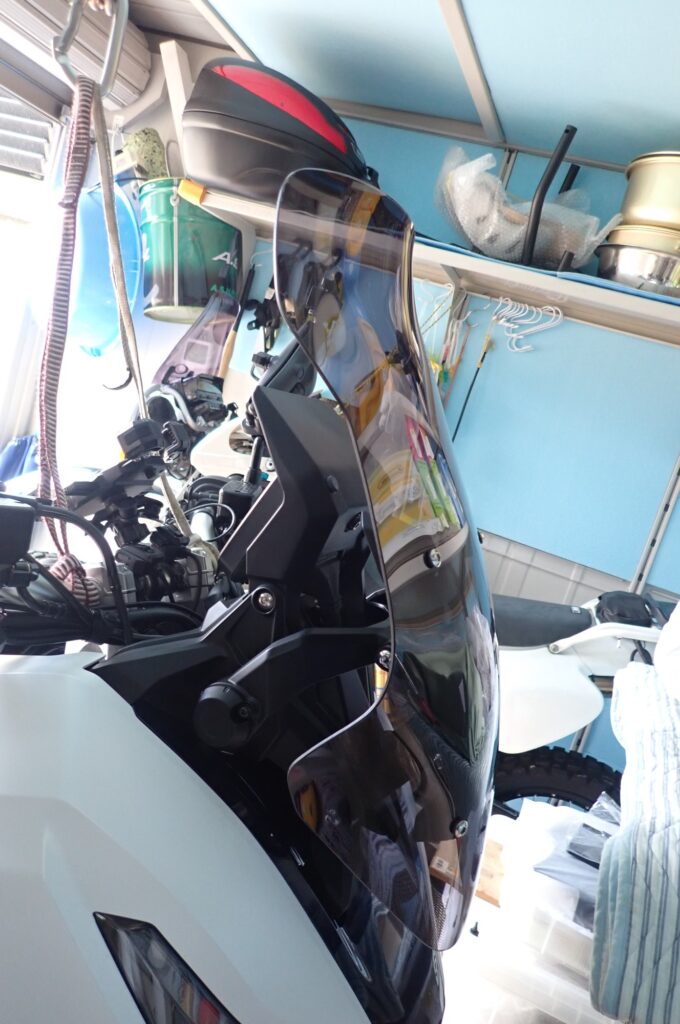
Viewing the bike from the side, the sculpted flipped lip gives the front end an athletic, rally-raid adventure silhouette.
The light smoke tint complements the factory graphics and chassis lines perfectly, delivering a clean, factory-plus aesthetic upgrade!
5. Recommended Tools & Windscreen Upgrades for Honda X-ADV
Here are the essential detailing products and popular aftermarket touring screens for X-ADV owners:
1. Plexus Plastic Cleaner, Protectant & Polish
The gold standard detailing spray for motorcycle windscreens and helmet visors. Micro-fills fine scratches and forms a dirt-repelling, hydrophobic barrier.
2. KTC / TONE 5mm Hex Socket Bit & Ratchet Wrench
A precision hex socket ensures you torque down windscreen hardware cleanly without stripping bolt heads.
3. Puig / GIVI Touring Windscreens for Honda X-ADV
If you prefer brand-name touring screens with proven wind-tunnel engineering, tall screens from Puig or GIVI provide maximum wind protection for high-mileage highway touring.
Conclusion: Upgrading Screen Aerodynamics for Ultimate Touring Comfort!
Here is a quick summary of key takeaways when swapping windscreens on the Honda X-ADV:
- Simple DIY job: Requires only a 5mm hex wrench and four bolts.
- The flipped-lip profile kicks highway airflow over your helmet without needing an oversized screen.
- Always maintain the correct washer stack (Plastic Washer → Rubber Washer → Screen) to prevent acrylic stress fractures.
- Coat with Plexus before installation to protect against UV haze, scratches, and bug residue.
In the next installment, I’ll take this flipped-lip screen onto the highway for an extended high-speed test run to evaluate real-world noise reduction and helmet wind buffeting. Stay tuned!
Ride safe and enjoy wrenching!