Hello everyone!
Following my previous delivery day post, today I am bringing you my real-world riding impressions.
The X-ADV, Honda's flagship adventure scooter, comes standard with a 5-way adjustable windscreen designed to reduce wind blast while riding. On long-distance tours, wind protection is a critical factor that directly impacts rider fatigue.
"How much does the actual wind pressure change when you adjust the OEM windscreen height?" "Does the optimal screen position change depending on your height?"
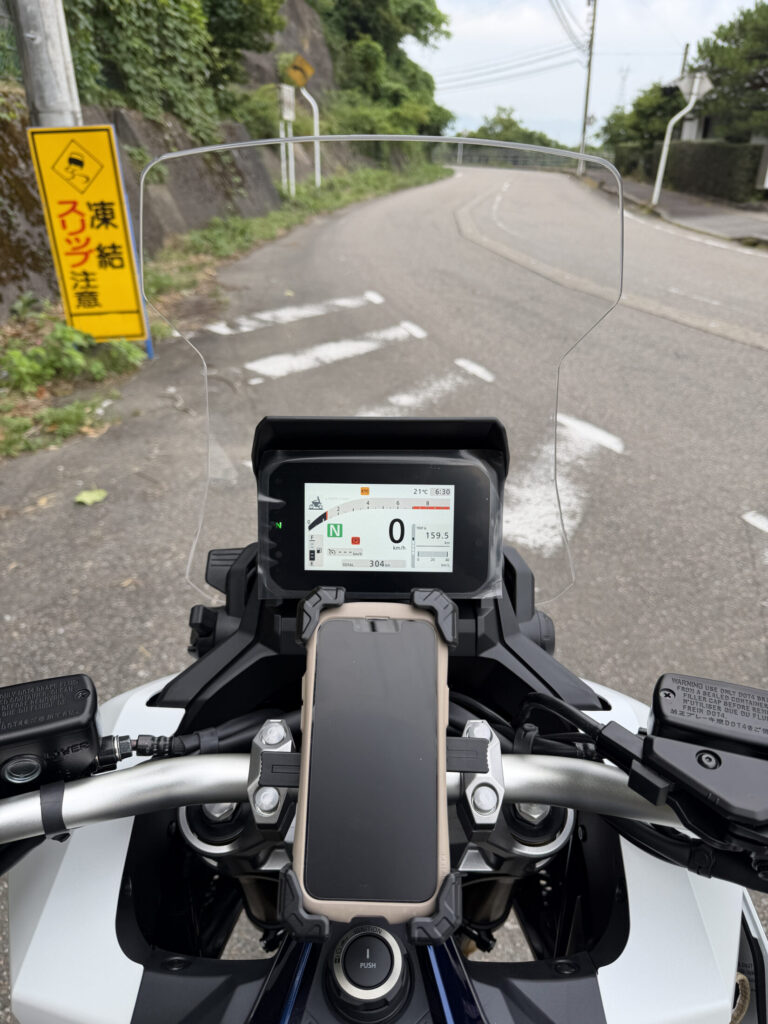
To answer these questions for fellow riders, I took my new machine out on the road. Standing at 167 cm (5'6"), I tested all five positions of the factory adjustable screen to see exactly how it performs.
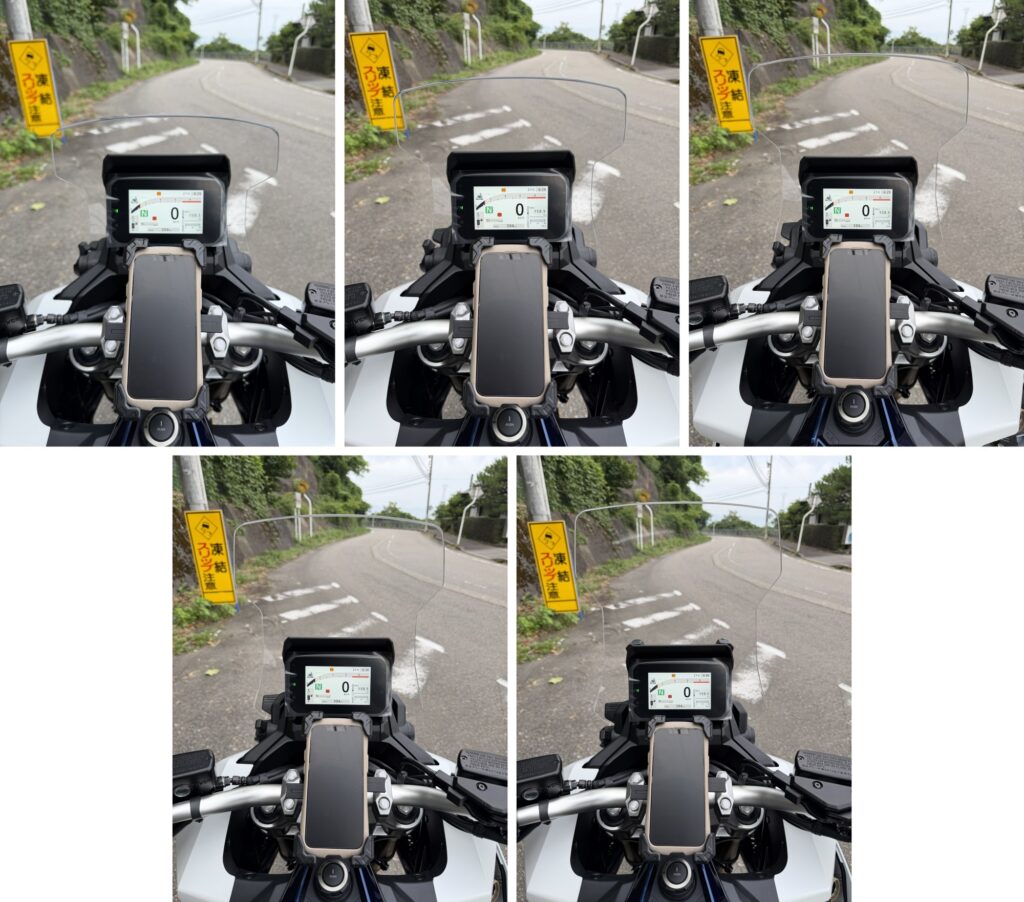
[Image 1: Side-by-side cockpit view comparison of the Honda X-ADV OEM windscreen adjusted from position 1 to 5]
I will break down exactly how the wind buffet noise and wind target areas shift at different heights.
This post is structured perfectly for a quick scroll on your smartphone. Furthermore, because I plan to translate and expand this content into English and Italian sub-sites later, I have written this with a clean structure, keeping subjects and objects crystal clear.
If you are considering buying an X-ADV or debating an aftermarket screen upgrade, stick around!
Honda X-ADV OEM Adjustable Windscreen Overview
The factory windscreen on the Honda X-ADV features a clever, tool-less manual adjustment system that locks into five distinct stages.
Setting the lowest position as "Stage 1" and the highest as "Stage 5," you can seamlessly adjust your wind protection to match your riding scenario. For this test, I cruised on public roads starting from 60 km/h (approx. 37 mph) to evaluate how the airflow changes at each level.
[5-Stage Review] Real-World Riding Impressions and Airflow Changes
Let’s look at the real-world feel of the three most distinct and practical positions from the test.
Stage 1 (Lowest): Built for Summer? Neck Wind and Heavy Buffet Noise
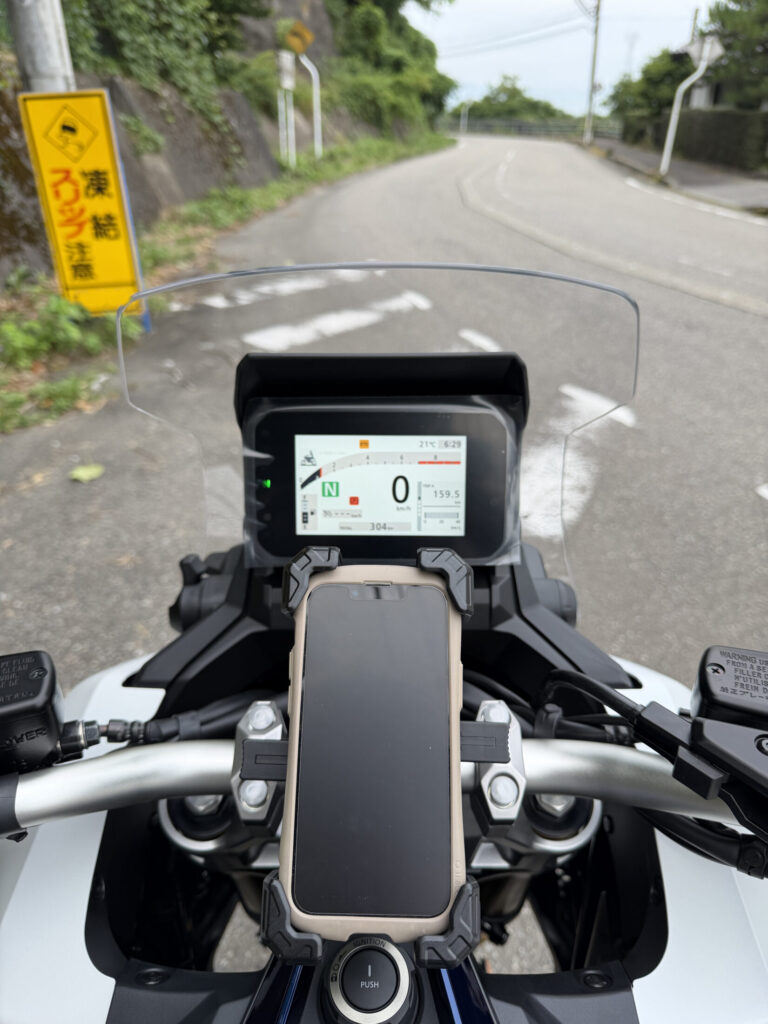
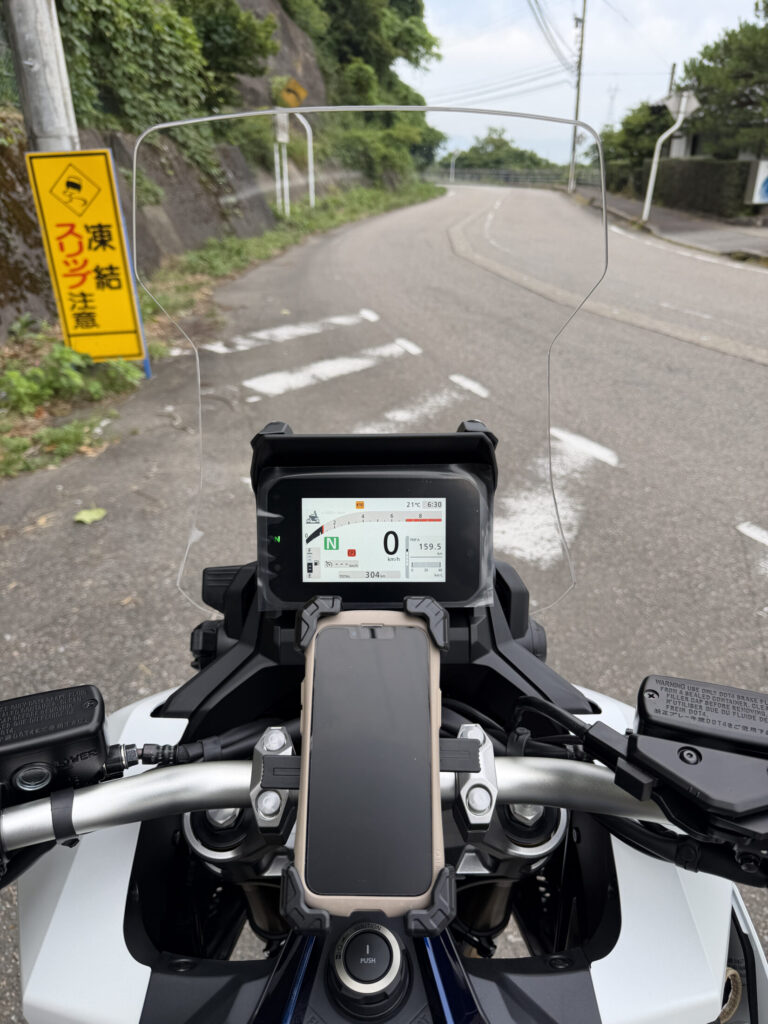
[Image 2: View from the cockpit with the X-ADV windscreen set to its lowest position (Stage 1)]
Dropping the windscreen all the way down to Stage 1 channels oncoming airflow directly toward the rider's upper body.
- Impressions: High wind buffet noise around the helmet.
- Wind Target: Direct wind blast against the chest and around the neck area.
This lowest setup gets freezing in the winter, but it feels perfect for hot summer rides when you want to aggressively channel fresh air into your helmet and jacket ventilation zones.
(Note: Raising the screen to Stage 2 slightly softens the wind pressure hitting your chest.)
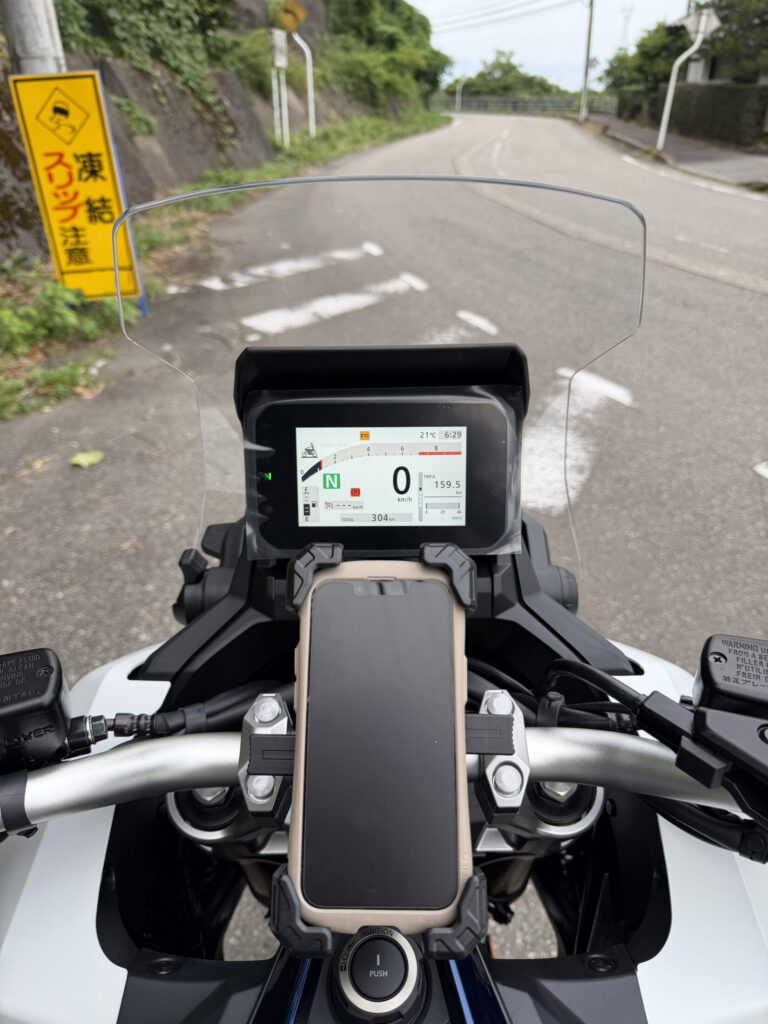
Stage 3 (Middle): The Sweet Spot for a 167cm Rider!
[Image 3: Cockpit view with the X-ADV windscreen adjusted to the middle position (Stage 3)]
Setting the screen to the third position up from the bottom delivered the best overall experience for me.
- Impressions: Wind buffet noise drops drastically, significantly boosting cabin quietness.
- Wind Target: Uncomfortable pressure on the torso disappears, leaving just a gentle, managed breeze.
For my 167 cm (5'6") posture, Stage 3 provides the absolute best balance of wind management. This is my go-to main position for long-distance touring.
(Note: Moving up to Stage 4 further reduces frontal wind blast, but a slight back-pressure turbulence begins to form behind the helmet.)
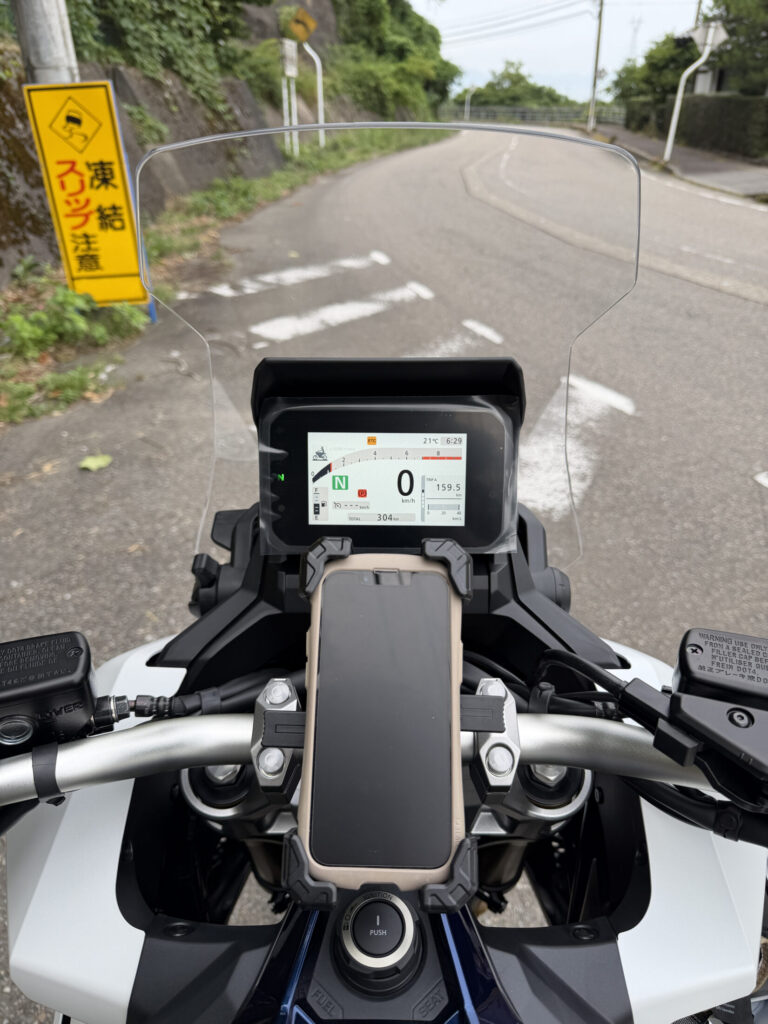
Stage 5 (Highest): Ultimate Wind Protection!
[Image 4: Maximum wind protection layout with the X-ADV windscreen pulled all the way up to Stage 5]
Pulling the windscreen all the way up to Stage 5 maxes out the machine's wind protection capabilities.
- Impressions: Almost completely blocks oncoming wind blast to your torso, shoulders, and neck.
- Wind Target: You only feel a slight breeze clipping the very top of your helmet (the crown).
This highest setting is an absolute lifesaver when cruising for long hours on the highway, riding through heavy rain, or fighting off biting cold during winter rides.
Future Challenges: Deflecting Air Past the Helmet
While the OEM 5-way adjustable screen is highly engineered and performs exceptionally well, I noticed one minor drawback. Even at my sweet spot (Stage 3) or maximum height (Stage 5), a small amount of residual wind clips the crown of my helmet, creating minor wind noise.
To make long-distance cruising quieter and more comfortable, I want to kick that airflow just a bit higher over my head.
As a future customization plan, I am looking into aftermarket options. My goal is to find an aftermarket windscreen featuring a flipped-up edge (spoiler shape) or add an adjustable clip-on screen spoiler to the top of the OEM unit. A spoiler-shaped edge deflects oncoming air much higher, which should eliminate helmet buffeting entirely.
Aftermarket Windscreens & Spoilers to Boost X-ADV Wind Protection
If you want to add an extra layer of comfort to your X-ADV, here are three highly-rated aftermarket options favored by riders worldwide:
1. MRA Vario Touring Screen for Honda X-ADV
This high-performance screen features an adjustable aerodynamic flap (spoiler) mounted on the top edge. It is incredibly popular across Europe. By adjusting the flap's angle, you can fine-tune exactly how air deflects over your helmet.
Pro-Tip: Having used an MRA Vario screen on a previous motorcycle, I found that the top flap mechanism can occasionally catch your line of sight. To keep your field of vision completely unobstructed, always choose the "Clear" version over smoked options.
2. Puig Clip-On Screen / Adjustable Visor
This is a universal adjustable spoiler that clamps directly onto the top edge of your factory windscreen. You do not need to drill any holes into your OEM screen; it simply clips on and efficiently redirects airflow upward.
3. GIVI Clear Windscreen (D1188ST)
Looking at reviews from senior X-ADV owners, the GIVI D1188ST gets stellar feedback. It offers minimal optical distortion and dramatically reduces the physical wind blast hitting your body.
Conclusion: The OEM Windscreen Is Exceptional—Match the Height to Your Ride!
That wraps up my review of the Honda X-ADV’s factory adjustable windscreen and real-world wind protection.
For a 167 cm (5'6") rider like me, running Stage 3 for regular road touring and pulling it up to Stage 5 for highways or rain is the optimal strategy. Since Honda made this system so effortless to adjust on the fly, you are missing out if you don't utilize it!
Following my discovery of the high build quality in hidden areas, this rider-focused comfort feature makes me incredibly glad I bought this bike. If you want to eliminate wind buffet noise and unlock ultimate comfort, definitely look into adding one of the aftermarket screens or spoilers mentioned above.
Ride safe, and enjoy the ultimate motorcycle life!