"Does your GIVI top case rattle or make annoying vibrating noises while riding?"
"Have the rubber bungs on your baseplate squished flat, warped, or turned sticky to the touch?"
If you use a GIVI Monokey or Monolock top case on your motorcycle, chances are you've encountered this exact issue.
The primary culprit behind top case play and vibration noise is the gradual degradation of the baseplate rubber dampers (cushion bungs) embedded in the mounting plate.
Over years of use, these rubber bungs compress under load and break down (hydrolyze), turning sticky and losing elasticity. This creates unwanted clearance between the case and the baseplate, causing persistent rattling on the road. In worst-case scenarios, the excessive vibration places abnormal stress on the locking mechanism, increasing the risk of the box unlatching.
In this guide, I’ll show you how to easily refresh your baseplate in just 10 minutes using genuine, budget-friendly replacement parts: the GIVI Z126 Baseplate Rubber Damper Set (Part No. 90177).
Follow along with step-by-step photos and practical tips!
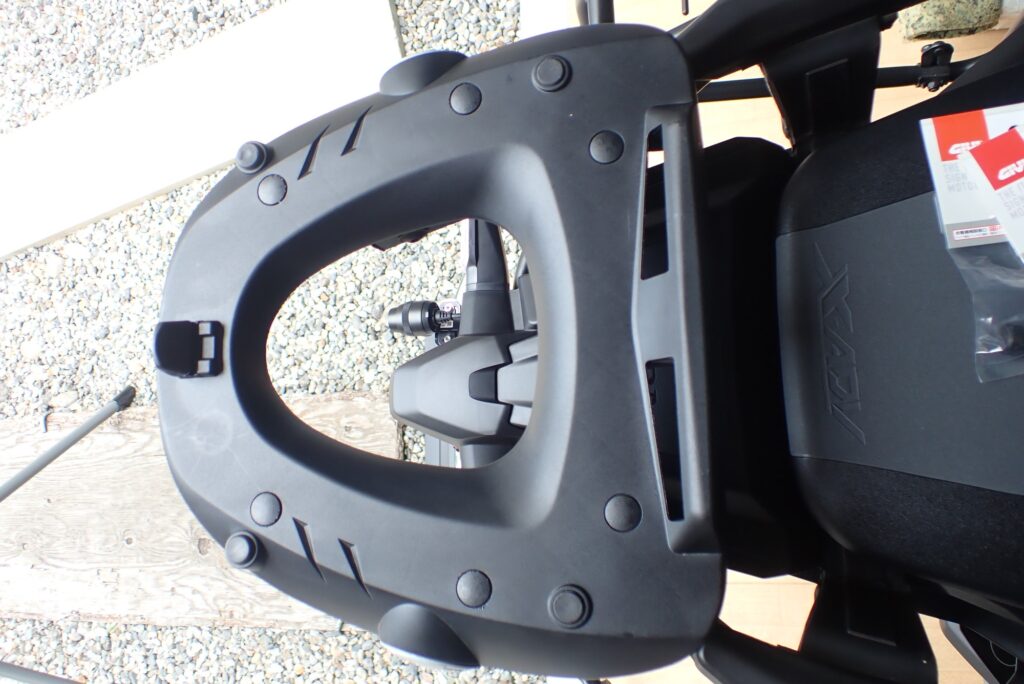
1. Signs of Worn Baseplate Rubbers You Should Know Before Replacement
GIVI baseplate rubbers serve as critical vibration dampers, cushioning the interface between the top case and the baseplate while absorbing road shocks.
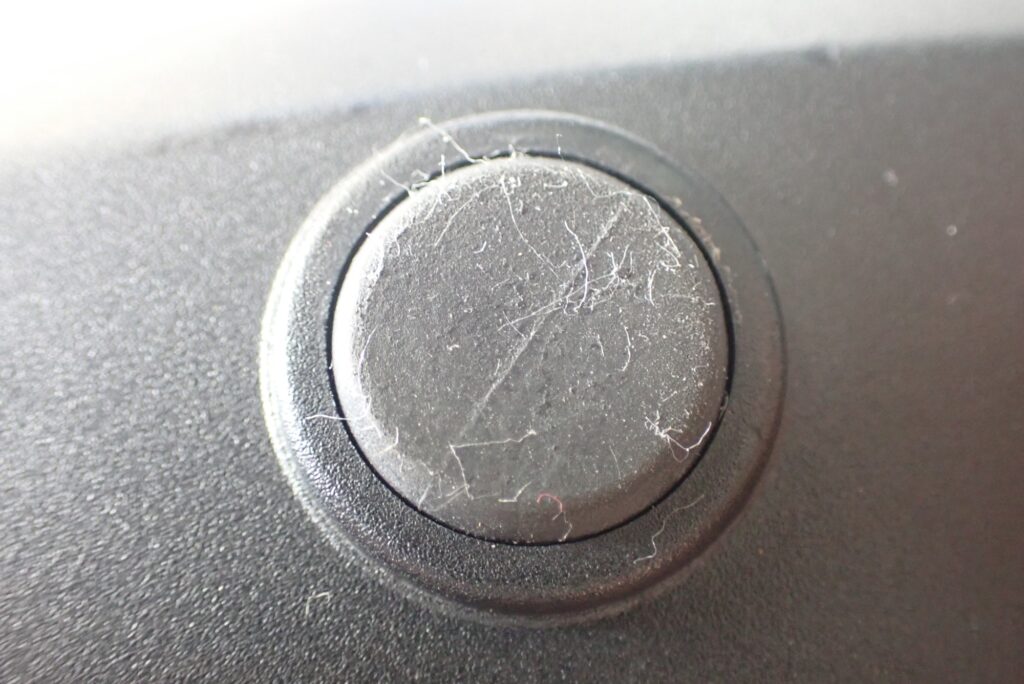
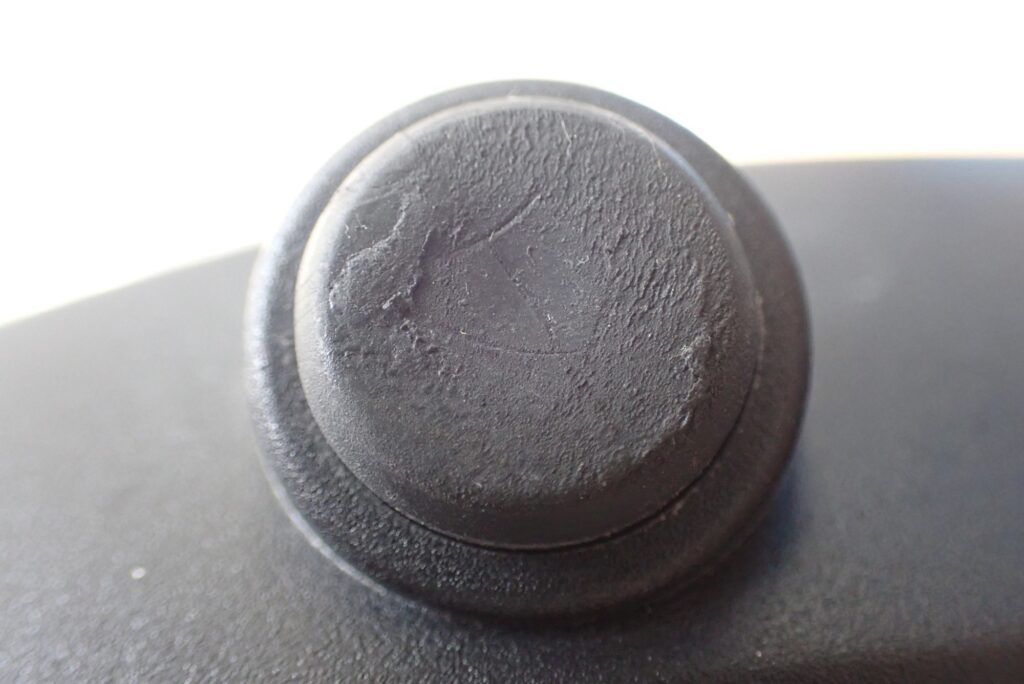
Inspecting the rubbers on my baseplate revealed that years of clamping pressure had completely flattened their top profile, causing permanent compression deformation. Furthermore, the rubber compound had begun to break down, leaving a sticky, tacky surface that caught lint and dust every time I wiped down the plate.
Note: The old rubbers shown here were in service for 14 years. Because the motorcycle was stored indoors, they retained their basic shape, but bikes parked outdoors will require replacement much sooner.
2. Required Replacement Parts & Tools
The tools and parts needed for this DIY job are basic and minimal:
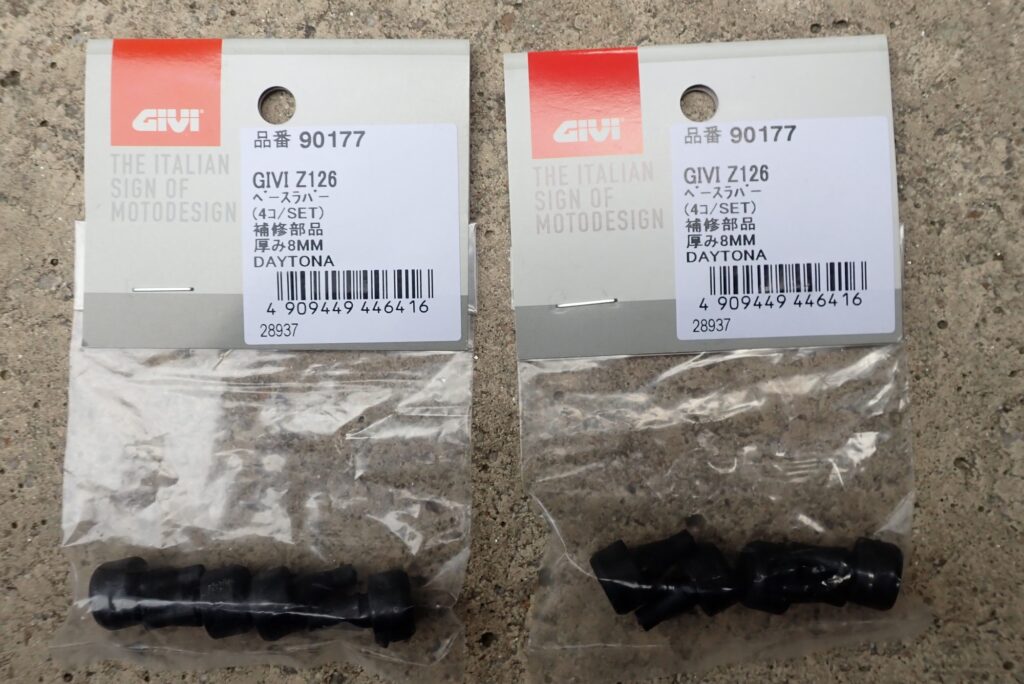
Parts & Tools Checklist
- GIVI Z126 Baseplate Rubber Dampers (Part No. 90177 / Daytona): 4 pcs per pack (8mm thickness)
- Precision Flathead Screwdriver: For gently prying out old rubber bungs
- Silicone Off (Degreaser / Brake Cleaner) & Kimwipes / Shop Towels: For cleaning out dirty mounting holes
- Needle-Nose Pliers (Long-Nose Pliers): For pulling the rubber stems from underneath to lock them firmly in place
3. GIVI Baseplate Rubber Replacement DIY Step-by-Step Guide
The entire replacement procedure takes only about 10 to 15 minutes.
Step 1: Remove the Old Base Rubbers
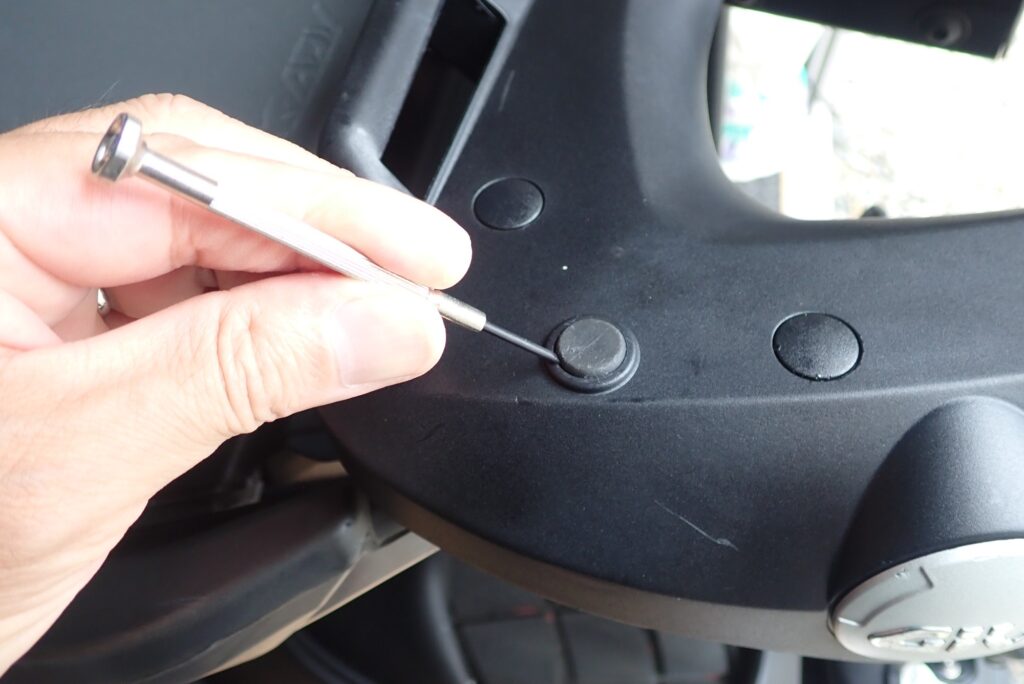
Insert a thin tool, such as a precision flathead screwdriver, between the rubber edge and the mounting hole. Gently pry upward using leverage to pop the old rubber out cleanly.
Step 2: Inspect Hole Structure and Clean the Mounting Sockets
Take a close look at the new GIVI Z126 rubber dampers:
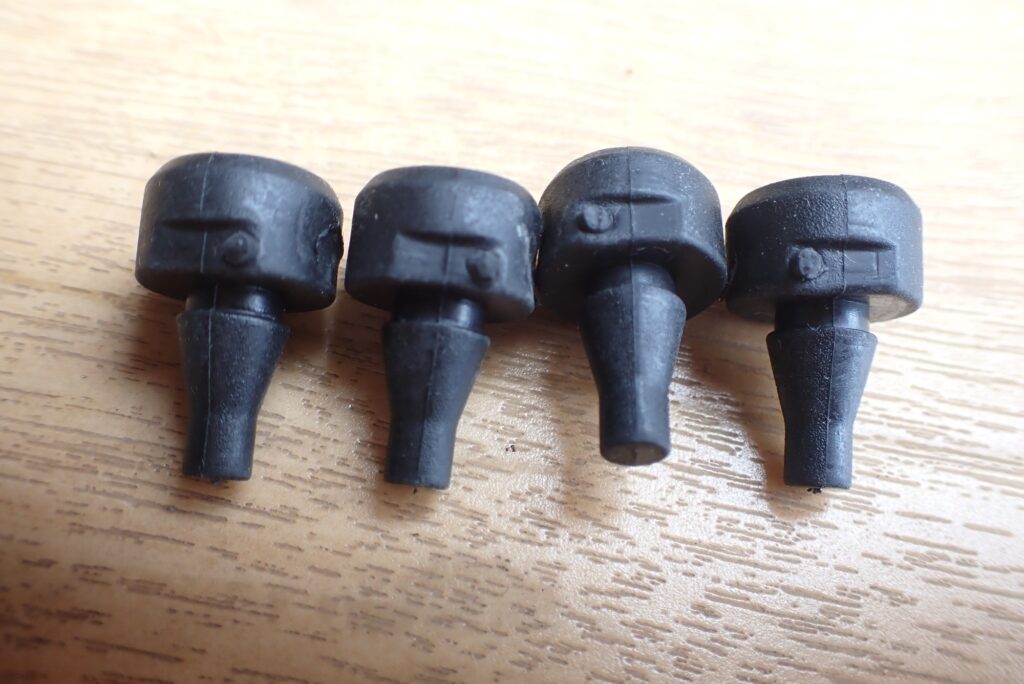
Notice that the new rubber is not a perfect cylinder; it features a flat side and a tiny alignment tab on the perimeter.
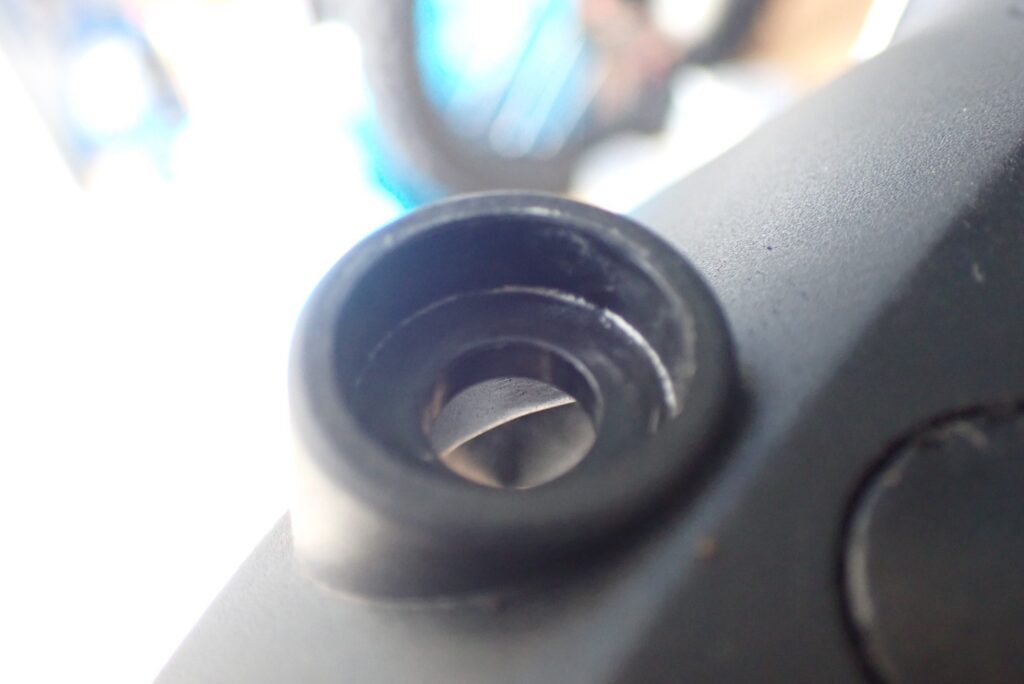
Checking the socket holes on the GIVI baseplate, the receiving hole is entirely round with no corresponding keyways or notches. Therefore, you can insert the new rubber at any angle or orientation without issue.
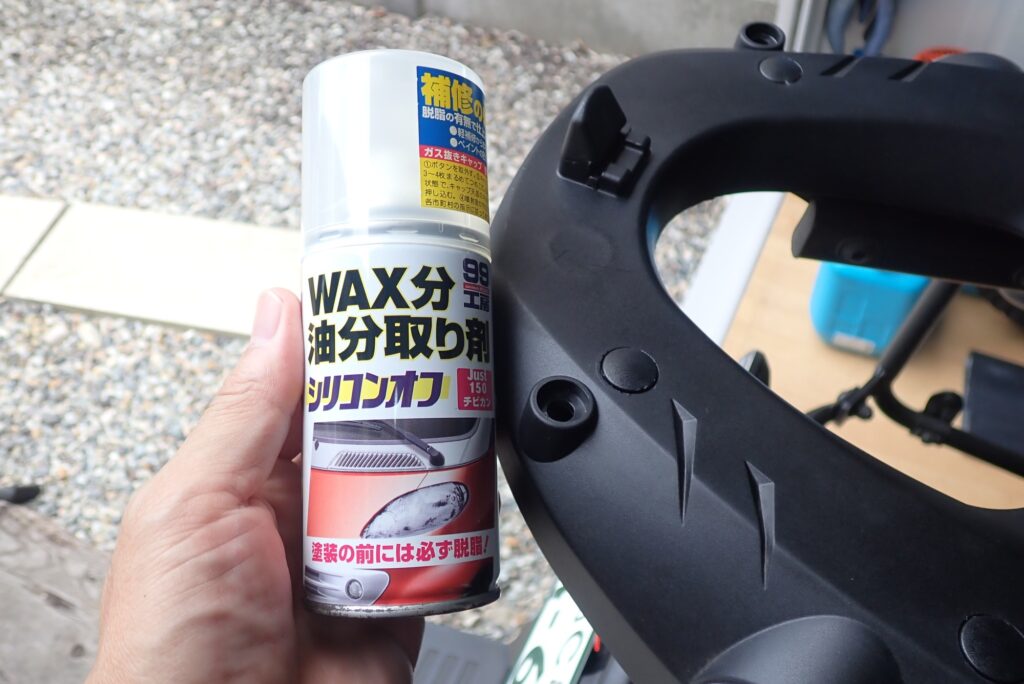
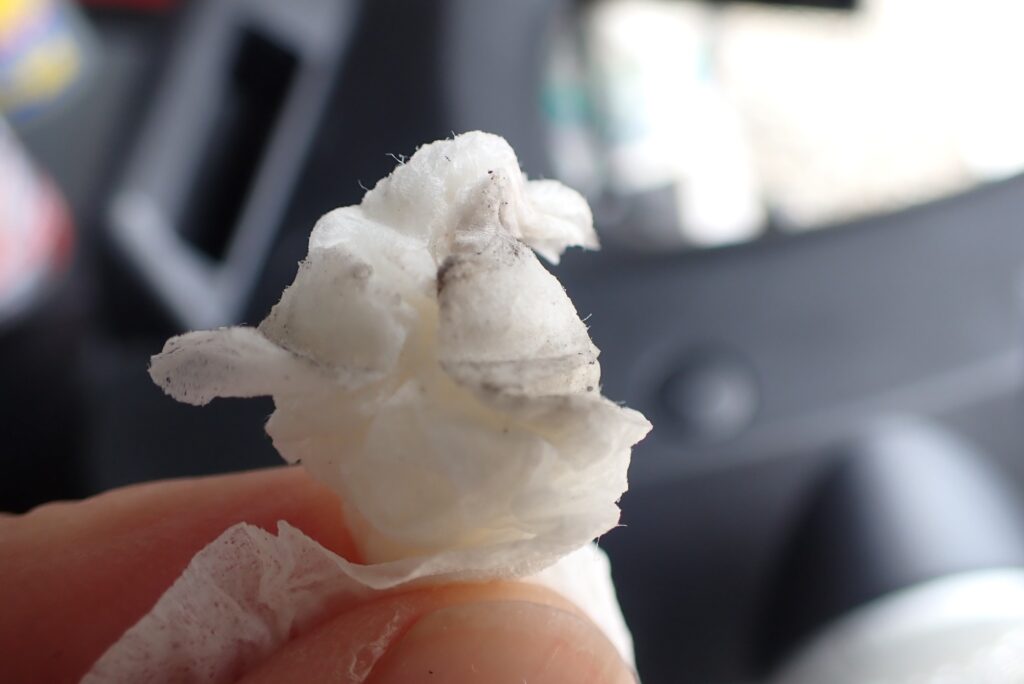
Accumulated road grime, grit, and oxidized rubber residue often collect inside the sockets. Spray a shop towel or Kimwipe with silicone off (or brake cleaner) and thoroughly degrease and wipe down each mounting hole before installing new parts.
Step 3: Insert New Rubbers & Lock Securely (The Pro Technique)
Once clean, push the new rubber bung straight into the mounting hole using your thumb.
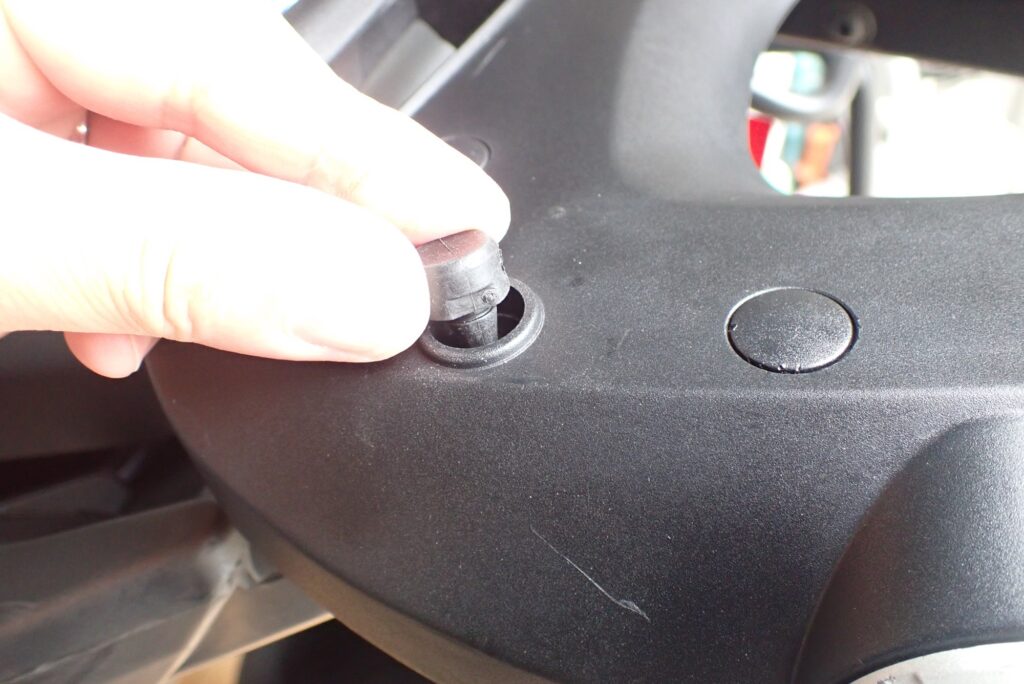
Simply pushing down from the top is rarely enough to pop the bottom retaining collar completely through the underside of the baseplate, leaving the rubber sitting too high.
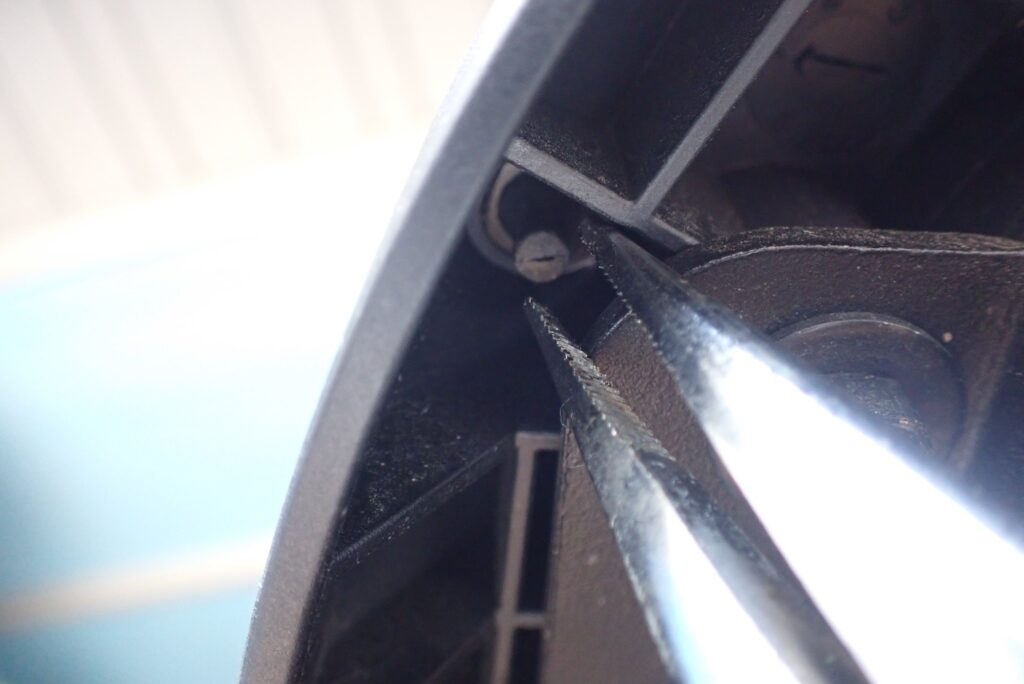
Here is the essential trick:
Reach underneath the baseplate with needle-nose pliers, grip the rubber stem (tail), and gently pull downward until you feel a distinct "pop."
Once the retaining collar snaps securely over the bottom lip of the socket, the damper is locked into position.
(Note: If you do not feel a snap, inspect underneath to confirm whether the collar is already fully seated. Avoid pulling with excessive force so you don't tear the rubber stem).
4. Completed Installation & Before/After Comparison
Repeat the process for all four mounting locations on the baseplate.
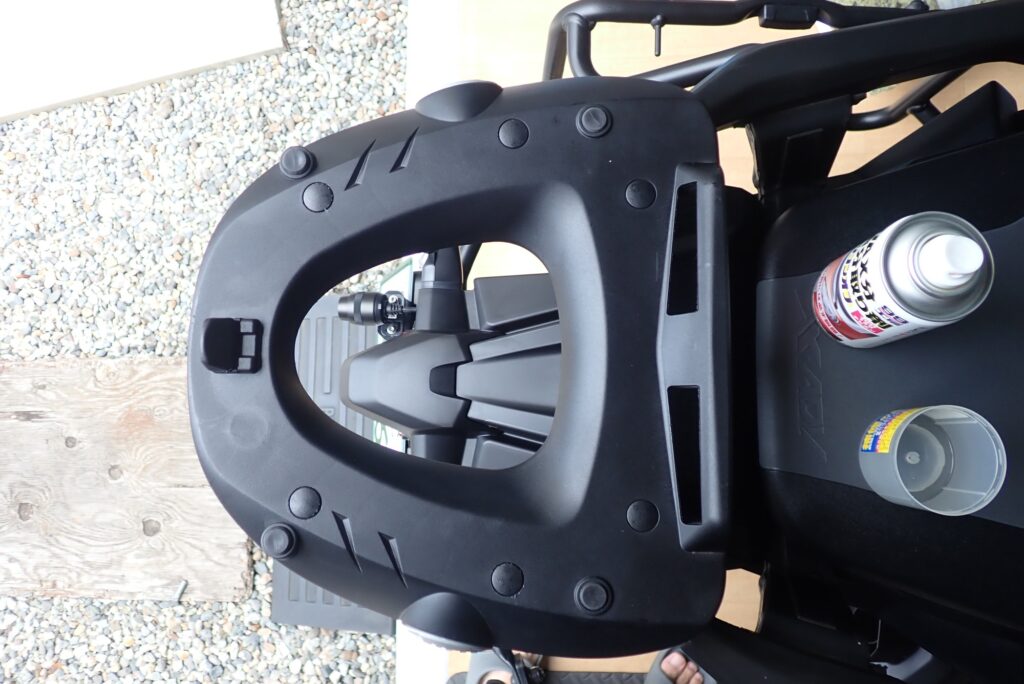
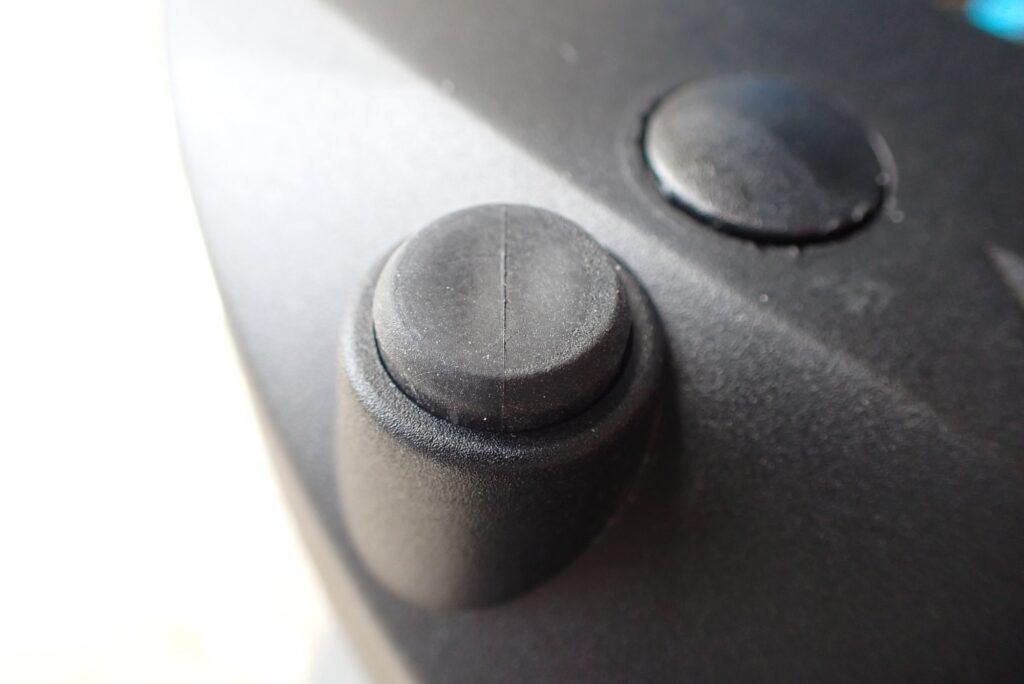
With new dampers installed, full elasticity and optimal 8mm cushion height are restored. The top surface is smooth, perfectly flat, and completely free of sticky residue.
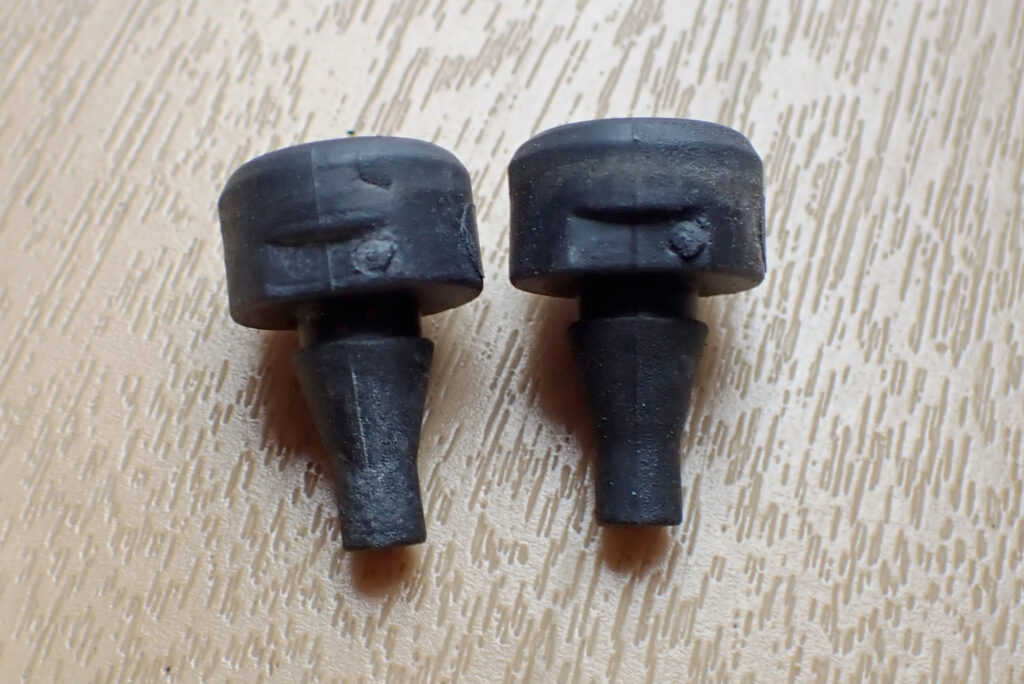
Comparing the brand-new dampers with the crushed 14-year-old bungs (photo above), the difference in profile height and rubber resilience is night and day.
When docking the top case onto the refreshed plate, it snaps into the latch with a crisp, reassuring "click." Shaking the case firmly by hand confirms zero free play or rattle—a rock-solid, factory-fresh fit!
5. Recommended Products & Tools for GIVI Maintenance
Here are the essential replacement parts and tools used in this maintenance guide:
1. GIVI Z126 Baseplate Rubber Damper Kit (4 pcs / Part No. 90177)
The genuine OEM replacement rubber kit distributed by Daytona. An inexpensive, high-value upgrade that instantly eliminates top case rattles and play.
2. SOFT99 99 Kobo Silicone Off Degreaser Spray
An essential degreasing cleaner for removing oils and road grime before component installation and decal application.
3. KTC (Kyoto Tool) Needle-Nose Pliers
A high-precision pair of pliers that makes gripping and seating rubber stems in tight spots effortless.
Conclusion: Restore Rock-Solid Top Case Stability with an Inexpensive DIY Fix!
Here is a quick summary of key takeaways when replacing GIVI baseplate rubbers:
- Top case vibration and rattling noises are caused by compressed, worn-out baseplate rubbers.
- The GIVI Z126 replacement kit (Part No. 90177) makes this an easy 10-minute DIY repair for just a few dollars.
- Insertion orientation does not matter, but pulling the stem from underneath with needle-nose pliers is the key to locking the retaining collar firmly in place.
- Replacing old bungs restores a tight, rattle-free fitment and quiet riding comfort.
If your top case feels loose or the rubber pads feel sticky, grab a set of replacement dampers and enjoy a smooth, quiet ride on your next tour!
Ride safe and enjoy wrenching!