Hello everyone!
In my previous post, I showed you how I removed a crooked front fender extender installed by the previous owner, executed a meticulous degreasing routine, and re-bonded the components using 3M ultra-strong double-sided tape.
While I ran into a classic DIY accident where the insane initial tack of the 3M tape locked the pieces down instantly before I could perfect the alignment, the inner tape layout designed to block out mud entry was executed flawlessly.
Today, we have reached the final installment of this fender extension upgrade!
In this post, I will break down the mechanics of securing the part using physical screws to withstand intense road vibrations and wind blast, followed by a detailed look at sealing the seams with silicone bathroom caulking. This critical step completely eliminates the void where road grime compacts and drives up your front unsprung weight. If you want to shield your machine from long-term trouble and complete this upgrade like a pro, stick around!
[Screw Securing] Drilling Accurate Pilot Holes for Absolute Mechanical Fastening
While backing up your installation with ultra-strong double-sided tape provides immense structural integrity, the front mudguard is a harsh environment constantly subjected to high-speed wind blast and relentless road shocks. To guaranteed a 100% fail-safe setup that will never degrade over time, you must back up the adhesive with physical hardware.
Since the components are already locked into position by the tape from the previous step, you can safely use the existing extender holes as a perfect guide to drill fresh pilot holes into the main fender.
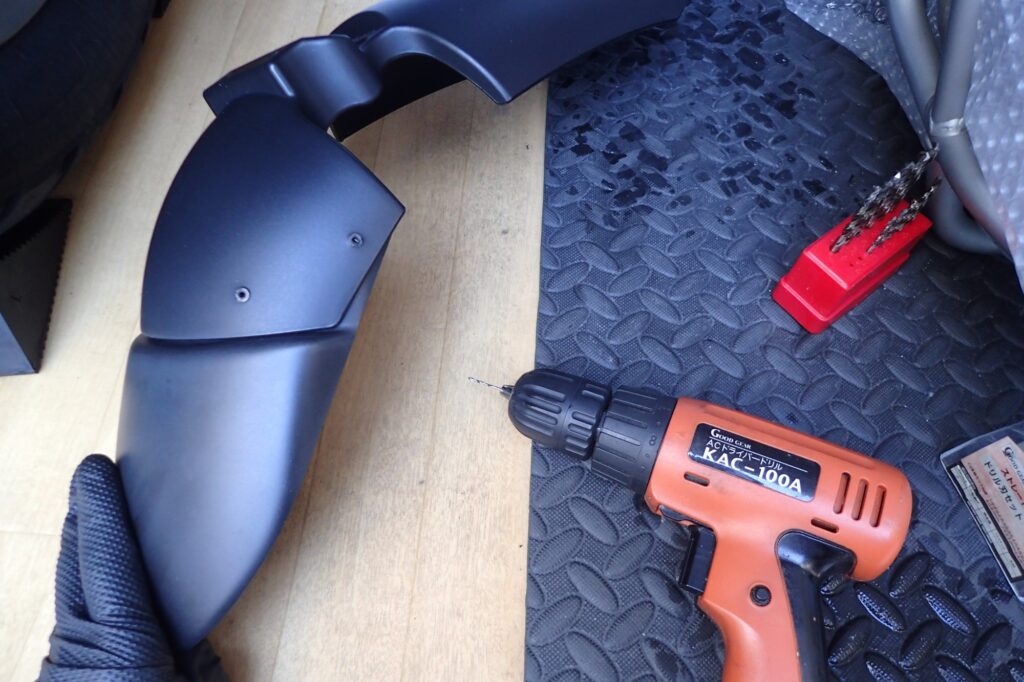
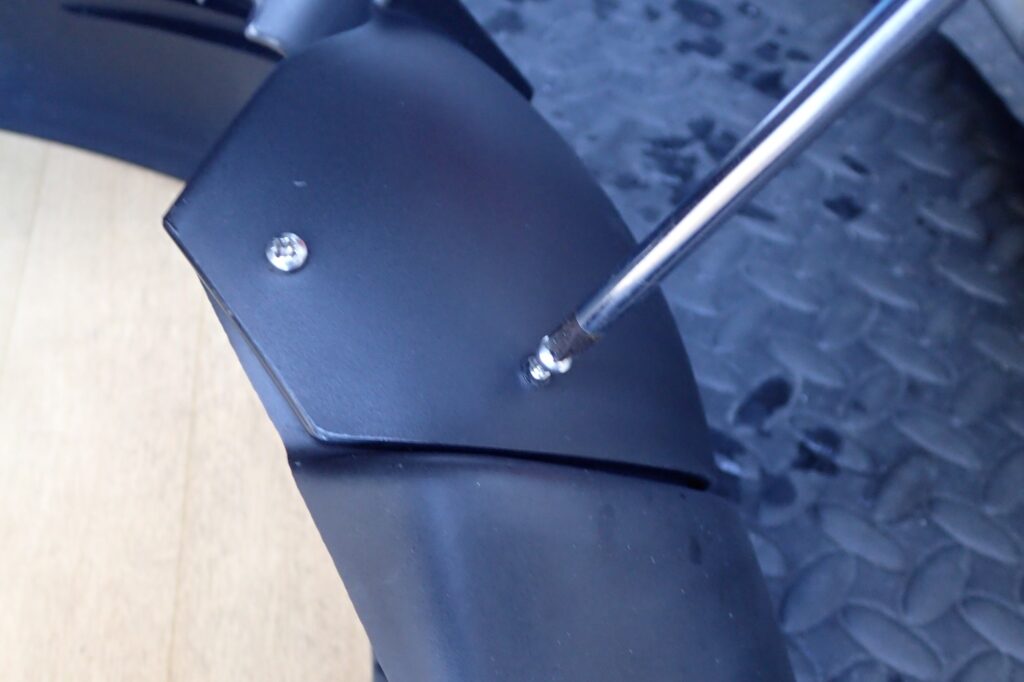
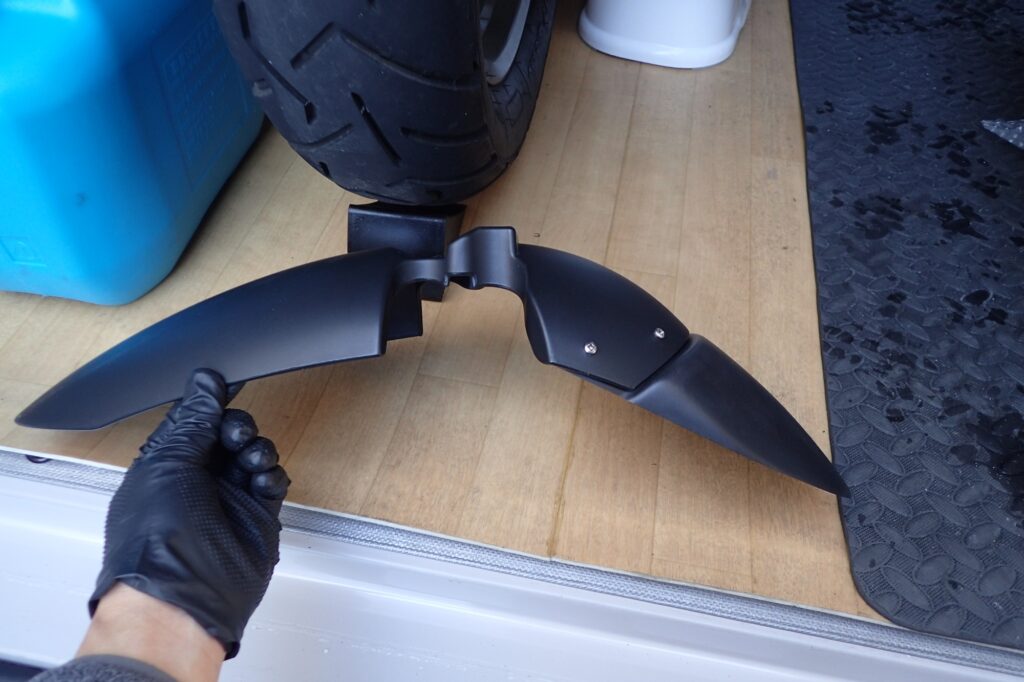
- Bore the pilot holes: Secure a drill bit matched to your screw size, and carefully drill through the plastics using an electric drill driver.
- Drive the hardware: Insert corrosion-resistant stainless steel screws and tighten them down vertically using a manual screwdriver.
By marrying the "surface adhesion" of premium tape with the "point fastening" of hardware, you create a rugged, bulletproof assembly that is physically impossible to fling off mid-ride.
[Ingenuity] Sealing Seams 100% with Konishi Bath Bond Q
With the mechanical fastening complete, move straight into the headline objective: permanently blocking road grime from entering the seam. During the initial teardown, we discovered that the tiny overlapping gap between the fender and extender acts as a massive debris trap. We need to apply a bead of sealant to close this vulnerability for good.
To execute this, grab a waterproof chemical compound normally found in home plumbing maintenance:
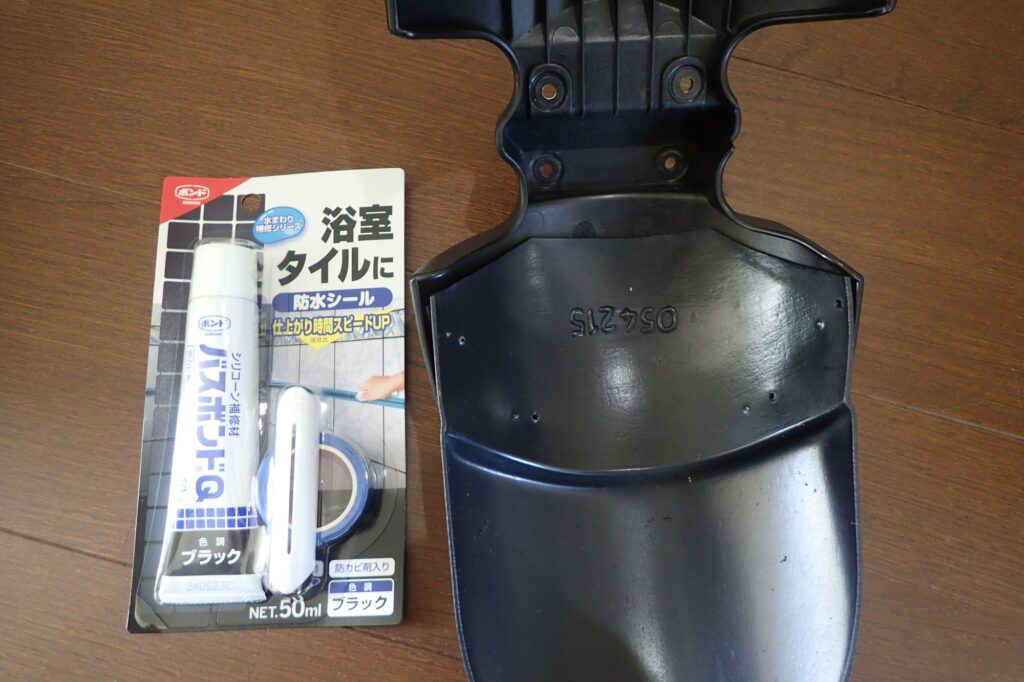
Always select a "Black" formulation to match the color profile of raw motorcycle plastics, ensuring the final look remains subtle and integrated. Silicone compounds are ideal because they retain excellent flexibility after curing, meaning the bead will never crack or flake away under heavy chassis vibrations.
Precise Masking and Injecting the Caulking Compound
Silicone sealant is incredibly sticky and messy. If it slops onto surrounding areas, cleaning it up is a nightmare. Taking your time with prep work directly dictates the beauty of your final finish.
1. Meticulously Lay Down Your Masking Tape
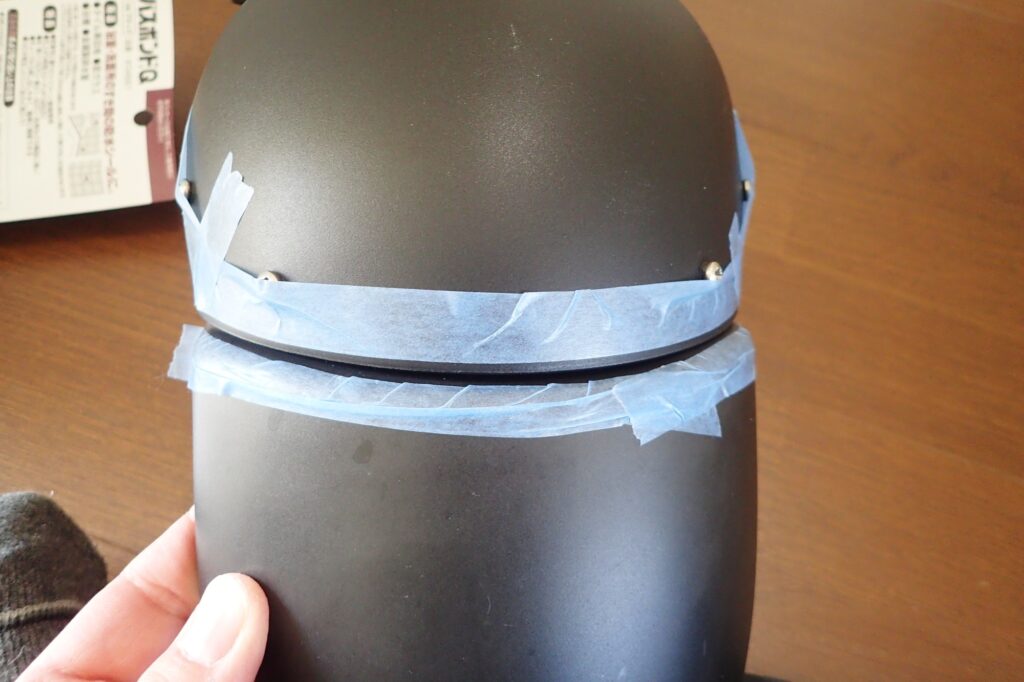
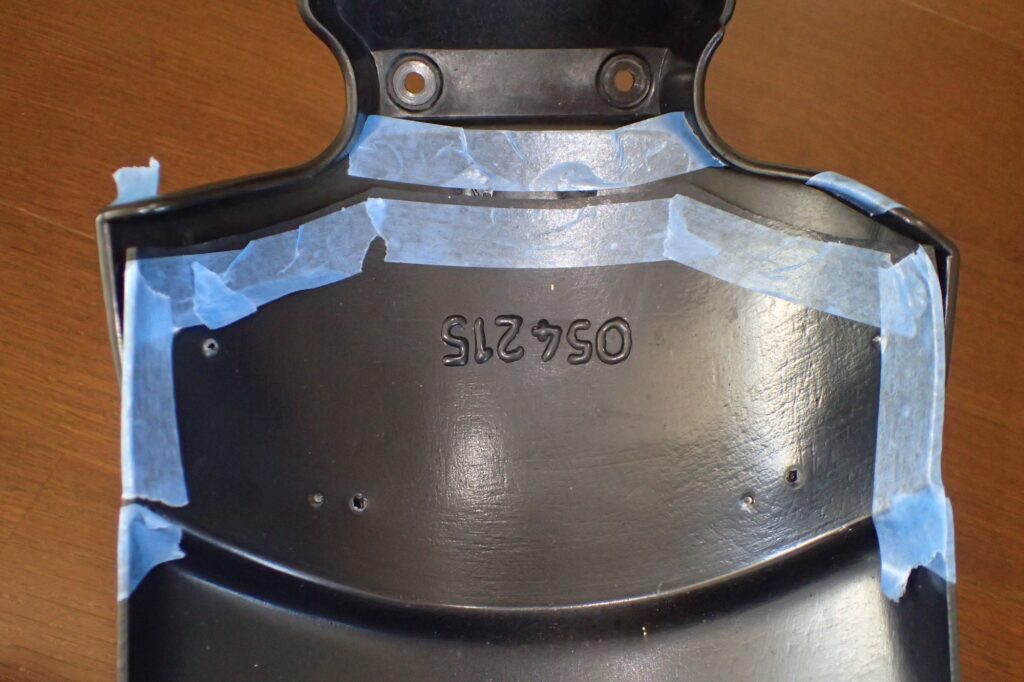
- Apply masking protection: Line both sides of the overlapping seam with masking tape, leaving a tiny millimeter-wide gap for the sealant, as shown in the photos. This extra step keeps excess compound completely off your visible plastics.
2. Inject and Smooth the Sealing Compound
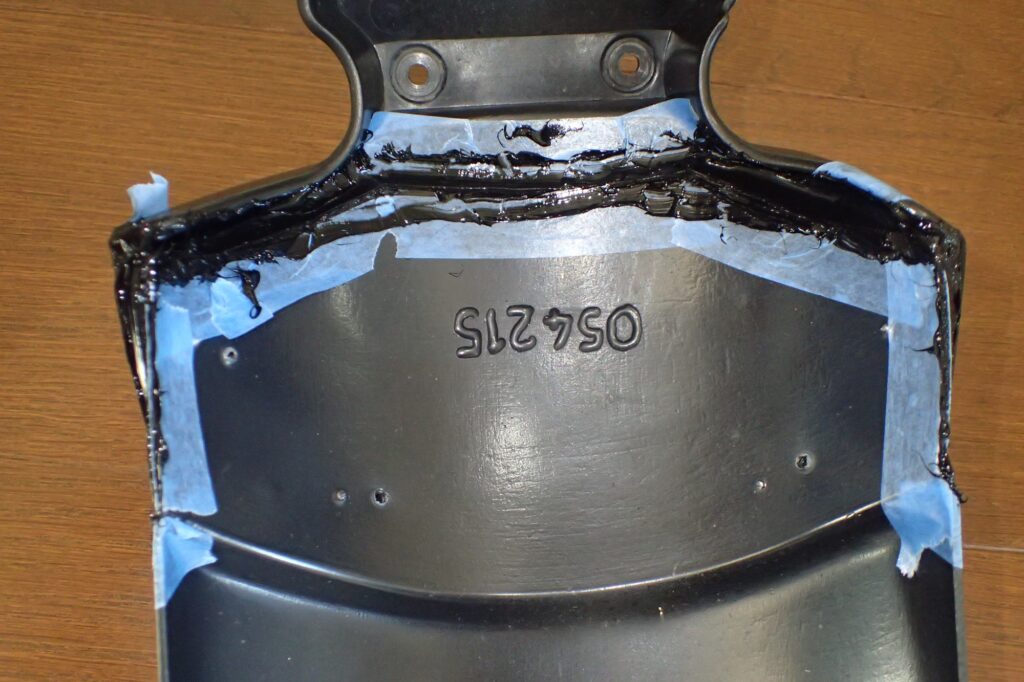
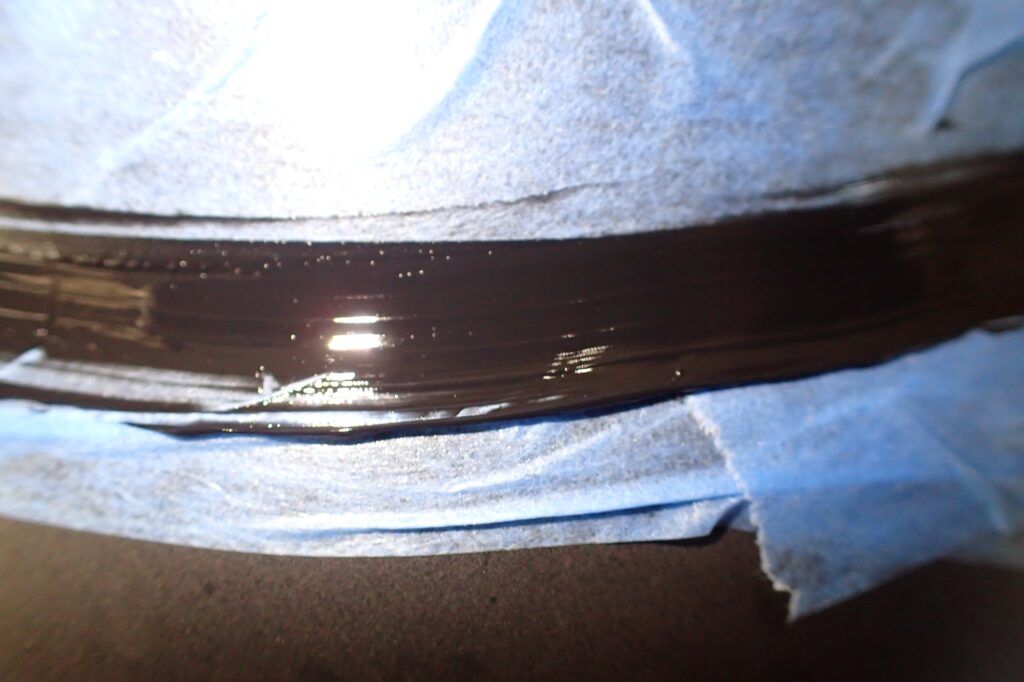
- Fill the void: Position the nozzle and inject the black caulking compound directly from the tube, forcing it deep into the narrow overlapping seam.
- Tool the joint: Before the compound begins to skin over, drag a gloved fingertip or a caulking spatula firmly across the bead to smooth it flat. Ensure the compound is driven completely into the void to lock out air and moisture.
- Pro-Tip: This sealant sticks aggressively to skin and is tough to wash off. Always wear nitrile gloves when working with raw silicone.
Conclusion: A Flawless, Gap-Free Finish to Preserve Your Handling Dynamics
Peel away the surrounding masking tape while the silicone is still semi-wet, then allow the assembly to sit until the compound cures rock hard. With that, your installation is officially complete.
Let’s inspect the close-up details of the finished product:
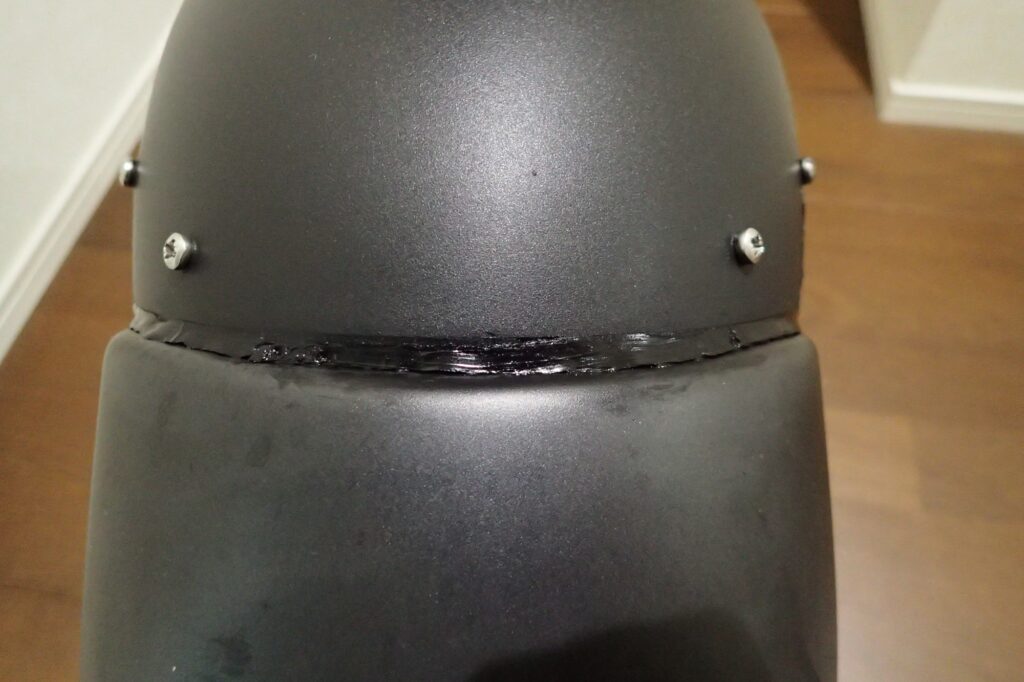
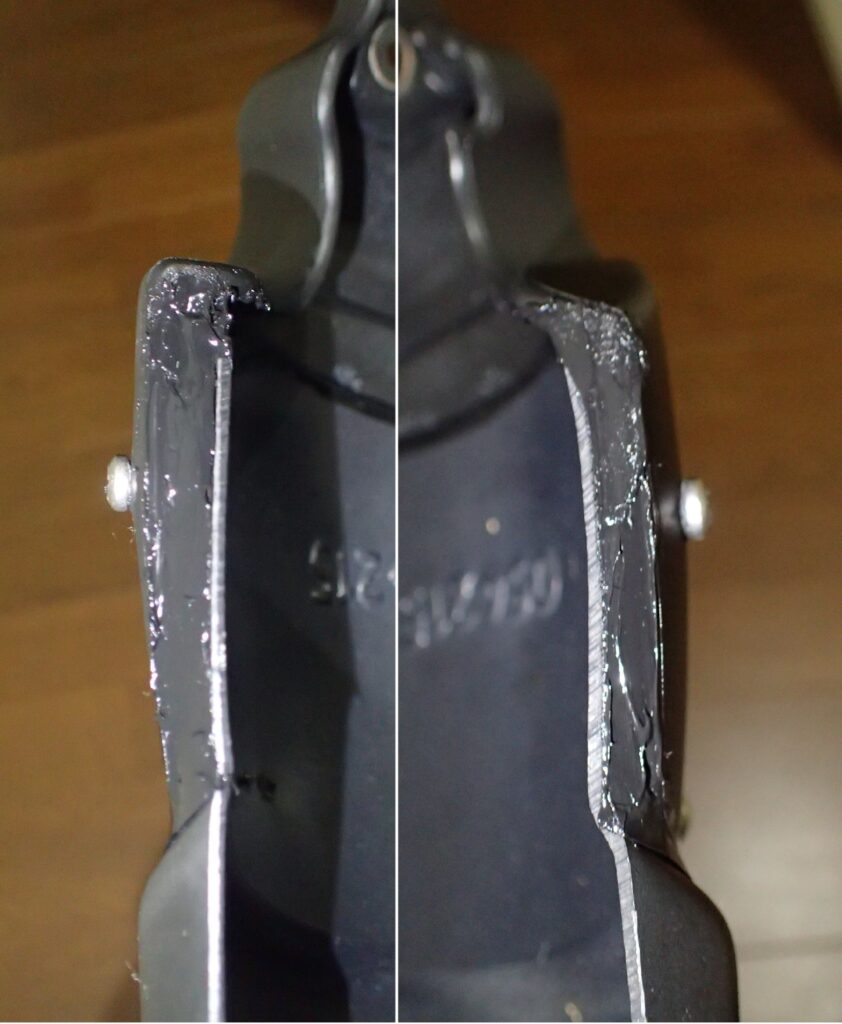
As you can see in the photos, that annoying mechanical step where the plastics overlap is now completely sealed beneath a smooth, durable silicone skin.
Looking closely at the cross-sections, the entry path for water and grit has been reduced to absolute zero. Even if you encounter relentless downpours or blast down a muddy fire road, debris can never accumulate inside the fender assembly again. We have successfully eliminated the risk of a silent buildup of unsprung weight compromising your front suspension tracking.
3 Essential Maintenance Supplies for a Pro-Tier Installation
To ensure a lifetime of trouble-free performance from your exterior modifications, keep these proven supplies in your garage workshop:
- Konishi Bond Bath Bond Q (Black) 50ml A premium, high-flexibility silicone sealant featuring phenomenal weatherability and vibration resistance. It is the gold standard for sealing raw plastic motorcycle trim and executing quick waterproof barriers for custom electrical wiring.
- TAKAGI Electric Drill Driver The ultimate tool to bore clean pilot holes through tough plastic bodywork without risking cracking or splitting the material. Sourcing a model with an adjustable clutch/torque setting is ideal for delicate motorcycle DIY work.
- 3M Automotive Masking Tape (243J General Purpose) While the masking tape included with cheap sealant kits often features weak adhesion that lifts off greasy plastic, stepping up to genuine 3M automotive tape ensures a tight hold and razor-sharp sealant lines every time.
Final Thoughts: Meticulous Prep and Sealing Keep Your Running Gear Agile
That concludes the final chapter of our BMW G650GS front fender extender overhaul.
What started as a simple mission to correct a sloppy, misaligned part taught us a massive lesson about hidden debris accumulation. By deploying a triple-defense strategy—locking the core with 3M tape, securing the structure with four screws, and sealing the perimeter with silicone caulking—we achieved a bulletproof setup that elevates the bike's utility.
At a glance, a fender extension looks like a minor aesthetic change. However, executing thorough care on these hidden seams is the true secret to preserving the light, nimble, and supple steering responsiveness that makes the G650GS running gear shine.
When you get around to installing an extender flap on your machine, use this caulking workflow to build a clean, gap-free setup that lasts a lifetime!
Ride safe, and enjoy the ultimate motorcycle life!