Hello everyone!
While disassembling the fairing plastics on my Honda X-ADV to route wiring for a USB power port and front/rear dashcams... it finally happened.
I snapped the main side fairing retention tab clean off.
I initially assumed that working in the dead heat of summer would protect the plastics—reasoning that warm resin would be pliable and flex smoothly, unlike in cold winter weather when frozen plastics turn brittle. Boy, was I wrong.
As I discovered the hard way, snapping fairing tabs isn't just about ambient temperature. The primary culprit was not knowing the exact tab location and failing to account for its brutally aggressive underside locking barb.
Replacing an OEM side panel on a premium machine like the X-ADV is an expensive mistake. To save X-ADV owners worldwide from suffering this same nightmare, I am laying out everything: the hidden tab location, a failure analysis of its hook geometry, hand safety precautions, and a step-by-step DIY guide on reshaping and repairing the broken tab using a rotary tool and plastic welding compound!
Whether you're scrolling through this on your phone in the garage or prepping for your next electrical upgrade, read this guide before touching your bodywork!
[The Disaster] A Snapped Fairing Tab in Mid-Summer Heat
To route clean wiring harnesses for my USB charger and dashcam system, I set out to remove the left side fairing panel.
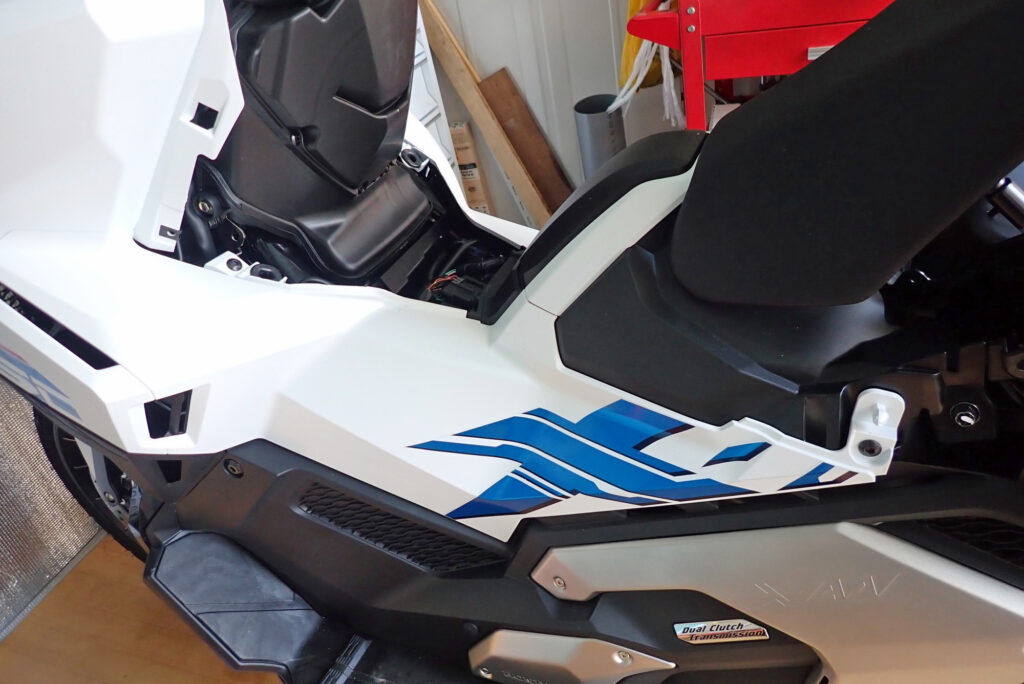
A classic DIY mistake is attempting fairing removal during freezing winter months when cold plastic turns brittle. To avoid this, I deliberately waited for a scorching summer day. I was confident that the heat-softened plastic would flex and slide out effortlessly without snapping.
However, as I applied steady outward pressure, a sickening CRACK! echoed through the garage. The tab snapped right at its root...
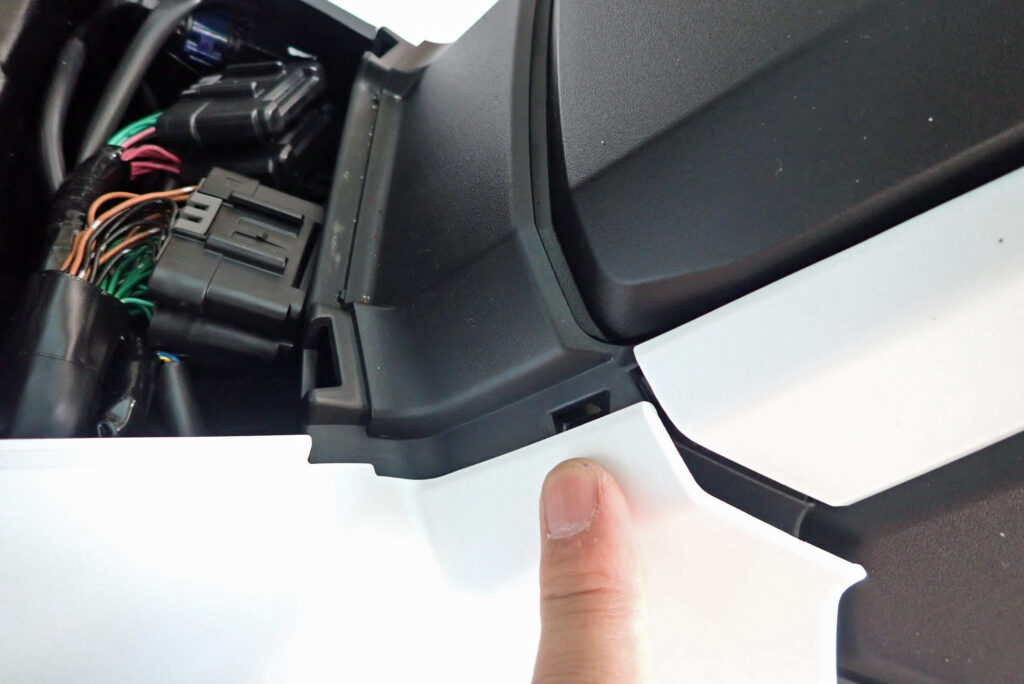
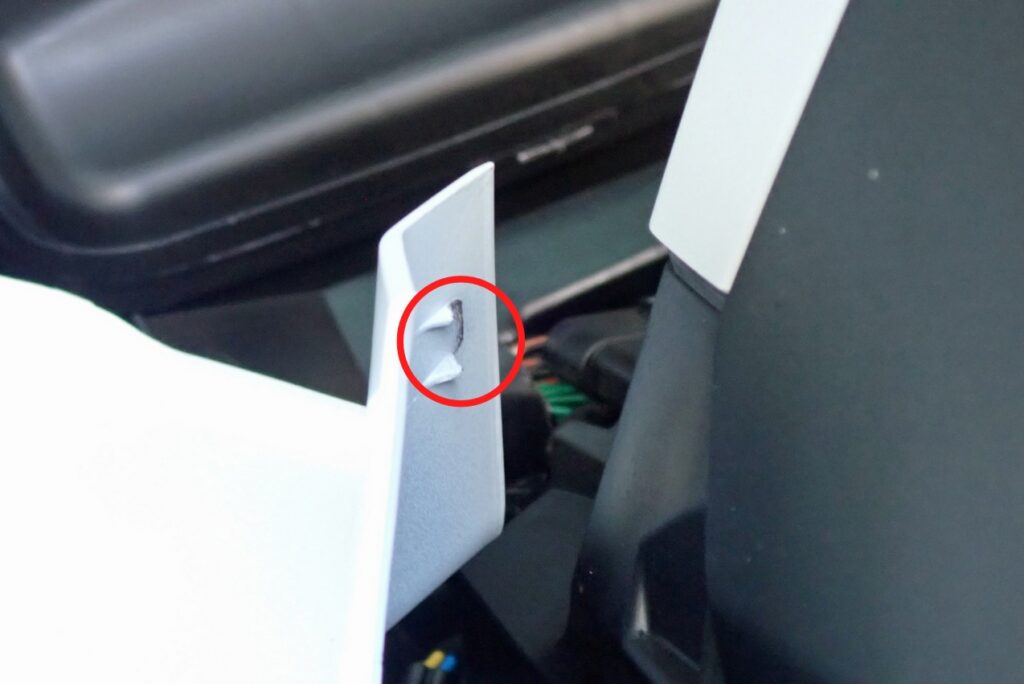
As indicated by my finger in the photo above, the plastic tab anchored into the frame receiver (near the front seat-to-frame junction) snapped cleanly at its base (highlighted by the red circle).
The thought of paying for a brand-new factory Honda fairing made my stomach turn instantly.
[Failure Analysis] Why Did It Snap? Hook Geometry Breakdown
To figure out why the tab snapped despite the summer heat, I closely examined the broken piece.
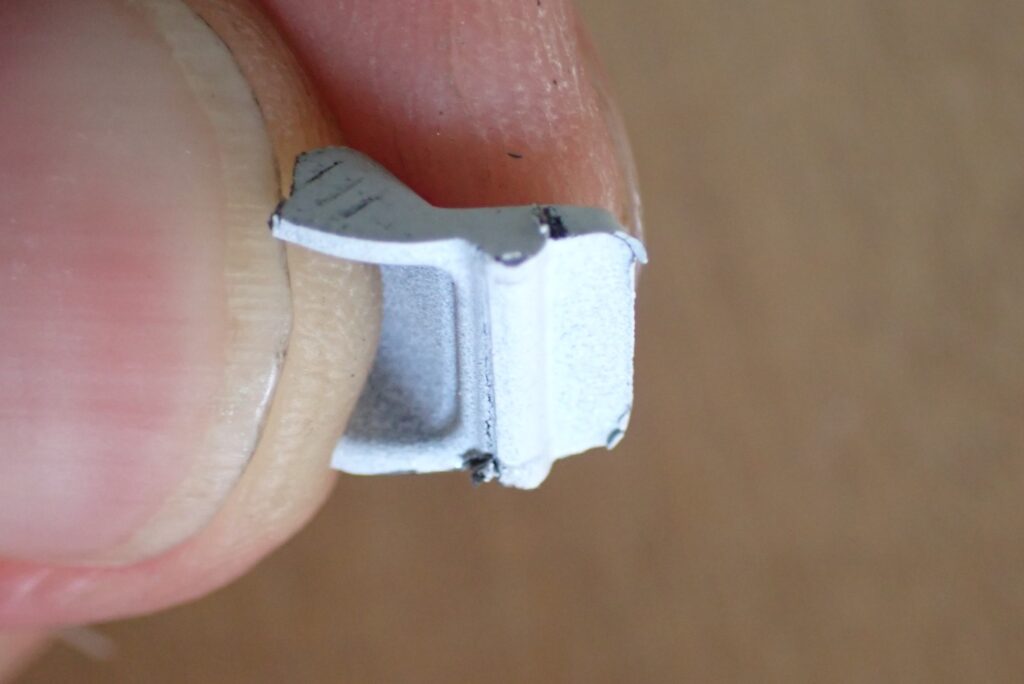
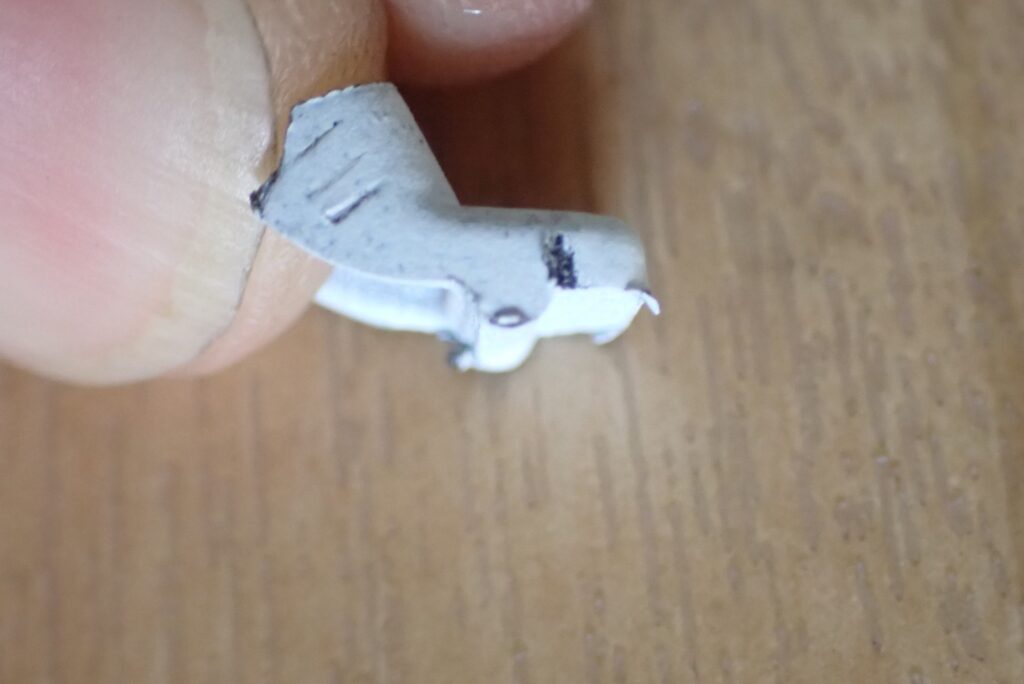
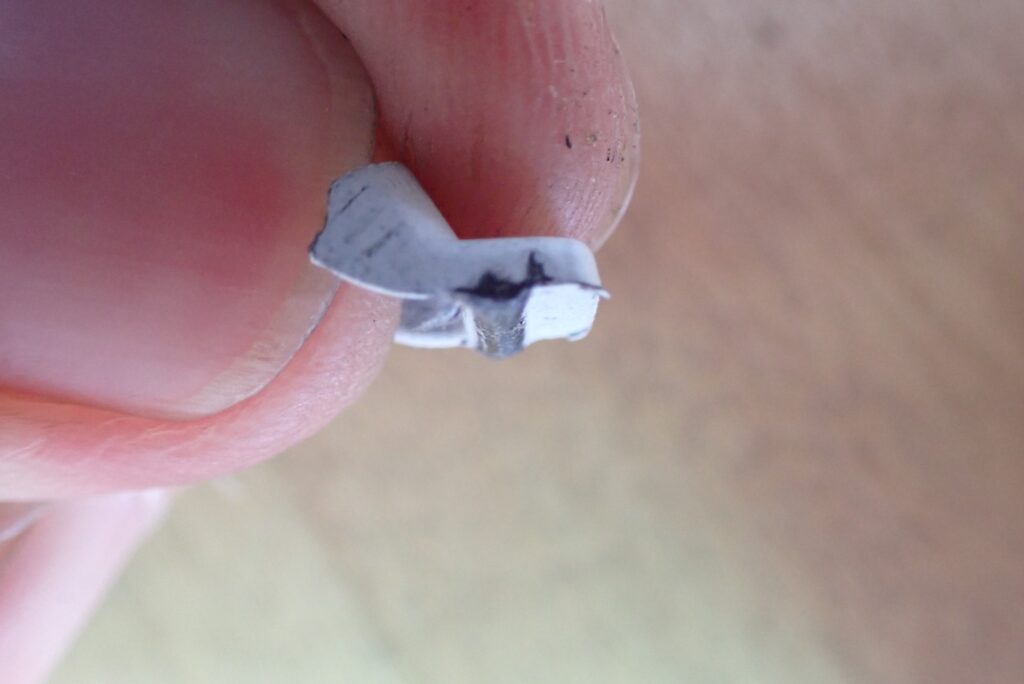
Looking at the broken tab profile, the failure mechanism became glaringly obvious. This wasn't a standard straight alignment pin—it featured a brutally aggressive hook-shaped barb on its underside.
- The Structural Trap: Pulling the panel straight outward causes the lower hook barb to lock firmly into the metal frame receiver.
- Mechanism of Failure: Yanking the fairing straight out without unhooking this lower barb subjects the plastic root to severe torsional stress. It will snap clean off regardless of ambient temperature!
Without knowing the tab's exact location and the mandatory release angle required to disengage that underside barb, pulling the panel straight out will break it every single time.
[Warning] Never Work Bare-Handed! Wear Mechanics Gloves
I learned another painful lesson during this disassembly battle: sliced knuckles.
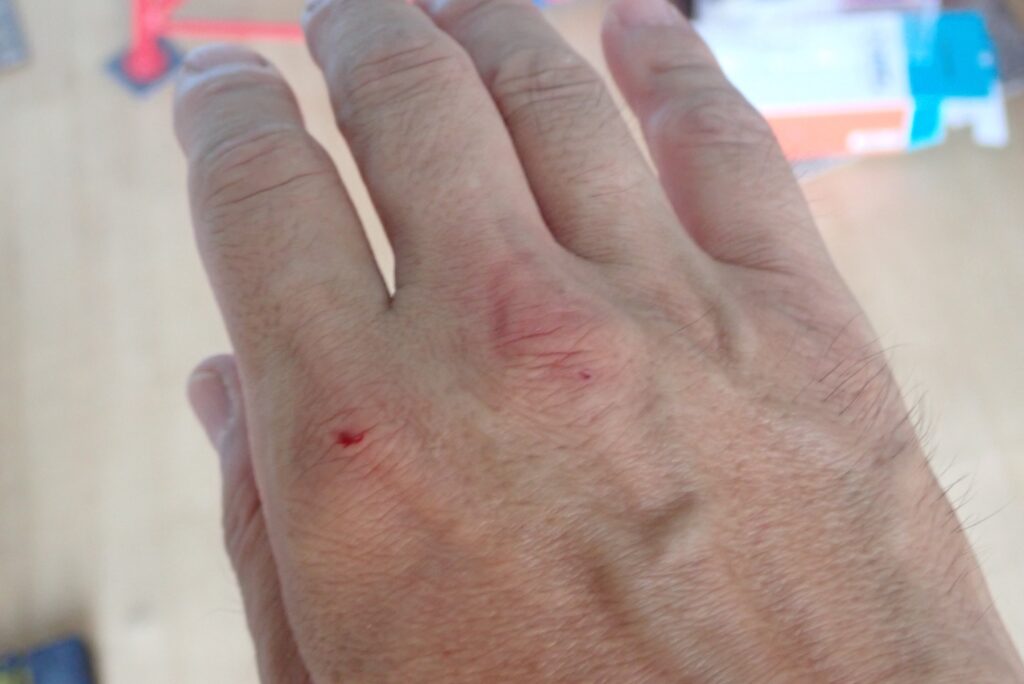
While wrestling with the stubborn panel, my hand slipped and sliced open on a sharp edge, drawing blood.
The undersides of motorcycle fairings, bracket edges, and raw metal frame stampings feature razor-sharp edges. When a tight panel suddenly pops free while you're pulling with full force, your hands can slam violently into the chassis frame.
Never work on bodywork bare-handed! Always wear a pair of thin, high-grip mechanics gloves to shield your hands from sharp metal edges and slipping tools.
[DIY Fix & Modification] Reshaping the Tab with a Rotary Tool & Plastic Welding
Replacing the entire side panel is costly, so I executed a recovery plan: modify the tab geometry using a rotary tool first, then weld it back onto the fairing base.
Simply gluing the tab back on without modifying its shape guarantees it will snap off again during your next service. Here is how to modify the tab for smooth future fairing removals:
1. Grind Down the Aggressive Underside Barb with a Rotary Tool
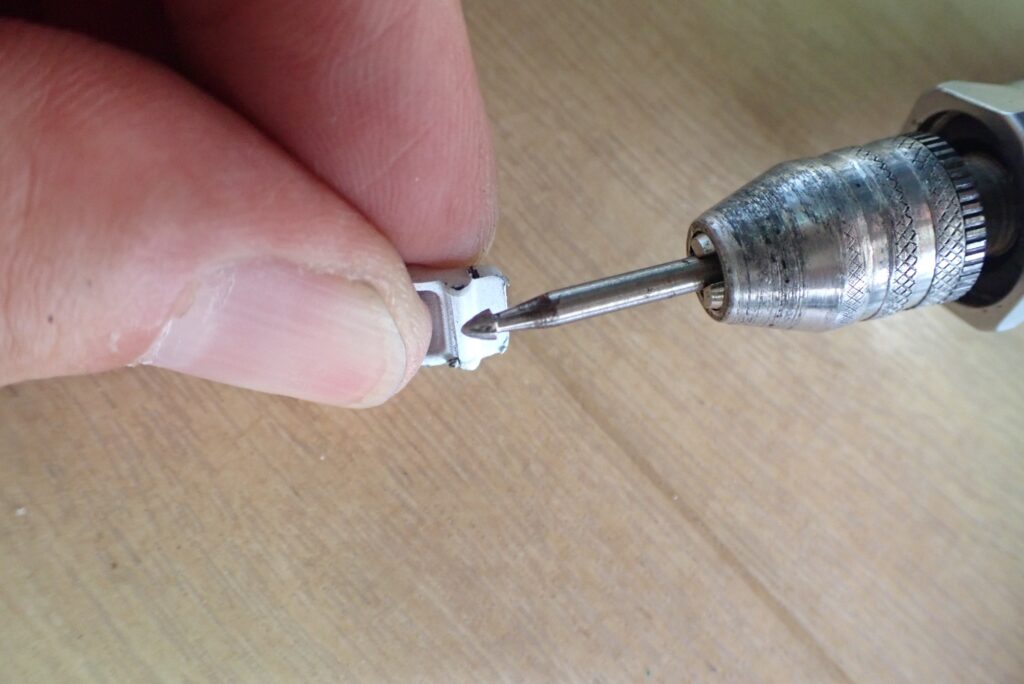
Use a precision rotary tool (Dremel or Proxxon) to carefully grind away the aggressive underside hook barb that caused the tab to seize in the frame receiver.
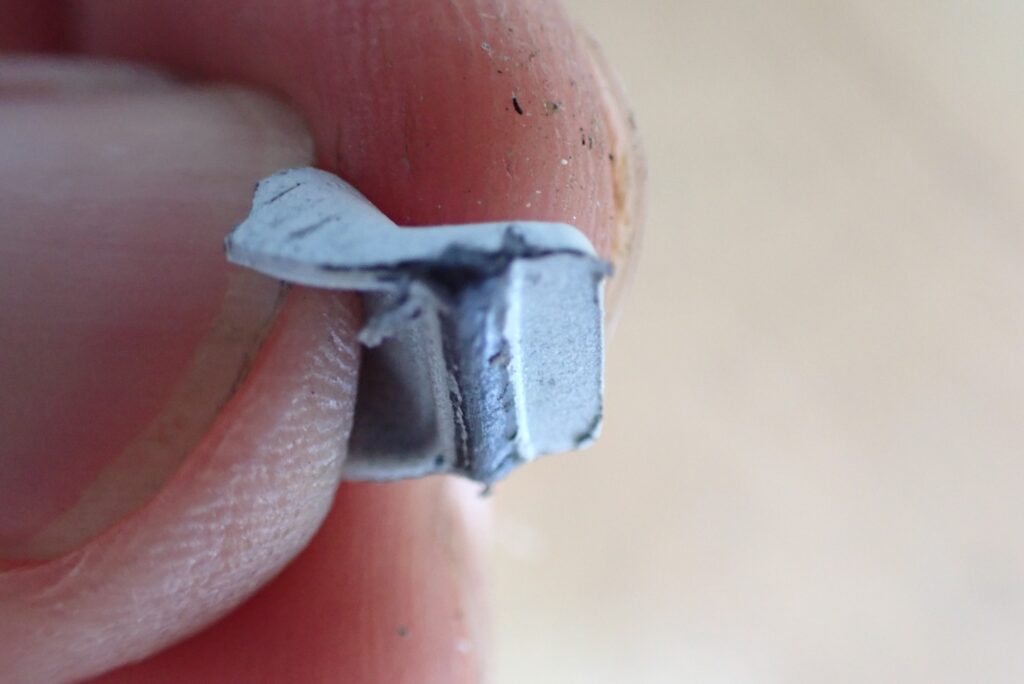
Compare the tab profile before and after grinding. Smoothing out that aggressive locking lip maintains proper panel retention while allowing the tab to slide free smoothly when pulled outward during future maintenance.
2. Fuse the Tab Back to the Fairing with Plarepair (Acrylic Resin)
To fuse the modified tab back onto the snapped fairing base (Image 1), use Plarepair (acrylic resin welding compound) or a heavy-duty two-part epoxy engineered specifically for ABS plastics.
(Note: Because welding with Plarepair requires removing the entire side fairing assembly from the bike, I focused on modifying the tab shape first during this phase.)
Essential Workshop Tools for Fairing Disassembly & Repairs
To prevent fairing damage and achieve professional-grade plastic repairs, keep these proven workshop tools in your garage:
- Muto Shoji Plarepair (Plastic Welding Chemical Kit) The ultimate chemical compound for repairing broken motorcycle plastics. Unlike standard glues, Plarepair uses acrylic resin powder and liquid monomer to chemically melt and fuse ABS plastic back into a single solid piece, restoring OEM structural strength.
- PROXXON Mini Rotary Tool Kit An indispensable tool for precision grinding, deburring, and reshaping plastic tabs. Essential for custom motorcycle bodywork modification.
- Mechanix Wear Mechanics Gloves Mandatory safety gear to prevent cuts and scrapes. Delivers tactile feel while shielding hands from sharp chassis stampings and slipping tools.
- amon Panel Removal Tool Set Uses lever action to unseat tabs precisely at their mounting points rather than relying on raw hand pulling, dramatically lowering the risk of snapping bodywork.
Conclusion: Understand the Tab Geometry to Prevent Fairing Disasters
That wraps up my breakdown of the Honda X-ADV side fairing tab failure, geometry analysis, and modification workflow!
- Temperature won't save you: Pulling against a hidden locking barb will snap plastic regardless of summer heat.
- Identify the culprit: The main cause of failure is the aggressive hook barb on the underside of the side fairing tab.
- Safety first: Always wear protective mechanics gloves to prevent hand injuries during fairing disassembly.
- Modify before welding: Grind down aggressive hook barbs with a rotary tool before fusing broken tabs back together with Plarepair.
Before attempting to install USB power, dashcams, or electrical accessories on your Honda X-ADV, use my mistake as a cautionary lesson. Keep tab locations and release angles in mind!
Ride safe, and enjoy the ultimate motorcycle life!