Hello everyone!
The Honda X-ADV brilliantly fuses off-road prowess with maxi-scooter comfort. While tackling dirt trails or wet tarmac is an absolute blast on this machine, every owner faces the exact same post-ride headache: severe mud spray flinging off the rear tire.
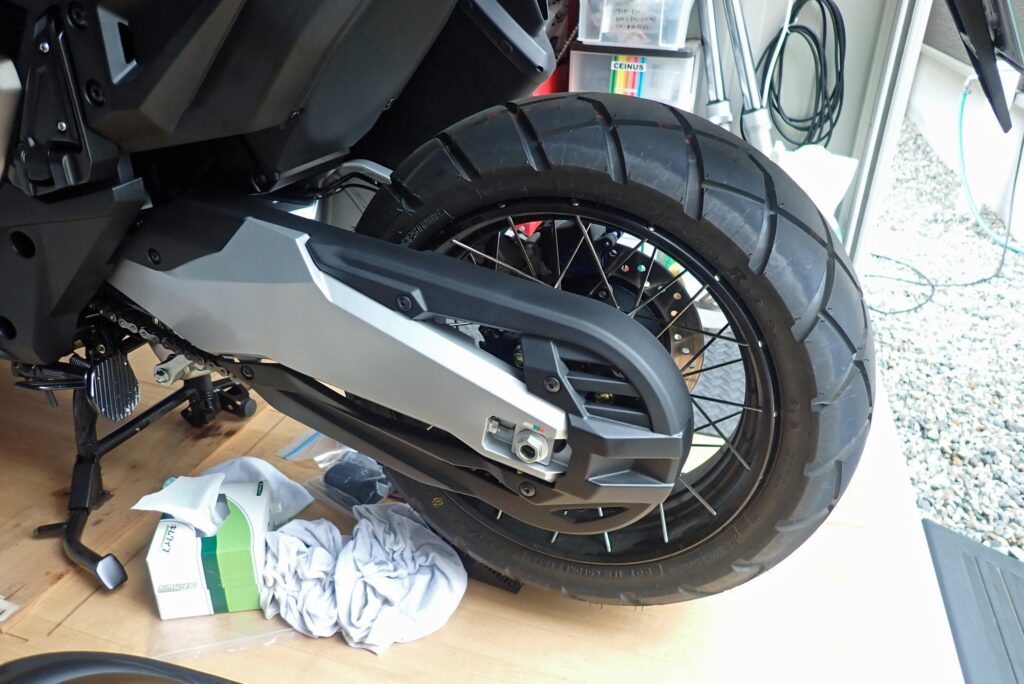
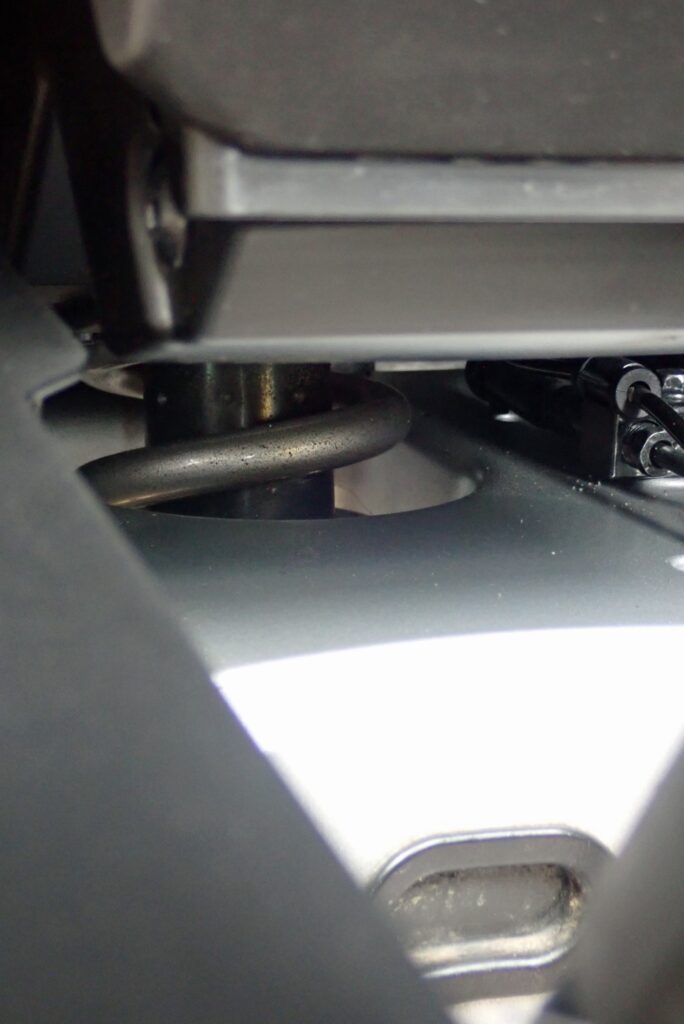
If you ride in rainy weather or over muddy trails on a bone-stock setup, you won't just end up with dirty water caked all over your riding gear and rear seat. Fine gravel and road sludge blast directly onto the exposed rear shock absorber, shortening its seal life and degrading overall suspension performance.
While there are various aftermarket fenders and mudguards on the market, I selected the Puig Rear Splash Guard without hesitation.
The reason is simple: among the options I looked at, it was the only single component that solved both issues—stopping rear tire mud spray AND shielding the rear suspension unit.
In this article, I will walk you through the entire unboxing, bracket fitting, proper rubber damper orientation, and exact torquing steps with real garage photos. If you want to protect your machine's running gear and keep your jacket clean, let's dive in!
[Parts Check & Tool Prep] Puig Splash Guard Kit & Required Tools
First, let's inspect the contents of the Puig Splash Guard kit and review the required tools for the job.
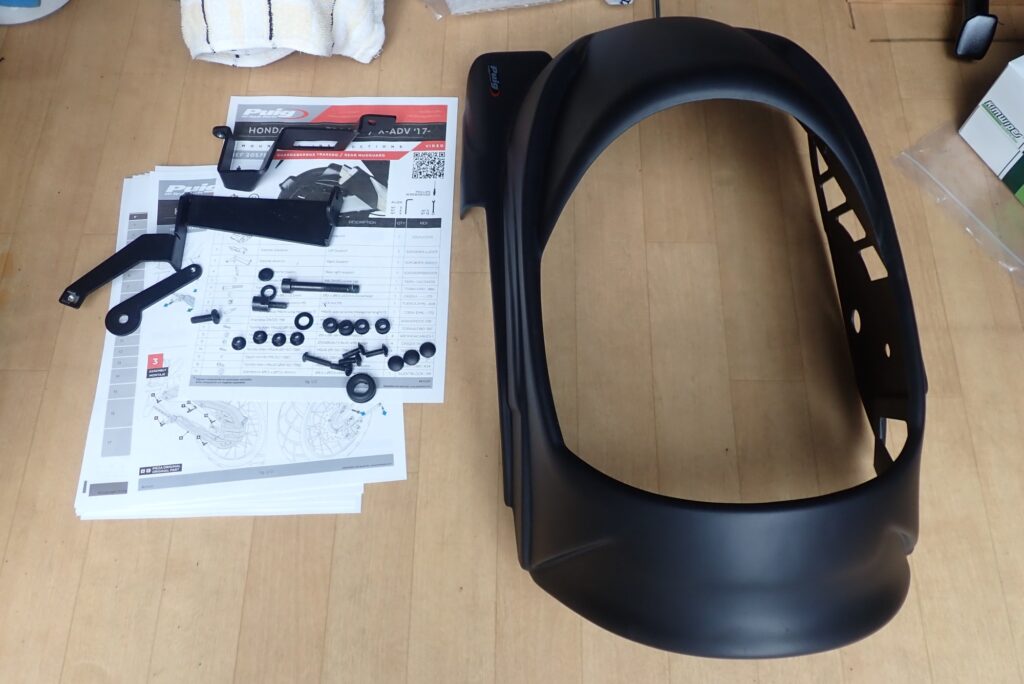
The kit contains a large molded plastic guard body designed to cover a wide tire radius, heavy-duty black-powder-coated steel brackets for left/right swingarm mounting, custom hardware, stepped collars, and rubber damper bushings.
Required Workshop Tools
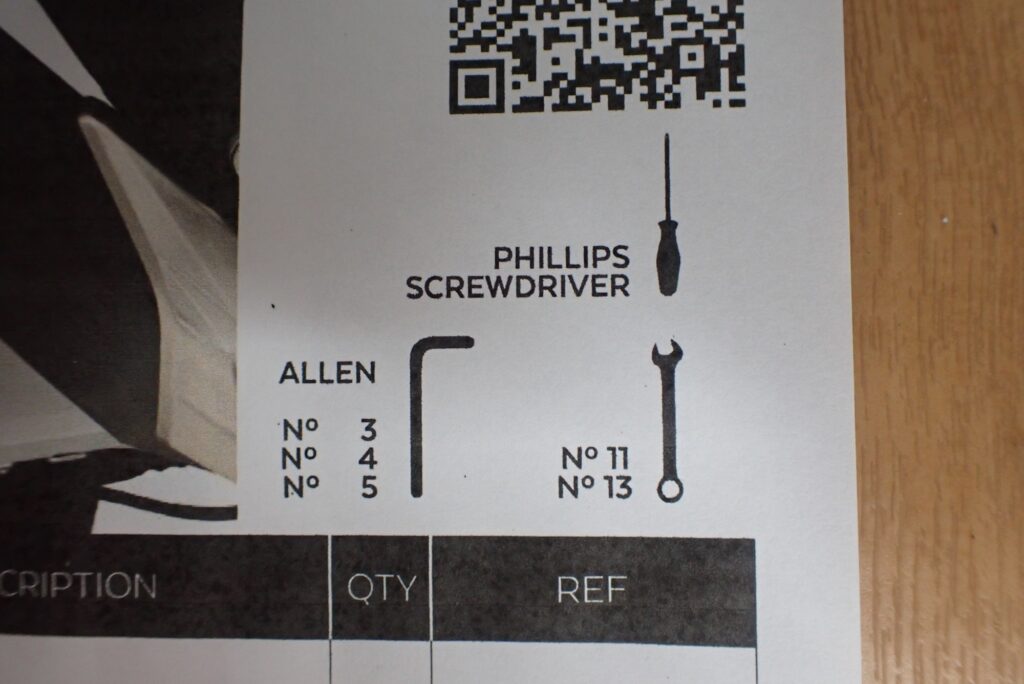
As specified in the official instruction sheet, gather the following tools:
- Phillips Screwdriver
- Allen / Hex Keys: 3mm, 4mm, 5mm
- Spanners / Box Wrenches: 11mm, 13mm
- Torque Wrench & Hex Sockets: (Strongly recommended for safe, precise torquing down)
- Medium-Strength Threadlocker: (Recommended to prevent vibration loosening)
[Step 1: Left Side Chain Guard Mount] Avoid Unnecessary Disassembly: Bracket Fitting Tip
Start by installing the base bracket on the left side of the machine (swingarm/chain guard side).
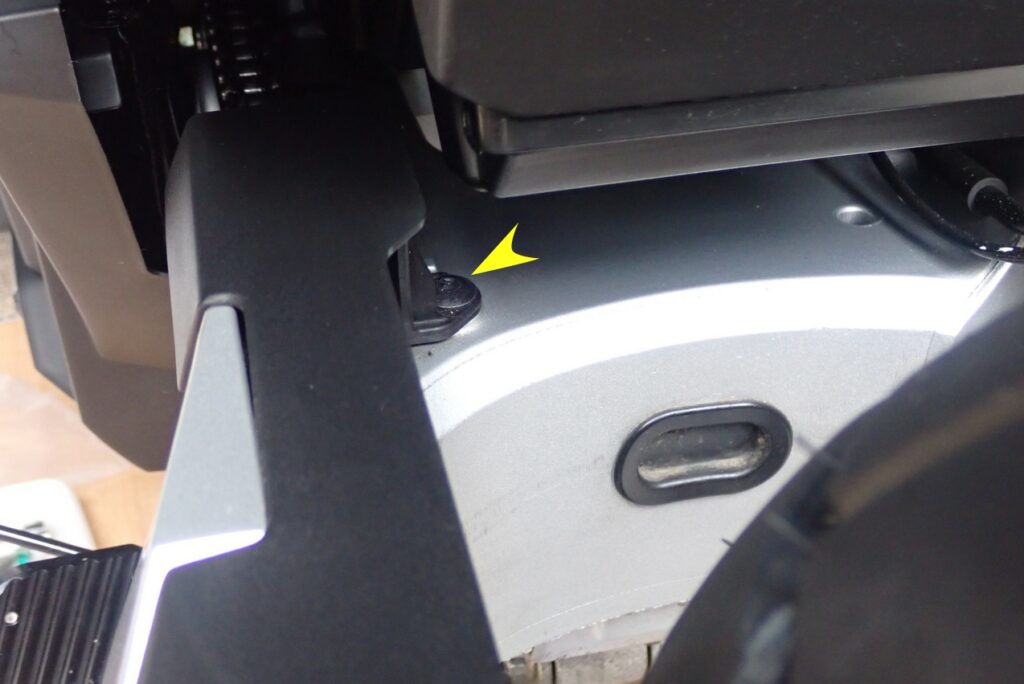
Here is a common pitfall that catches many DIY mechanics off guard! When working around the chain guard, you do NOT need to unbolt the fastener hidden deep above the upper chain guard (shown in the photo). Forcing tools into that tight gap risks scratching your factory swingarm finish.
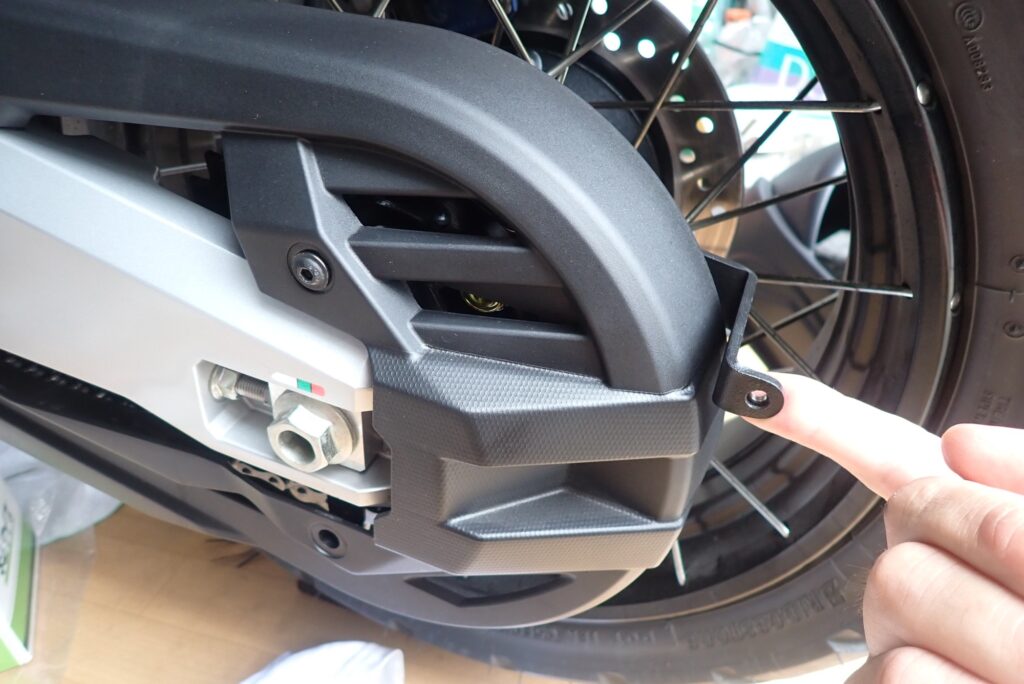
- Loosen the stock fasteners: Loosen the factory mounting bolts on the stock chain guard.
- Sandwich the bracket: Position the included Puig L-bracket beneath the guard so it is sandwiched neatly in place.
When correctly fitted, the mounting tab for the splash guard will project cleanly past the trailing edge of the chain guard, exposing the threaded receiving hole shown in the photo.
[Step 2: Right Side Caliper Mount] Attaching Brackets to the Parking Brake & Caliper Bolts
Next, move to the right side of the machine (rear brake caliper side) to install the main support bracket.
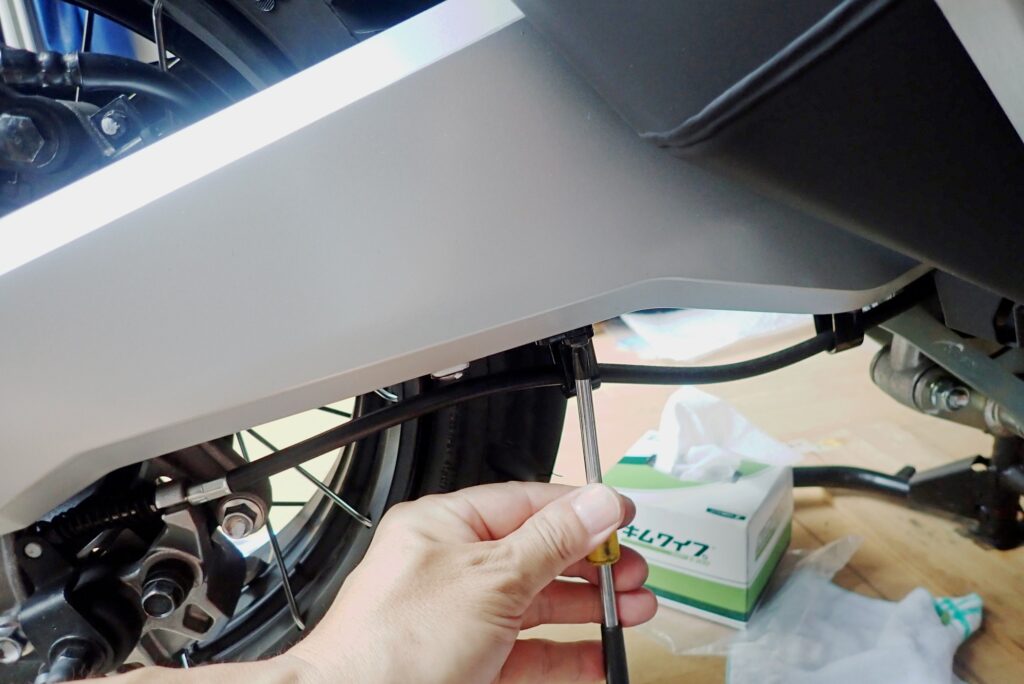
- Remove the cable holder screw: Back out the Phillips screw securing the parking brake cable holder along the underside of the swingarm.
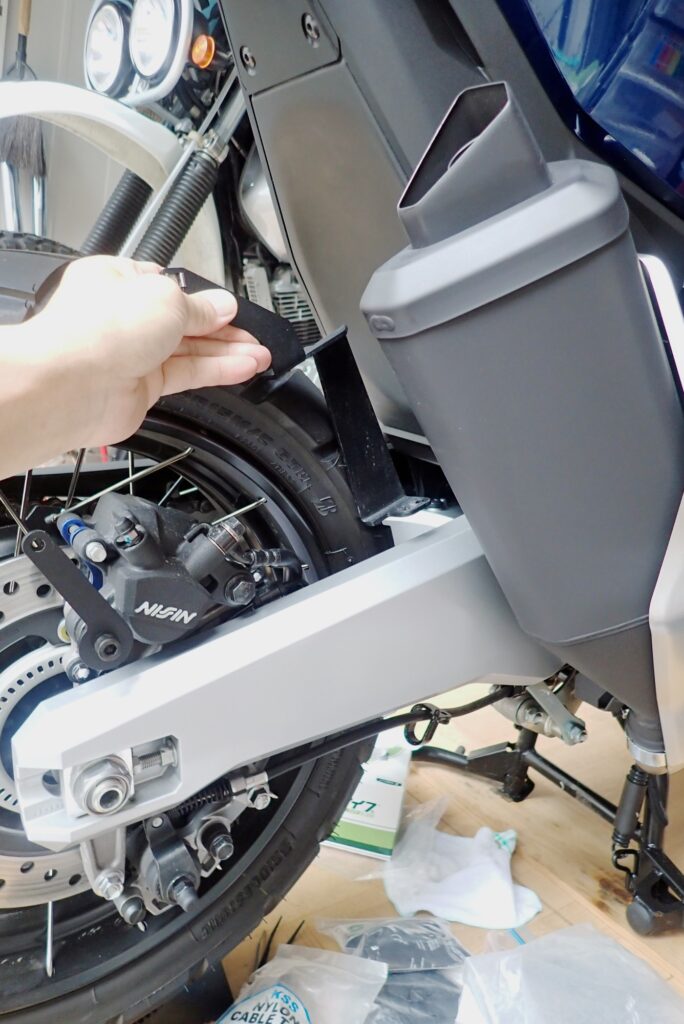
- Mock-up the lower bracket: Hand-tighten the lower bracket together with the parking brake cable holder as a temporary fit.
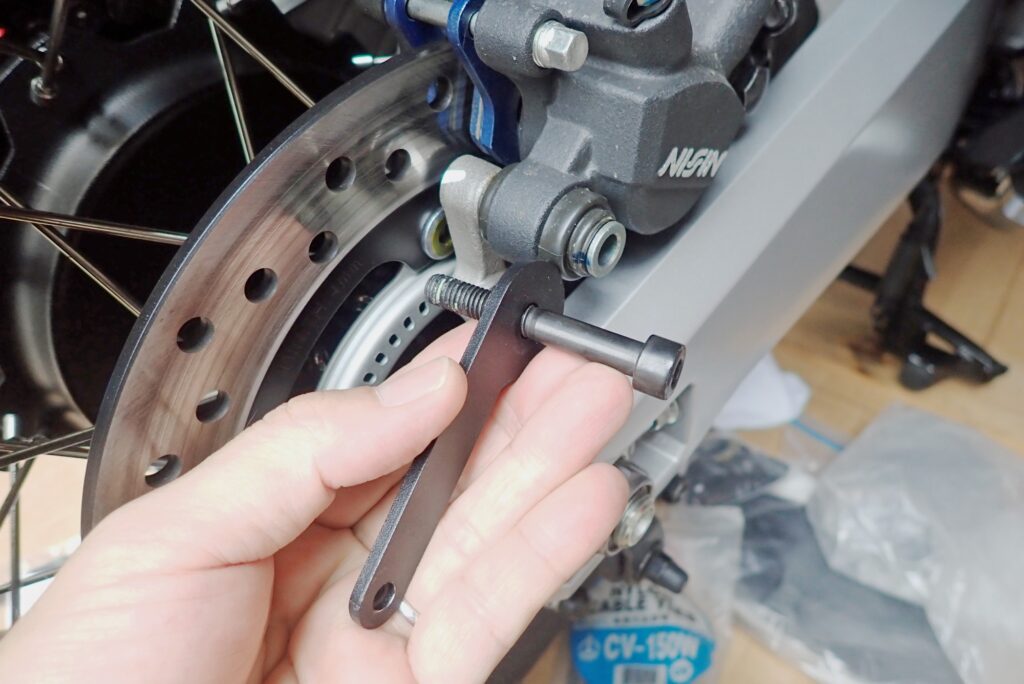
- Remove the caliper bolt: Back out the stock rear brake caliper mounting bolt.
- Align the main bracket: Place the heavy-duty black steel Puig bracket against the caliper boss and insert the provided custom long bolt. This main bracket serves as the structural backbone holding the splash guard rigid from the right side.
[Step 3: Guard Assembly] Rubber Damper Orientation Tips to Prevent Cracks
Installing the rubber damper bushings correctly into the mounting holes on the plastic guard body is crucial for long-term durability under road vibrations.
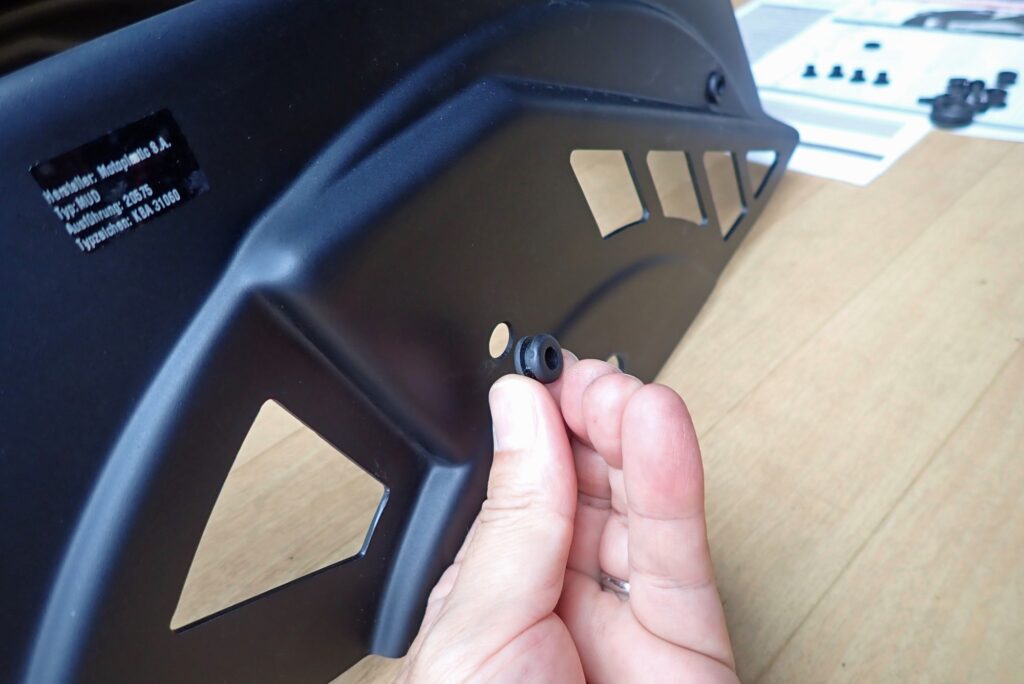
- Insert the rubber dampers: Fit the rubber damper bushings into the pre-drilled mounting holes on the guard body.
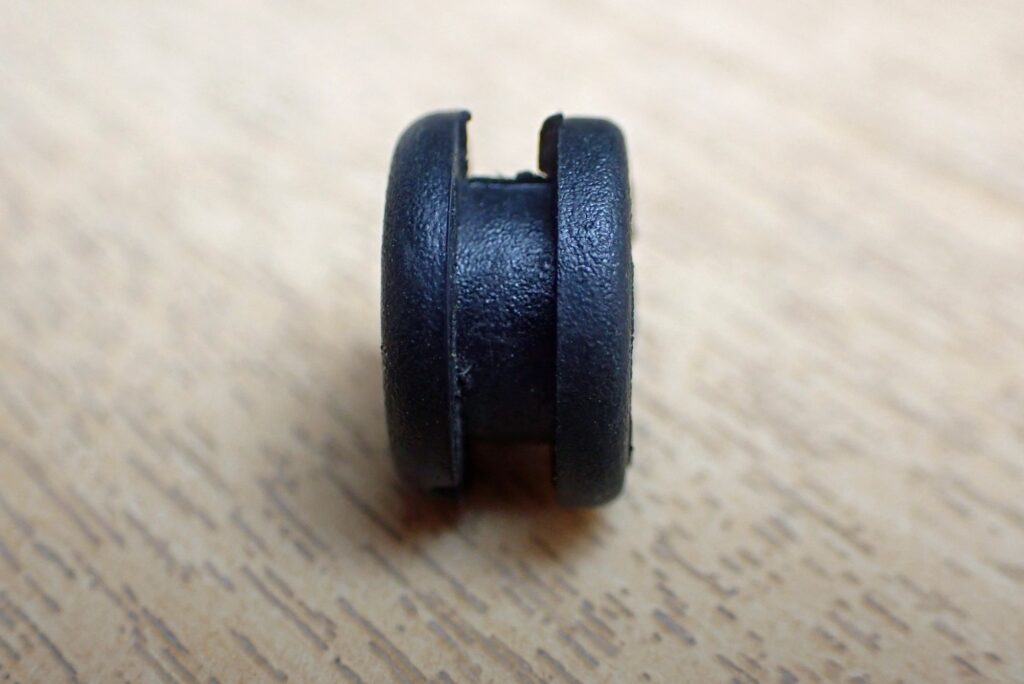
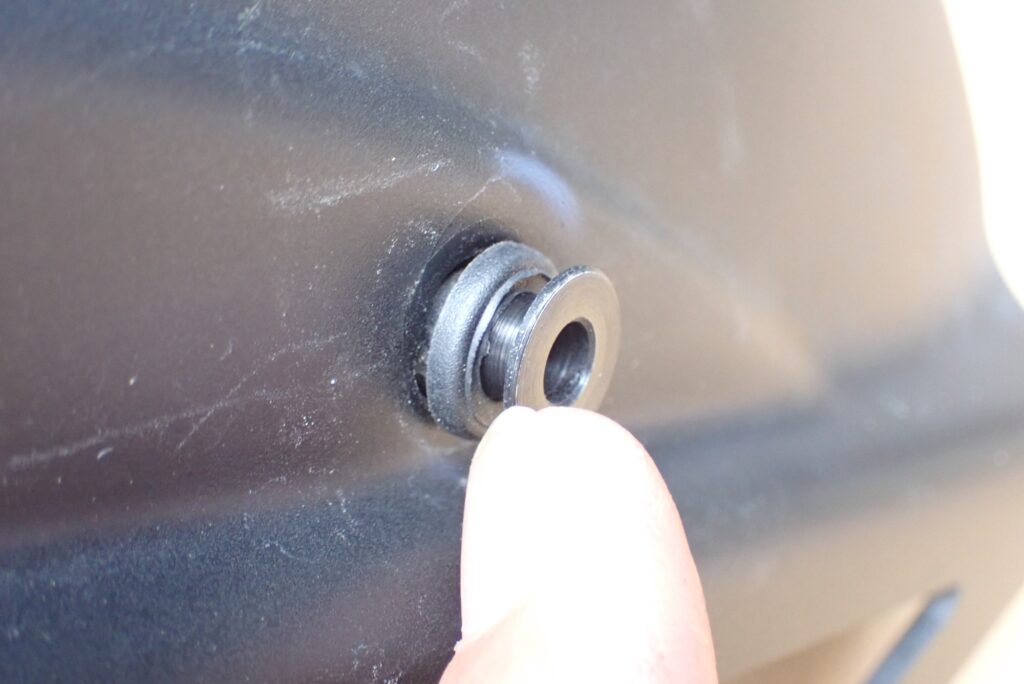
Notice that these rubber damper bushings feature an asymmetrical cross-section. Because the official instructions omit details regarding installation direction, pay close attention here:
Mechanic's Pro-Tip: Install the rubber damper so its flat, square-edged face points outward toward the flanged metal collar. This ensures that clamping pressure distributes evenly across the rubber surface when torqued down, preventing the plastic guard from cracking or tearing under heavy chassis vibration.
[Step 4: Torquing Down & Final Prep] Applying Threadlocker and Torquing to Spec (22 N·m)
With both mounting brackets positioned and the guard body prepared, proceed to final assembly and torquing down.
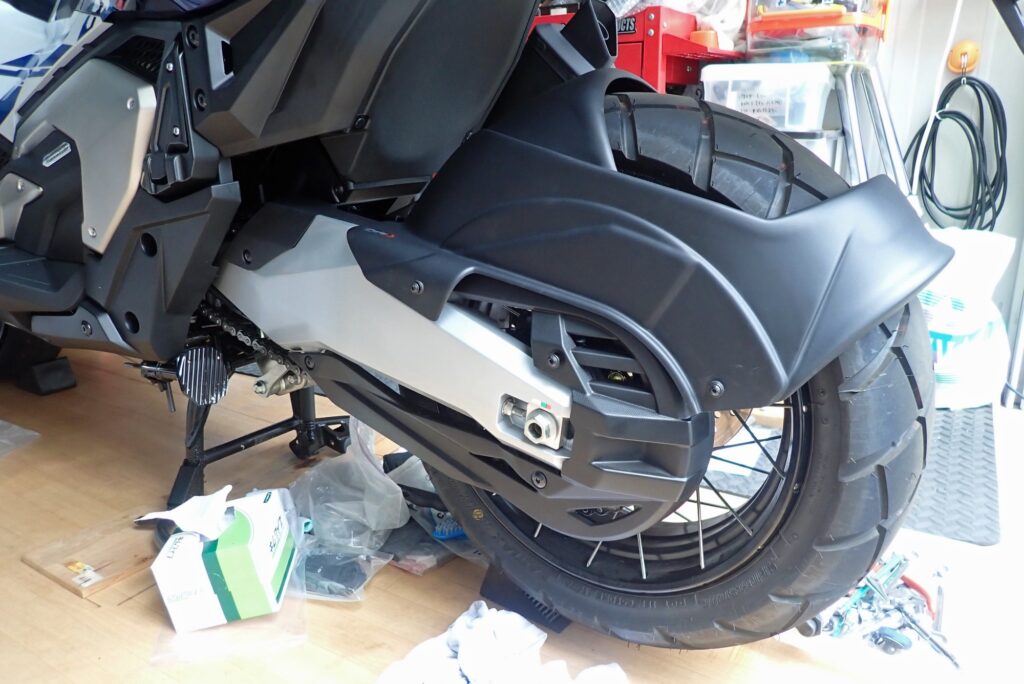
- Position the guard body: Align the plastic splash guard onto the right and left brackets and start the mounting bolts by hand.
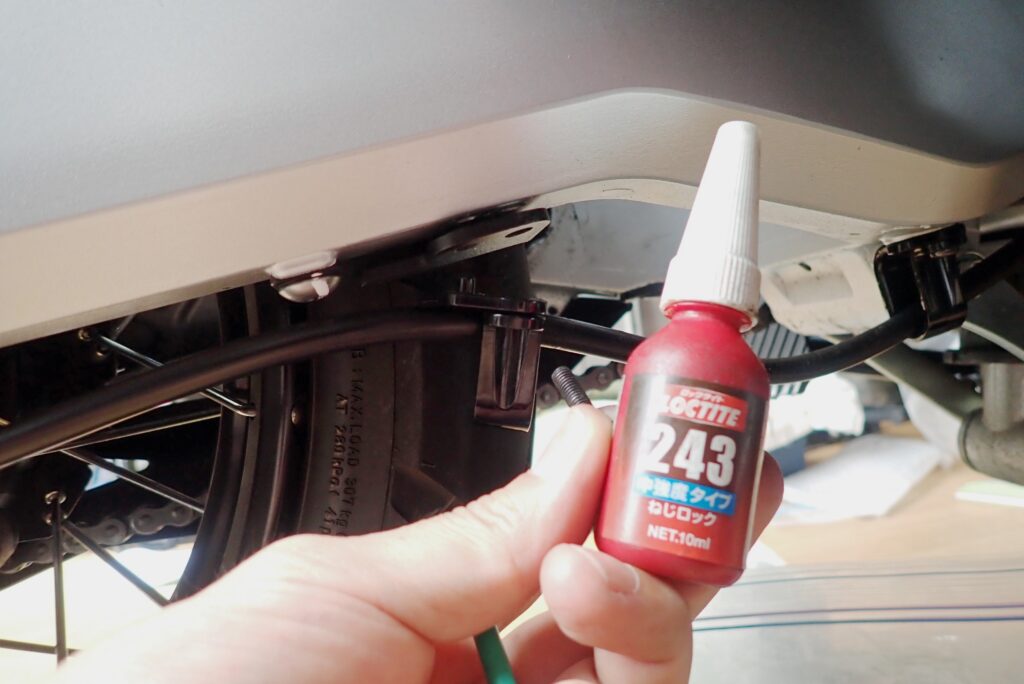
- Apply threadlocker: Because the swingarm area experiences severe vertical road shocks, apply a small drop of Loctite 243 medium-strength threadlocker onto the lower mounting threads to prevent vibration loosening.
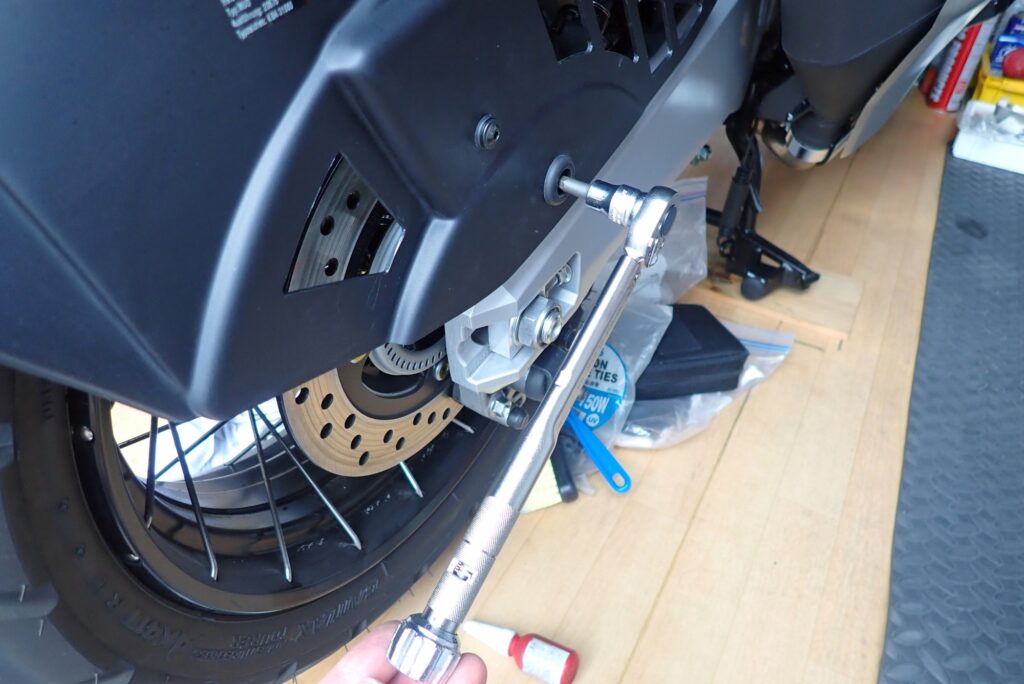
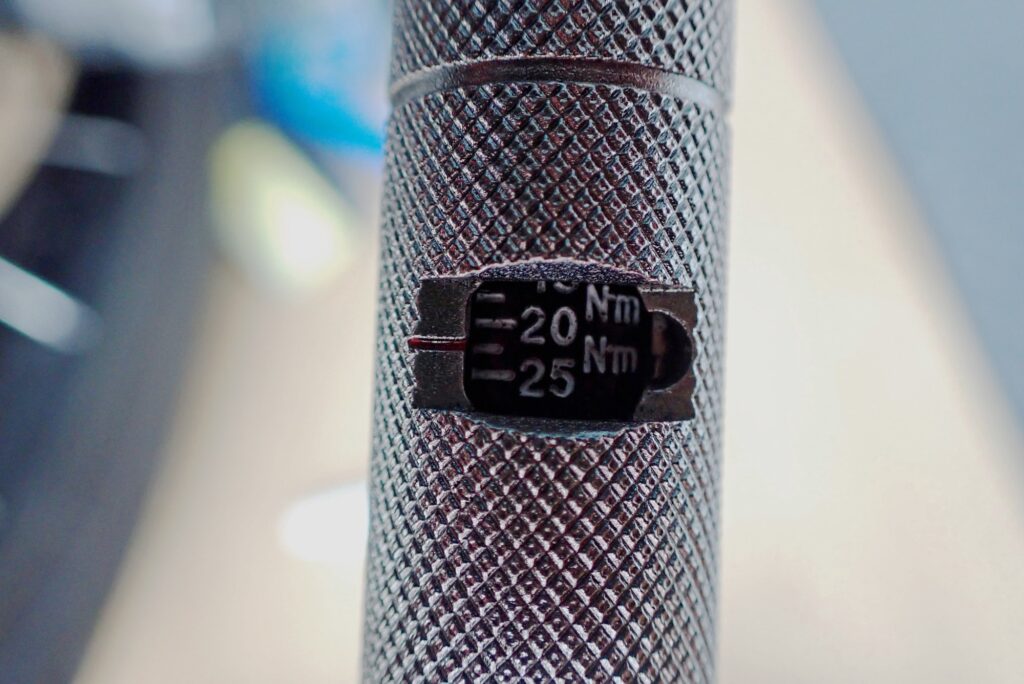
- Torque down the caliper bolt: The rear brake caliper bolt is a critical running gear safety component. Never rely on guesswork or hand feel. Use a calibrated torque wrench to torque the caliper bolt down to Honda's exact factory specification of 22 N·m.
[Post-Install Review] Zero Mud Splatter! Sleek Aesthetics & Coverage Check
With all fasteners torqued to spec, let's audit the finished installation!
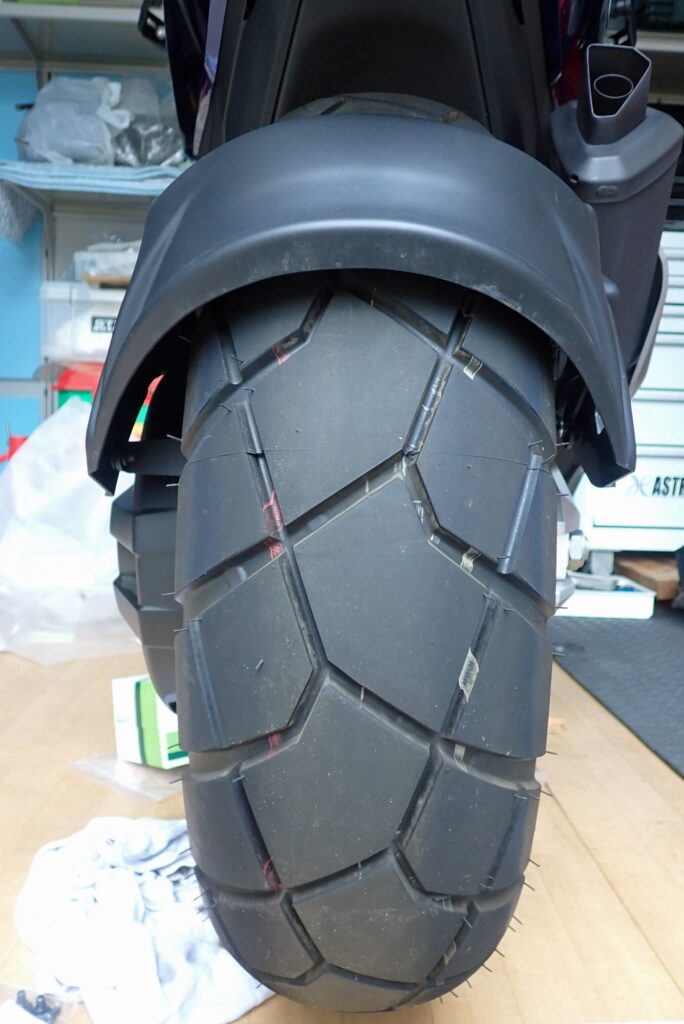
Looking from directly behind, the splash guard tracks down the exact centerline of the block-pattern rear tire with zero clearance issues or misalignment.
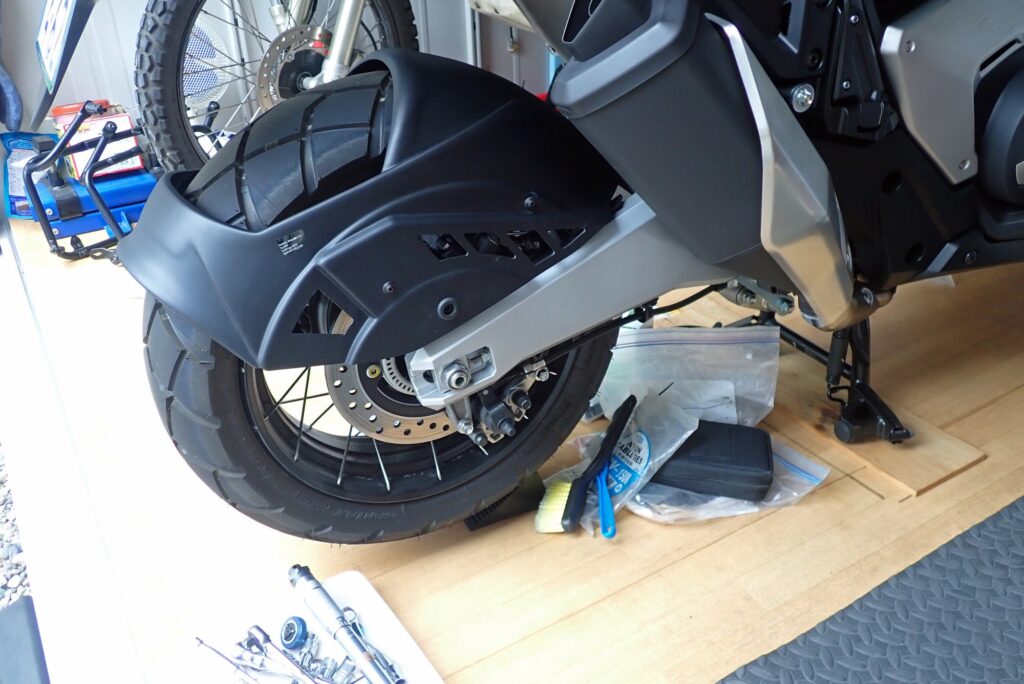
The left side profile looks good too. The guard integrates cleanly with the X-ADV's aggressive design lines as if it were a factory OEM accessory.
Because the shield extends forward over the front section of the swingarm, it helps block water spray, flying gravel, and road sludge from reaching the rear shock absorber unit and underside chassis.
Essential Workshop Tools & Components Used
To execute this installation safely and achieve maximum durability, here are the essential components and tools deployed in this project:
- Puig Rear Hugger / Splash Guard for Honda X-ADV The premier mud-defense upgrade for the X-ADV platform. Constructed from high-impact ABS plastic paired with rigid steel brackets to prevent high-speed flutter.
- Loctite 243 Medium-Strength Threadlocker An essential workshop chemical for securing fasteners on high-vibration running gear components like swingarms and calipers.
- Tohnichi Precision Torque Wrench Mandatory for safely applying exact factory torque specifications (22 N·m) to critical brake caliper mounting bolts.
- High-Precision Metric Allen / Hex Wrench Set Ensures precise engagement with hex socket heads, preventing rounded fasteners during assembly.
Conclusion: Elevate Your X-ADV's Touring Capability and Protection with Puig
That wraps up the step-by-step DIY guide for installing the Puig Rear Splash Guard on the Honda X-ADV.
- Dual Protection: Solves both rear tire mud splatter and rear shock grime accumulation in a single upgrade.
- Efficient Workflow: Avoid unbolting unnecessary chain guard fasteners on the left side.
- Mind the Orientation: Position the flat face of the rubber dampers outward to protect the plastic body from vibration cracking.
- Torque to Spec: Always secure swingarm hardware with medium-strength threadlocker and torque caliper bolts to 22 N·m.
Installing this splash guard cuts down detailing time after wet-weather tours and protects your rear suspension unit for long-term reliability.
Ride safe, and enjoy the ultimate motorcycle life!