Hello everyone, Boo here.
Today is about my second attempt at fitting a new chain to my BMW G650GS, after the first one failed.
Last time I over-riveted it, and the end of the connecting link pin split, as in the photo below.

I bought a new connecting link and tried again. (In case I failed again, I bought two.)

This is the new connecting link.

The connecting link fitted into the chain, before fitting the side plate.

I fit the plate holder to the KASHIMARU tool and press the side plate on.

Measuring the chain width after fitting the plate. It was 17.24 mm, so I think that's fine.
Now for the riveting.
This time I paid attention to the points I think caused the failure:
- I was checking the riveting wrongly with the KASHIMARU riveting tip
- I didn't check the rivet diameter while working
- The KASHIMARU tool and the chain were at an angle while riveting.
On point 1, I had misunderstood D.I.D's manual. The rivet/cutter pin should be at 90 degrees to the plate, but I had assumed it should be pressed tight against the plate at 90 degrees.
It doesn't need to touch the plate. If you tighten it until it does, the pin splits.
Source: D.I.D KASHIMARU manual (PDF, in Japanese)
On point 2, D.I.D's website states the rivet dimensions.
Source: D.I.D connecting link rivet dimensions (in Japanese)
According to it, the rivet diameter for the 520VX3 is 5.5 mm or more.
In other words, 5.5 mm is enough.
The rivet diameter is the outside diameter of the riveted pin end.
On point 3, the KASHIMARU holder wasn't square to the chain (the tool wasn't parallel to the chain).
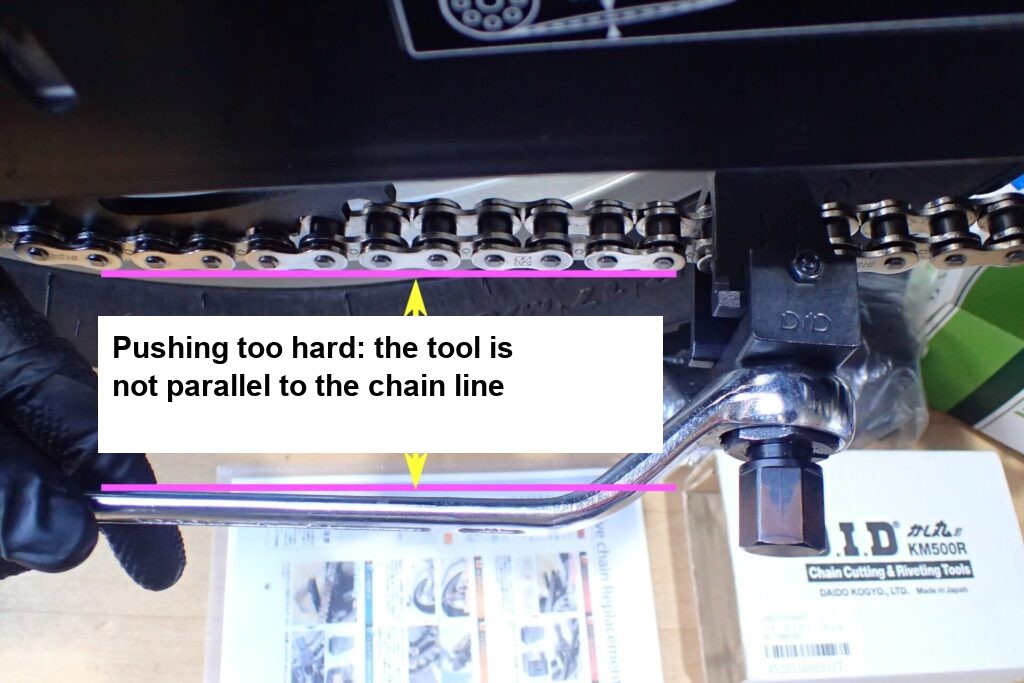
This photo is staged, but when I failed, I think I was so focused on applying force that it ended up like this.
So, here is the result of working carefully with all that in mind!

Success!
I did this together with replacing the rear shock, removing the swingarm and replacing its bearings, and replacing the rear linkage bearings, so it took a long time, but now the bike can be ridden again.


All the riveted pins were 5.5 mm or more.
For a while, I'll keep a close eye on the chain as I ride.

Finally, I put rust preventive on the KASHIMARU tool and put it away.
Who knows when I'll next rivet a chain.