A motorcycle dashcam has become essential kit these days — for peace of mind in the event of an accident, and as protection against tailgating and road rage incidents.
When fitting the hugely popular Daytona Mio MiVue M820WD — prized for its picture quality and features — to a Honda X-ADV (2026 model, RH21), most riders run into the same two headaches: where to mount the front camera, and how to deal with the cable length.
- "I don't want to drill into the expensive original fairing..."
- "I'm worried double-sided tape will fail in the summer heat or rain, and take the paint with it when it comes off..."
- "The standard cable just isn't long enough to reach from the unit under the seat to the handlebar area..."
The short answer: combine the Kaedear Rotary Camera Stay (KDR-YX401) with Daytona's genuine 1m camera extension cable (part no. 40861), and you get the ideal front camera setup — zero fairing modification, no double-sided tape required.
In this article I'll walk you through the whole fitting process for the X-ADV, paying close attention to reliability and safety at every step.
💡 Check out the key parts I used for this build!
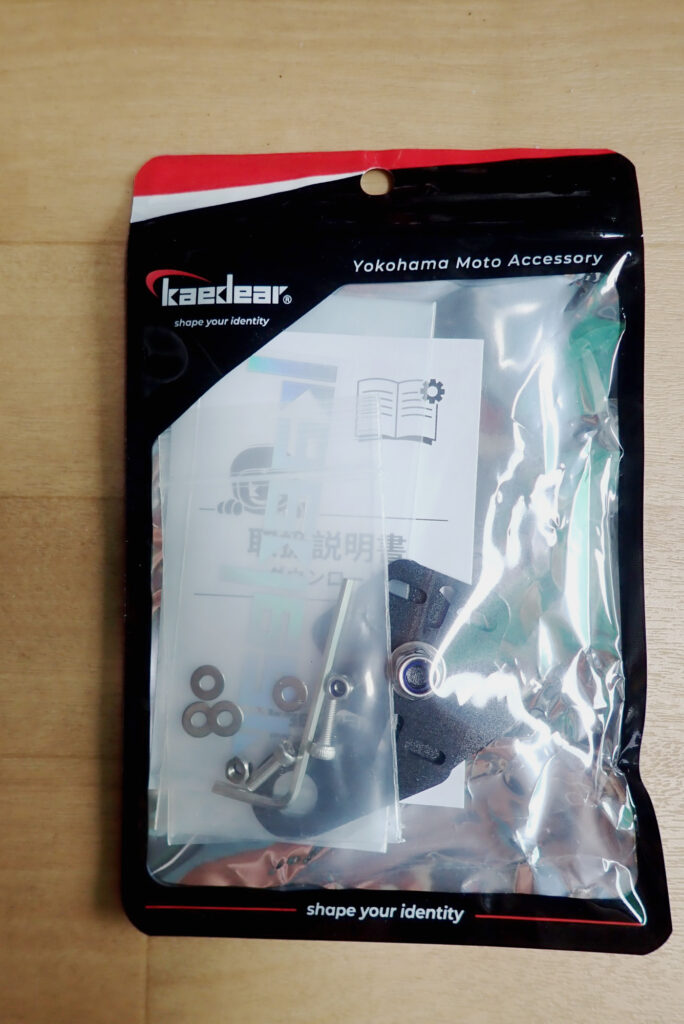
Kaedear Rotary Camera Stay (Mirror) KDR-YX401 — a rigid, corrosion-resistant aluminium bracket, sold via Japanese retailers.
Daytona Camera Extension Cable 1m (Part No. 40861) — a genuine Daytona accessory for the M820WD, sold via Japanese retailers.
Daytona Motorcycle Dashcam MiVue M820WD — sold via Japanese retailers.
1. Why Mounting a Dashcam Front Camera on the X-ADV Is So Tricky
The Honda X-ADV blends adventure-bike styling with a big commuter's practicality, and the front end is sculpted with sharp, three-dimensional lines.
The usual approach to fitting a front camera is to stick it to the fairing surface or under the screen with double-sided tape, but on the X-ADV that creates some significant problems, as shown below.
| Mounting method | Advantage | Issue/risk on the X-ADV |
| Stuck directly to the fairing (tape) | Quick and easy to fit | High risk of coming loose over time from sun and rain exposure; removing it can damage the paintwork. |
| Drilled into the fairing, bolted on | Very secure fixing | Drilling the original fairing lowers resale value and risks letting water in. |
| Mounted below the headlight | Discreet | Can foul the mudguard when the front suspension compresses. |
| Shared with the mirror bolt (recommended) | No modification, rock solid, won't come loose | Zero modification to the bike. A high mounting point gives a wide, unobstructed field of view. |
If you want to avoid marking up your bike while keeping your mind at ease for the long haul, mounting via an existing bolt hole — the mirror-mount method — is the best option.
2. Solving the Wiring Problem: Why You Need Daytona's Genuine Extension Cable (Part No. 40861)
When fitting a dashcam to the X-ADV, the standard approach is to tuck the main unit away in the under-seat storage compartment, where it's both secure and well protected from the weather.
The catch is that you'll run straight into a cable-length problem.
The front camera cable supplied with the M820WD is only about 0.9m long — nowhere near enough to run from under the seat, through the frame and fairing, and out to the handlebar and mirror area.
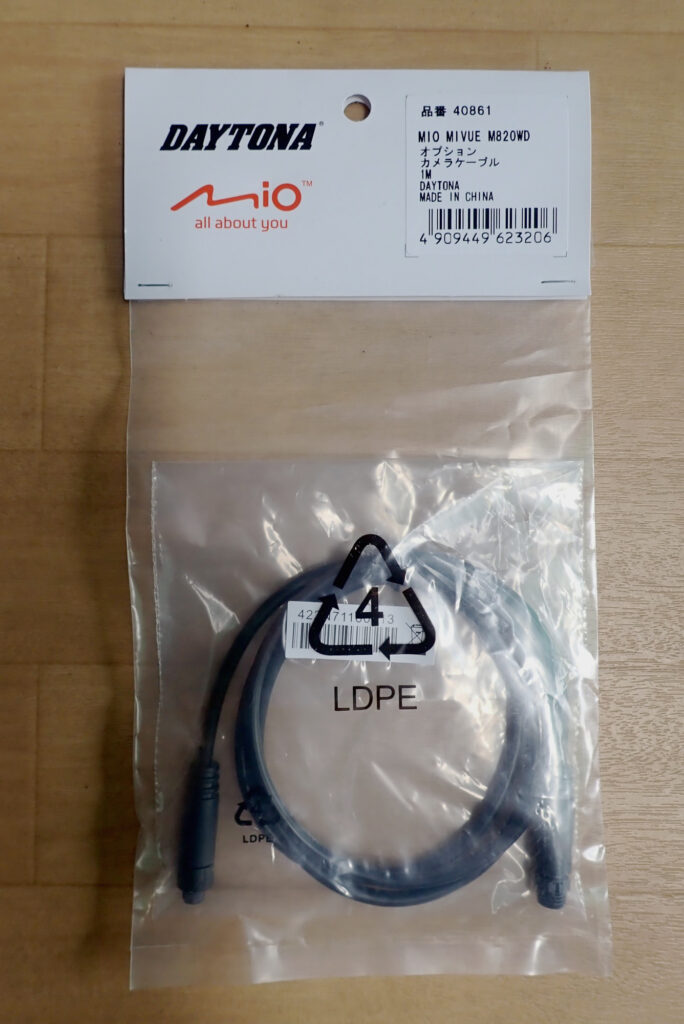
This is where Daytona's genuine 1m camera extension cable (part no. 40861) becomes essential.
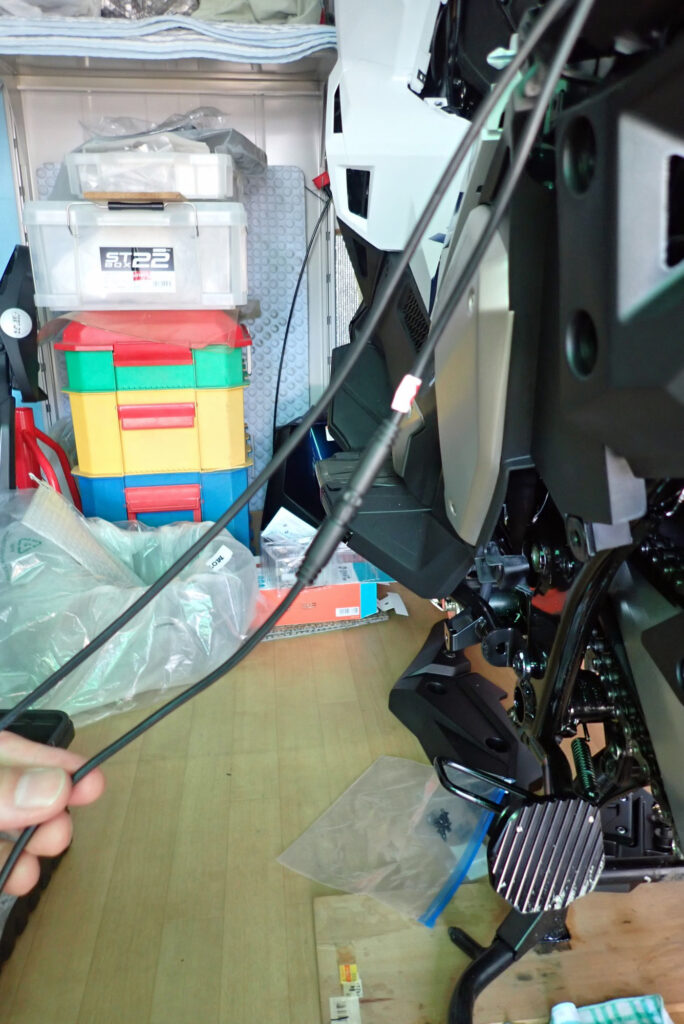
This extension cable uses a screw-lock connector designed specifically for the M820WD.
Push the connector fully home and hand-tighten the outer locking ring, and it seals out vibration and rainwater completely, even on rough roads. It's the kind of dedicated part you simply can't replace with a generic aftermarket cable.
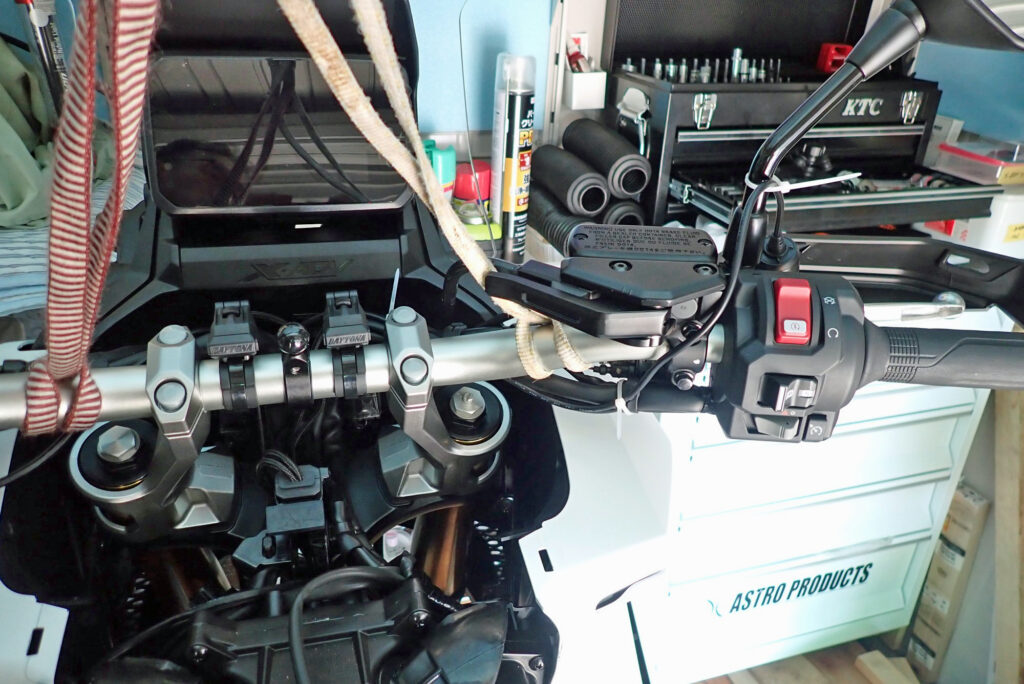
With the 1m extension spliced in, I was able to route the cable neatly from the under-seat storage, through the bike, and out to the right mirror area without any pulling or tension on the wiring.
3. In-Depth Review: Kaedear's KDR-YX401 Camera Mount
To mount the front camera below the right mirror, I chose the Rotary Camera Stay (Mirror) KDR-YX401 from Kaedear, a brand specialising in motorcycle accessories.
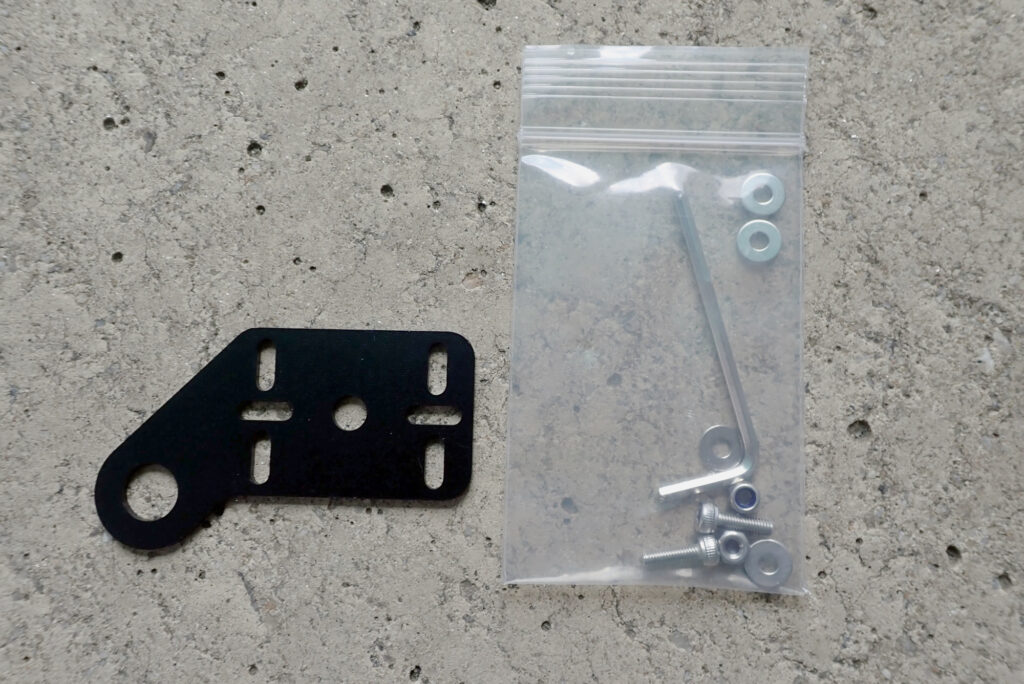
Key Features of the Kaedear KDR-YX401
- Rigid, corrosion-resistant aluminium alloy: thick-section aluminium that shrugs off wind loading and shocks from bumps.
- Everything included: mounting bolts, nylon lock nuts and a hex wrench all come in the box.
- Shares the mirror bolt (fits M10/M8): simply slots onto the mirror bolt for an easy fit.
- Excellent value: typically retails for around ¥1,000 in Japan.
A Closer Look: Why I Skipped the Rotating Plate and Bolted the Mount Directly
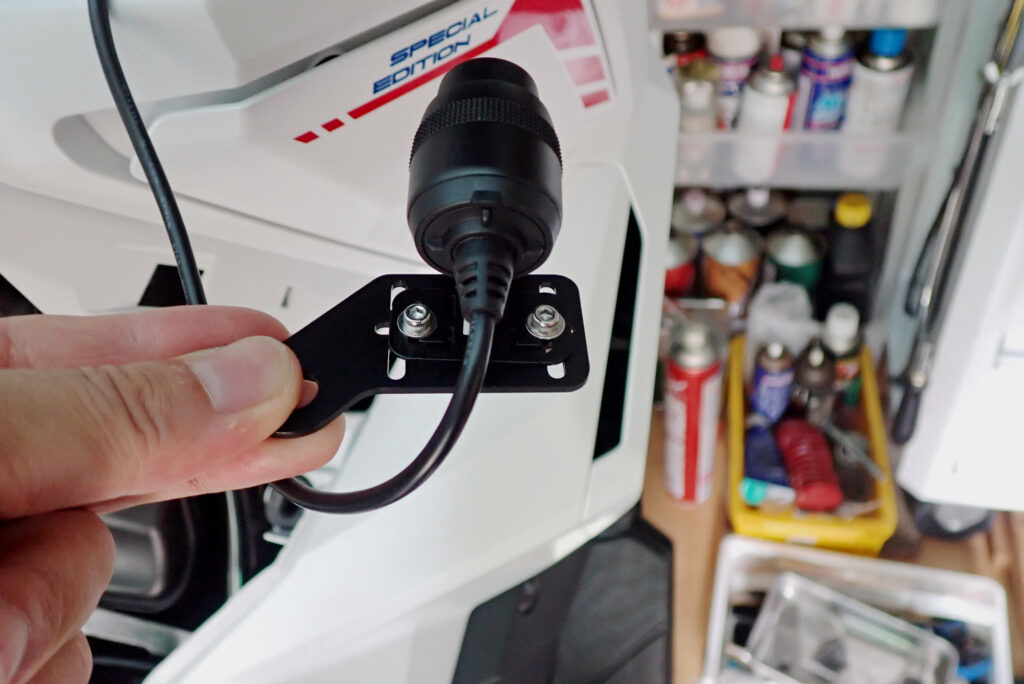
The kit comes with a round rotating plate that lets you angle the camera freely. For this fit, though, I deliberately skipped the rotating plate and bolted the camera mount directly to the stay body.
There were two reasons for this:
- Direct mounting already gives enough angle adjustment (up/down and side to side). The Daytona M820WD's own mount has a built-in tilt mechanism, so combining that with the stay's fixed angle is enough to get a proper forward-facing view.
- It completely removes the risk of the tape failing over time. Using the rotating plate means sticking the camera mount on with double-sided tape, and I wanted to avoid the adhesive degrading from outdoor storage, summer sun and years of weather — so I went with an all-metal, all-bolted fixing instead.
Nylon Lock Nuts Mean No Threadlocker Needed
The lock nuts supplied with the Kaedear stay are nylon lock nuts (also known as nyloc nuts) — nuts with a nylon insert moulded into them to stop them working loose.
As you tighten the bolt, the nylon bites hard into the thread, so the fixing won't work loose even under the constant high-frequency vibration a bike generates. That means you get a genuinely secure fit using nothing but the tools in the box — no liquid threadlocker required.
4. Fitting It to the X-ADV: Step-by-Step, With My Notes
Now let's go through the actual fitting procedure, step by step.
Step 1: Tools You'll Need
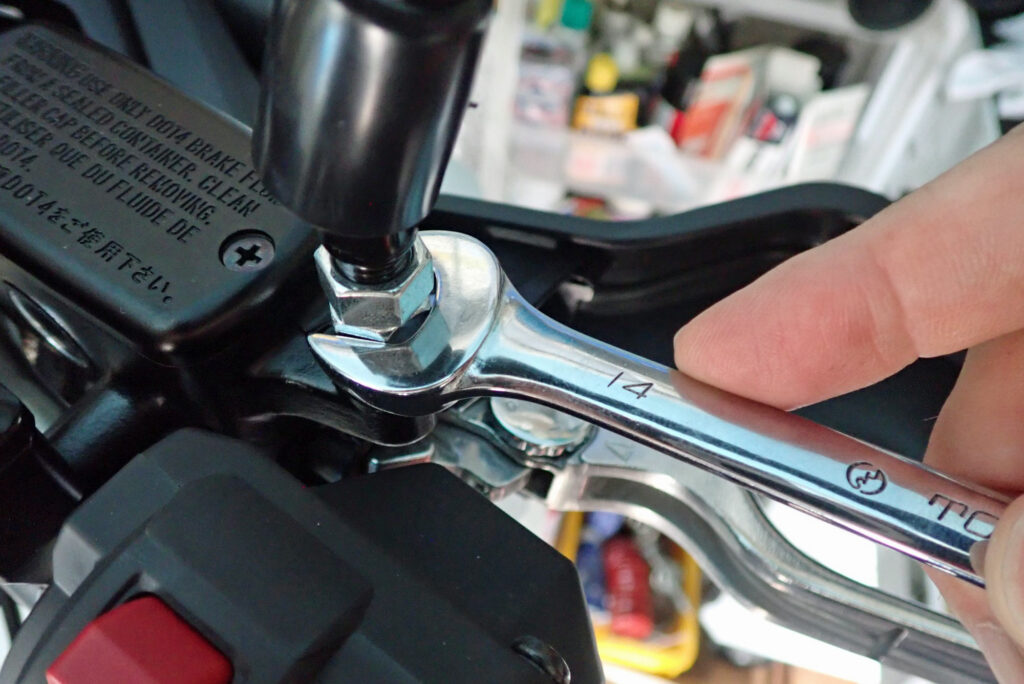
- 14mm open-end spanner (for removing and refitting the mirror)
- The hex wrench supplied with the kit (for assembling the Kaedear stay)
Step 2: Removing the Right Mirror
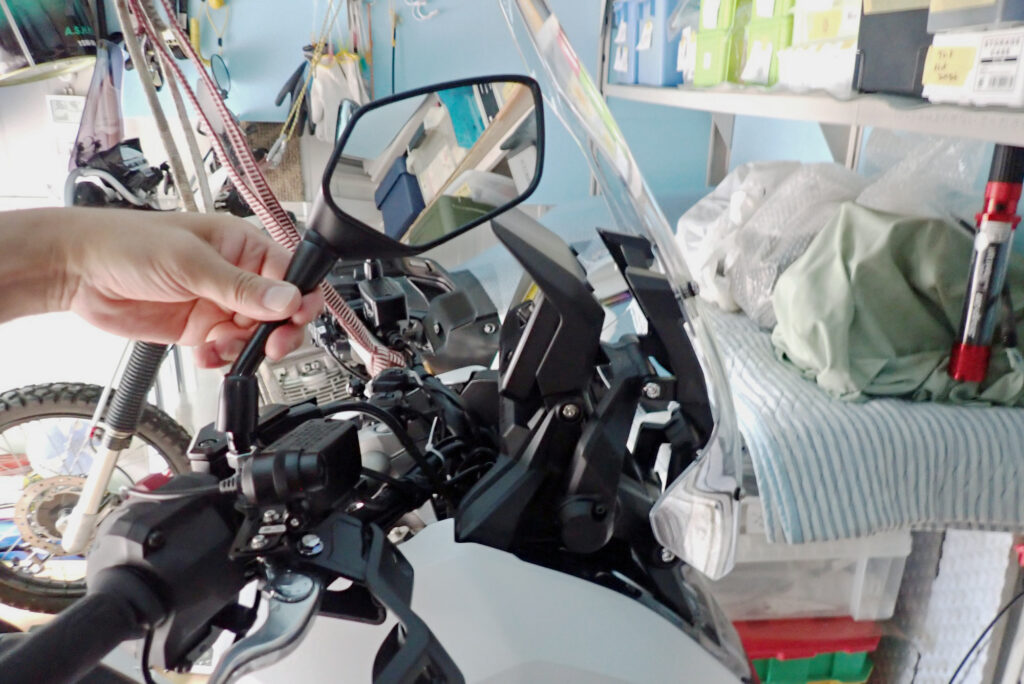
The X-ADV's mirrors use a double-nut design with a built-in impact-absorbing mechanism.
- Peel the rubber boot at the base of the mirror upward.
- Use a 14mm open-end spanner to loosen the lower adapter bolt and remove the mirror.
⚠️ One tip
On Honda models, mirror adapter threads can be either standard or reverse-cut, depending on the year and which side you're working on. Don't force it — check which way the thread turns before you start loosening it.
Step 3: Assembling the Camera and Kaedear Bracket
- Line up the M820WD's camera mount with the mounting hole on the Kaedear stay body.
- Pass the supplied bolt through and tighten the nylon lock nut on the back.
- Keeping an eye on the horizontal and vertical angle, tighten it up firmly with the hex wrench.
Step 4: Connecting the Extension Cable and Routing It
- Run the cable forward from the M820WD main unit installed in the under-seat storage.
- Splice in Daytona's extension cable (40861) and tighten the screw-lock ring on the waterproof connector securely.
- Leave enough slack so the cable doesn't pull tight even at full steering lock in either direction, then secure it with cable ties.
Step 5: Bolting the Bracket Back Onto the Mirror — Job Done!
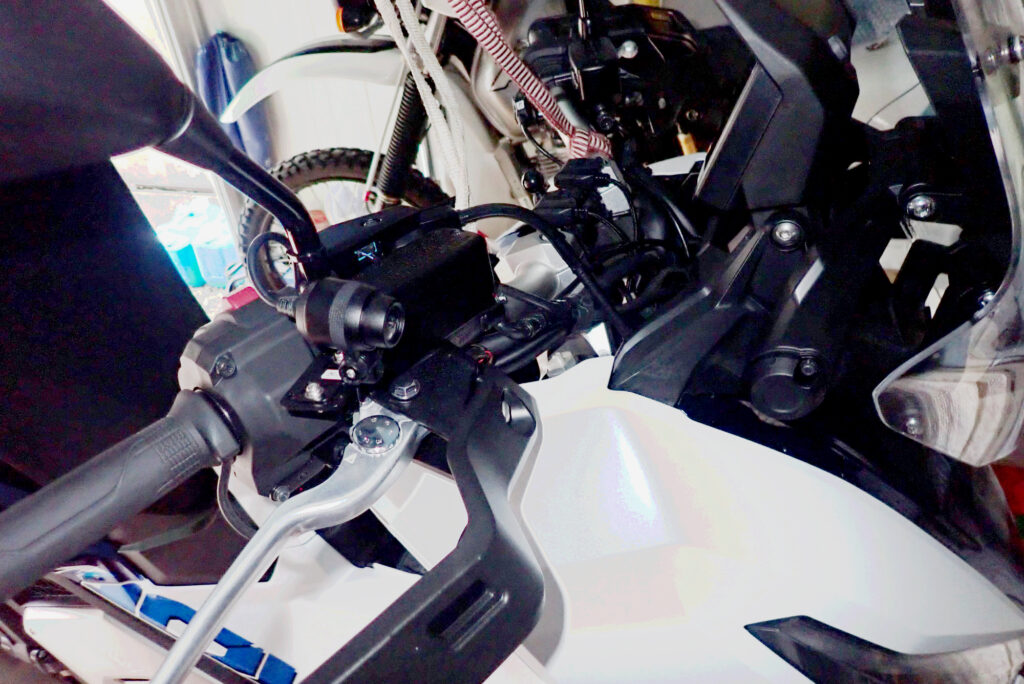
- Fit the Kaedear stay onto the mirror holder on the bike.
- Thread the right mirror's bolt back in on top of it and tighten it firmly with the 14mm spanner.
- Check that nothing fouls the brake lever or throttle operation, adjust the mirror for a clear rear view, and you're done!
The camera tucks in neatly under the right mirror and looks like it could almost be a genuine Honda option.
5. Pros and Cons: An Honest Review
Here's an honest rundown of what worked well and what didn't, based on actually fitting this to my X-ADV.
What I Liked
- ⭕ Zero fairing modification, zero double-sided tape — your bike stays completely unmarked, and you can return it to fully standard spec at any time, whether you're selling up or changing the setup.
- ⭕ Rock-solid and worry-free — bolting the camera straight to the stay with nylon lock nuts means there's no risk of it coming loose over time, whatever the weather throws at it.
- ⭕ A high mounting point with a clear view — sitting up high under the right mirror, it gets a clean line of sight to the number plate of the vehicle in front and what's going on around you.
- ⭕ No strain on the wiring — thanks to Daytona's genuine 1m extension cable, you can route it neatly from the under-seat storage all the way to the handlebar area.
Things to Watch Out For
- 🔺 You'll need a 14mm open-end spanner — you can get by with the on-board toolkit or an adjustable spanner, but given the tight clearance around the mirror, a slim-jawed 14mm open-end spanner is the safer bet.
- 🔺 Extra cost for the extension cable — you'll need to buy the extension cable separately from the M820WD set (around ¥2,750 in Japan), but it's essential if you want to mount the unit under the seat.
6. Summary: Who Is This Mod For?
Custom parts and mounting stays for bikes are engineered by their makers with real care for on-road safety and versatility. Combining well-designed, off-the-shelf parts, each doing the job it's best suited for, is really the secret to a clean, successful DIY custom job.
This Mod Is a Good Fit If You...
- ✅ Ride a Honda X-ADV (RH21 / RH10 / RC95)
- ✅ Don't want to drill the expensive original fairing or stick anything to it with tape
- ✅ Want to rule out the camera coming loose from tape failing in summer heat and UV
- ✅ Want the dashcam unit tucked neatly away in the under-seat storage
If you want to keep your X-ADV's styling intact while riding with real peace of mind, give this Kaedear stay plus Daytona extension cable combination a try!
🛒 Items featured in this article
- 🔗 Kaedear Rotary Camera Stay (Mirror) KDR-YX401 (manufacturer's site, in Japanese) — Corrosion-resistant aluminium, with bolts and nylon lock nuts included for a secure, versatile fit.
- 🔗 Daytona Camera Cable 1m (Part No. 40861) (manufacturer's site, in Japanese) — Essential if you're mounting the M820WD under the seat; a genuine extension cable with a waterproof screw-lock connector.
- 🔗 Daytona Motorcycle Dashcam MiVue M820WD (Part No. 40860) (manufacturer's site, in Japanese) — Front and rear dual cameras with STARVIS sensors, plus smooth smartphone pairing, in a compact, high-performance unit.
7. Disclaimer
- The fitting procedure and parts combination described in this article are based on my own work on my personal bike (a Honda X-ADV, 2026-model RH21), and are given as one example, not a universal solution.
- Motorcycle maintenance and custom work directly affects your safety on the road. Always work in a safe location, and carry out any work carefully and entirely at your own risk.
- Under-tightened bolts can lead to parts coming loose while riding, which can cause an accident. Check everything immediately after fitting, and re-check the torque periodically afterwards.
- If you're not confident carrying out the work yourself, don't push it — it's best to have a trusted bike shop or licensed workshop do it for you.