A motorcycle speedometer cable is an important part: the inner wire spins at high speed inside it to carry the speed to the meter. If it runs dry, the needle can flicker, it can make noise, and in the worst case the wire can snap, so regular cleaning and lubrication are essential.
In this post, using my Honda XR250 (the Japan-market XR250 BAJA / MD30) as an example, I show with photos how to remove the speedometer cable, lubricate it with gear oil, and refit it. I also cover the points where it is easy to slip up, such as the nut that falls out of the fork clamp and which way the inner wire goes.
*Genuine speedometer cables for the XR BAJA and the related XR250 are discontinued for many model years, so look after your existing cable with regular lubrication and cleaning to make it last.
Why a speedometer cable needs lubrication, and which oil to use
Clutch and throttle cables move back and forth (pull and release), but in a mechanical speedometer cable the inner wire turns continuously. On Japanese motorcycles with mechanical speedometers, the cable usually turns at about 1,400 rpm at 60 km/h.
Because it keeps spinning fast, consider the following when choosing a lubricant.
- Thin lubricating spray (such as CRC 5-56 / WD-40 type): Too runny; centrifugal force flings it off, so it soon runs dry.
- Thick general-purpose grease: If it is too stiff, for example in cold weather, it adds friction, which can make the needle flicker or break the cable. Also, if you pack a lot into the outer cable, the spinning can carry it up into the meter and foul the instrument.
- Gear oil (such as 75W-90): It has a suitable viscosity and extreme-pressure properties and holds a film on the wire well, so it suits speedometer cables.
This time I used A.S.H. 75W-90 gear oil, which has a suitable viscosity and holds an oil film well.
Tools and oils you need
Having these tools and chemicals ready makes the job go smoothly.
- No. 2 Phillips (cross-head) screwdriver: for the screw at the wheel end and the fork clamp
- 8 mm spanner/wrench or socket: for the bolt on the bottom yoke
- Gear oil (such as A.S.H. 75W-90): for lubricating inside the cable
- Plastic cleaner (such as VuPlex): for cleaning the outside of the cable and the front fork
- Rags and a drip tray: to catch old oil and cleaning oil dripping from the bottom
Removing the speedometer cable
Undo the fixing points in order, so you don't pull the cable hard and kink it.
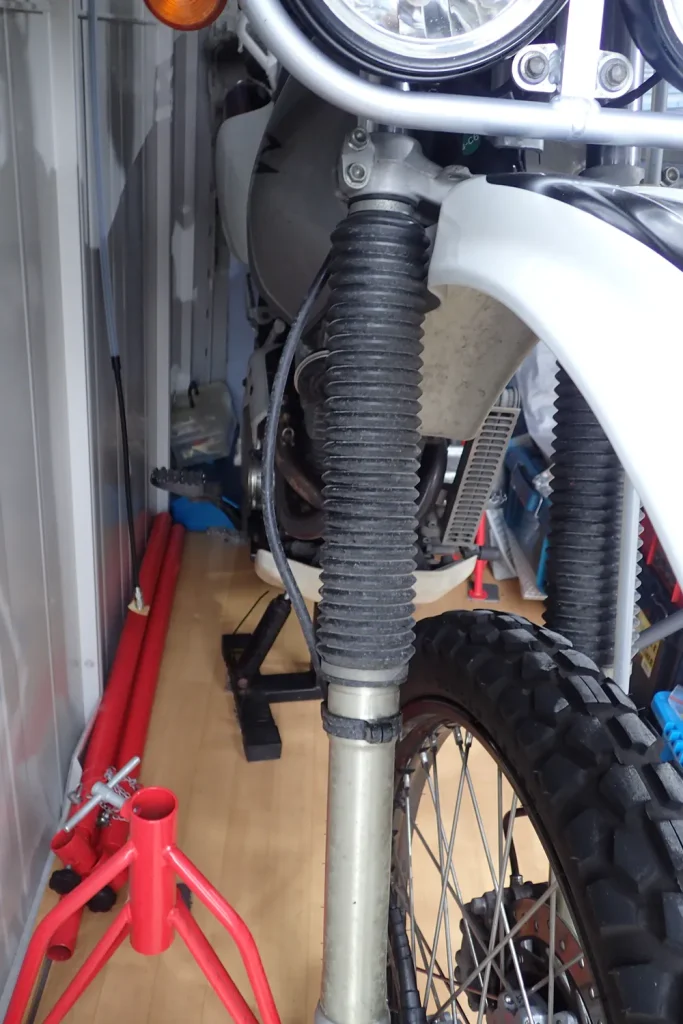
This is the XR BAJA seen from the front. The curved black cable running beside the front fork is the speedometer cable.
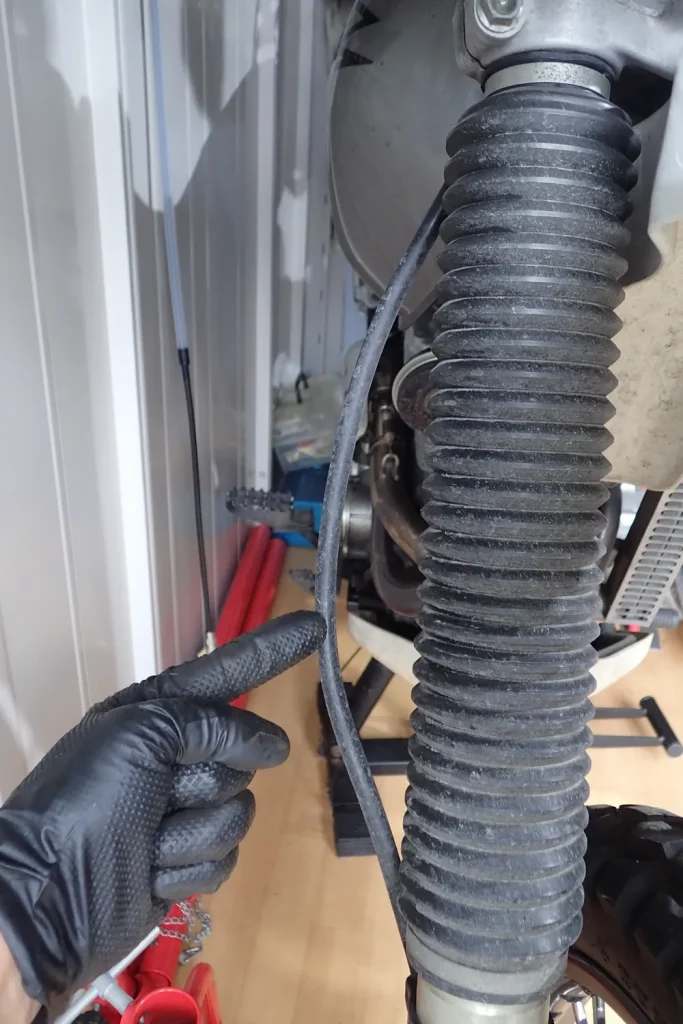
1. Remove the screw at the front wheel (speedometer gearbox) end
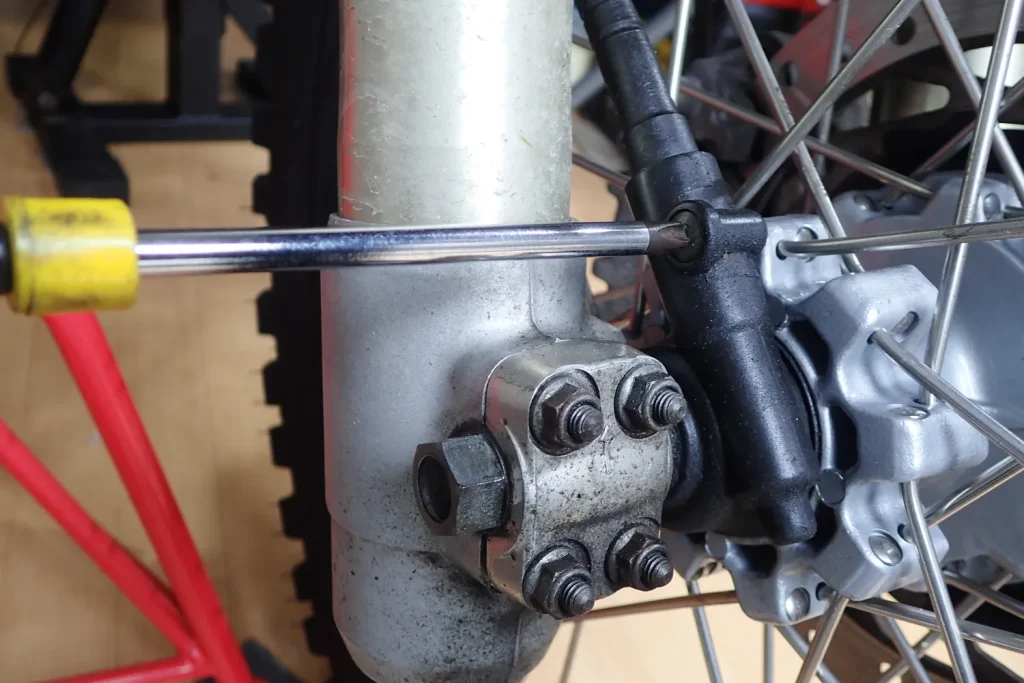
First, loosen the Phillips screw that holds the cable in the speedometer gearbox on the front wheel.
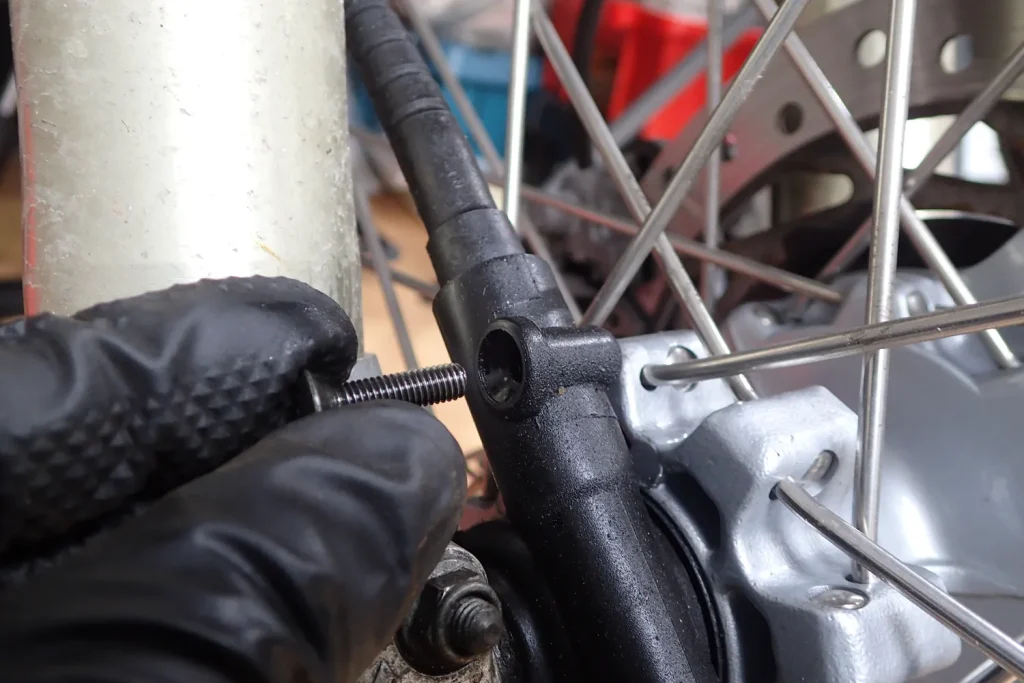
This screw is surprisingly long, so that it holds the cable end firmly. To avoid stripping the head, press a screwdriver of the right size firmly into it as you turn it.
2. Remove the clamp on the front fork (watch out for the nut falling out)
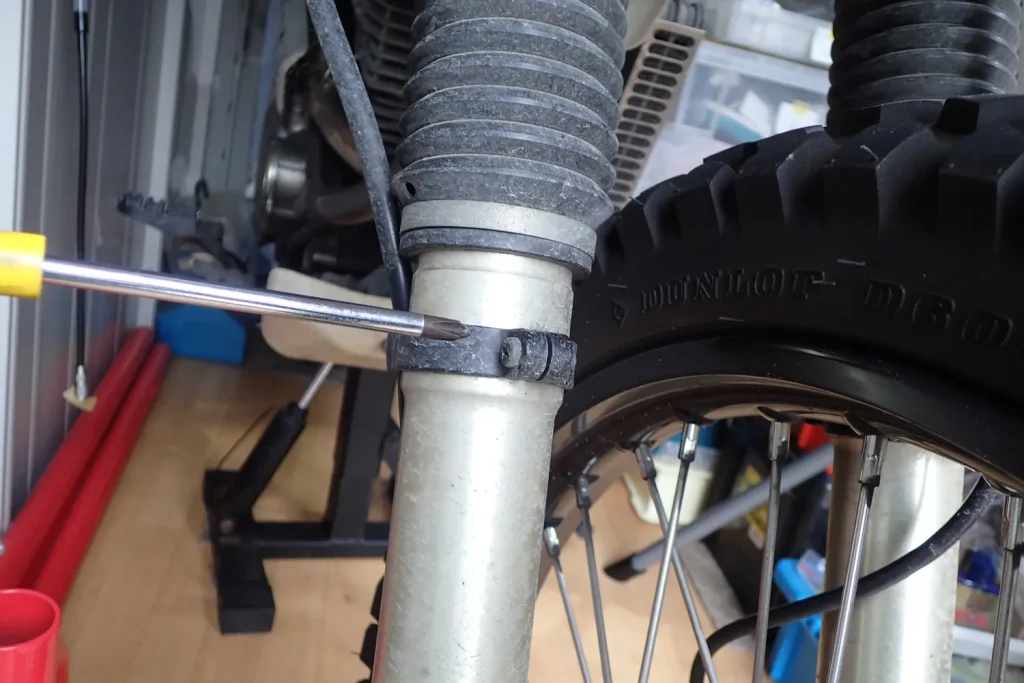
Next, remove the plastic guide clamp that holds the cable to the front fork. This is also held with a Phillips screw.
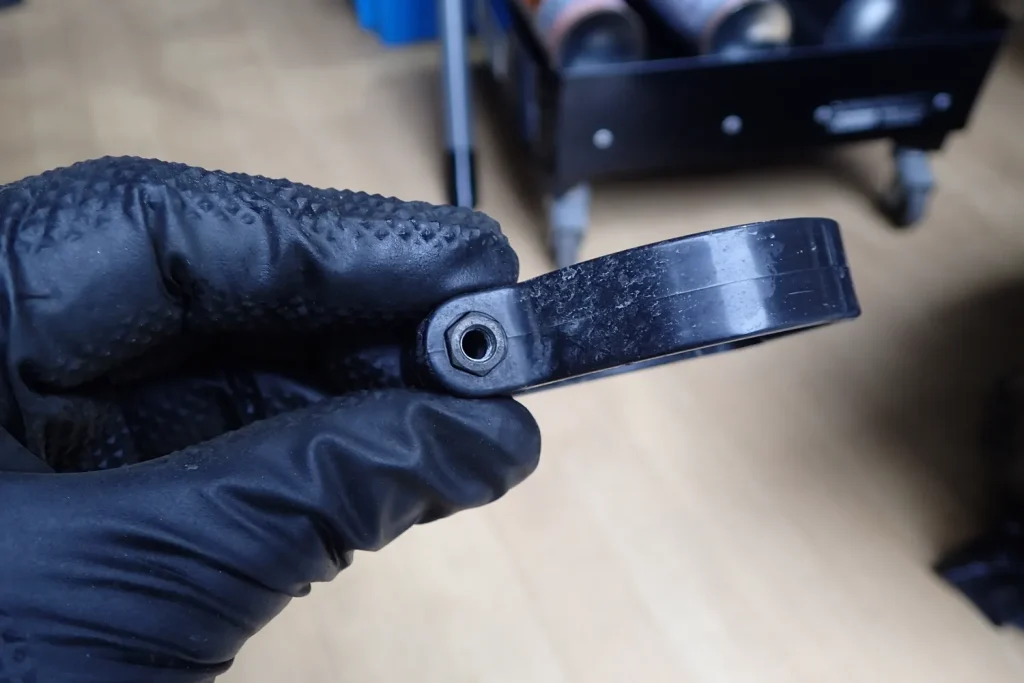
[Caution] The nut is only pushed into the back of this part. When you loosen the screw, the nut easily drops out and gets lost, so hold the back with your finger and loosen it carefully.
3. Pull the cable out at the wheel end
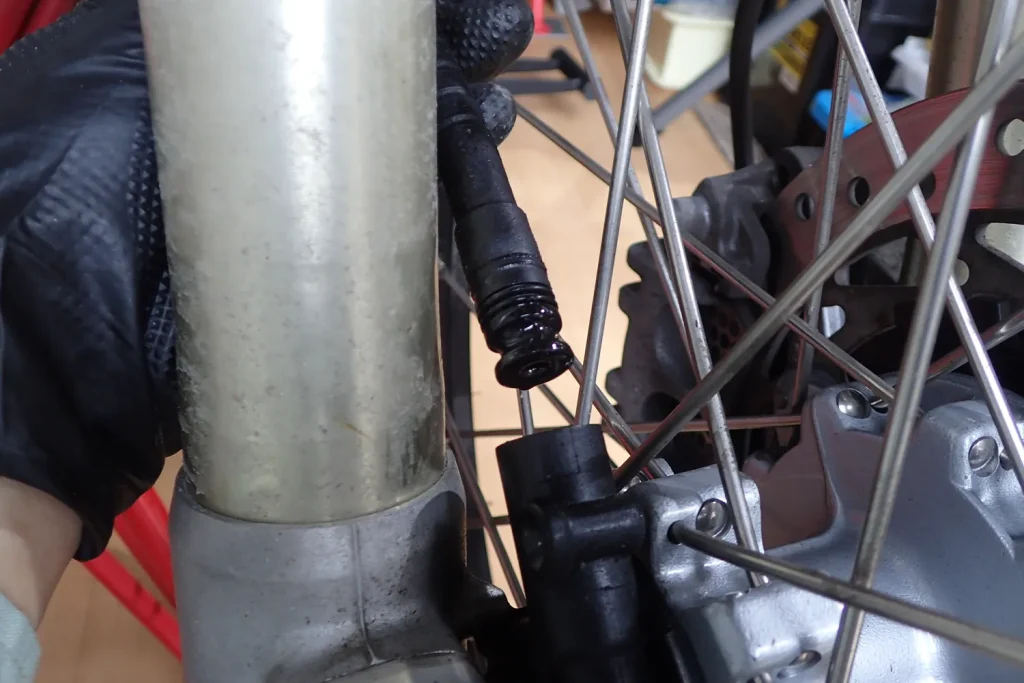
Once the guide is off and the cable can move freely, pull the cable out of the gearbox on the wheel.
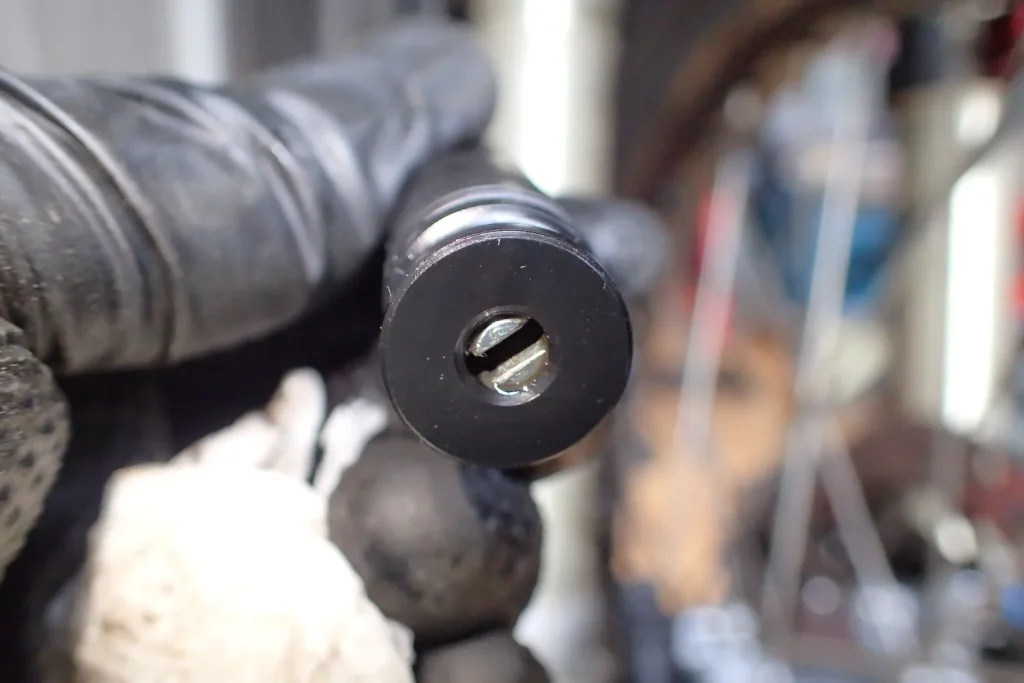
At the wheel end of the cable, there is a slot that engages with the drive tab in the speedometer gearbox.
4. Loosen the knurled nut at the meter end
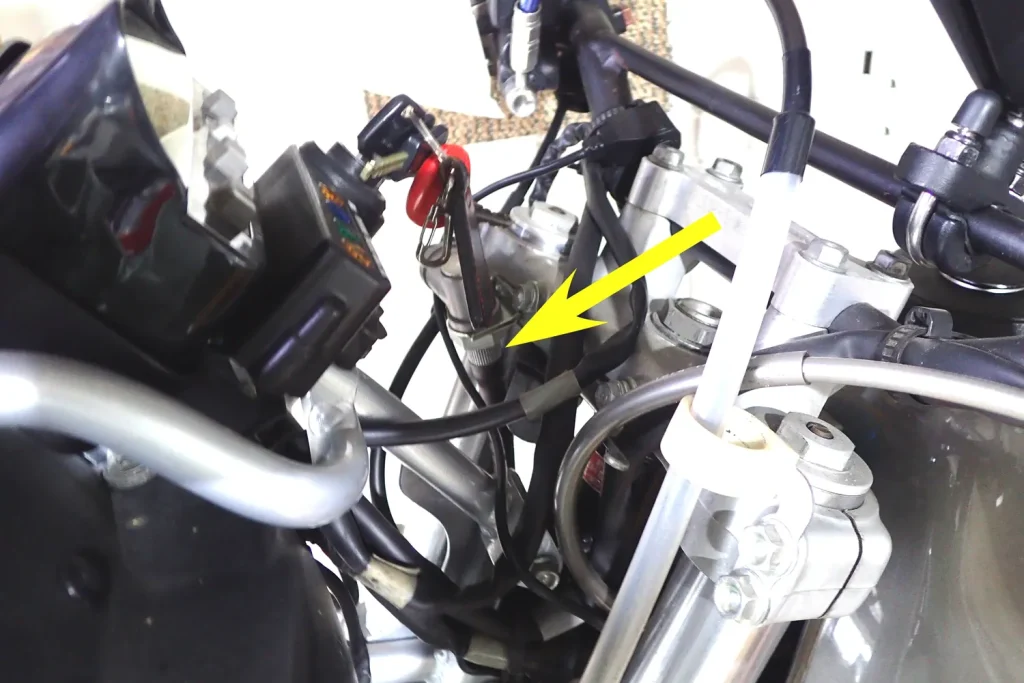
Next, disconnect the cable at the back of the meter. The point marked with the yellow arrow is where it is fixed.
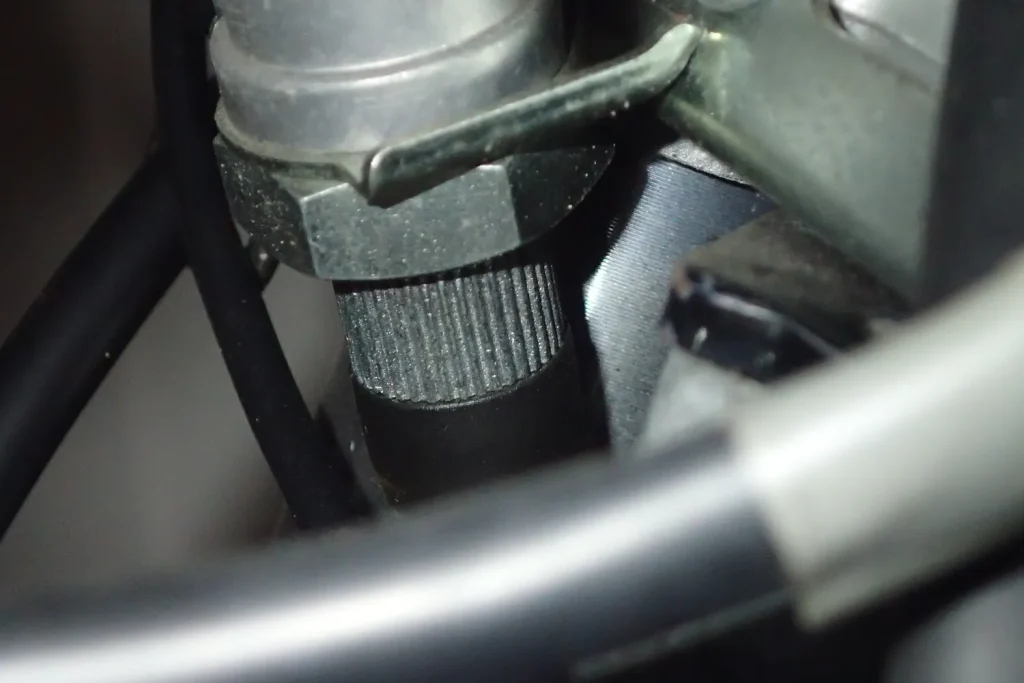
Turn the metal sleeve with the knurled (non-slip) grooves anticlockwise to undo it. Unless it is seized, you can turn it by hand.
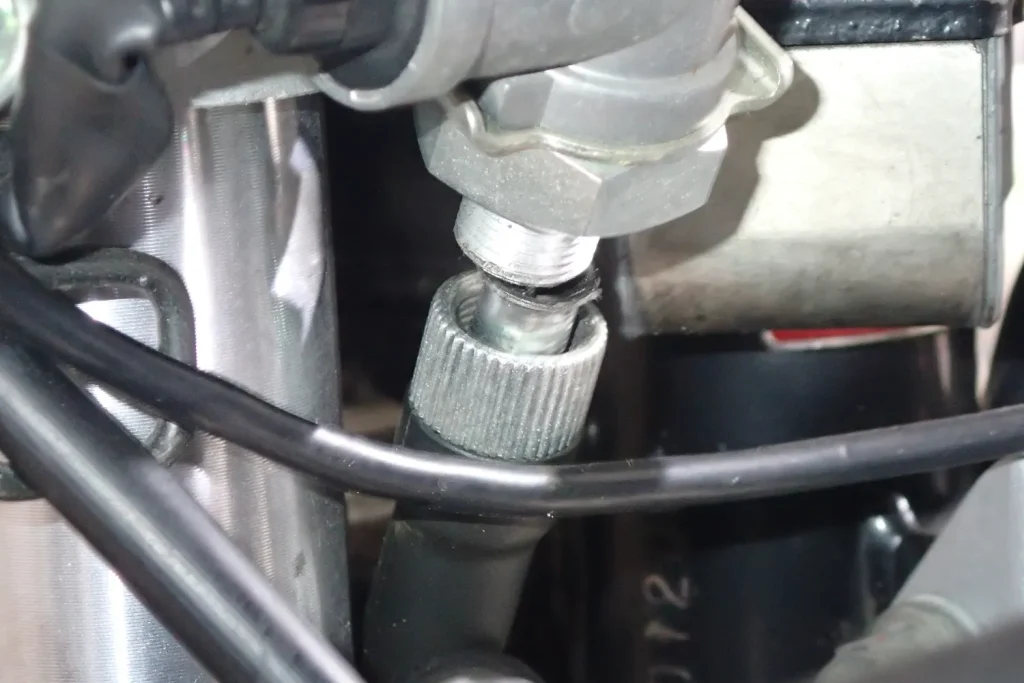
5. Remove the bolt (8 mm) on the bottom yoke
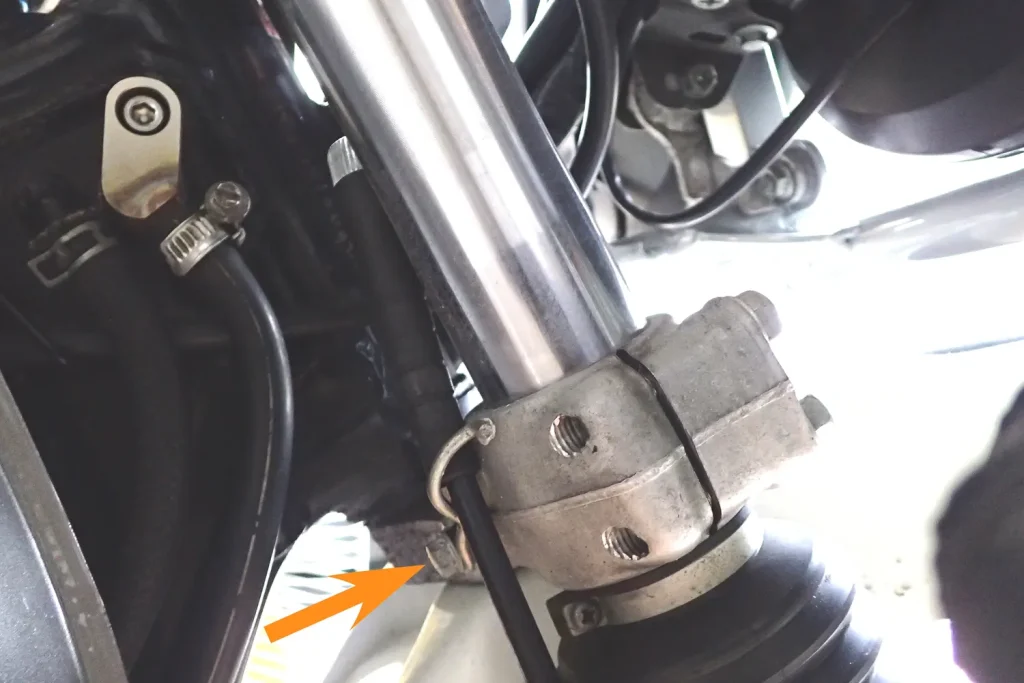
The speedometer cable is also clamped at the front fork bottom yoke (bottom bridge). It is held by a bolt with 8 mm across flats, so loosen it with a spanner and remove it.
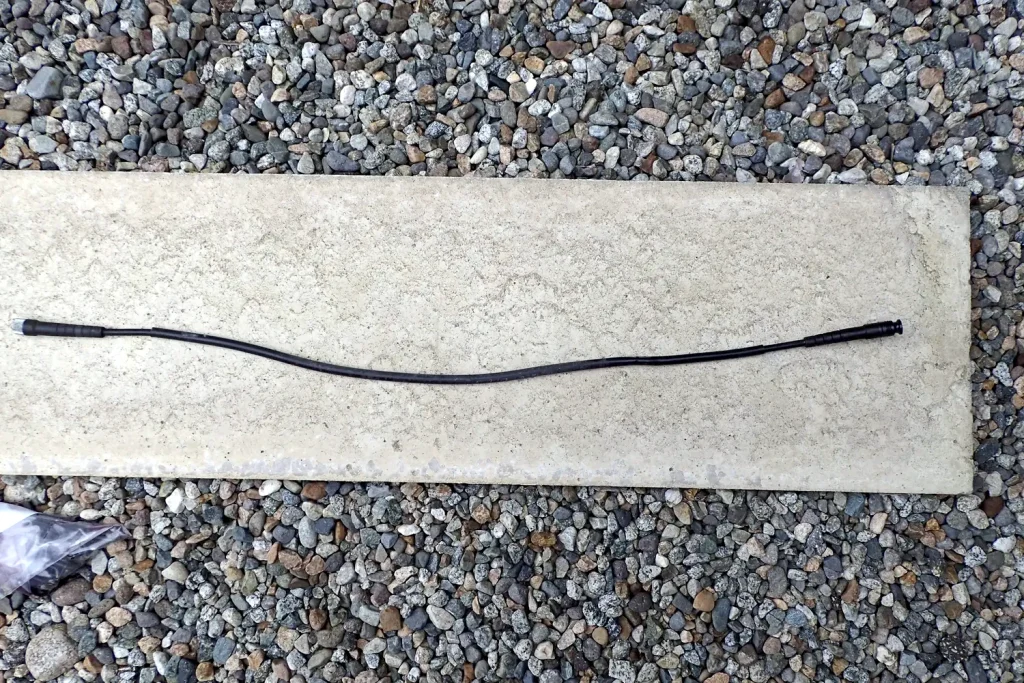
The speedometer cable is now completely off the bike.
Taking the cable apart, cleaning and lubricating it
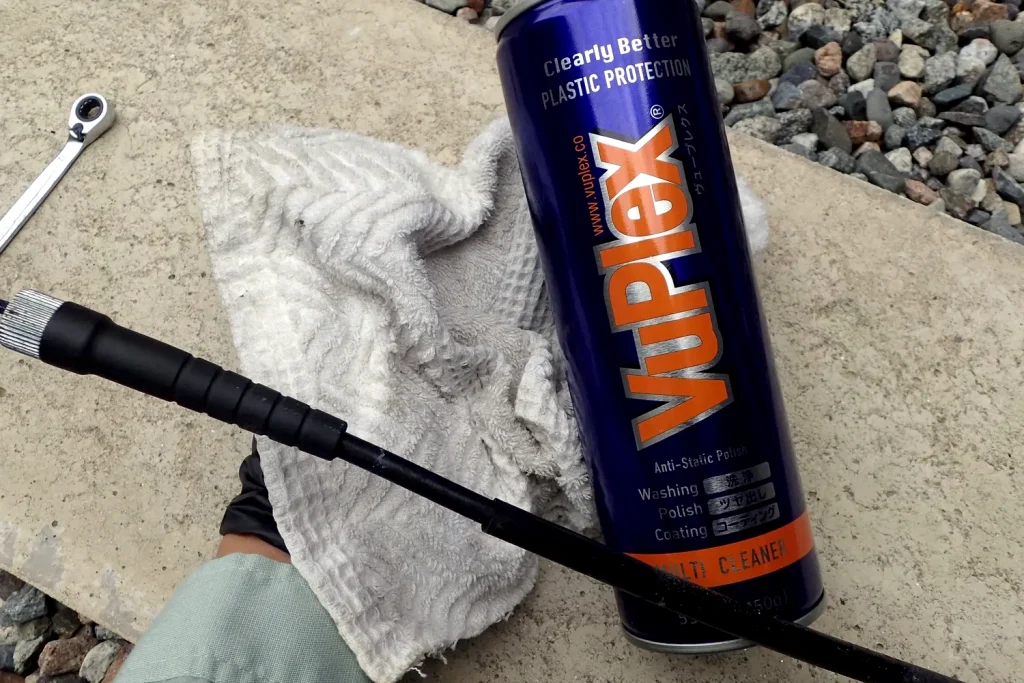
While it is off, wipe the dusty outside of the outer cable clean with a plastic cleaner (VuPlex).
How the inner wire is built, and pulling it out (it comes out at the bottom)
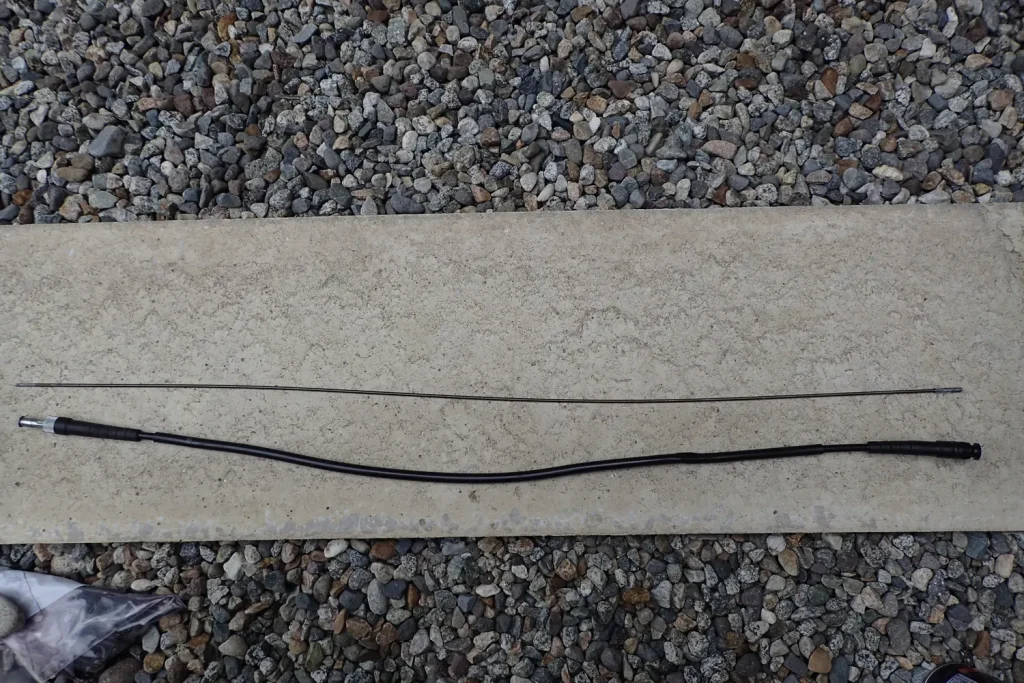
Pull the inner wire out of the outer cable. Because of the way the fitting at the end of the outer is made, the inner wire only comes out at the bottom (front wheel) end. It cannot be pulled out at the top (meter) end.
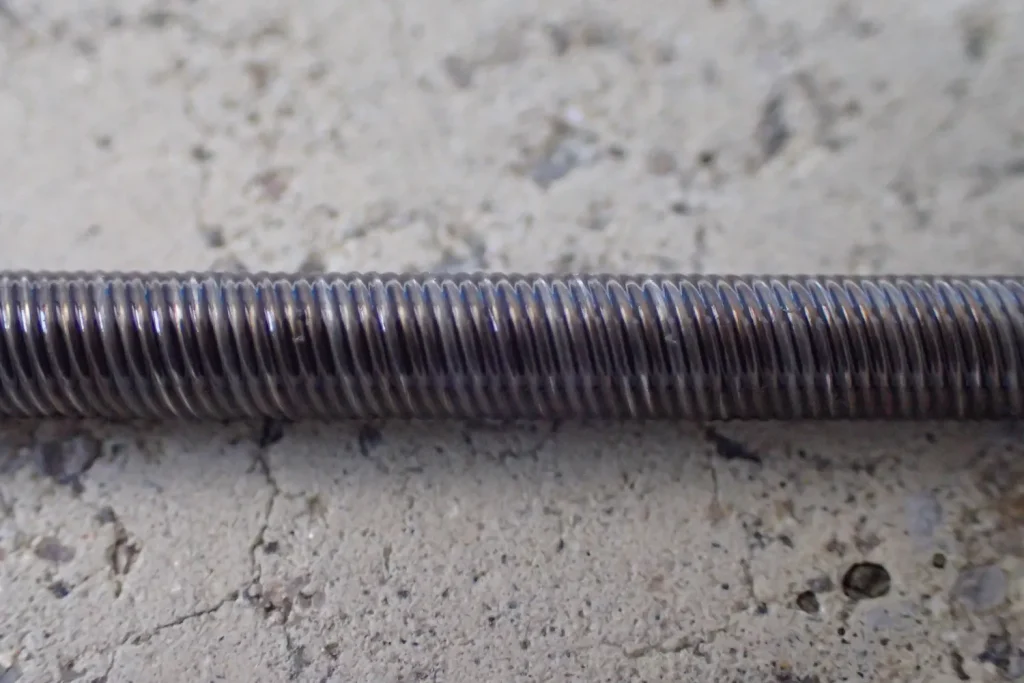
Close up, you can see that unlike an ordinary pull cable (stranded wire), the inner wire is built like a tightly wound spring. This lets it transmit turning force reliably even when it bends.
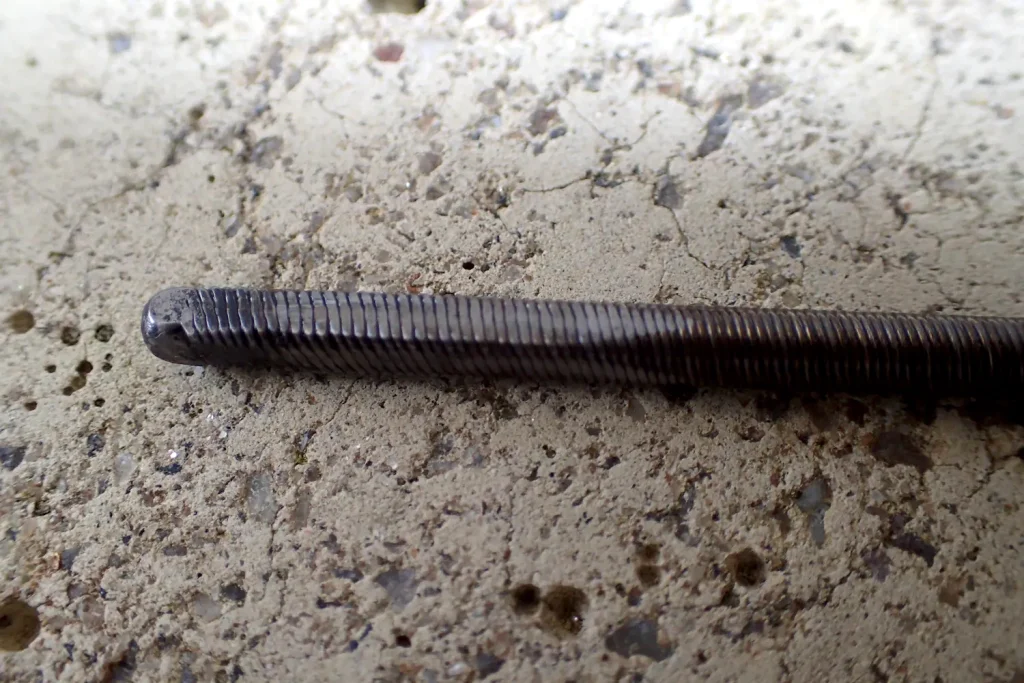
At the meter end, the wire is formed into a square section so that it fits into the drive socket inside the meter.
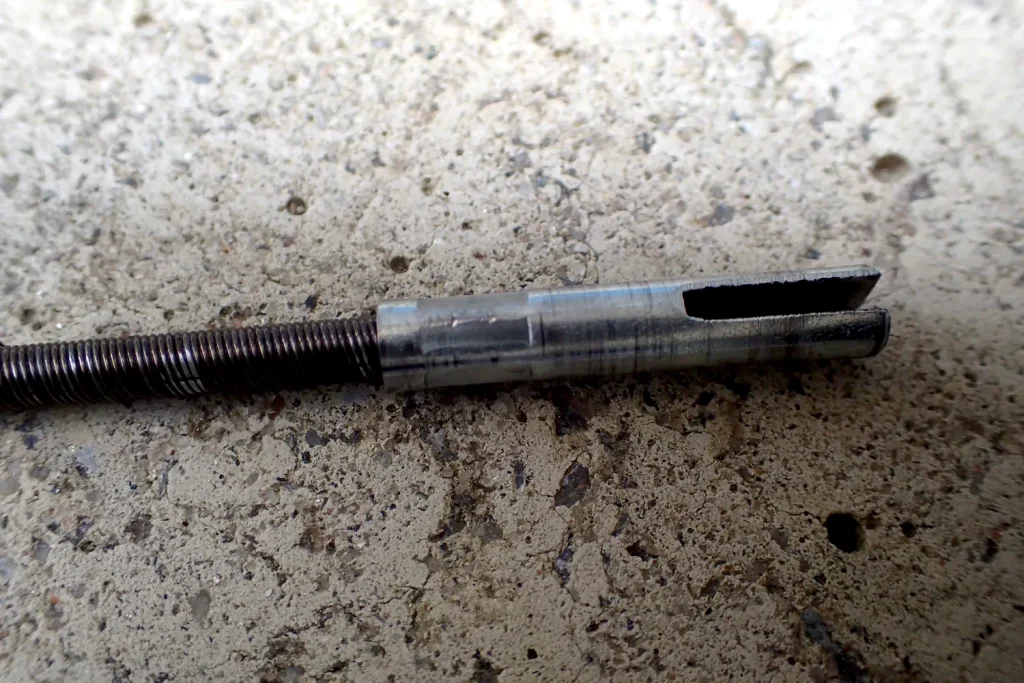
This is the front wheel end. A flat tang that engages with the speedometer gear is crimped onto it.
Cleaning and checking inside the outer cable
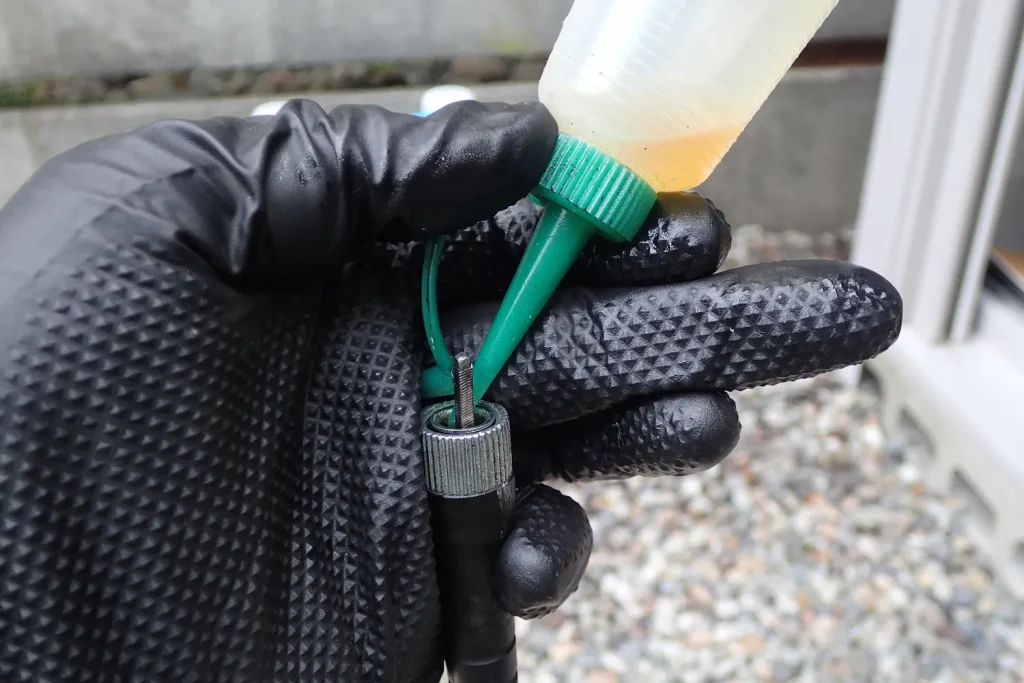
With the inner wire out, pour oil (A.S.H. 75W-90 gear oil) into the outer cable.
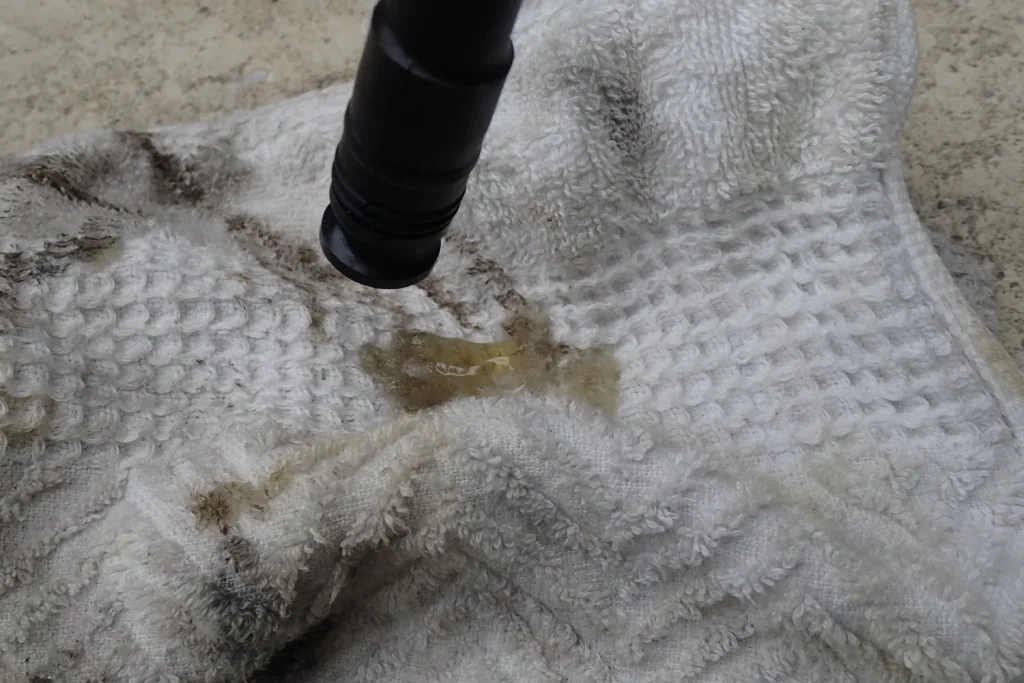
The oil that came out of the other end was clean, with no cloudiness or red rust. So I judged that there was very little rust or dirt inside.
Cleaning the inner wire and oiling it
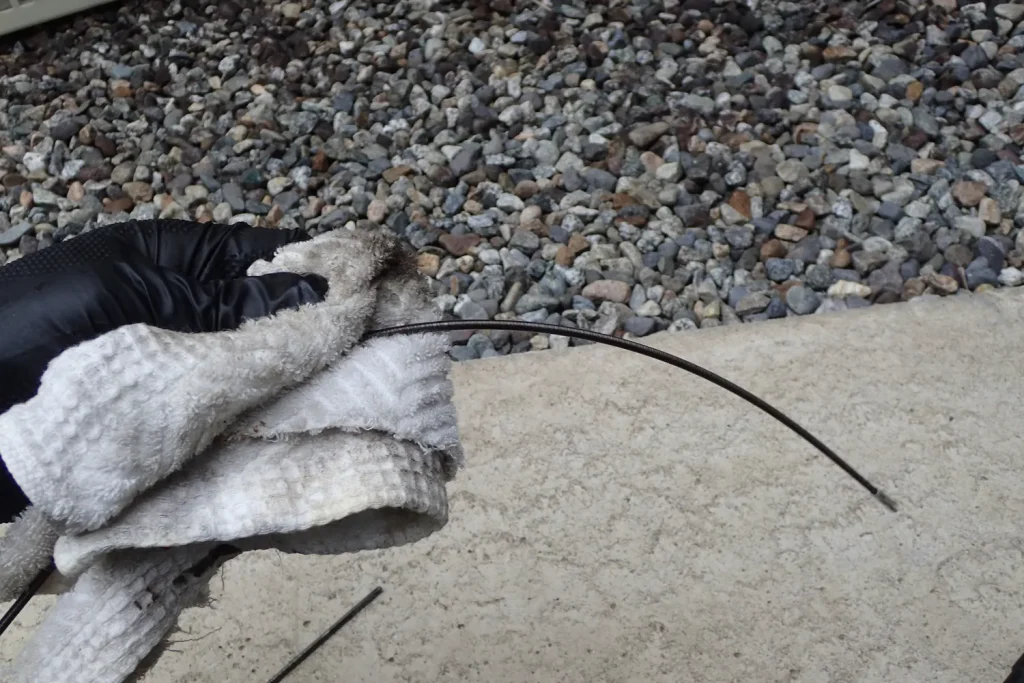
Wipe the old oil and dirt off the removed inner wire with a rag too.
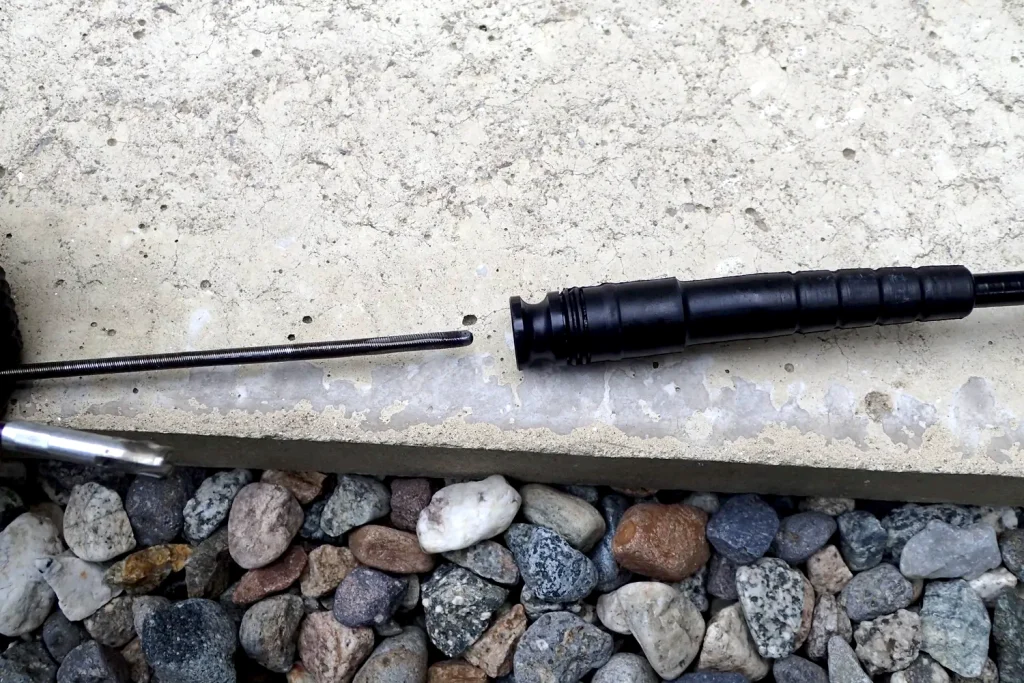
Insert the cleaned inner wire into the outer cable. As when you pulled it out, always insert it from the bottom (wheel) end.
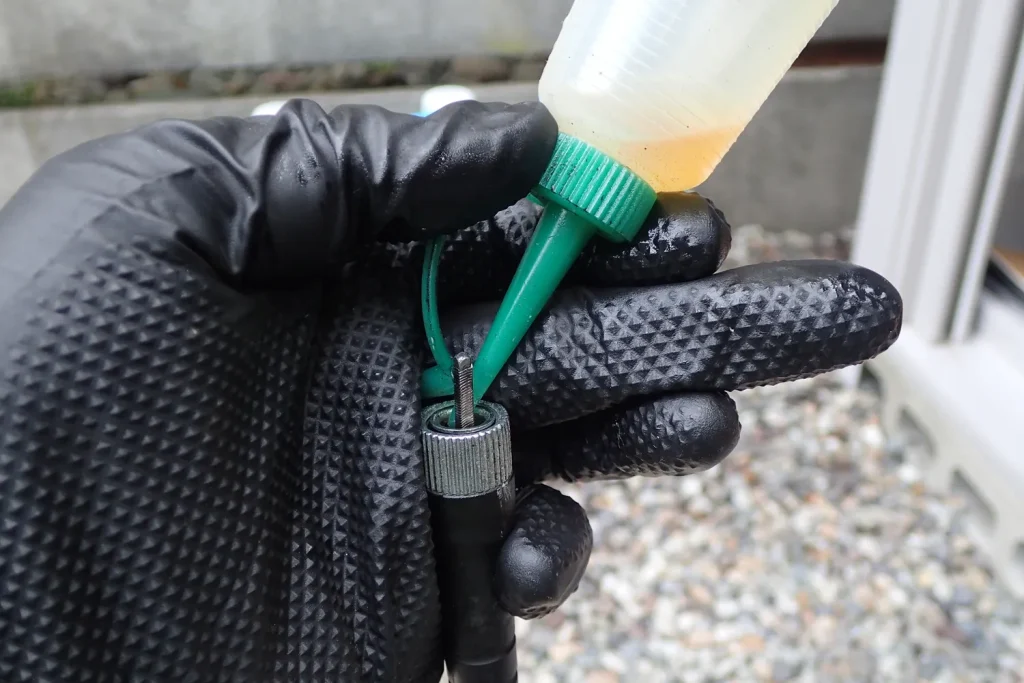
With the inner wire in place, pour gear oil in from the top again.
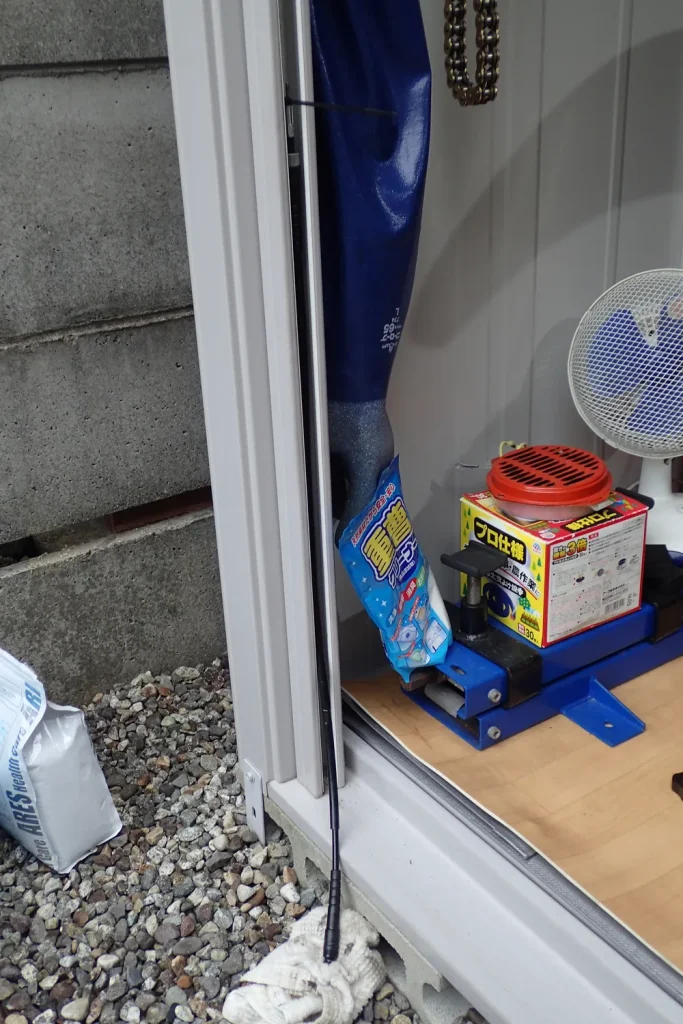
Stand the cable upright for a while, so the oil runs all the way down to the bottom under its own weight.
Cleaning the front fork while you wait
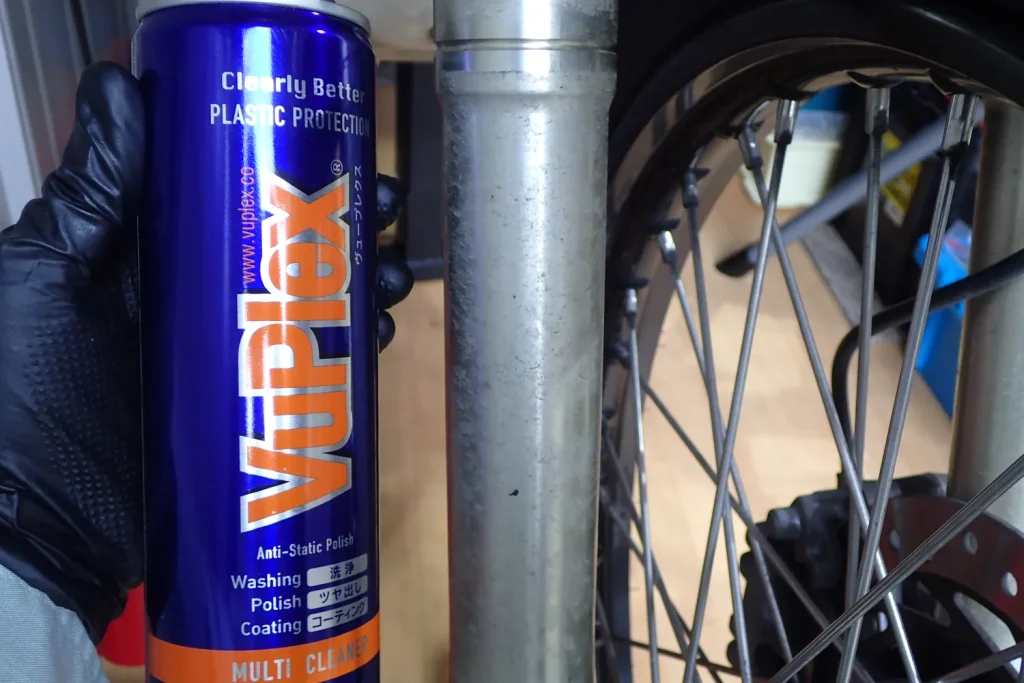
While you wait for the oil to reach the bottom, clean the area of the front fork that the cable usually hides. I used VuPlex here too. Since Plexus, which I used to use, became hard to get in Japan, I have switched to VuPlex and find it very handy.
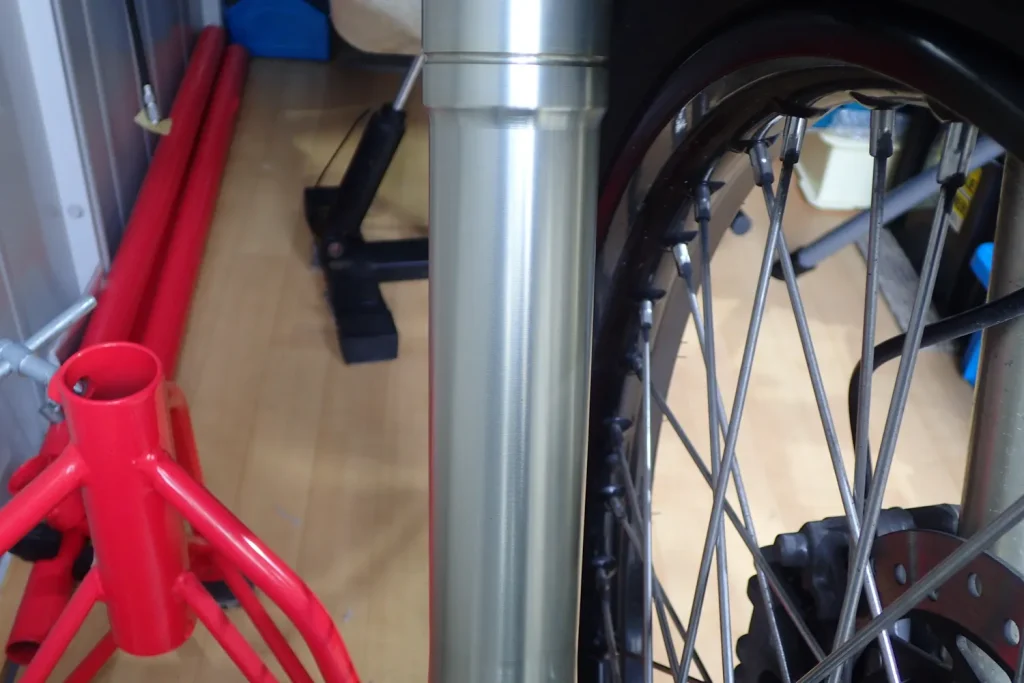
Leave it for a few tens of seconds after spraying, then wipe it off; the dirt lifts and it comes up clean.
Refitting the speedometer cable
Once the oiling is done, refit it to the bike. It is the reverse of removal, but there are tips on the order and on lining things up.
1. Fit the front wheel end first
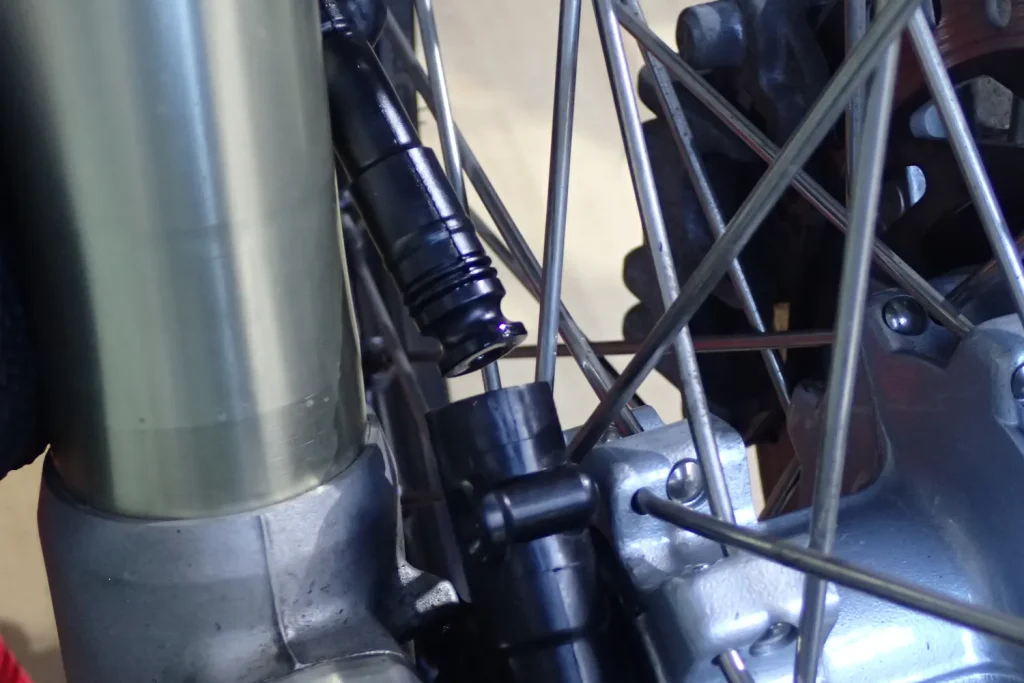
When refitting to the bike, always start at the front wheel end. If you fit the meter end first, the inner wire can slide out of the bottom when you move the bike or lift the cable.
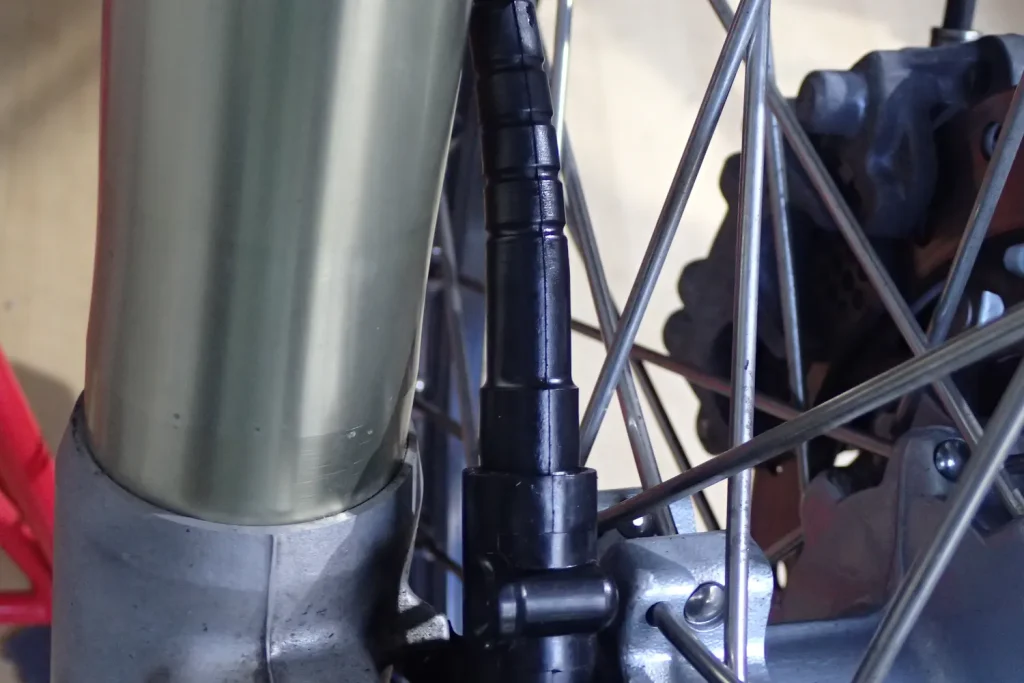
The speedometer cable goes a long way into the gearbox. If it stops part-way and won't go in fully, the slot in the end of the inner wire is not lined up with the tab in the gearbox. Turn the inner wire a little with your fingers as you push, and the slot will click into place and go all the way in.
2. Fit the bottom yoke clamp loosely
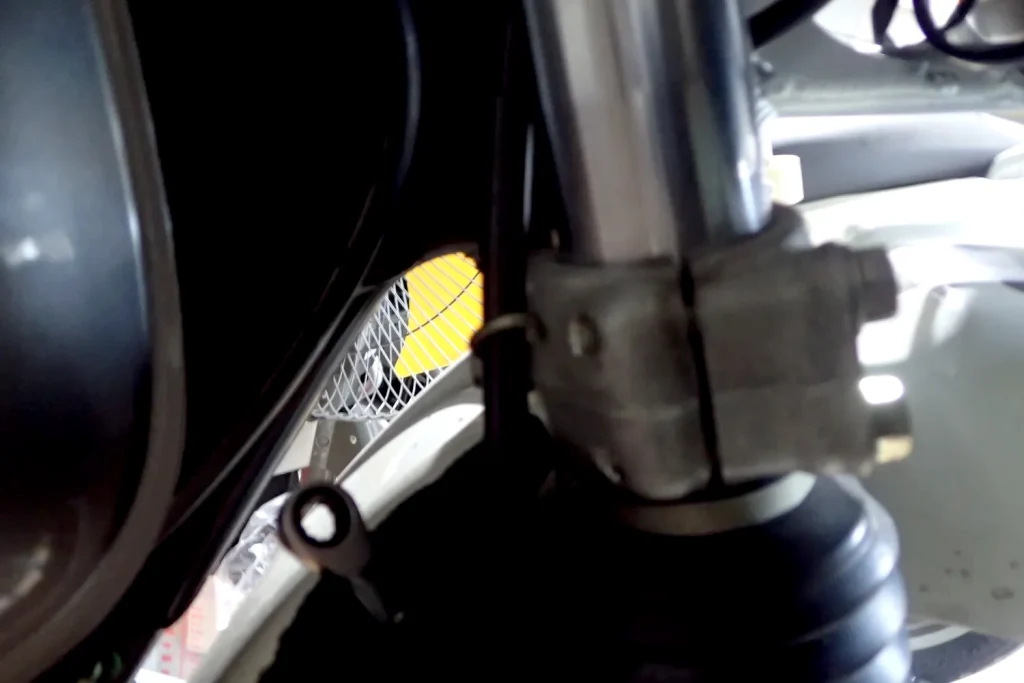
Once the wheel end is in, pass the cable through the clamp on the bottom yoke. Leave it loose at this stage, so you can adjust the position and avoid any sharp bends in the cable routing.
3. Tighten the knurled nut at the meter end
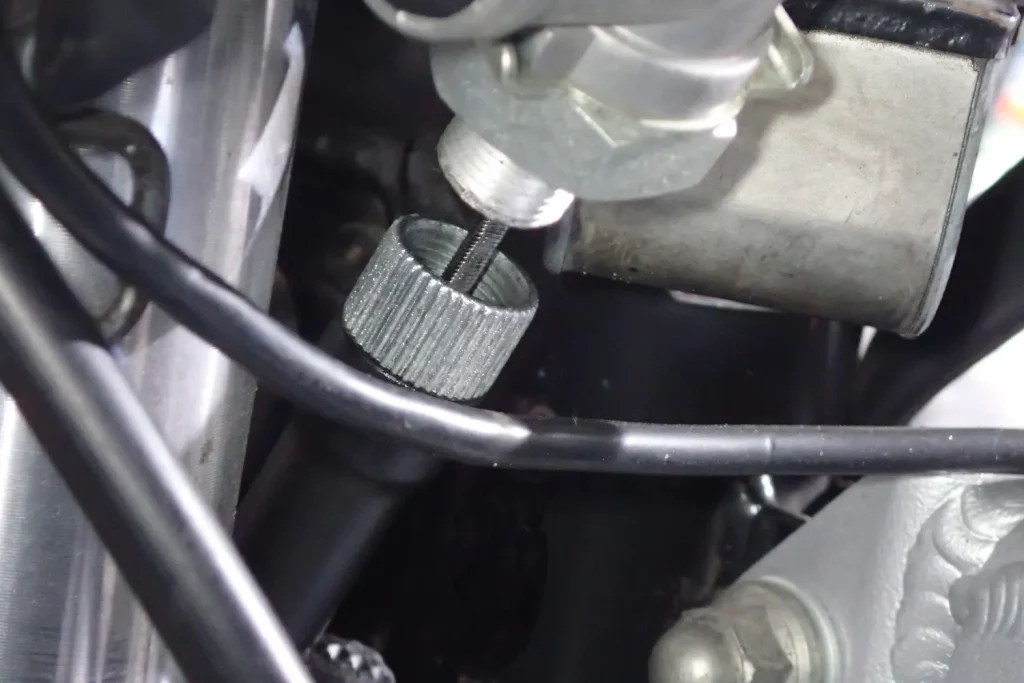
Fit the meter end. Feel with your fingertip that the square tip of the inner wire is properly seated in the square socket in the meter as you push it in.
Screw the knurled nut on straight by hand so it doesn't cross-thread. To avoid damaging the thread on the meter case, don't over-tighten it with a tool; tighten it fully by hand, then check that it is not loose.
4. Tighten the fork clamp and the screw at the wheel end
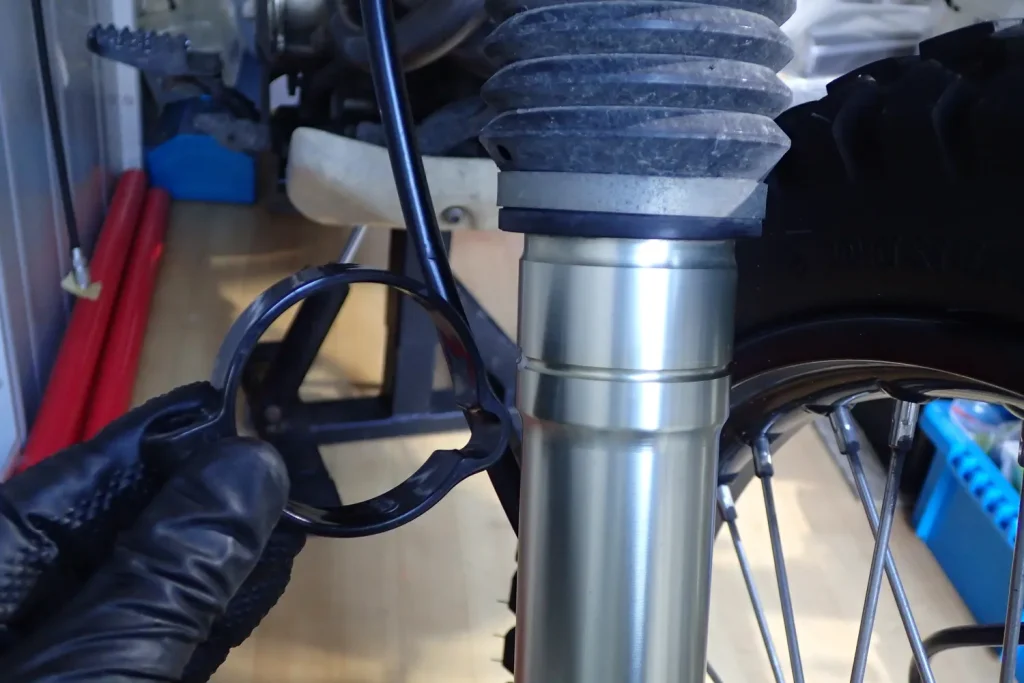
With both ends connected, fix the points in between securely.
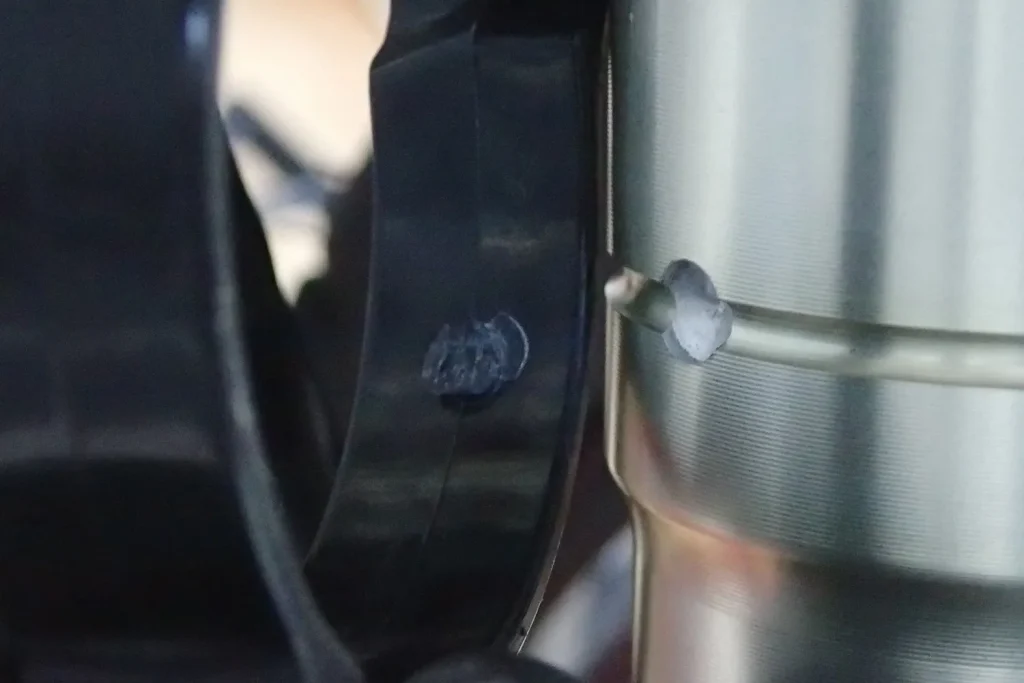
The cable guide on the front fork has locating bumps and recesses on both the fork and the clamp. Make sure they fit together exactly.
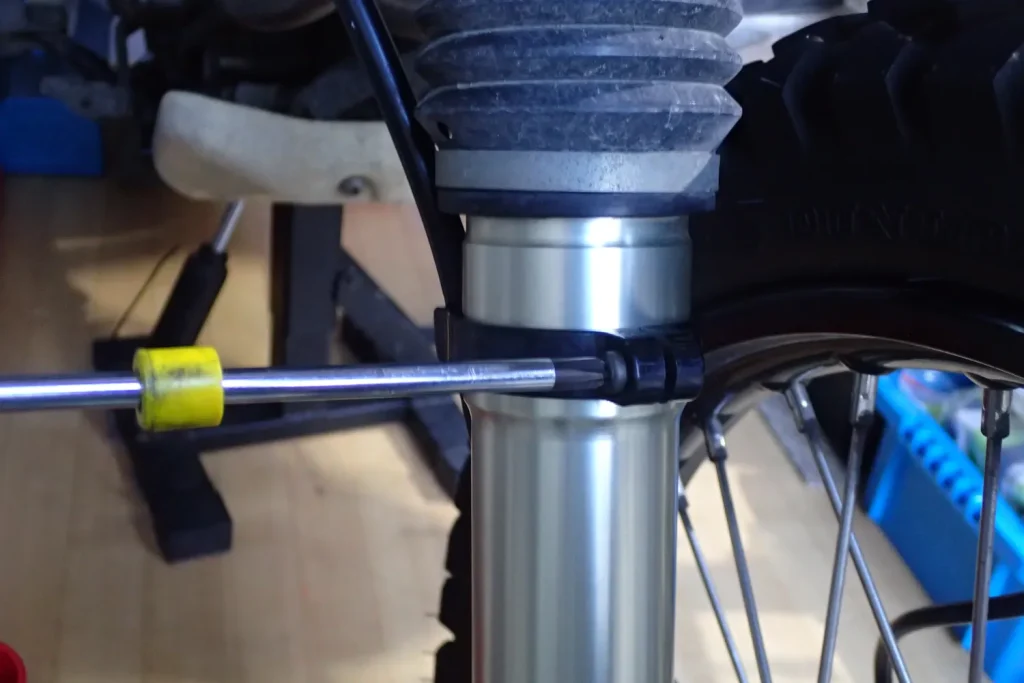
Tighten the Phillips screw. As when removing it, press lightly on the hexagon nut at the back with your finger so it doesn't lift, spin or drop out as you tighten.
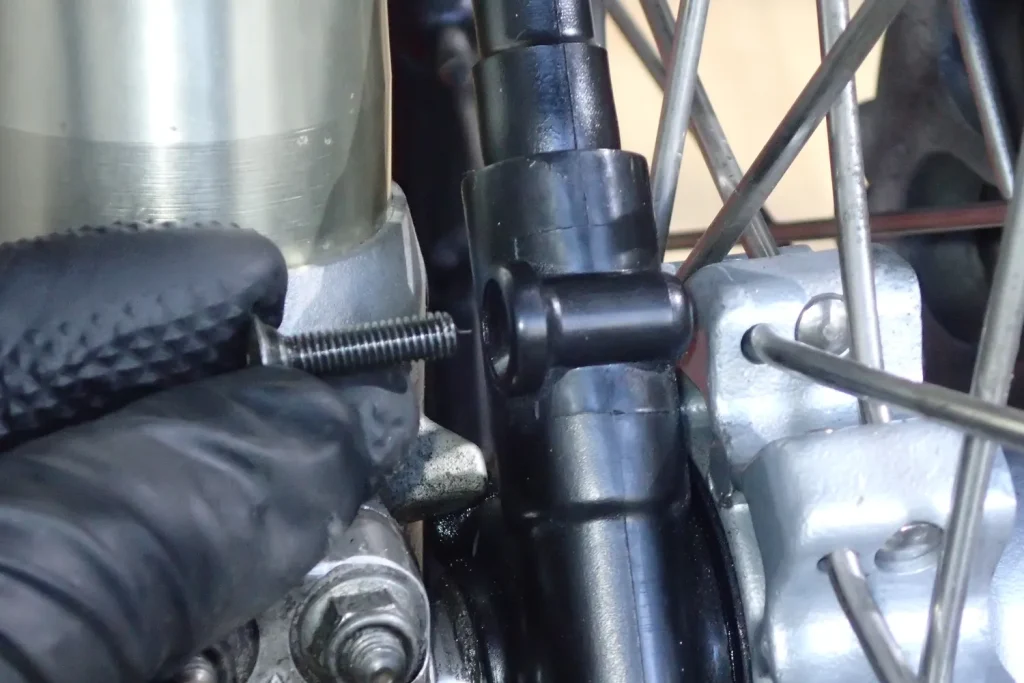
Fully tighten the screw at the wheel end. The screw won't go in unless the cable fitting is pushed in far enough to line up with its notch. If the screw catches part-way, don't force it; check again how far the cable is pushed in.
Finally, tighten the 8 mm bolt on the bottom yoke that you left loose, then turn the handlebars fully left and right to check that the cable is not stretched or pinched. The job is done.
Summary: regular lubrication helps a discontinued speedometer cable last
The speedometer cable is a part you don't usually notice, but inside it is always spinning fast. If the needle starts to flicker while riding, or you hear squeaking or rattling noises around the meter, it is a sign of a dry or worn cable.
On older bikes like the XR BAJA, new genuine cables are getting hard to find. Cleaning and lubricating the cable regularly with gear oil of a suitable viscosity prevents the wire from seizing or breaking, and keeps it in good condition for a long time. It is a quick job that needs no special tools, so do it along with your regular checks.