This post contains affiliate advertising (promotions).
Have the stickers on your bike's fairings faded from sun, rain and wind until the lettering has disappeared?
On my BMW G650GS, which spent a long time stored outdoors, the model-name sticker on the side cowl had deteriorated until every character except the "G" had vanished, and it looked rather shabby.
To cut to the chase: even without an expensive cutting plotter,you can neatly recreate a sticker for around 1,500 yen using a home inkjet printer and sticker paper made for cars and bicycles.
With more than 20 years of riding and 18 years of doing my own maintenance, I'll explain every step of how I traced and made a G650GS sticker from a photo, how it didn't quite fit the recess in the cowl, and the legal points to keep in mind when you do this for personal use.
- A faded original motorcycle sticker can be recreated at home with a home printer and outdoor sticker paper
- The paper I used is the ELECOM "EDT-STCAWN", with a water-resistant, weather-resistant UV-cut protective film
- By tracing a photo of the bike on a PC, you can recreate even a discontinued sticker at its original size
- If the sticker sits in a recess in the cowl, the trick is to cut it slightly smaller (about 1 mm as a guide; my own estimate)
- Repairing your own bike (personal use) should be fine. However, distributing the data, or selling or giving the stickers away, may break the law
| Item | Conditions / guide |
|---|---|
| Model | BMW G650GS (the method also works for cowl stickers on other models) |
| Difficulty | ★☆☆☆☆ (beginner level: PC work and cutting) |
| Time required | About 1 to 1.5 hours (including making the data and drying time) |
| Approximate cost | About 1,500 yen (sticker paper only) |
| Tools needed | PC and drawing software, inkjet printer, digital camera (or smartphone), scissors, craft knife, degreaser |
This post is a record of work I actually did on my own bike. I am an ordinary rider without any mechanic's qualification, and I cannot guarantee that the content is accurate or safe.
If you do the same work, please do so at your own judgement and risk. Procedures and specifications may differ by model, year and specification, so always check the manufacturer's service manual before starting.
I cannot accept responsibility for any damage caused by following this post. If you have any doubts about the work, I recommend asking a dealer or specialist.
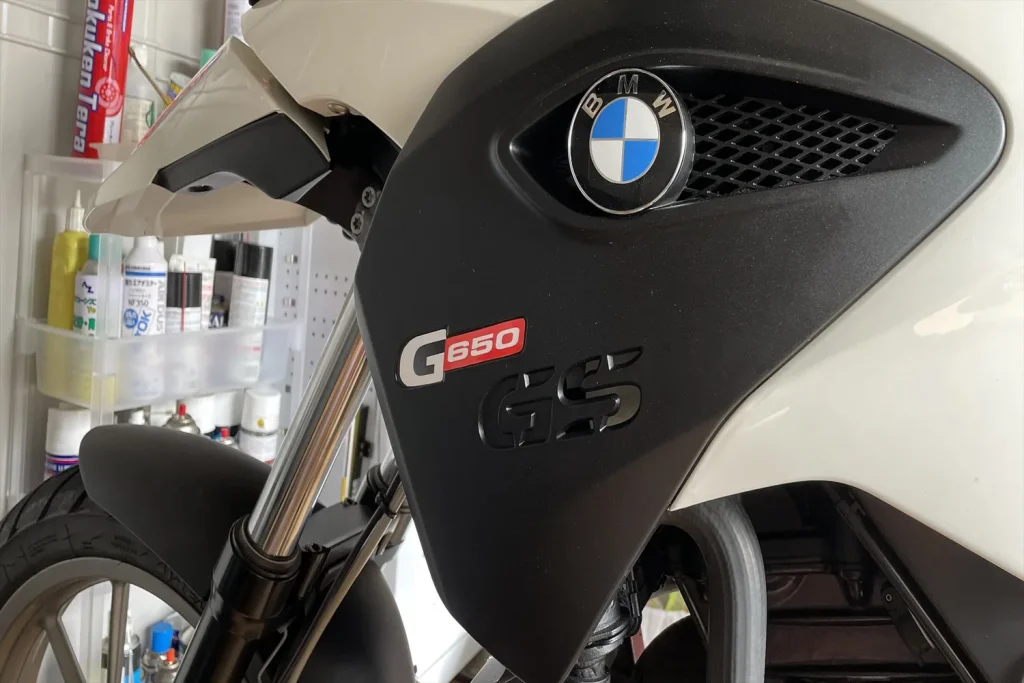
Can faded motorcycle stickers be recreated with a home printer?
On a bike stored outdoors, stickers inevitably fade from UV light and rain.
On my BMW G650GS, the original design had "650" in white letters on a red background to the right of the "G". Over the years the red had completely faded, and only the "G" was still legible.
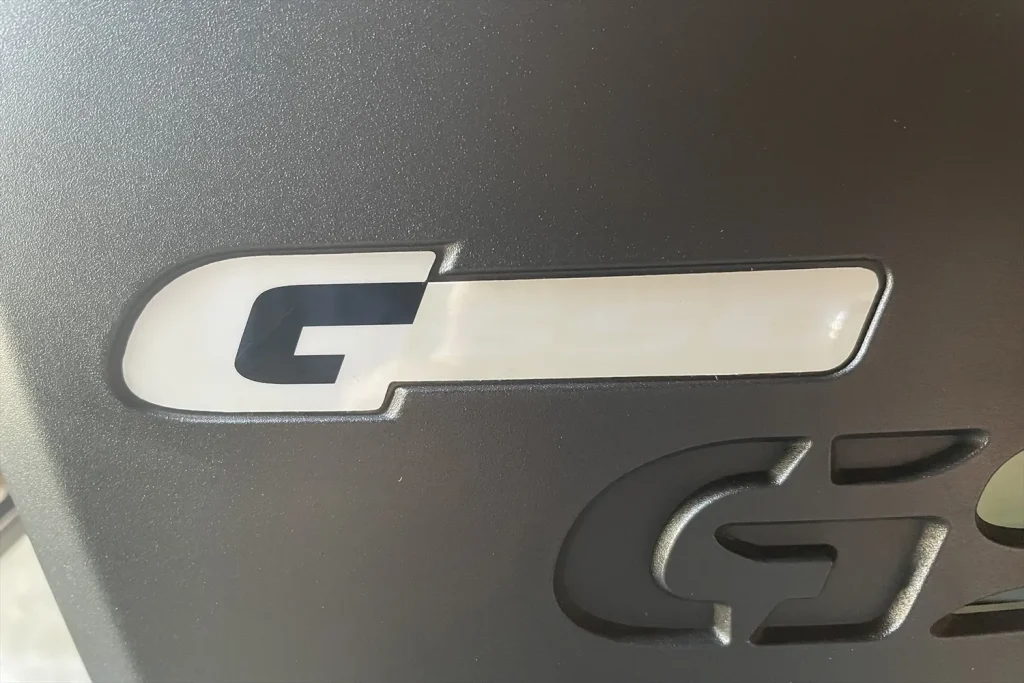
Ordering a new original sticker costs several thousand yen in Japan, and for older models it is not unusual for the part to be discontinued already.
So this time I decided to recreate the original design entirely DIY, using my own PC and drawing software, a home printer and commercially available outdoor sticker paper.
Legal points to know before making your own (copyright and trademarks)
When you make your own stickers with a manufacturer's logo or model name, you need to understand the legal rules (in my case, Japan's Trademark Act and Copyright Act; rules differ by country).
In short, under Japanese lawmaking a sticker at home and sticking it on your own bike to repair it or keep it looking good should be fine as personal use (this is my own understanding; I am not a legal expert, so please check with a professional if you are concerned).
| Law | Relevant articles / rules | How it applies to home-made stickers |
|---|---|---|
| Trademark Act (Japan) | Article 2(1) and (3), Article 25 | Trademark rights apply to use "in the course of trade" (as a business). Making and sticking a sticker to repair your own bike should not fall under this. |
| Copyright Act (Japan) | Article 30(1) (reproduction for private use) | The law allows individuals to make copies themselves for use within a limited private sphere such as the home. |
However, the following maybreak the law (and could lead to damages claims or criminal penalties), so don't do them.
- Distributing or publishing your traced data (images, PDFs, etc.) on a blog or social media(infringement of the right of public transmission)
- Selling or giving away spare stickers on flea-market apps or auction sites(trademark infringement / unfair competition)
- Having a printer or vinyl-cutting business make them for you(risk of falling outside the private-use exception)
Stick to the line of "make it yourself and put it on your own bike".
Tools and materials for making the sticker
These are the tools and materials I used. No special equipment is needed; everything is ordinary stationery and home equipment.
- Home-made sticker paper: ELECOM "EDT-STCAWN" (for cars and bicycles / A4 / white)
- Digital camera (or smartphone): for taking photos to trace at full size
- PC and drawing software: free software (such as GIMP or MediBang Paint) is enough
- Home inkjet printer: any ordinary colour printer
- Cutting tools: scissors, a design knife (or craft knife)
- Surface prep: parts cleaner (degreaser), rags
A bike's bodywork is exposed to direct sunlight, wind and rain, so ordinary paper sticker sheets soon deteriorate. Always choose paper that comes with an outdoor-rated, water-resistant UV-cut protective film, such as ones made for cars and bicycles.
If you want to make outdoor stickers easily, I found the ELECOM sheets I used easy to work with. If you want stickers that can stay on for many years, another option is outdoor sign vinyl cut on a cutting machine.
Five steps to make and replace a G650GS sticker
Here is the actual procedure in five steps.
Step 1: Photograph the sticker straight on so its shape is clear
First, photograph the remaining sticker on the bike with a digital camera or smartphone. Shooting at an angle distorts the shape so you can't reproduce it at full size, sohold the camera square to the sticker and shoot it straight on. If you put a ruler next to it in the shot, it is easier to scale the image to the exact size on the PC later.
Step 2: Trace over the photo in drawing software
Import the photo into your PC and open it in drawing (graphics) software. Create a new layer above the photo layer and carefully trace the outline of the sticker and the "G" and "650" lettering with the pen tool. This time I recreated the original colours digitally: a red background and white lettering.
Step 3: Print on the sticker paper, apply the UV protective film and cut out
Print the finished design on the ELECOM sticker paper (white film) with an inkjet printer. Once the ink is completely dry, press the supplied clear UV-cut protective film firmly on top, taking care not to trap air bubbles. Then cut carefully along the outline with scissors or a design knife.
Step 4: Peel off the old sticker and degrease the cowl
Carefully peel the old sticker off the cowl from one edge. Stickers that have been on for a long time tend to leave adhesive behind. If any remains, wipe it off gently with a rag dampened with parts cleaner or sticker remover, taking care not to damage the paint or plastic, and degrease the surface thoroughly.
Step 5: Stick the new sticker into the recess in the cowl
Position the new sticker on the cowl and apply it. Work slowly from one edge, pressing out the air with the pad of your finger as you go.
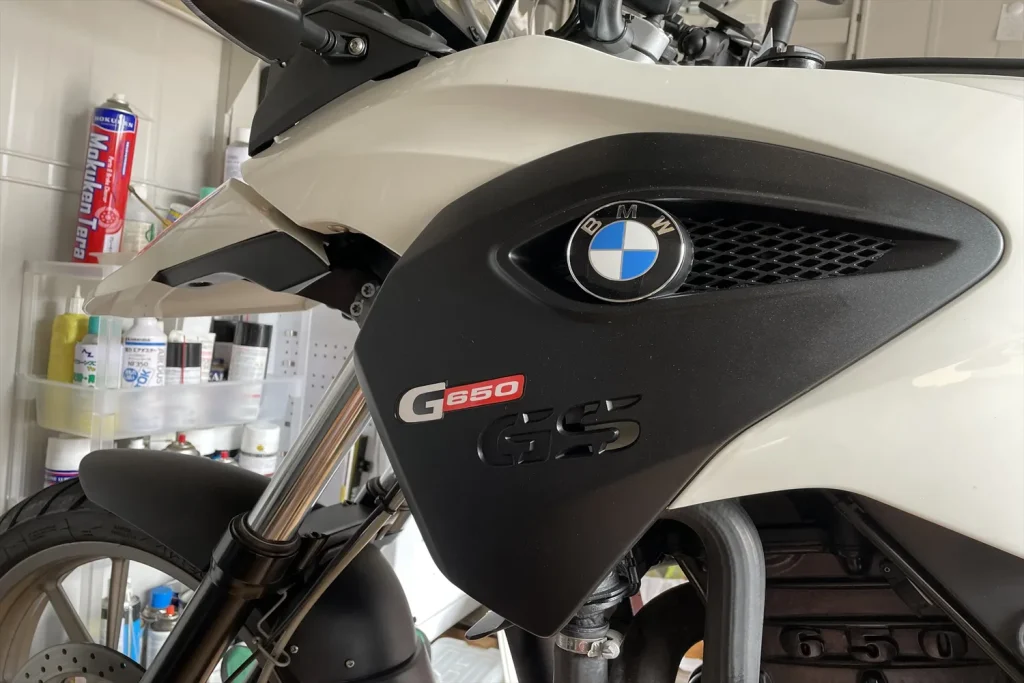
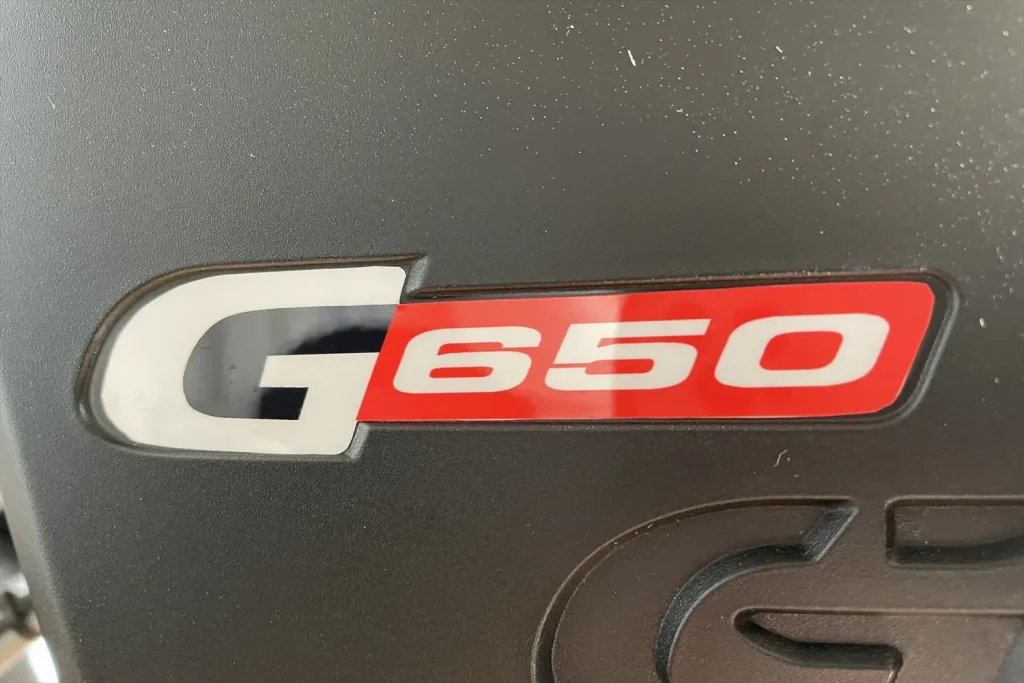
Where I stumbled and tips for a neat finish
From actually doing the job, I have two lessons and tips to avoid mistakes.
1. Made to the exact size of the recess, it won't quite fit
If you look closely at the photo after fitting,the outer edge of the sticker didn't quite fit inside the recess in the cowl and rode up slightly onto the rim.
If you make it exactly to the original size, a slight wobble when cutting or a small misalignment when sticking it on will leave the edges lifting. When making a sticker to sit in a recess in the cowl,as a guide, make the data and cut it about 0.5 to 1 mm smaller than the original all the way round, and I think it will sit inside the recess more easily (I haven't remade mine, so this figure is untested).
2. Fill an A4 sheet and print plenty of spares
The sticker paper is A4. Printing just one small model-name sticker and throwing the rest of the sheet away is a waste, sofill the whole A4 sheet with copies of the same sticker and print them all at once; I recommend it.
I printed plenty of spares too. Stickers printed on a home printer will eventually fade in the sun again after a few years of riding, but with spares in stock you can replace them whenever you like. With so many spares, you can keep the bike looking tidy at low cost.
FAQ about making your own motorcycle stickers
Q1. Won't the ink run or peel off in the rain or when washing the bike?
Sticker paper for cars and bicycles comes with a clear UV-cut protective film that covers the surface, so the printed side is less likely to come into direct contact with water and the ink is less likely to run in the rain or in a normal wash. However, avoid aiming a pressure-washer nozzle at the edge of the sticker at close range, as this can make it peel.
Q2. Any tips for cutting out smooth shapes?
Use a design knife with a sharp 30-degree blade rather than an ordinary large craft knife, and work on a cutting mat. Use a ruler for straight lines, and for curves, slowly turn the sticker sheet rather than moving the blade; this gives smooth curves.
Q3. Can I give spare stickers to riding friends or sell them online?
Better not. Giving away or selling stickers bearing a manufacturer's trademark or model logo, for example on flea-market apps, may breach trademark and unfair competition laws (in Japan, the Trademark Act and the Unfair Competition Prevention Act). Keep it to repairing the bike you ride yourself.
Summary: faded original stickers can be refreshed cheaply with DIY
Faded original stickers make the whole bike look old.
Although the sticker didn't quite fit in the recess, from a distance you can't tell it is home-made, and my bike got its crisp look back.
Even stickers that are discontinued and no longer available new can be restored easily for little more than a thousand yen with everyday tools and the right paper. If the tired look of your bodywork bothers you, do try making your own stickers, within the bounds of personal use.
The sticker making described in this post was done for private use, to keep my own bike looking good. I do not encourage commercial use, sale or transfer.
Information on prices, specifications and availability in this post is as of September 2026. Please check the manufacturers' and retailers' official websites for the latest information.