Hello everyone, Boo here.
This time it's about replacing the bearings in the rear suspension linkage (rear link) on my BMW G650GS.
Rear link maintenance is something you keep meaning to do, but it's a big job, so it's easy to put off.
And if you're going to strip the rear link and re-grease it, don't you feel like fitting new bearings while you're at it?
Here I'll show the tools and the steps I used to replace the rear link bearings.
I'm an amateur, so if you do this job yourself, you do it at your own risk.
You can replace rear link bearings cheaply with general-purpose tools, but special tools make the job much easier.
What you need
- Internal bearing puller: for removing the bearings
- The tools needed to use the bearing puller
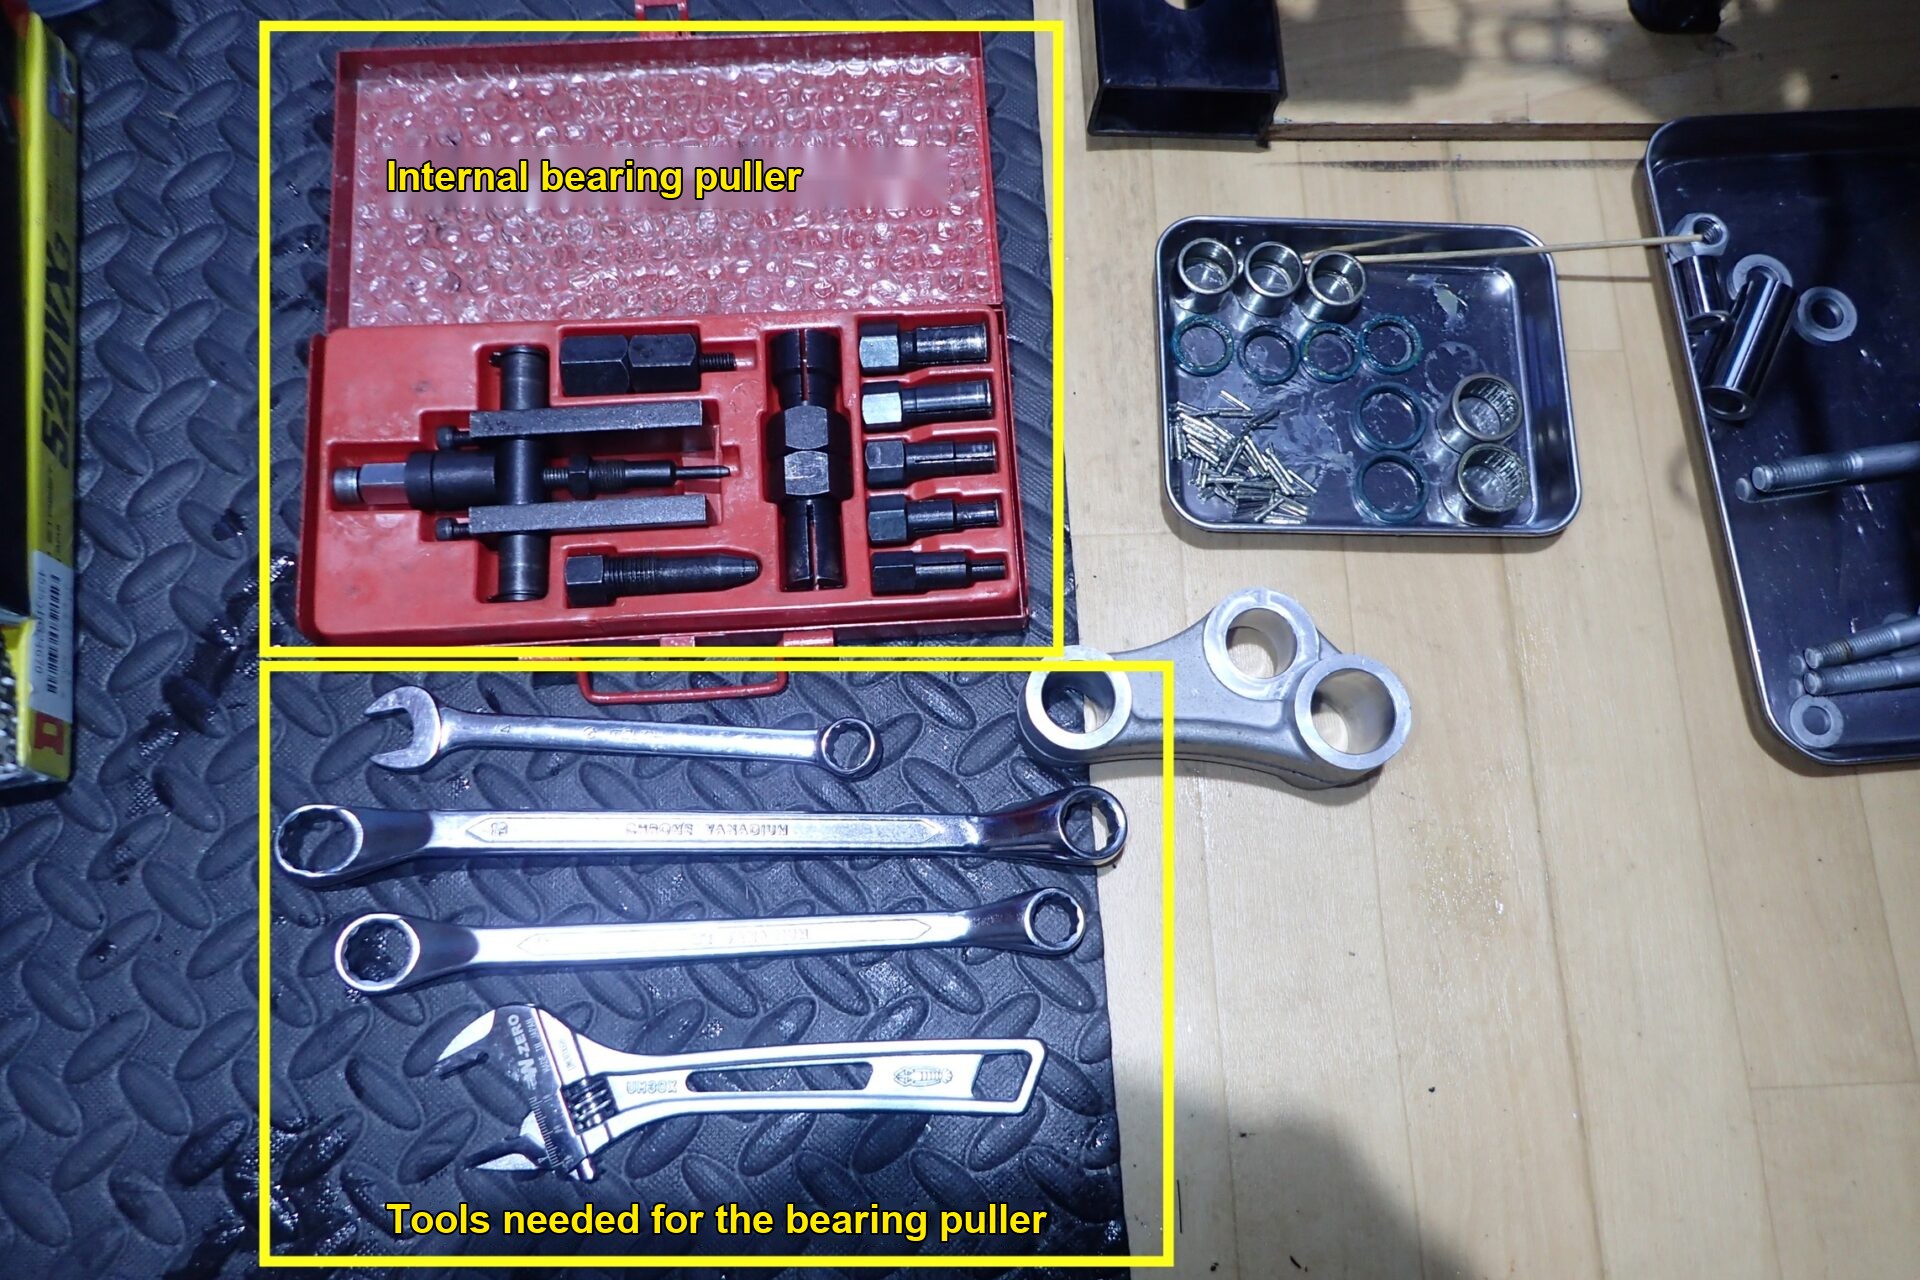
- Bearing installer
- M12 threaded rod
- Washers such as M12 and M14
- M12 nuts
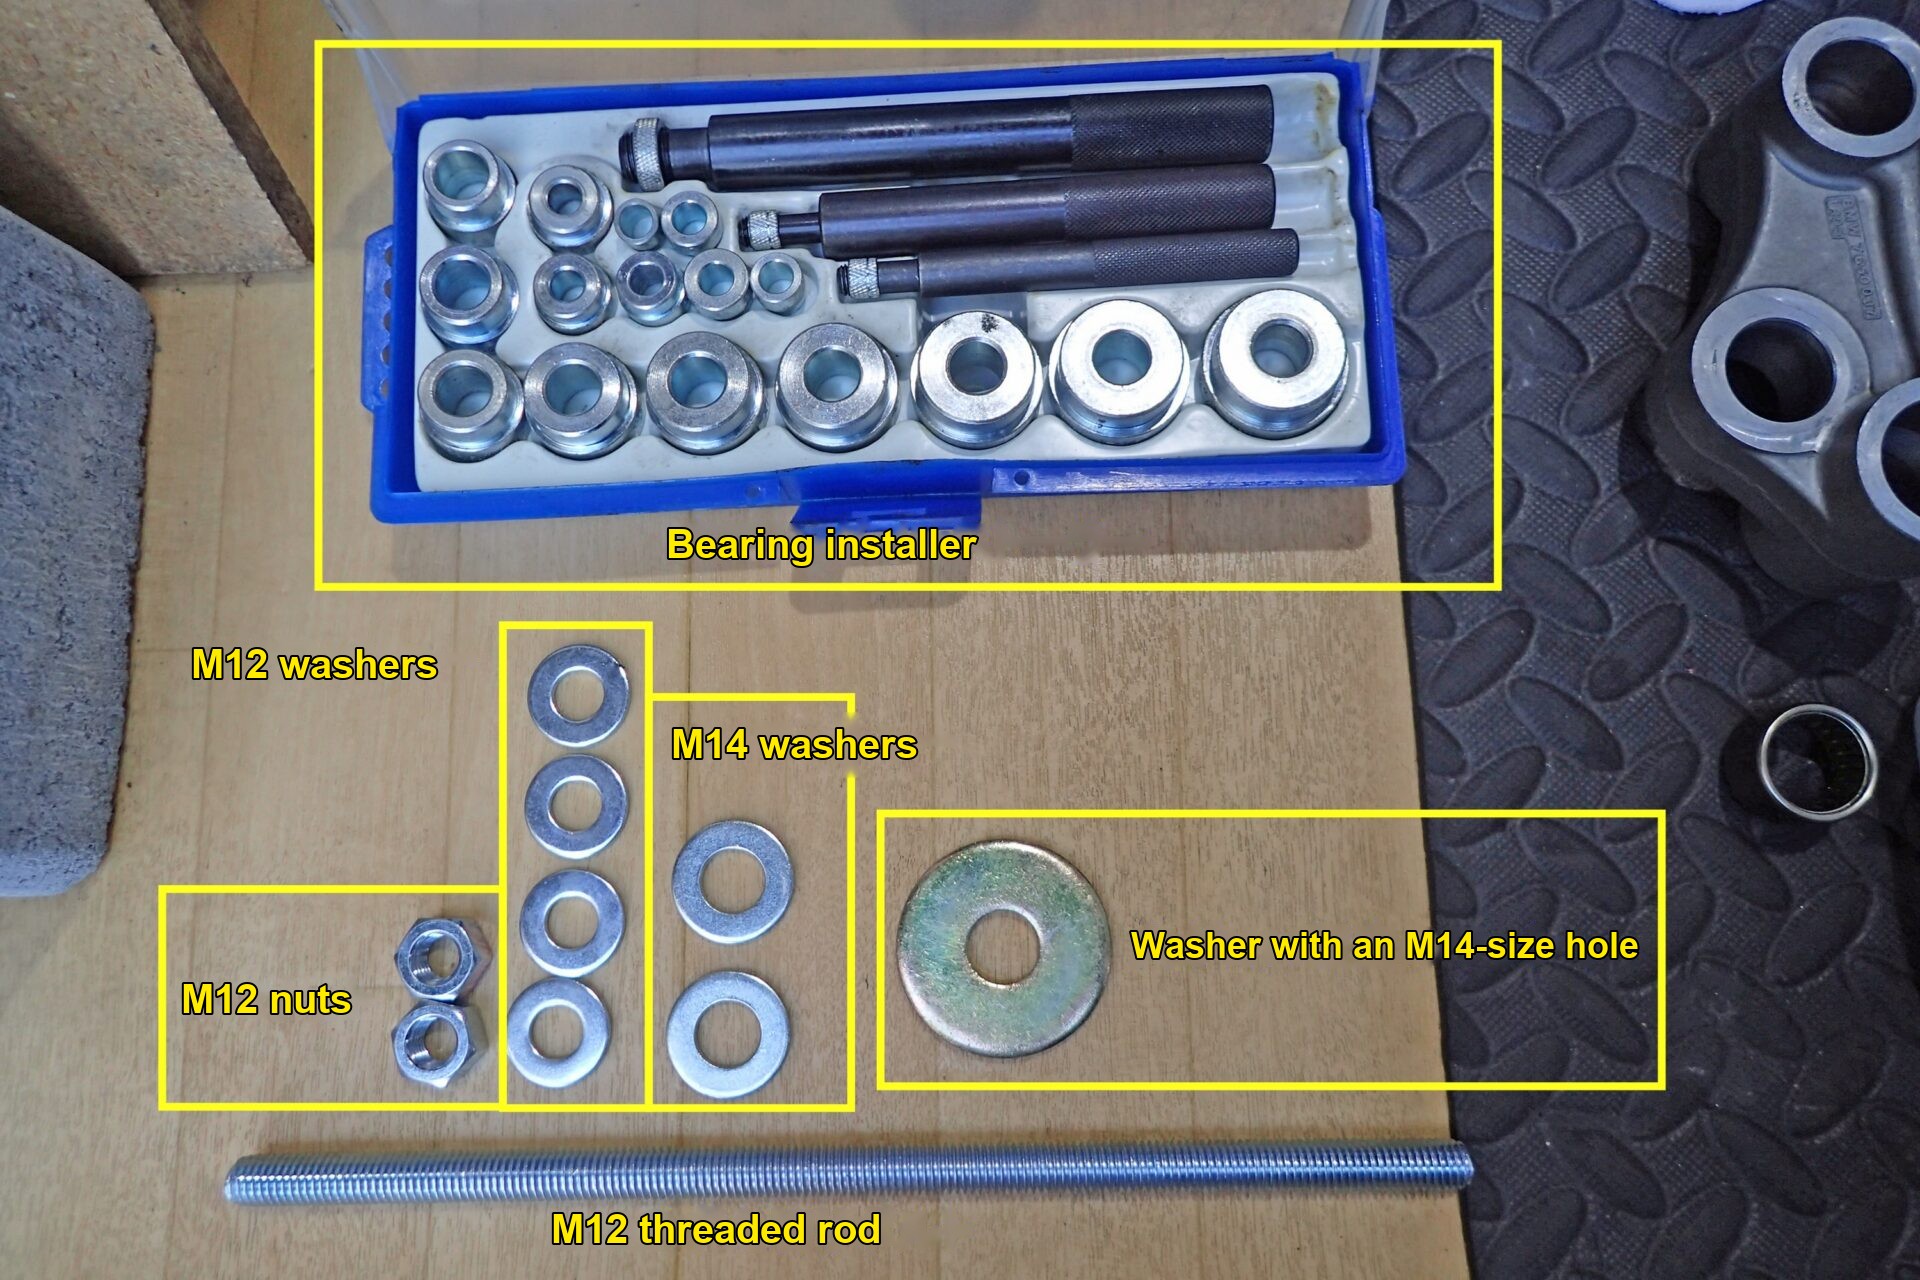
Buying a bearing puller and bearing installer costs money, but bikes use a lot of bearings.
For example, the wheels have bearings too, and replacing them makes the bike run more smoothly.
Compared with paying a bike shop for the labour, I think a bearing puller soon pays for itself.
How to replace the bearings
- Remove the part whose bearings you want to replace from the bike
- Remove the bearings
- Fit the new bearings
1. Remove the part whose bearings you want to replace from the bike
Here I'm replacing the rear link bearings, so the rear link comes off the bike.
On some bikes you may be able to remove just the link with a bit of ingenuity, but I think on most you can't.
This time I removed the rear wheel, swingarm and shock to get the rear link off.
For how I removed the pivot shaft to get the swingarm off, see this post.
2. Remove the bearings
With the rear link off the bike, it's time to remove the bearings.

Here's the rear link on its own.
This is after washing it in an alkaline cleaner.
Use the bearing puller to remove the bearings.

Set part of the bearing puller into the bearing,

set up the bearing puller as in the photo above, and turn the nut with a spanner,

and the bolt pulls the bearing out like this.

The bearing is out.
I was glad to see it was clean inside.
Remove all the bearings the same way with the bearing puller.
3. Fit the new bearings
Next, fitting (pressing in) the bearings.

First, clean the surface the bearing is pressed into and apply grease.

I used WAKO'S Multi Purpose Grease.

Grease the bearing as well.
Now press in the bearings.
Before setting up the tools, a few points to watch.
Check them against the photo and diagram below.
Whatever pushes the bearing in should be slightly smaller in diameter than the outside of the bearing
If you use something bigger than the bearing, it won't go into the hole you're pressing the bearing into.
However, if the bearing ends up flush with the edge of the hole, you don't need to worry about this.
Push on the side of the bearing with the markings (the right-hand side in the photo and diagram below)
This is so the bearing markings can be seen from outside.
Also, the marked side is wider and looks sturdier.
Use washers with the nuts
The nuts turn, so they mark the surface they bear on.
Also, the nuts are under pressure, and washers help spread that pressure as evenly as possible.
This is just an amateur's reasoning, so I may be wrong.
Don't let the threaded rod go crooked
Doing this by hand, it's hard to keep it perfectly straight.
But keep it as straight as you can.
If you keep tightening the nut with the rod crooked, you can deform the bearing or damage the part it's being pressed into (in this case, the rear link).
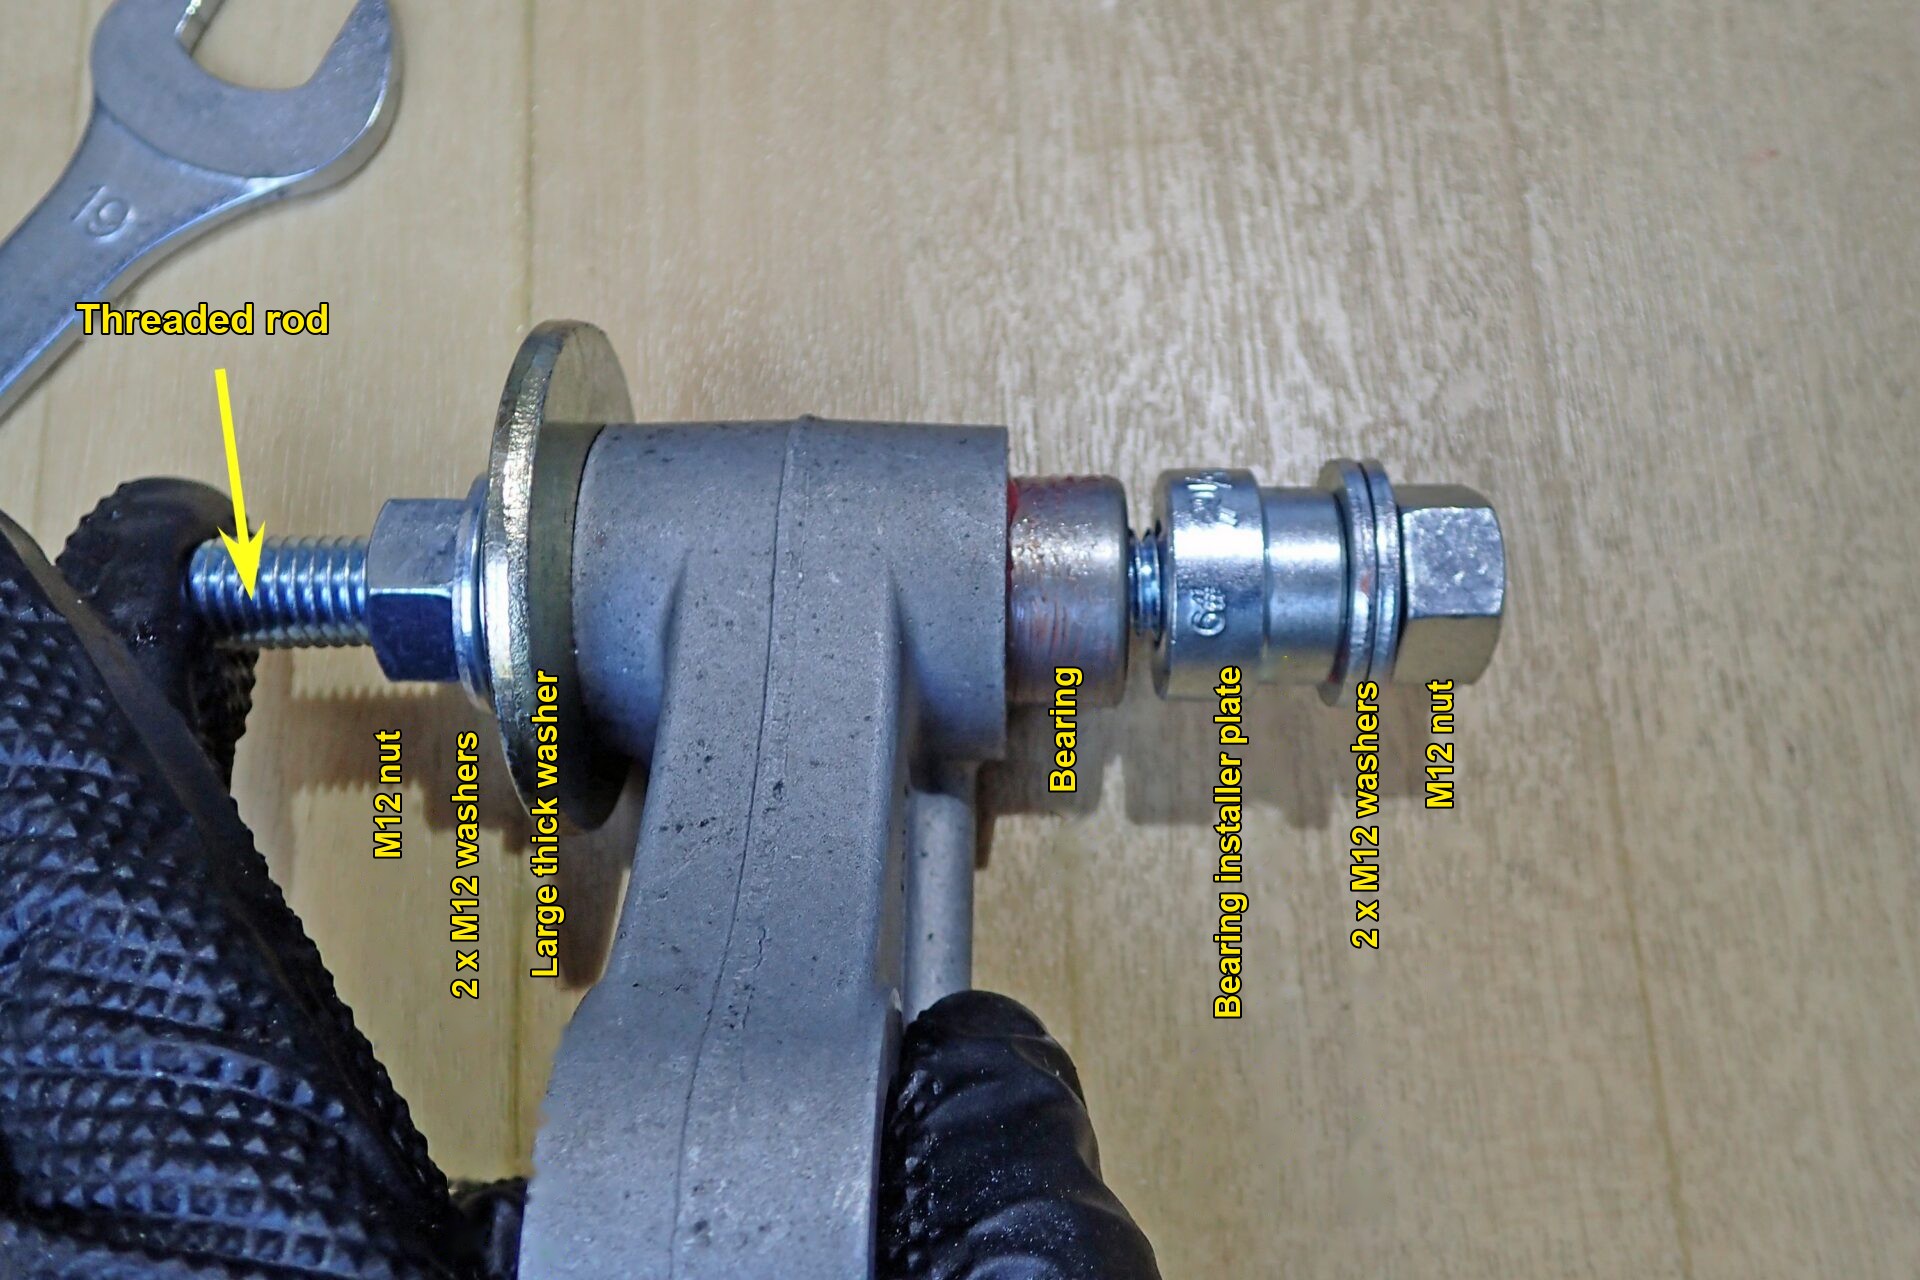
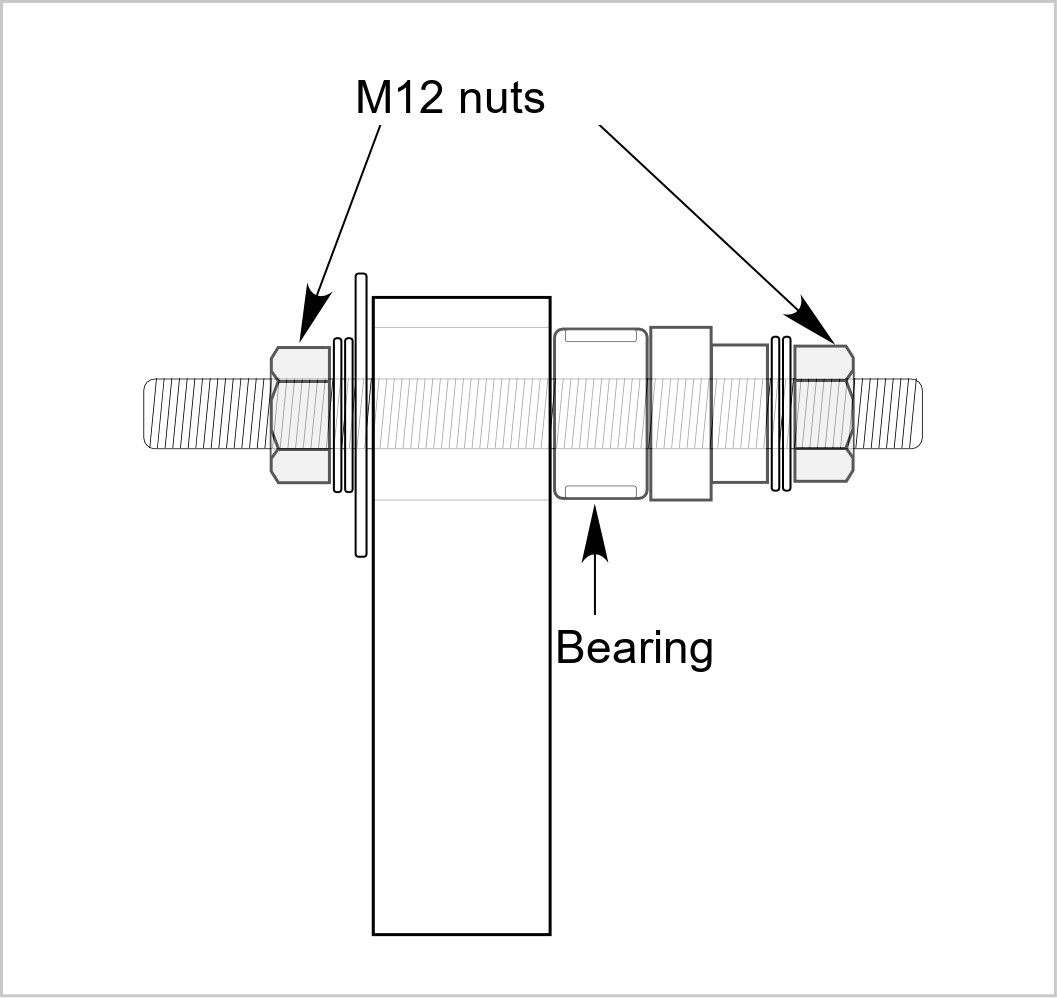
Here's a diagram of the setup.
Tightening the nut draws the bearing into the rear link.

Keep tightening the nut like this and the bearing goes in.
Repeat this for each bearing, and the rear link bearing replacement is done!