"I want to mount a top case on my Honda X-ADV to boost luggage capacity for touring!"
"I just bought the GIVI SR1188 rear rack, but I'm worried about installing it cleanly without damaging my bike..."
One of the most popular touring modifications to drastically upgrade the luggage capacity of the Honda X-ADV is installing a GIVI rear rack and carrier base (SR1188).
While the SR1188 rack usually comes without a baseplate, I acquired a used unit that included the mounting base and installed it on my bike.
The installation itself is straightforward—it is essentially a direct bolt-on job replacing the factory passenger grab bars. However, going through the process revealed two critical pitfalls that every owner must know beforehand:
- A noticeable increase in rear weight
- A high risk of scratching and chipping the rear fairing plastics
Without proper precautions, the carrier stays will directly rub against the rear painted plastics under road vibration, permanently damaging your bike's finish.
In this guide, I’ll walk you through the complete installation procedure, share real measured weight data, and explain a simple DIY method to protect your rear fairings from scratches!
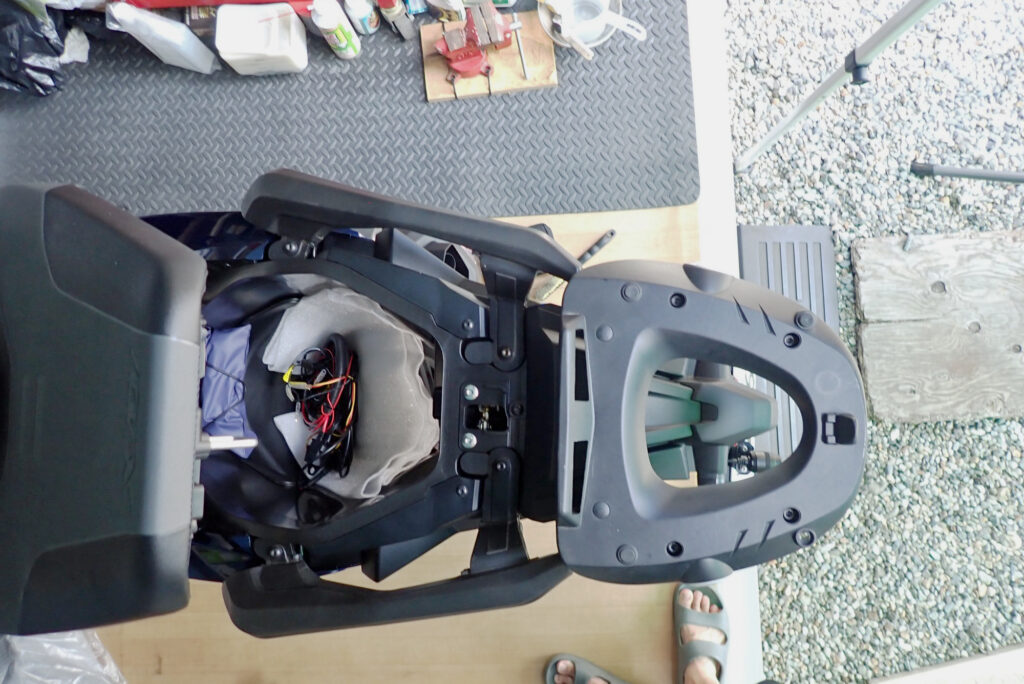
Note: The rack stays and carrier base combined weighed in at 4,300 g (4.3 kg).
1. Removing Stock Grab Bars & Measuring Real-World Weight Changes
First, remove the factory passenger grab bars. Open the seat and remove the mounting bolts—the teardown itself takes only a few minutes.
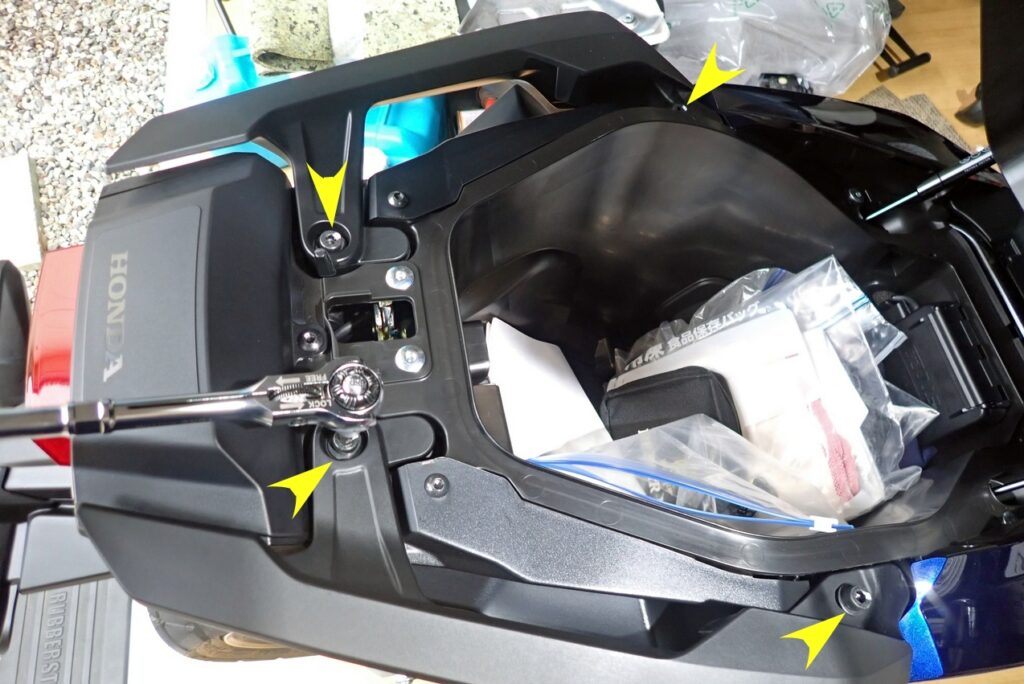
The bolts to remove are 6mm hex socket (Allen) bolts—specifically the four bolts indicated by the yellow arrows in the photo above.
Now, let's address an important question for riders: "How much weight does adding a rear rack add to the bike?"
Because the Honda X-ADV is known for its low center of gravity and nimble handling, I measured the exact weights of both setups on a digital scale.
Stock Grab Bars vs. GIVI Carrier Weight Comparison
| Component | Single Unit Weight | Total / Combined Weight |
| OEM Stock Grab Bars | 735 g (per side) | 1,470 g (approx. 1.47 kg) |
| GIVI SR1188 (Carrier base + Stays) | — | 4,300 g (approx. 4.30 kg) |
| Net Weight Increase (Difference) | — | + 2,830 g (+ 2.83 kg increase) |
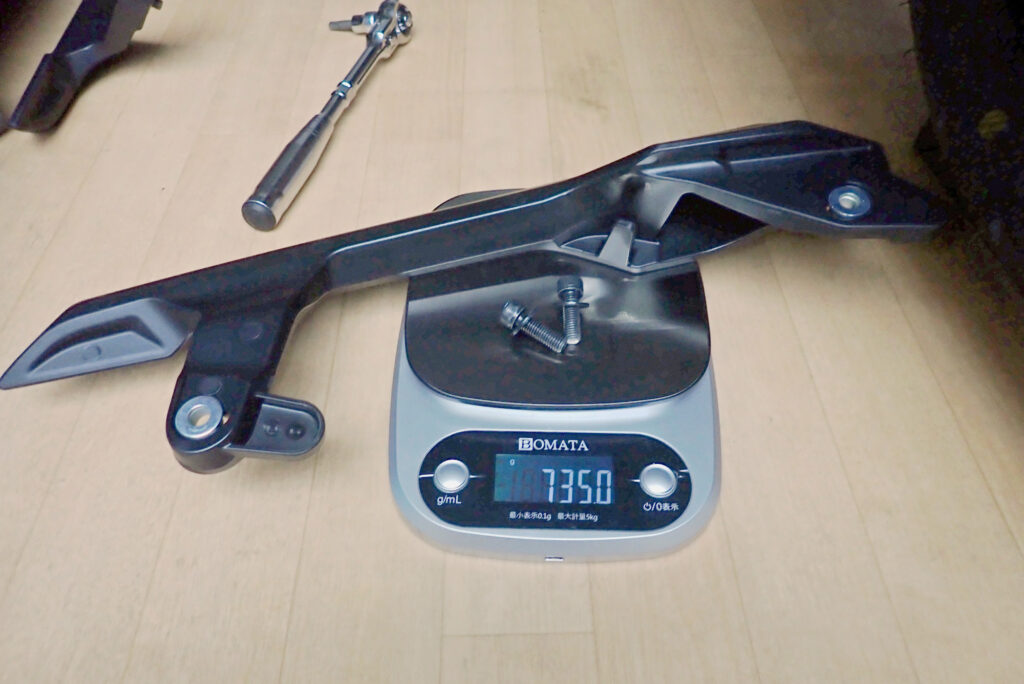
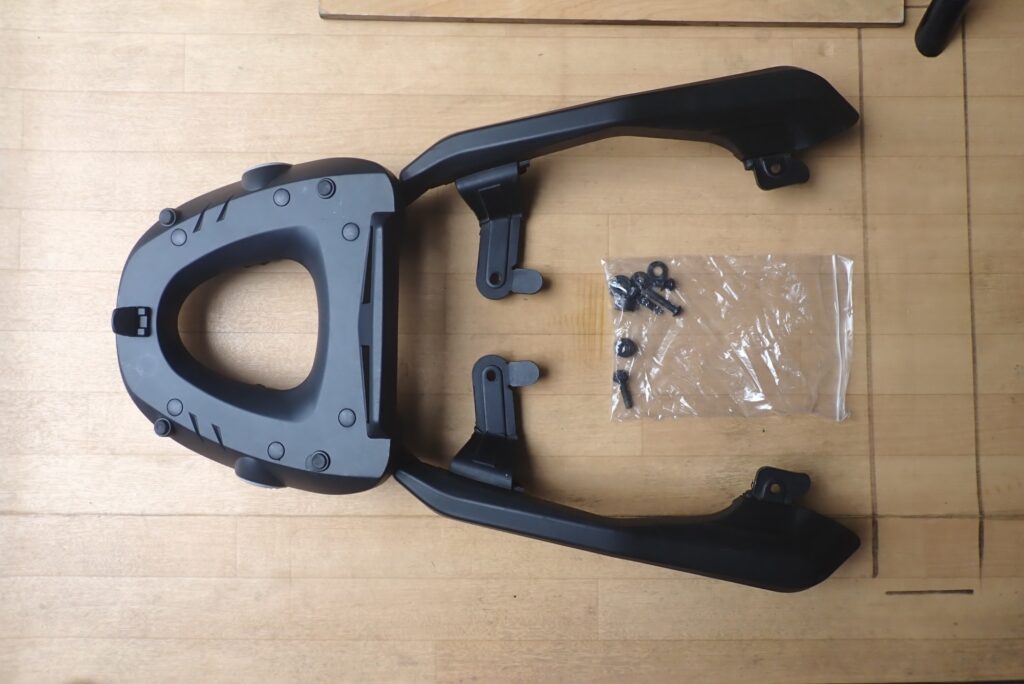
The digital scale confirmed that replacing the stock grab bars with the GIVI carrier rack adds approx. 2.83 kg (6.24 lbs) to the motorcycle.
Adding nearly 2.8 kg to the highest and rearmost section of the chassis—plus the weight of the top case and gear—makes the bike feel noticeably heavier when pushing, parking, or maneuvering at low speeds.
Note: The mounting bolts used for the GIVI rack are 5mm hex socket (Allen) bolts.
2. [Warning] Contact Points Where the Carrier Scratches the Rear Plastics!
In my excitement to finish the job quickly, I test-fitted and tightened down the GIVI carrier stays without adding any surface protection. That turned out to be a painful mistake.
The steel stays of the carrier base made direct contact with the painted rear plastics on both sides, leaving visible scratches on the fairings.
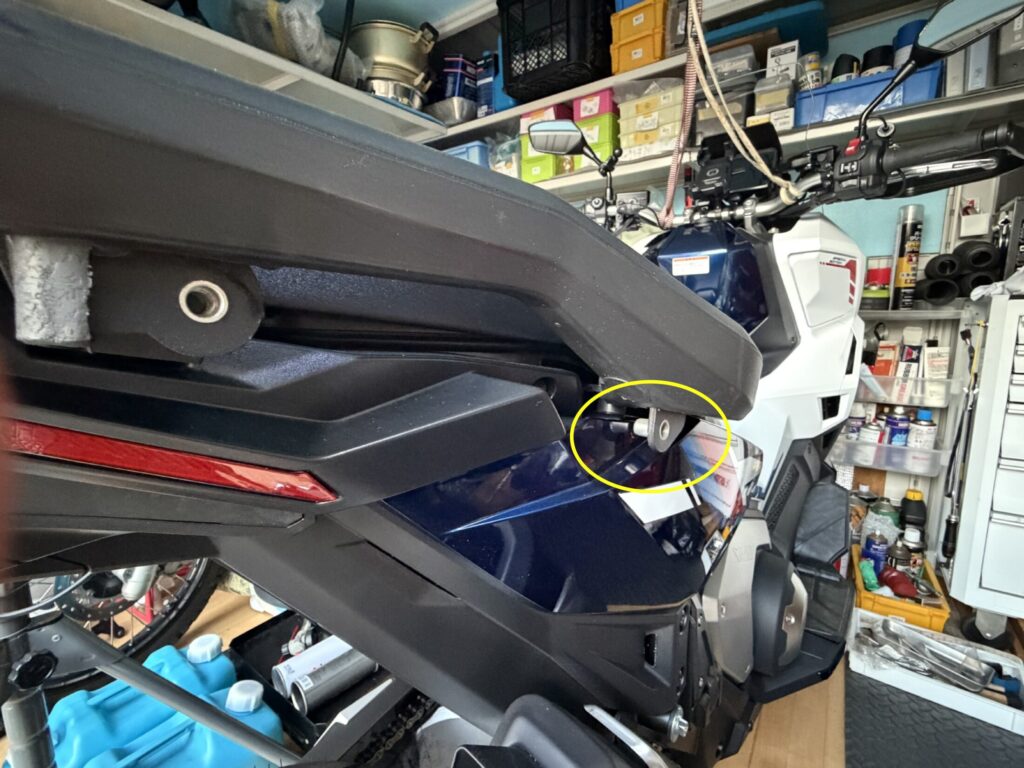
As shown inside the yellow circle above, the clearance between the carrier stay and the rear plastic fairing is razor-thin. When torquing down the bolts or riding over road bumps, the metal stay easily rubs against the plastic.
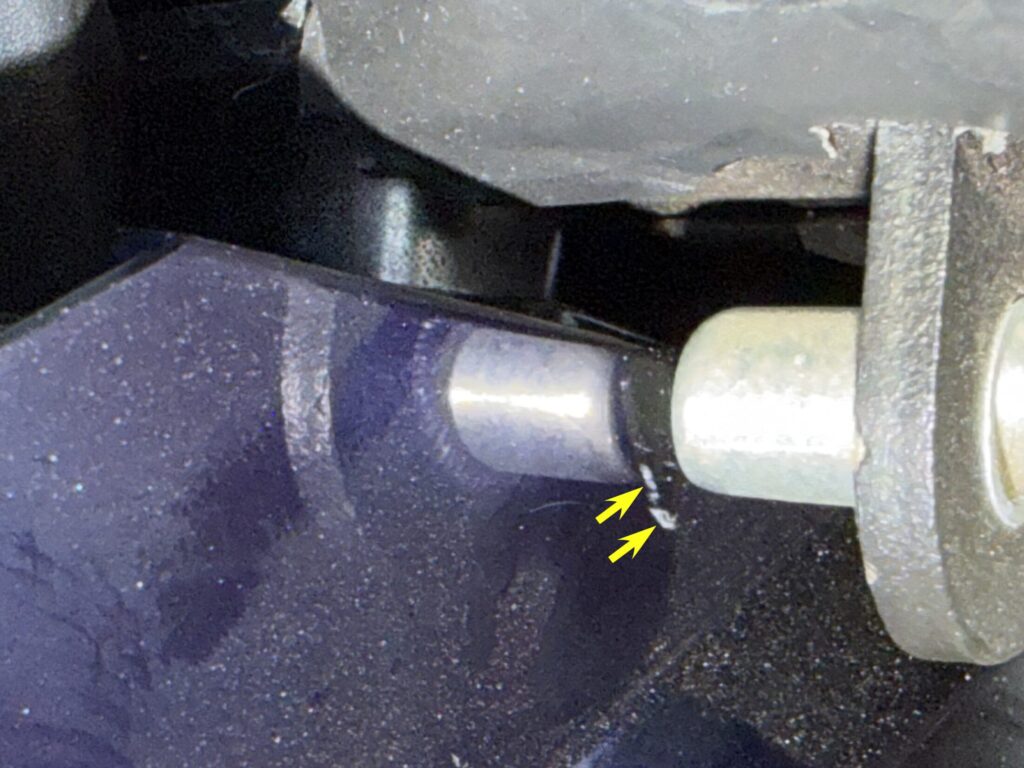
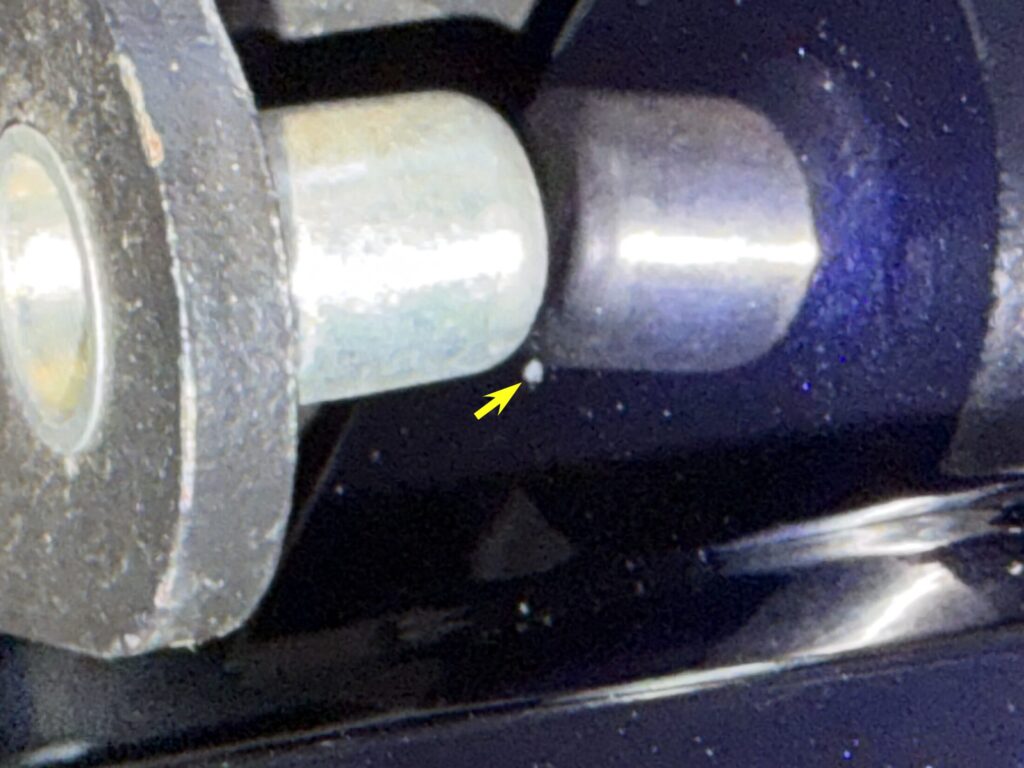
As you can see in the photos, the corners of the carrier stays rubbed off the clear coat and base paint on both the right and left sides, exposing white scratch marks.
If you plan to add side pannier rack stays in the future, even greater loads and vibration will be concentrated on these mounting areas.
My urgent advice to all riders: Never mock up or torque down this carrier without applying protective film first!
3. The Ultimate Fix: Protecting Fairings with Daytona Protec Pad Film
While the scratches were disappointing, I immediately applied protective film to prevent any further damage and isolate the contact points.
I used Daytona Protec Pad (Part No. 13083), a trusted clear paint protection film designed specifically for motorcycles.
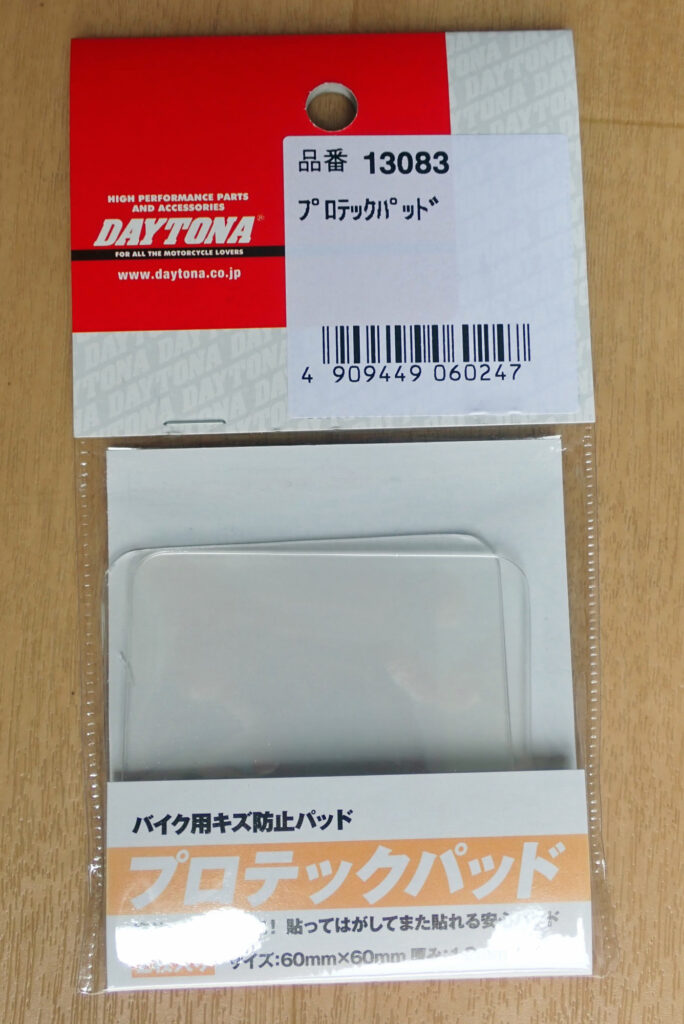
This Protec Pad is thick, flexible, and features a reusable adhesive that can be peeled off cleanly without leaving sticky residue.
Step-by-Step Installation & Application Tips
- Clean and degrease the fairing surface: Thoroughly wipe away road grime, grease, and dust around the contact areas using a detailing cleaner or coating agent (I used SurLuster Zero Finish).
- Trim the protection film: Cut the Protec Pad with scissors into custom-shaped pieces matching the contours of the rear fairing and stay contact points.
- Apply the film: Position and press the cut pads firmly onto the exact contact spots.
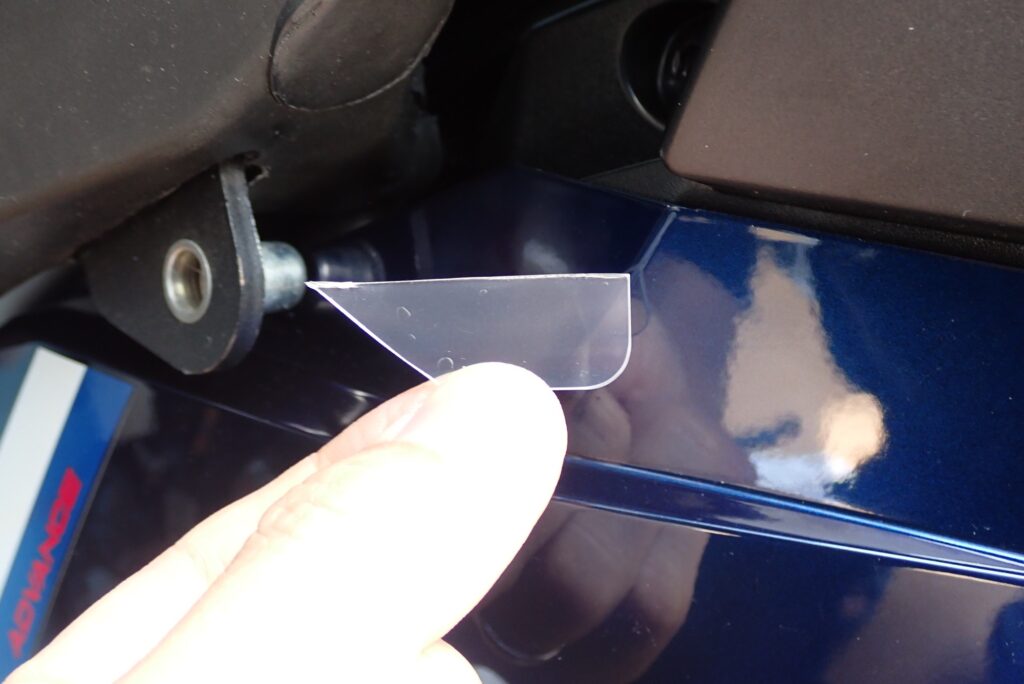
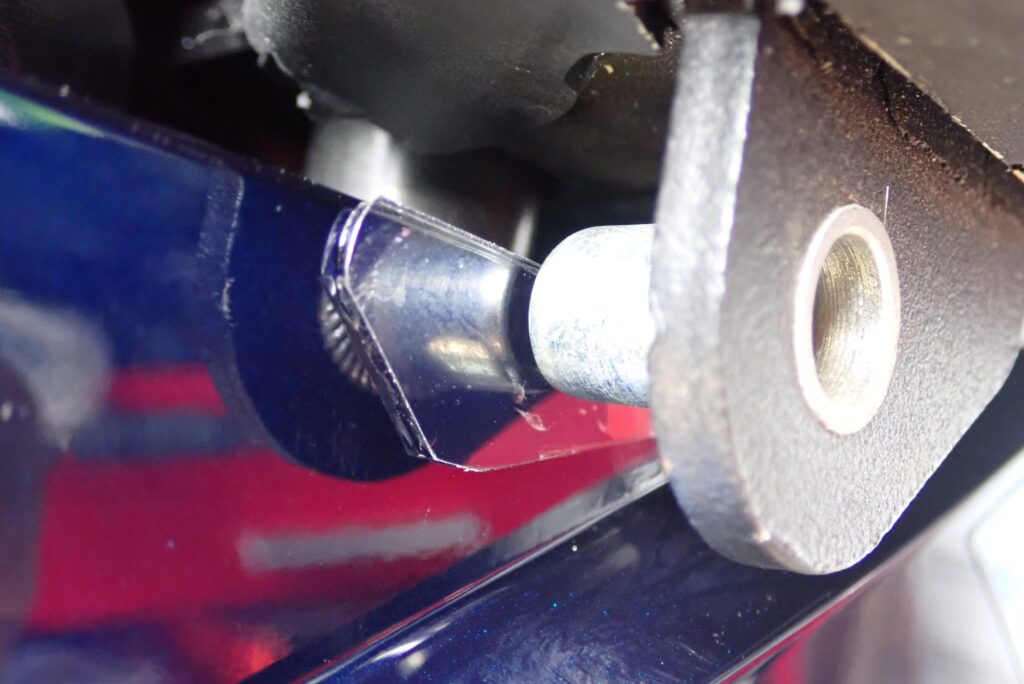
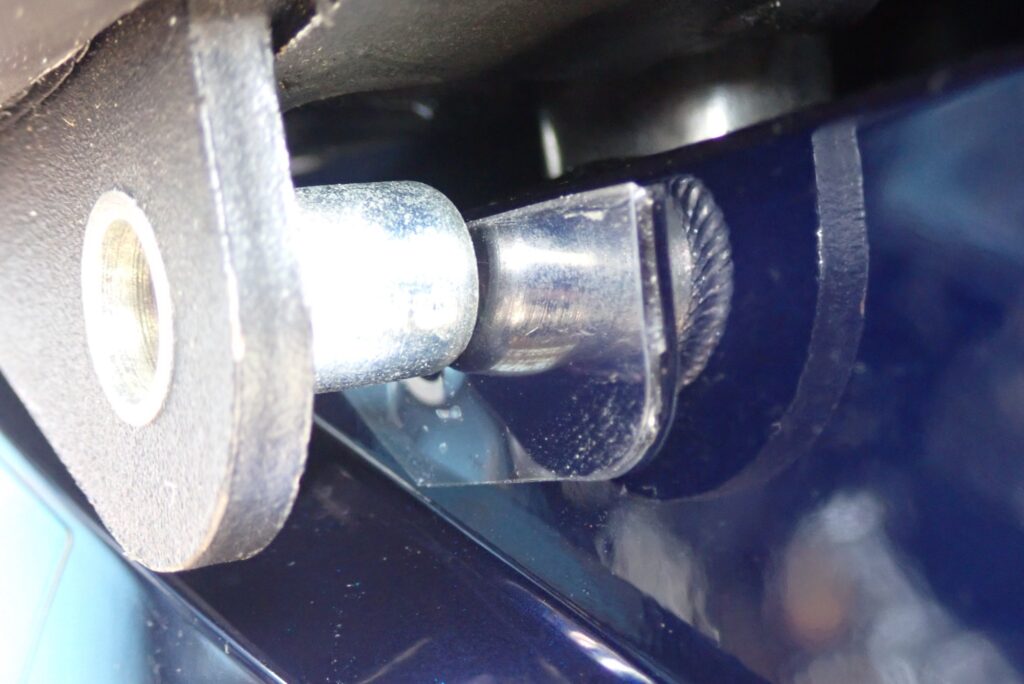
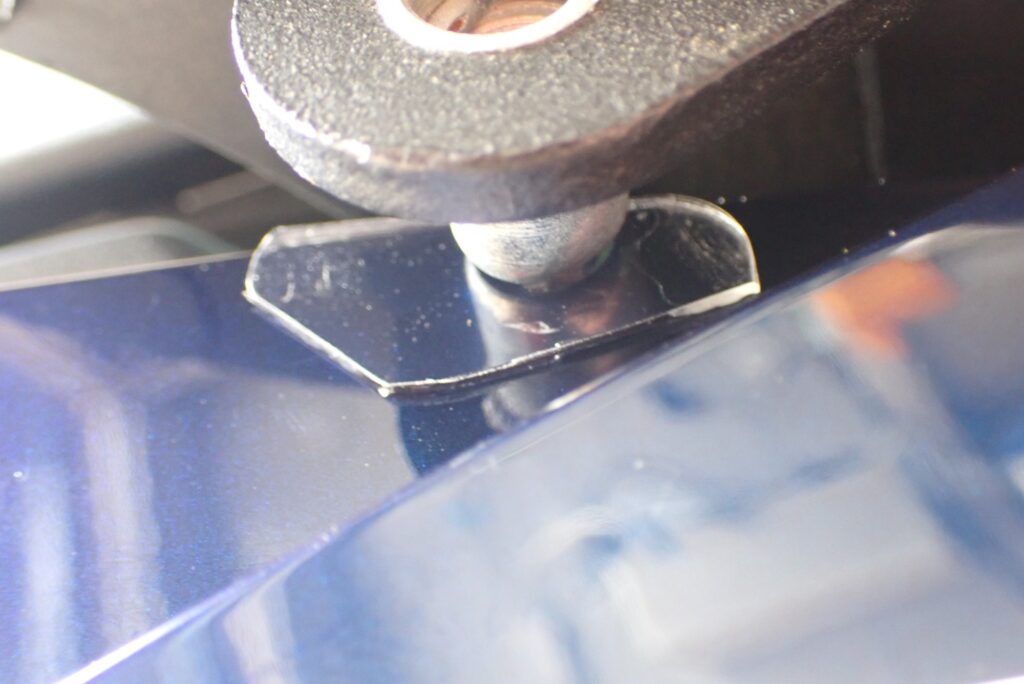
As shown in the photos, sandwiching the custom-cut Protec Pad between the fairing and the steel stay creates a strong physical buffer.
Because the pad is transparent, it remains virtually invisible while preventing direct metal-to-plastic contact!
4. Recommended Tools & Accessories for Honda X-ADV Carrier Installation
Here are the essential items and tools used in this project. Having them ready before starting your DIY build will keep your bike scratch-free and ensure a smooth installation.
1. Daytona Motorcycle Paint Protection Protec Pad (Part No. 13083)
A vital paint-protection film that prevents fairing scratches. I strongly recommend buying and applying this before mounting the rack!
2. GIVI Rear Rack SR1188 (Honda X-ADV Specific)
The dedicated rear rack required to mount GIVI Monokey or Monolock top cases on the Honda X-ADV. If you plan to install the PLO1188MK side pannier rack stays later, you need either this rack or the Honda OEM rear carrier.
(Note: MONOKEY / MONOLOCK baseplates are sold separately).
3. Ko-ken Z-EAL Hex Bit Sockets (5 mm and 6 mm)
High-precision hex bit sockets allow you to torque down mounting bolts cleanly without stripping bolt heads.
Conclusion: Protect Your Fairings and Enjoy Upgraded Touring Luggage!
Here is a quick summary of key takeaways when installing the GIVI SR1188 rear rack on a Honda X-ADV:
- Installation is a straightforward direct bolt-on replacing the stock grab bars.
- Switching from stock grab bars (1.47 kg) to the GIVI rack (4.3 kg) adds approx. 2.8 kg of weight to the rear.
- Mounting without protection will cause the carrier stays to rub and scratch the rear fairings.
- Applying Daytona Protec Pad film in advance guarantees 100% scratch protection.
To avoid any regrets on your pride and joy, be sure to apply protective pads before bolting on your GIVI carrier!
Ride safe and enjoy wrenching!