Hello everyone!
In my previous post, I broke down the exact process for removing the aluminum underguard and the right lower fairing to prep for an oil change. Now that we have ample workspace secured, today I’m bringing you part two—the complete, professional-grade walkthrough for the 1,000 km break-in oil change.
Hitting the 1,000 km mark on a brand-new bike is the critical break-in window when initial gear and piston meshing produces the highest amount of fine metal particles (sludge) suspended in the oil. Because the X-ADV is packed with Honda's proprietary Dual Clutch Transmission (DCT) technology, replacing both the main cartridge engine oil filter and the dedicated paper DCT oil filter at the same time is non-negotiable.
For this milestone service, I treated my machine to a premium overhaul: pairing Honda's top-tier 100% synthetic PREMIUM SPORTS oil with SOD-1 Plus, an ester-based high-performance oil additive revered by pro shops.
If you want to keep the heart of your machine running in peak condition for years to come, let's get right into it!
[Parts & Tools Checklist] Items Required for a Premium Oil Service
Here is the complete lineup of replacement parts, oil, chemicals, and specialized tools laid out in the garage for today’s service:
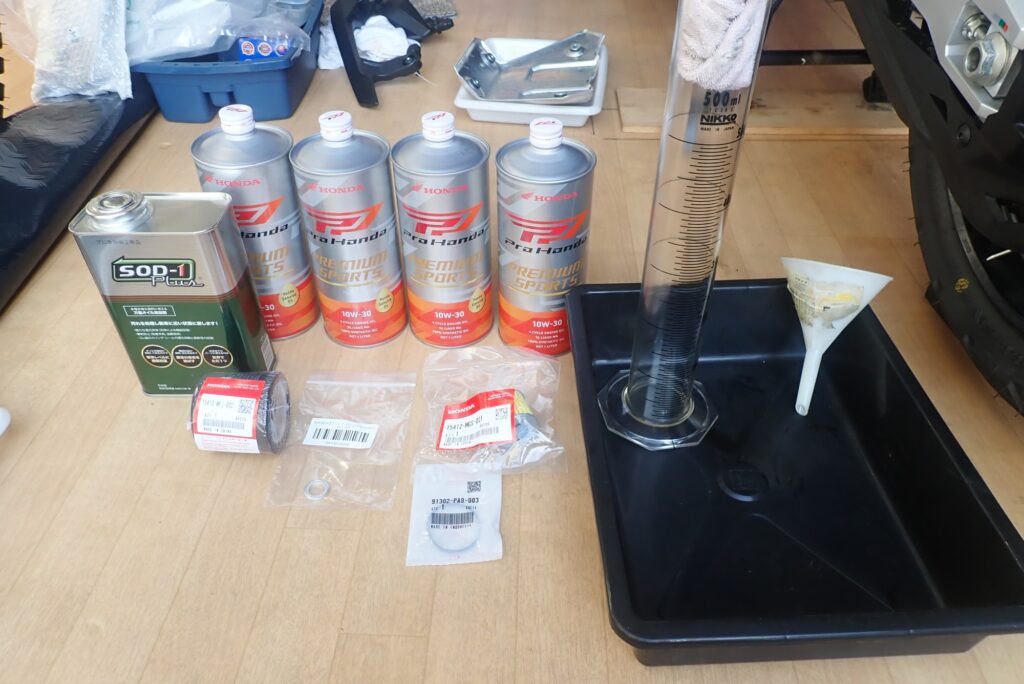
[Image 1: Complete maintenance kit laid out for the Honda X-ADV break-in service including OEM oil, two filters, additive, and measuring tools]
- Engine Oil: Honda OEM PREMIUM SPORTS (10W-30 / 100% Synthetic)
- Oil Additive: D1 Chemical SOD-1 Plus (Ester-based high-performance oil additive)
- Replacement Part 1: Honda OEM Engine Oil Filter Cartridge (15410-MFJ-D02)
- Replacement Part 2: Honda OEM DCT Oil Filter (15412-MGS-D21)
- Consumables: OEM Drain Plug Washer (94109-12000), DCT Cover O-ring (91302-PA9-003)
- Specialty Tools: KTC Oil Filter Wrench (AVSA-064 / 64 mm), Torque Wrench, Digital Caliper, 500 ml Graduated Cylinder, Funnel, Oil Drain Pan
During the sensitive break-in period of a brand-new engine, stick strictly to genuine Honda OEM parts rather than aftermarket alternatives for total reliability.
[Step 1] Draining the Old Engine Oil and Prepping the Drain Bolt
First, drain the degraded factory break-in oil completely from the crankcase. To ensure smooth, rapid drainage, locate and loosen the oil filler cap positioned behind the right floorboard area before pulling the drain plug.
Golden Rule of Oil Changes: Always verify that you can break the oil filler cap loose before draining the oil. If you drain the oil first and discover the filler cap is seized or stripped, your machine is stranded.
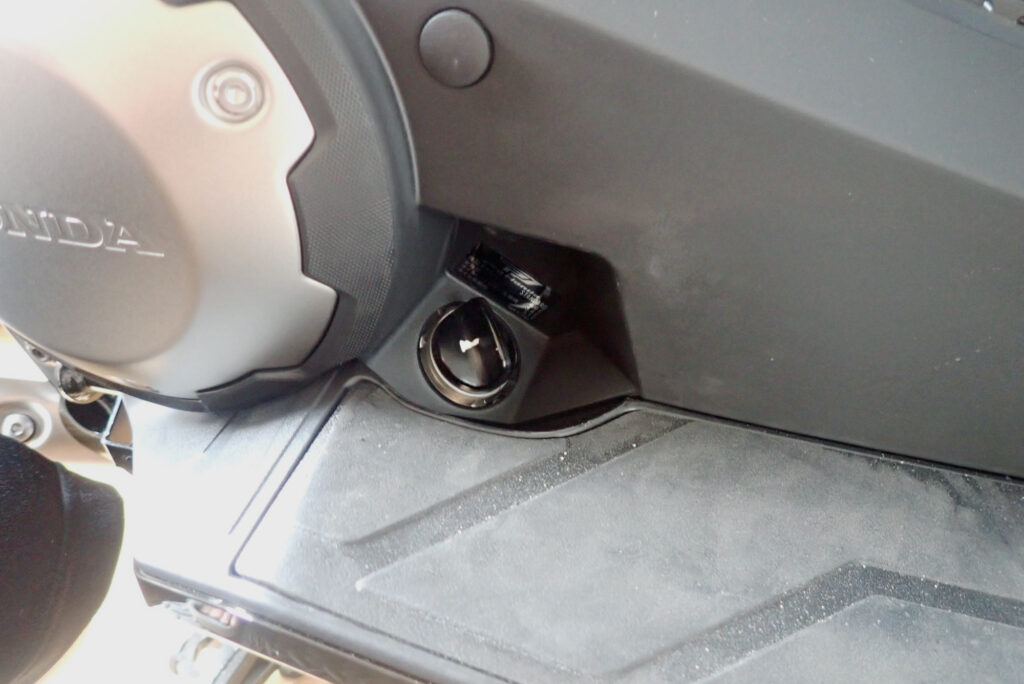
[Image 2: Black oil filler cap located at the lower right step section, loosened beforehand to vent the crankcase]
Once the filler cap is loosened, move beneath the chassis to locate the drain plug.
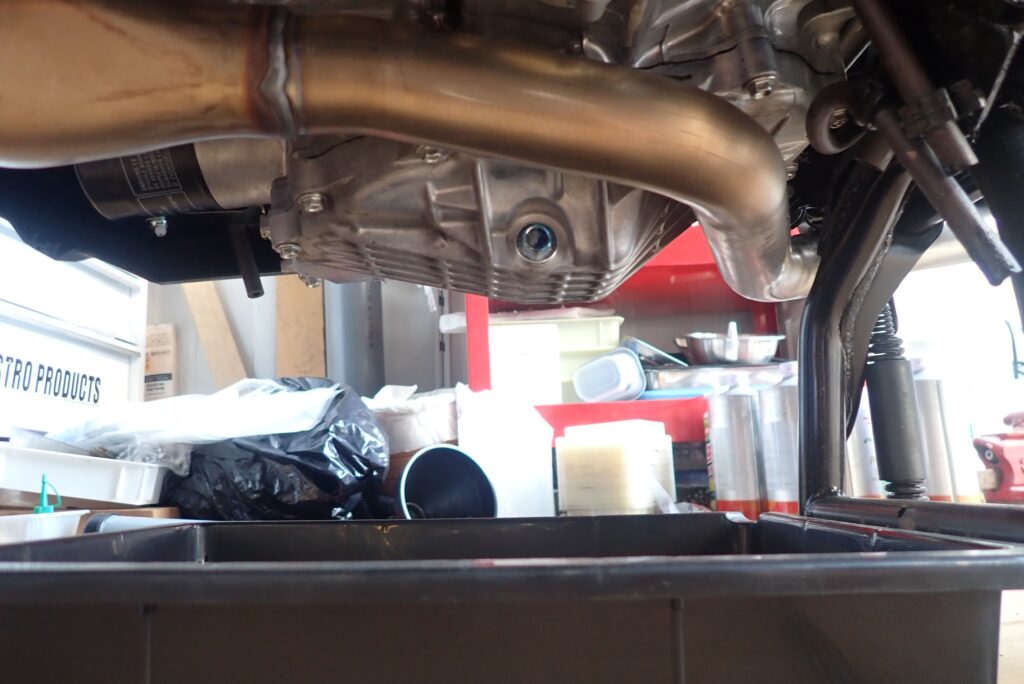
[Image 3: Underside view of the engine crankcase showing the location of the oil drain plug]
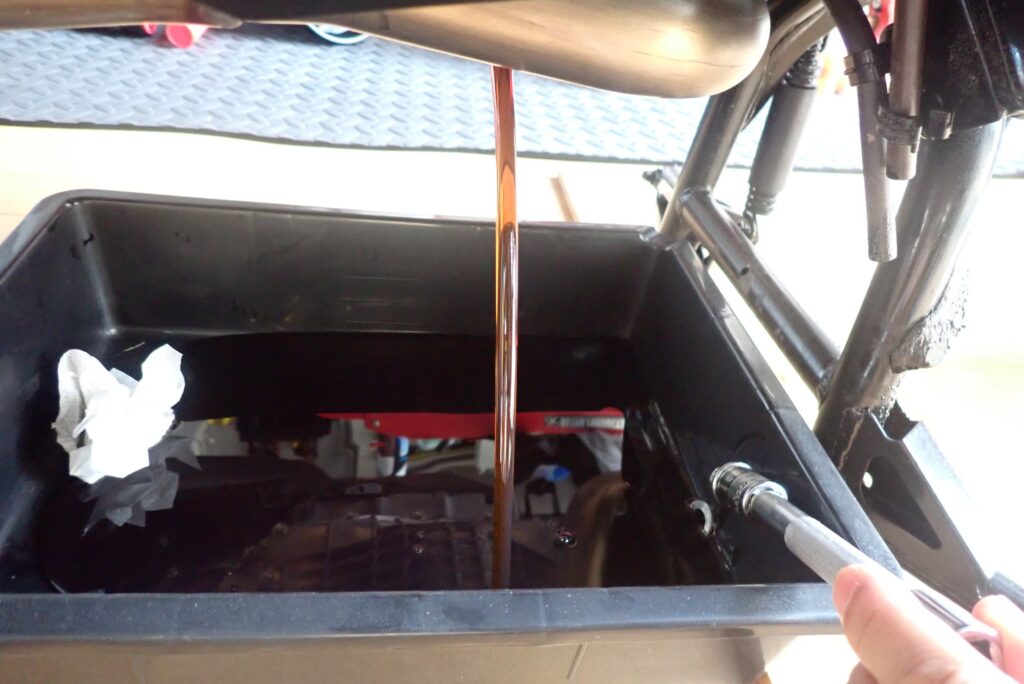
[Image 4: Unthreading the drain plug with a socket wrench to rapidly discharge the old engine oil into a pan]
Back out the drain plug to let the hot oil stream freely into your drain pan. Oil discharged after the first 1,000 km will display a noticeable cloudiness due to suspended break-in metal sludge.
While waiting for the last drops to drain, clean the drain bolt and replace the crush washer.
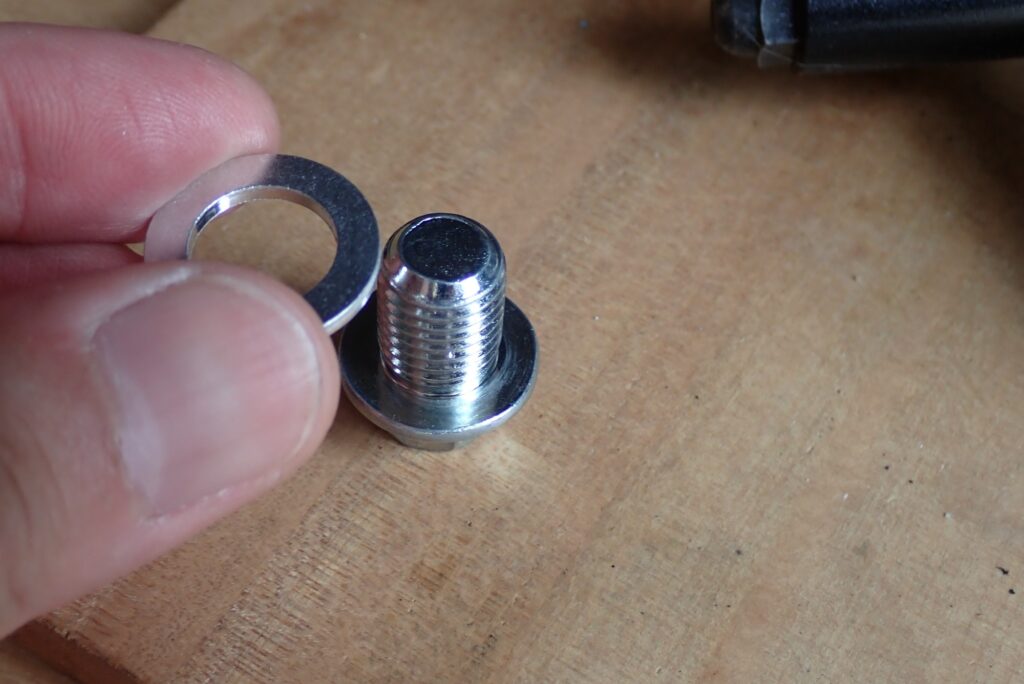
[Image 5: Removing the old crushed drain washer and installing a fresh OEM aluminum crush washer onto the drain bolt]
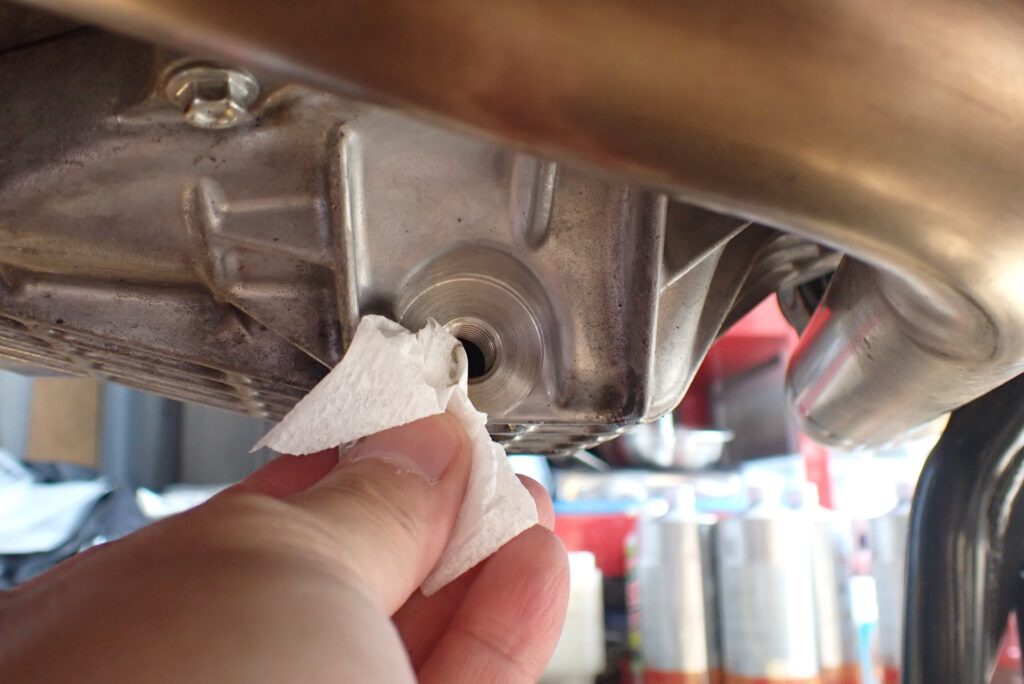
[Image 6: Meticulously wiping down the crankcase drain port mating surface with a lint-free Kimwipe after draining completes]
Crush washers seal the crankcase by deforming under pressure when torqued down. Always install a brand-new crush washer with every oil change. Reusing an old, crushed washer is a guaranteed recipe for oil weeping. Clean the crankcase mating surface thoroughly with a shop rag or parts cleaner.
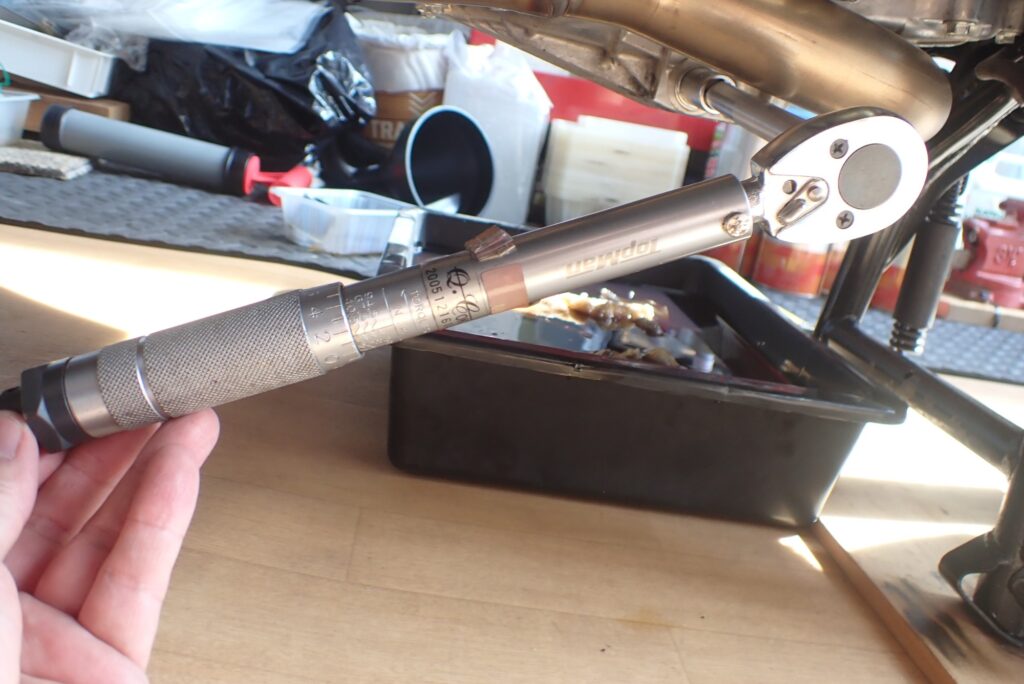
[Image 7: Torquing down the drain bolt to exact Honda factory specifications using a torque wrench]
- Torque down the drain plug: Use a calibrated torque wrench to tighten the drain plug to Honda's exact torque specifications. Because the aluminum crankcase threads are soft and easily stripped, relying on a torque wrench is mandatory to prevent catastrophic thread damage.
[Step 2] Replacing the Engine Oil Filter Cartridge & Checking Center Stud Clearance
Next, swap out the main spin-on engine oil filter cartridge located on the underside of the crankcase.
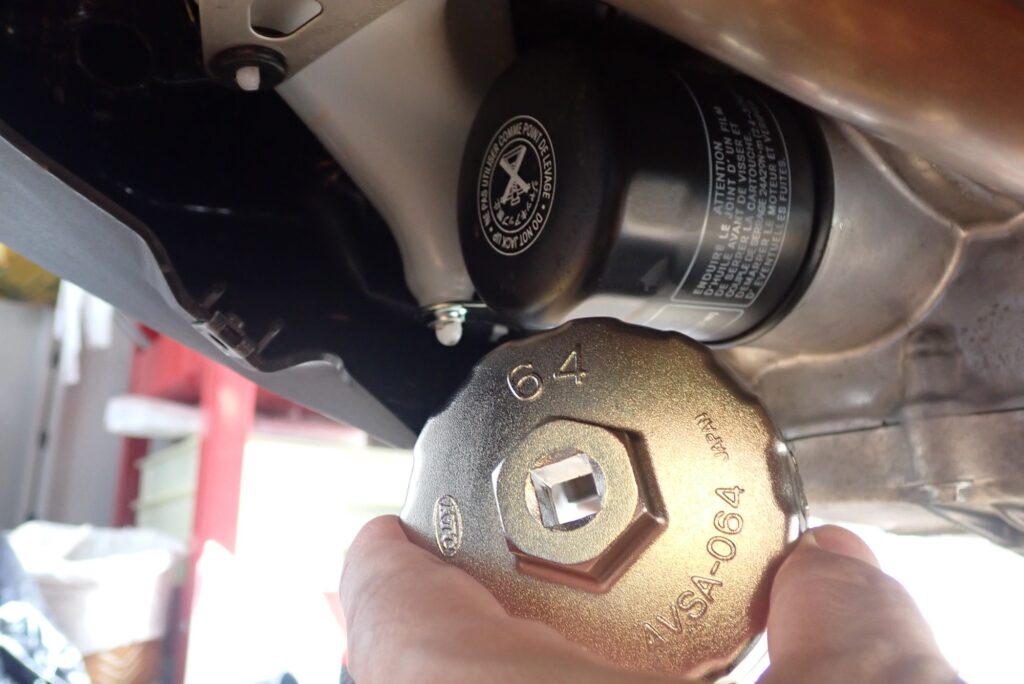
[Image 8: Fitting a KTC 64 mm oil filter cup wrench (AVSA-064) onto the black filter cartridge on the engine underside]
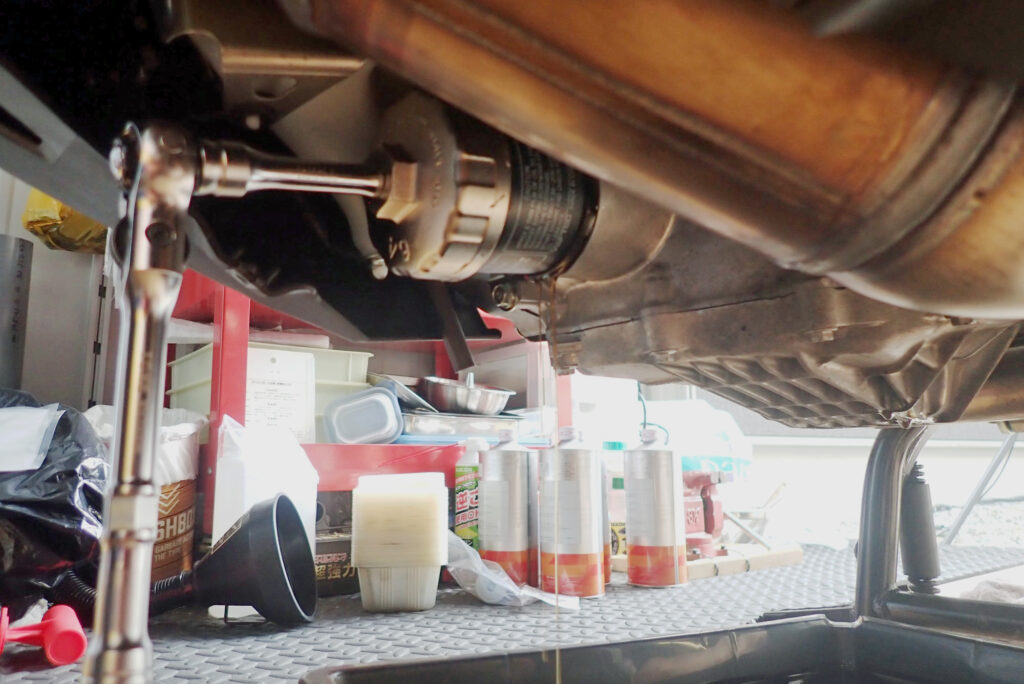
[Image 9: Attaching a ratchet wrench to unthread the old oil filter counterclockwise]
- Unthread the old filter: Fit a dedicated 64 mm cup wrench (KTC AVSA-064) snugly onto the filter housing and unthread it counterclockwise using a ratchet handle. Position your drain pan directly beneath it, as residual oil will spill out as the seal breaks.
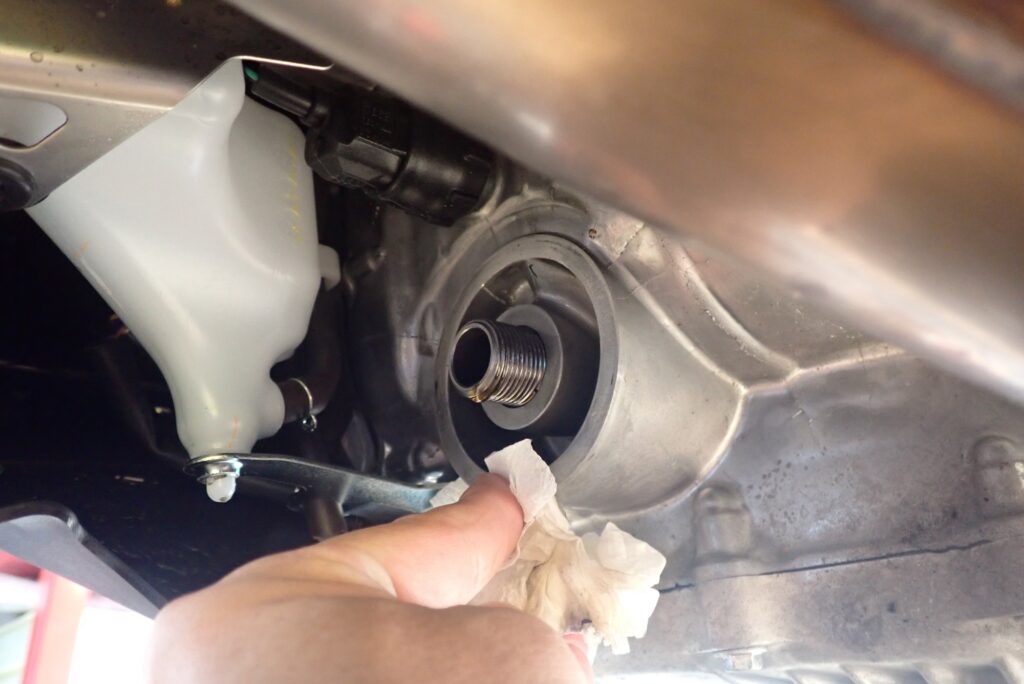
[Image 10: Cleaning away old oil film and grit from the filter mounting boss using a shop rag]
- Clean the mounting boss: The filter mounting boss is a critical sealing interface. Spray parts cleaner onto a clean shop rag and wipe away every trace of old oil film, grit, and road grime.
Now prep the brand-new OEM Honda oil filter.
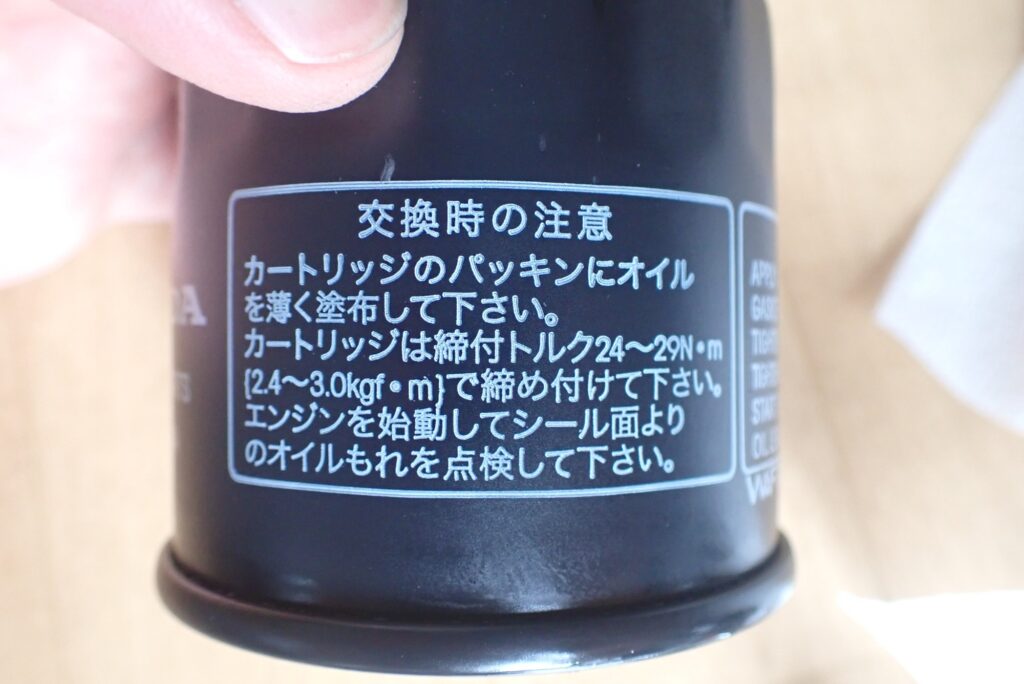
[Image 11: Brand-new genuine Honda oil filter displaying Japanese and English torque specs (24–29 N·m) and gasket lube instructions printed on the side]
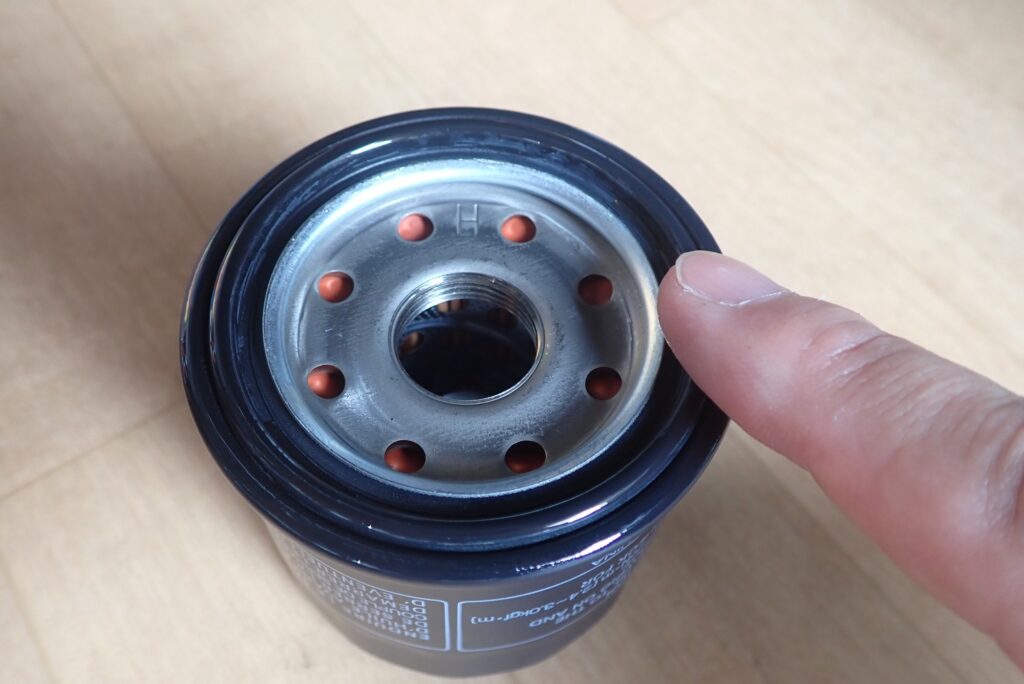
[Image 12: Applying a thin film of clean engine oil onto the black rubber O-ring gasket of the new filter using a fingertip]
- Lube the rubber O-ring: Apply a thin coat of fresh engine oil around the rubber gasket of the new filter before threading it on. This prevents the rubber from twisting, pinching, or tearing during installation, ensuring a perfect airtight seal.
Mechanic’s Inspection: Measuring the Center Stud Protrusion
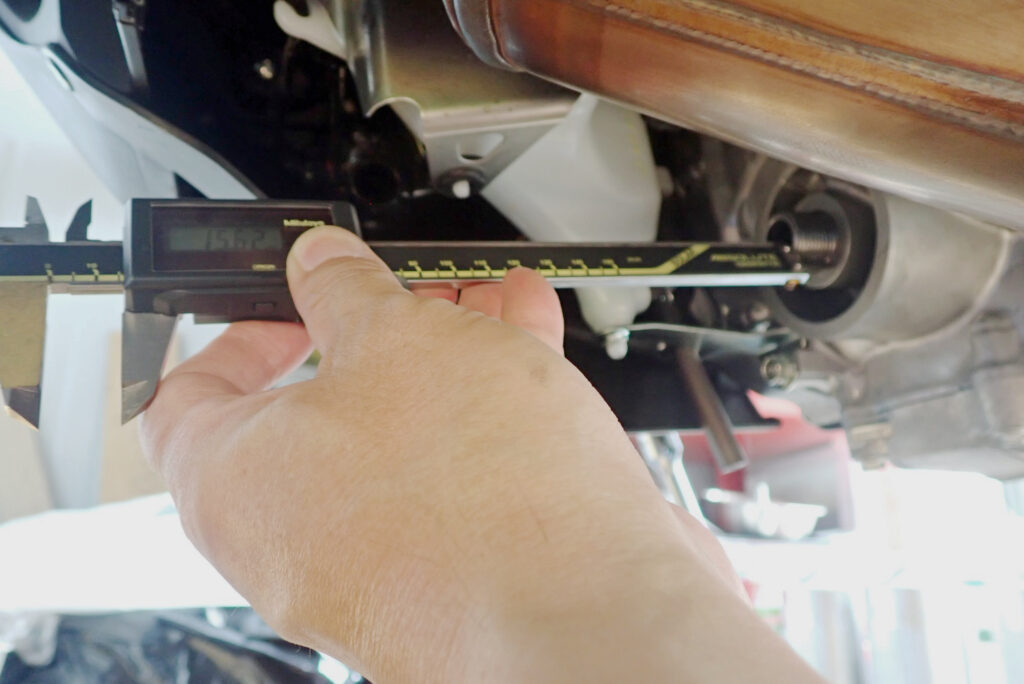
[Image 13: Measuring the outer thread diameter of the engine oil filter center stud using a digital caliper, displaying 15.62 mm]
As a quick workshop check, I measured the outer thread diameter of the center mounting stud using a digital caliper, which read 15.62 mm.
According to the factory service manual, the standard protrusion height spec for this stud is [ 16.5 plus or minus 0.5 ], revealing a slight dimensional variation on this specific unit.
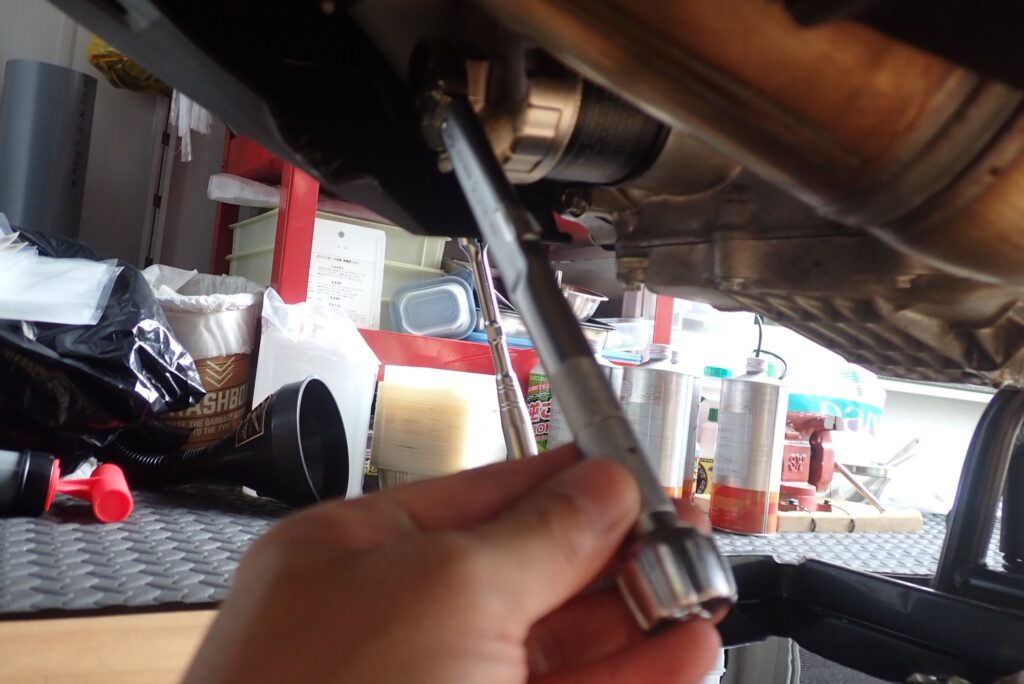
[Image 14: Using a torque wrench to torque down the new oil filter precisely to target specification (approx. 26 N·m)]
- Torque specifications: Following the guidelines printed right on the filter housing, torque down the new filter using a torque wrench set to approximately 26 N·m (within the 24–29 N·m factory window).
[Step 3] Replacing the DCT-Specific Oil Filter and Inspecting the Old Element
Now for the hallmark of servicing an X-ADV: replacing the dedicated DCT oil filter. Having stripped the right lower fairing in the prep phase, access to the side-cover housing on the crankcase is completely unobstructed.
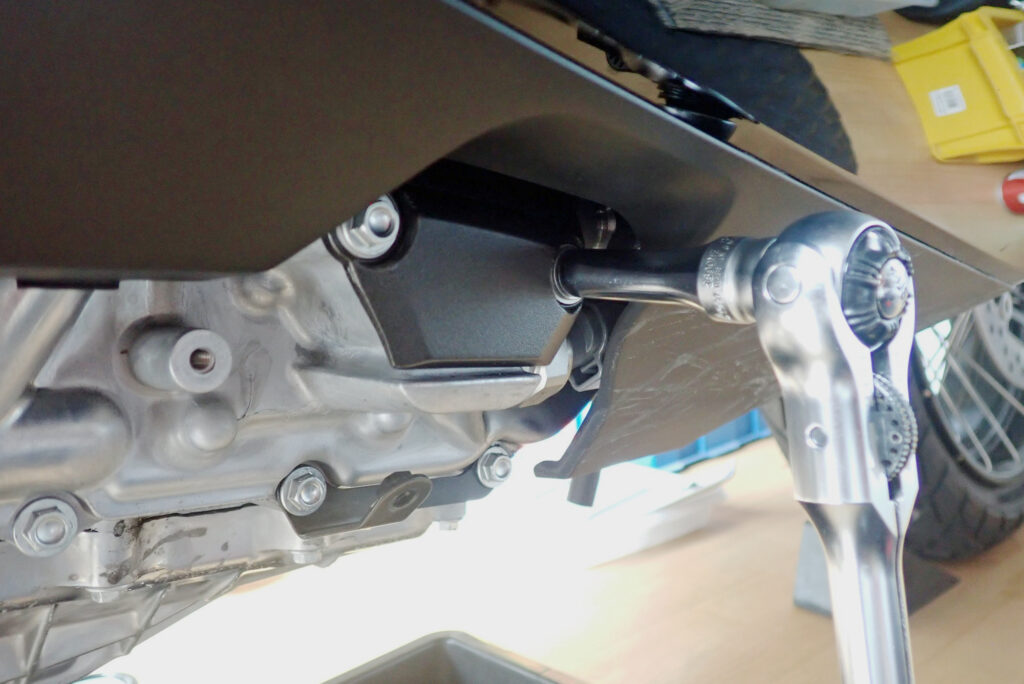
[Image 15: Loosening the two bolts securing the DCT oil filter cover using a ratchet wrench]
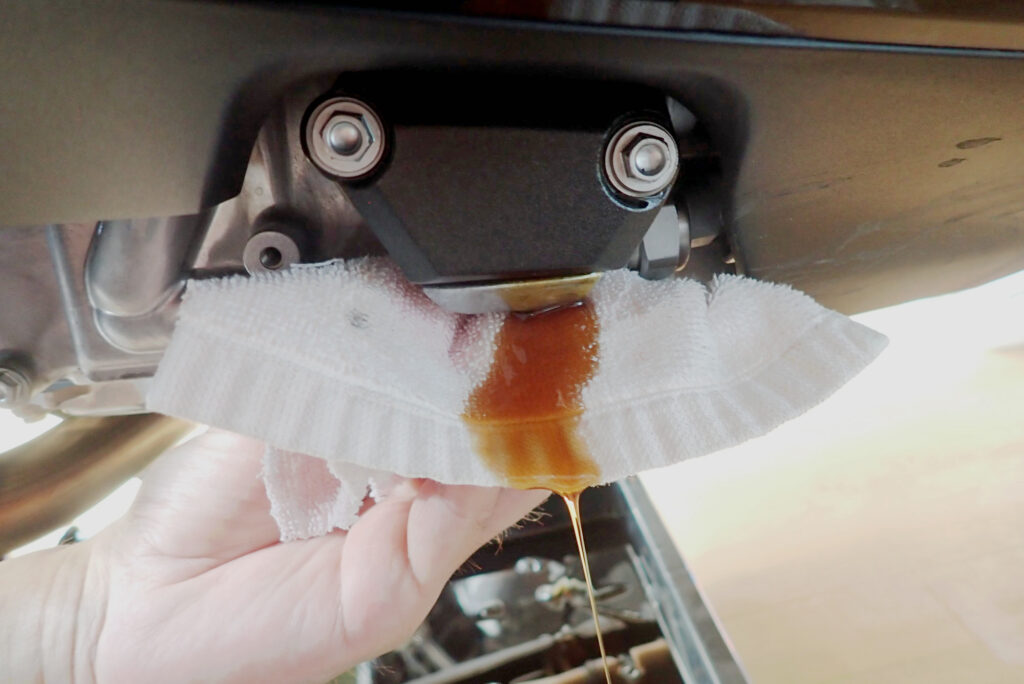
[Image 16: Gently catching the residual oil weeping from behind the cover with a clean white shop rag as the seal breaks]
- Unbolt the DCT cover: Evenly loosen the two cover bolts. Hold a clean shop rag directly beneath the housing to catch the residual oil weeping out as the cover pulls free.
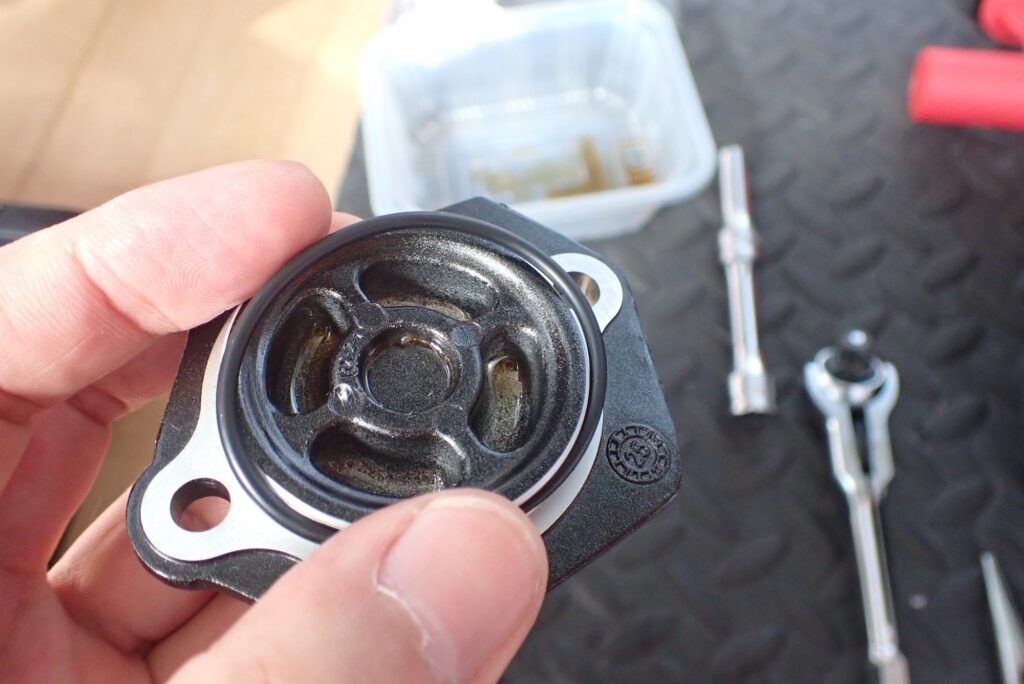
[Image 17: Backside of the removed black DCT oil filter cover, showing the rubber sealing O-ring fitted into its channel]
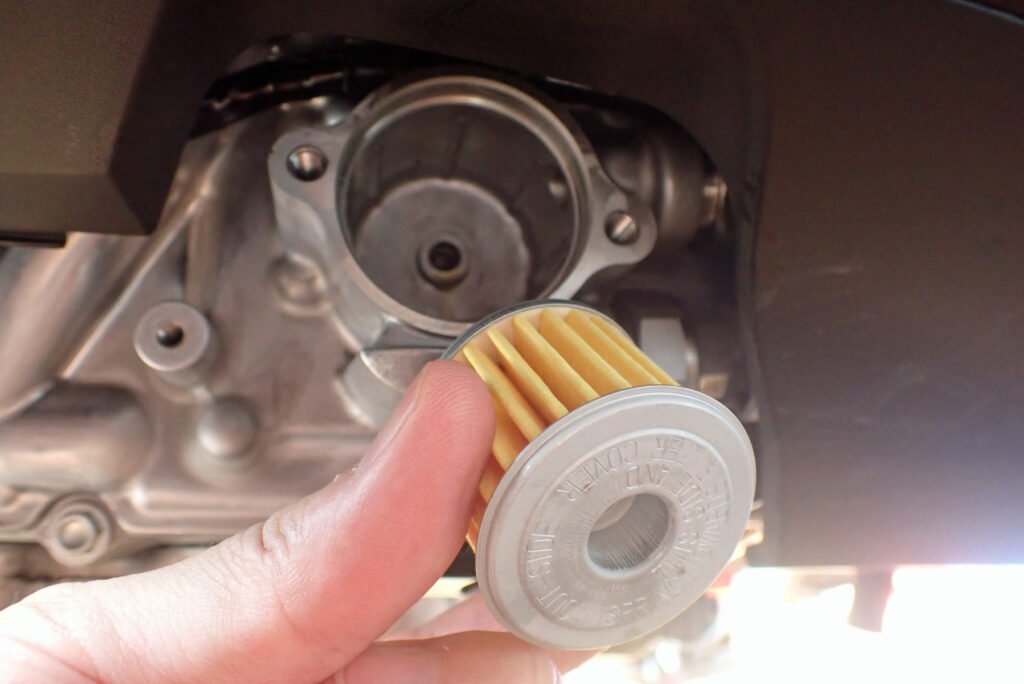
[Image 18: Inside view of the right-side DCT oil filter housing with the cover removed]
- Replace the O-ring: Inspect the rubber O-ring seated in the cover channel. Because heat cycling degrades this rubber seal over time, always replace it with a fresh OEM O-ring to prevent oil leaks under high hydraulic pressure.
Extract the old paper filter element from the cavity and inspect its condition.
The Shocking Reality: How Dirty is a 1,000 km DCT Filter?
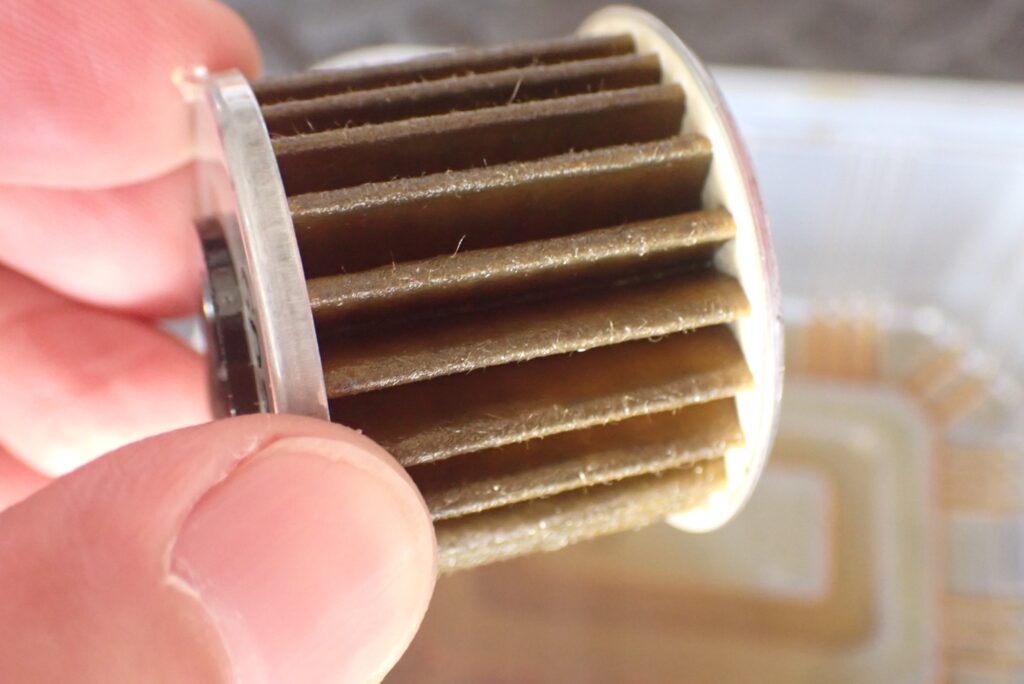
[Image 19: Close-up of the removed paper DCT oil filter, heavily discolored to a dark brown/black hue]
Look at that element. What started as a pristine cream-yellow paper filter has turned completely dark brown after just 1,000 km. It is heavily loaded with micro-sludge and metallic shear particles generated as the internal transmission gears mesh during break-in.
This visual proof highlights the critical role this paper element plays in protecting the DCT’s ultra-delicate hydraulic solenoid valves. Performing this replacement at the 1,000 km mark is 100% essential.
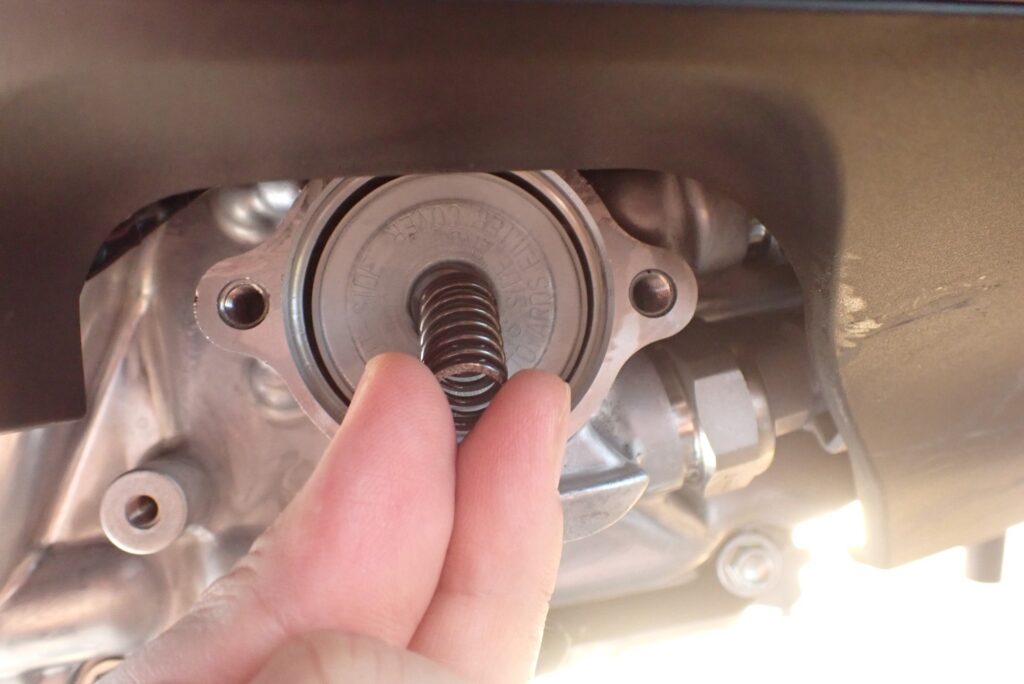
[Image 20: Verifying the orientation of the new yellow paper DCT filter (checking the OUT-SIDE marking) and pairing it with the internal metal spring]
Critical Assembly Notes:
- Do not lose the internal spring! The DCT housing contains a small metal coil spring that keeps pressure on the element. It frequently sticks to the back of the old filter and drops out unnoticed.
- Check element direction! The end-cap of the genuine paper filter is clearly stamped "OUT-SIDE". Installing this filter backward will block the hydraulic oil gallery, triggering shift errors or catastrophic transmission failure.
- Install the new filter: Triple-check that the "OUT-SIDE" stamp faces outward toward you (the cover side). Seat the internal spring, insert the new element, install the fresh O-ring into the cover, and torque the cover bolts down evenly.
[Step 4] Dosing and Adding PREMIUM SPORTS Oil + SOD-1 Plus Additive
With both drain plugs torqued and both filters installed, move on to the fluid fill process.
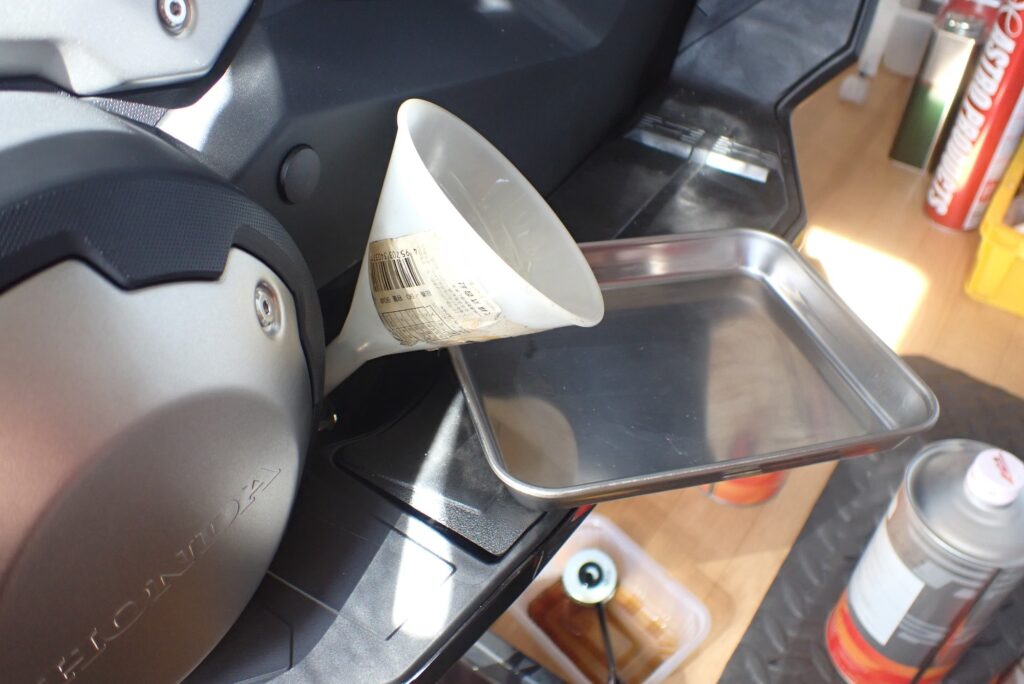
[Image 21: Setting up a white funnel in the right-side filler port with a stainless steel tray positioned beneath to catch accidental drips]
For an X-ADV (DCT model) undergoing a simultaneous engine and DCT filter change, the factory oil capacity spec is 3.4 liters.
To maximize cleaning, anti-wear protection, and hydraulic circuit performance, I added D1 Chemical SOD-1 Plus, a premier ester-based oil additive, blended at the recommended 7% ratio for DCT systems:
- Total Capacity Spec: $3.4 \text{ liters}$ ($3,400 \text{ ml}$)
- SOD-1 Plus Additive (7% ratio): $238 \text{ ml}$
- Honda PREMIUM SPORTS Oil: $3,162 \text{ ml}$ (approx. $3.16 \text{ liters}$)
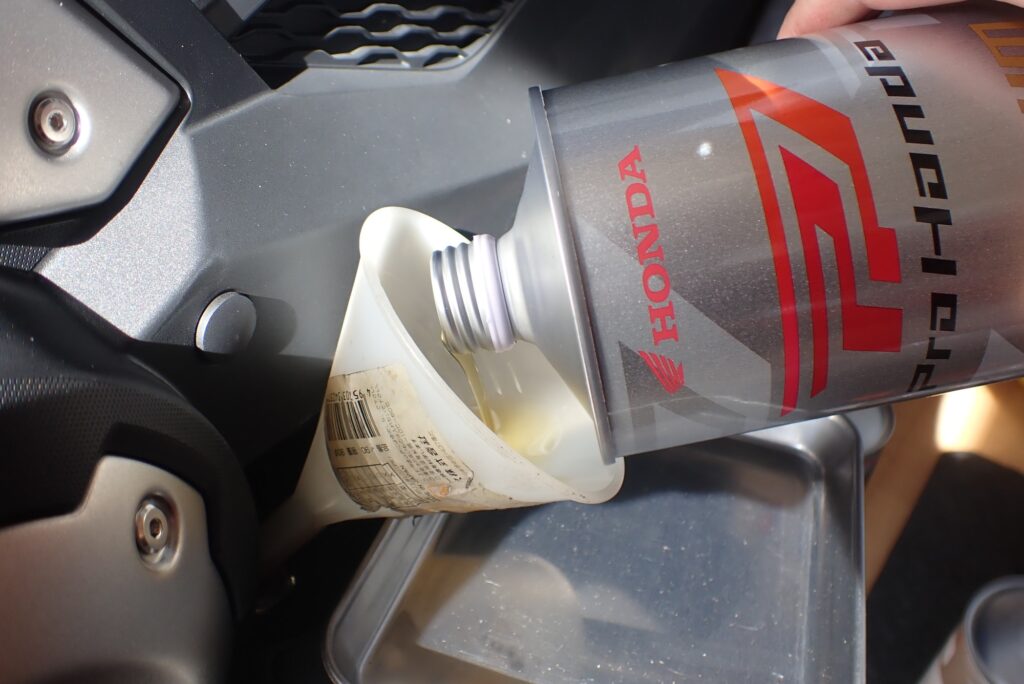
[Image 22: Pouring Honda's top-tier PREMIUM SPORTS synthetic oil slowly into the filler port through the funnel]
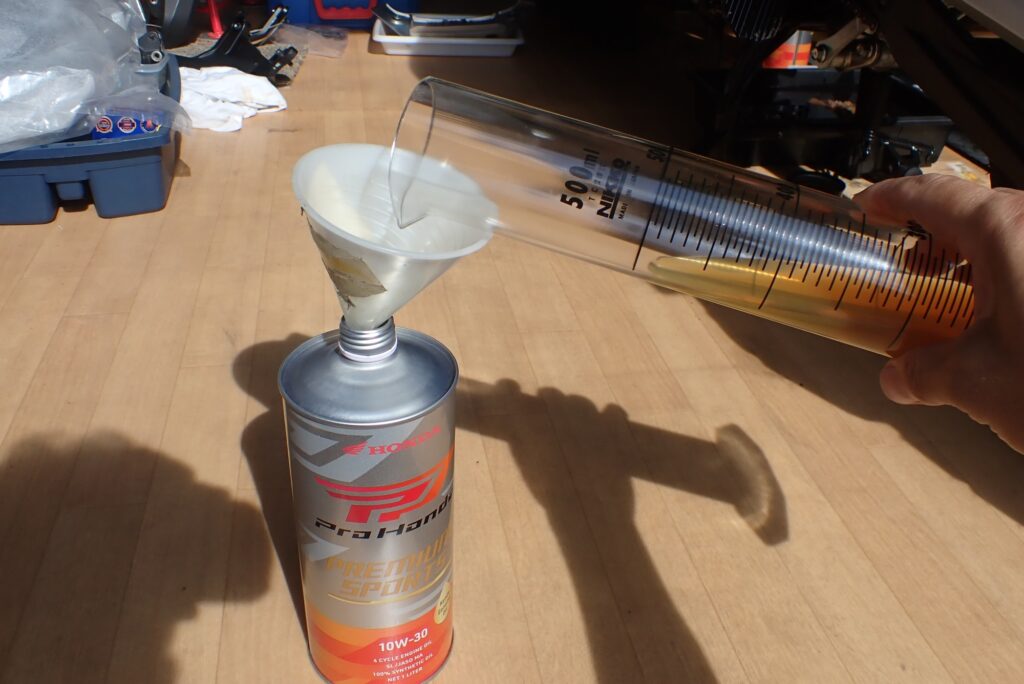
- Pre-mix the additive: Pour the exact dose 238 ml of SOD-1 Plus directly into your Honda oil jug and shake vigorously to premix the additive thoroughly into the base oil before pouring.
- Pour fluid in: Insert a funnel into the filler port and slowly pour the pre-mixed blend into the crankcase.
Once filled, hand-tighten the filler cap, start the engine, and let it idle for a few minutes. Visually inspect the drain plug, main filter, and DCT cover for any signs of weeping or leaks. Shut off the engine.
Checking Oil Level with the Dipstick
Allow the machine to sit upright on level ground for a few minutes so the oil settles completely into the oil pan.
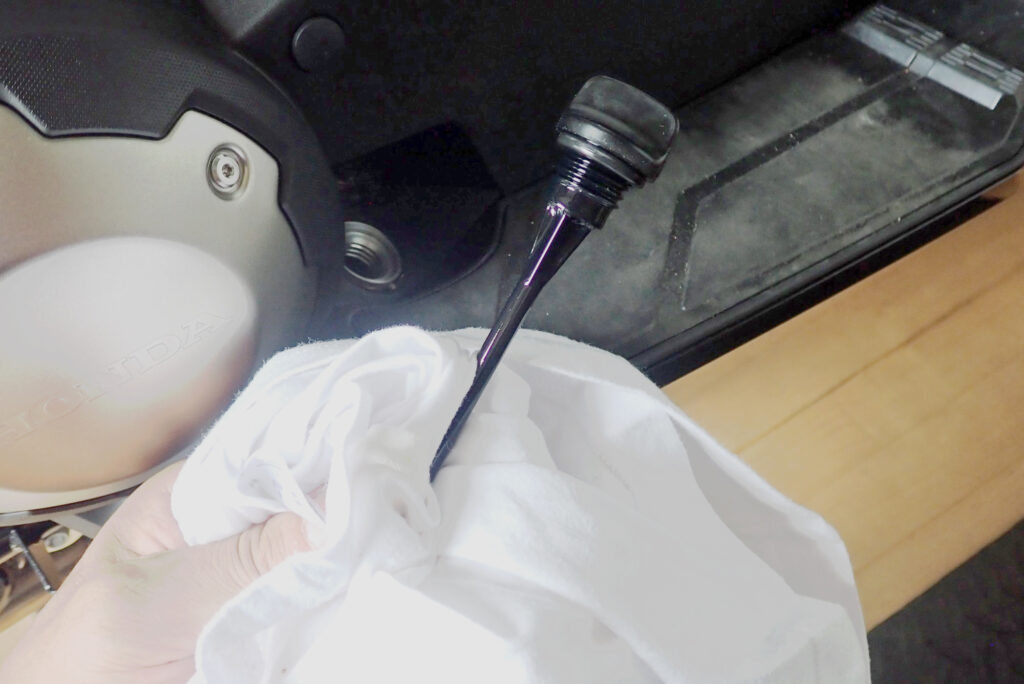
[Image 23: Pulling the oil dipstick out from the filler port and wiping it clean with a fresh white shop rag]
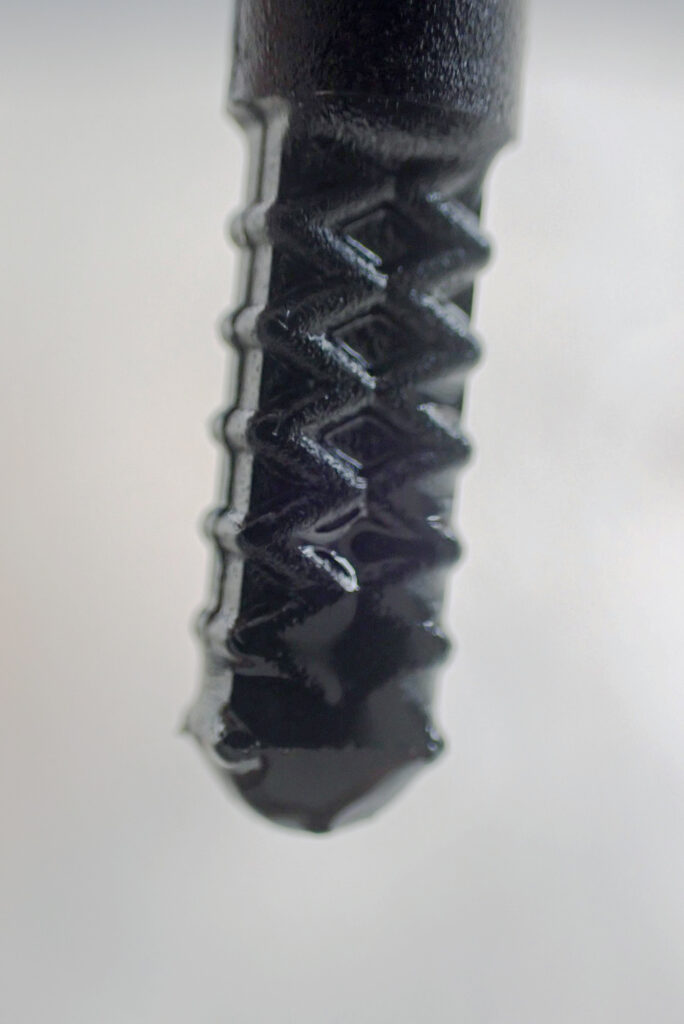
[Image 24: Close-up of the dipstick tip showing clean, amber oil coating the cross-hatched operating range]
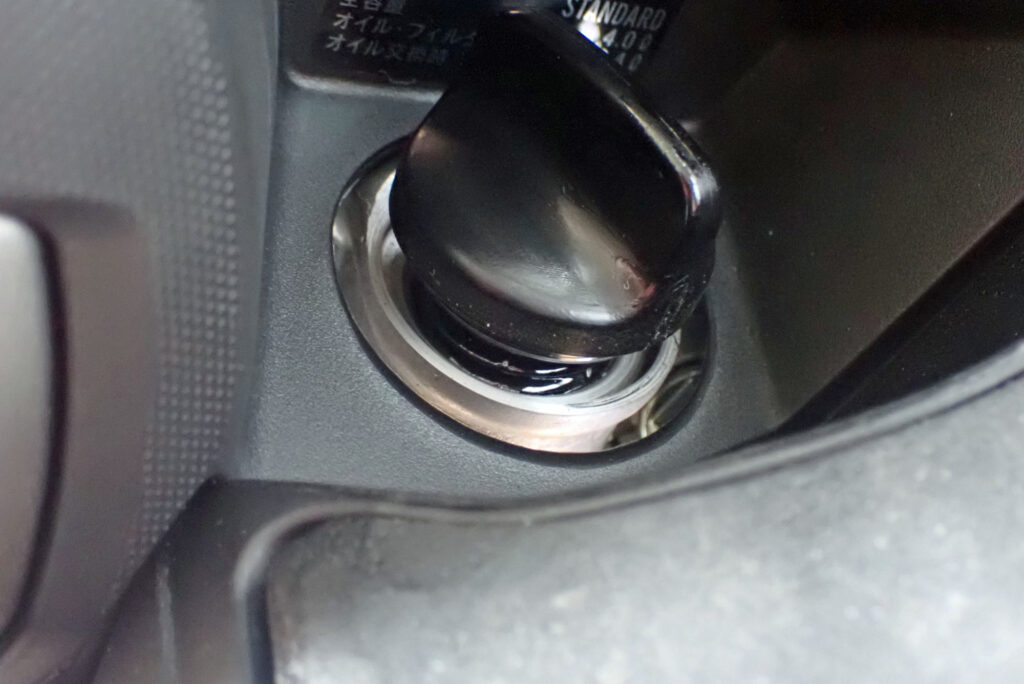
[Image 25: Tightening the oil filler cap/dipstick securely clockwise by hand after verifying the level]
- Measure oil level: Pull the dipstick, wipe it clean, reinsert it into the filler neck without screwing it down, and pull it back out to read the level.
- Verify range: Ensure the oil film lands squarely between the upper (UPPER) and lower (LOWER) limits of the cross-hatched grid.
- Secure the cap: Thread the dipstick cap back in clockwise and tighten securely by hand.
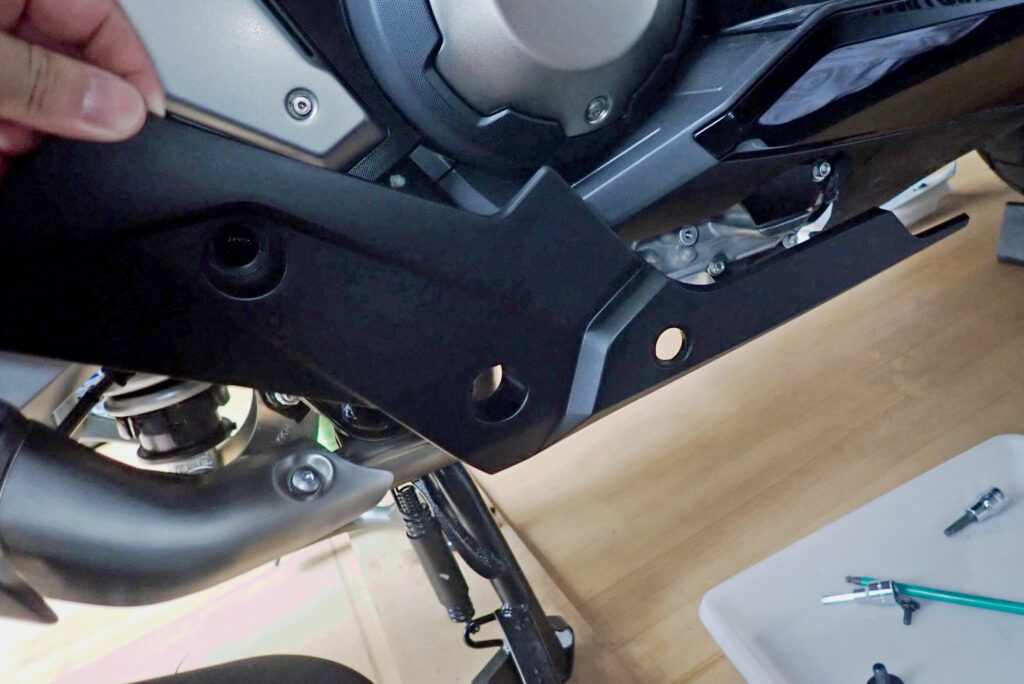
[Image 26: Reinstalling the right lower fairing plastics and lower aluminum skid plate onto the chassis after completing the oil service]
Reinstall the right lower fairing and the aluminum skid plate back onto the chassis in reverse order of disassembly, and your premium oil service is complete!
Proven Supplies & OEM Essentials for This Service
To replicate this high-grade service in your own workshop, here are the essential OEM consumables and professional tools deployed in this project:
- HONDA PREMIUM SPORTS 10W-30 (100% Synthetic)Honda's flagship motorcycle oil engineered for everything from track days to extreme adventure touring. It delivers exceptionally light shift feel and maintains precise DCT clutch engagement over extended service intervals.
- D1 Chemical SOD-1 Plus (Ester-Based Additive)A next-generation ester additive praised by professional mechanics. It minimizes initial break-in wear and prevents sludge accumulation inside the high-precision hydraulic control valves of the DCT system.
- Honda OEM Engine Oil Filter & DCT Filter KitThe genuine spin-on cartridge (15410-MFJ-D02) and paper DCT element (15412-MGS-D21) set. Sticking strictly to OEM filters guarantees correct bypass pressure values and filtration efficiency.
Conclusion: Dual Filter Swaps and Precise Dosing Preserve Peak DCT Performance
That wraps up my step-by-step guide for the 1,000 km break-in oil change on the Honda X-ADV.
- Eradicate Break-in Sludge: Swapping both the engine oil filter and paper DCT filter simultaneously captures suspended metal particles generated during initial engine meshing.
- Execute Precise Torquing: Pre-lube new rubber O-rings with fresh oil and torque all drain plugs and filters down to exact factory specifications.
- Mind the Assembly Details: Pay strict attention to the DCT filter orientation ("OUT-SIDE" marking) and ensure the internal coil spring is reinstalled.
The discolored paper DCT element removed today clearly proves the massive amount of sludge circulating during break-in. Upgrading to a premium cocktail of Honda PREMIUM SPORTS oil blended with SOD-1 Plus eliminates factory shift stiffness, transforming the DCT into a silky-smooth, lightning-quick transmission.
Equip yourself with the correct tools, take your time, and enjoy the satisfaction of servicing your own machine!
Ride safe, and enjoy the ultimate motorcycle life!