Does your BMW G650GS feel jerky when pulling away or at very low speeds? Does it knock or stall easily at low revs?
In short, a BoosterPlug is a plug-in (connector-to-connector) part that takes about 30 minutes to fit. On my G650GS, low-speed rideability improved noticeably.
I fitted one to my own G650GS. In this article, I show how to unplug the connector, where I put the sensor and module, and what I noticed while doing the job.
| Item | Details | Notes |
|---|---|---|
| Bike | BMW G650GS | Single-cylinder model (may also apply to bikes with the same engine) |
| Difficulty | ★★☆☆☆ (beginner to intermediate) | Plug-in only. Take care when fixing the sensor |
| Time | About 30–40 minutes | Including removing and refitting the right-hand side panel |
| Tools | Torx driver, cable ties (zip ties), side cutters | Torx is for the right-hand side panel |
Key points
- The BoosterPlug simply plugs in between the intake air temperature sensor and its connector behind the right-hand side panel
- The original connector unlocks safely when you push in its thin metal wire clip with your finger
- Fix the unit to the frame where it won’t touch the forks at full lock
- Put the ambient temperature sensor near the airbox intake, away from engine heat and direct sunlight
- The airbox snorkel tapers towards the front. On my bike the cable tie hasn’t loosened in over a year, but an anti-slip measure gives extra peace of mind
Why fit a BoosterPlug to a BMW G650GS?
A BoosterPlug adjusts the signal from the intake air temperature sensor so that the mixture at low revs is about 6% richer (according to the manufacturer). This softens the snatchy throttle response typical of single-cylinder engines.
Modern fuel-injected bikes built to strict emissions rules run very lean at very low revs. This can make the bike hesitate when pulling away and feel jerky when you just crack the throttle open.
With the BoosterPlug fitted, the response when you first open the throttle became gentler, and I felt more confident riding in town and doing U-turns.
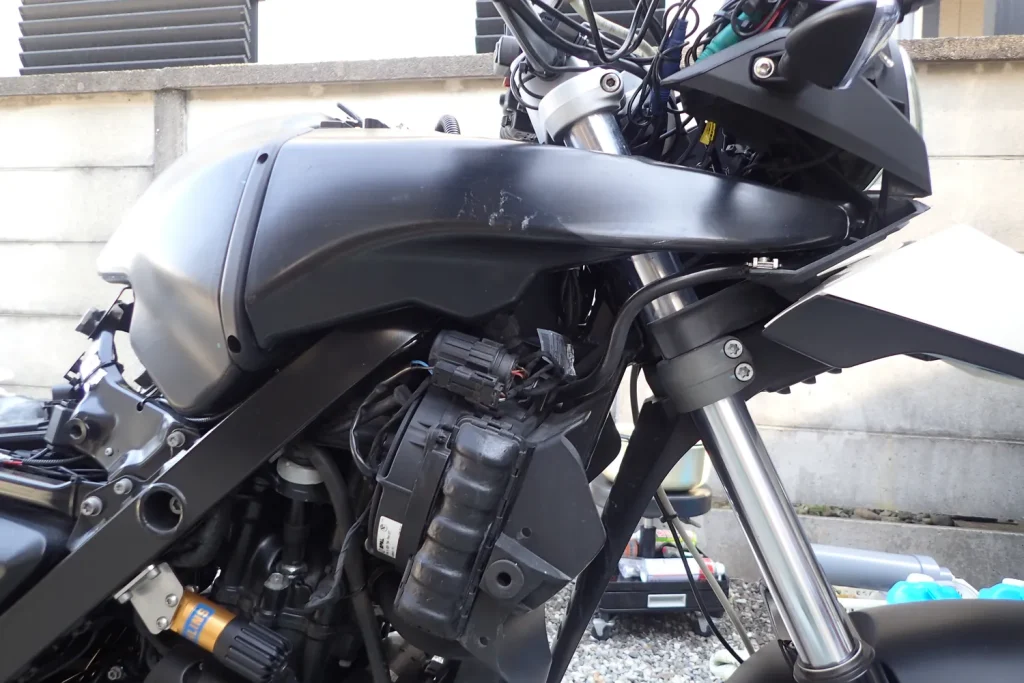
There is no cutting or splicing of wires. It just plugs in between the original connectors, so even if you are new to working on bikes, you can fit it in about 30 minutes.
Tools and safety checks before you start
You only need three basic tools: a Torx driver for the side panel, cable ties and side cutters.
| Tool | Use | Tips |
|---|---|---|
| Torx driver | Removing the right-hand side panel bolts | Use the size that fits the panel bolts |
| Weatherproof cable ties | Fixing the unit and sensor cable | Heat- and weather-resistant ties are recommended near the engine |
| Side cutters | Trimming the cable tie tails | Flush-cut cutters avoid leaving sharp ends |
Before you start, always turn the ignition off and make sure the engine and exhaust have fully cooled down. Don’t do this straight after a ride: you could burn yourself, and heat builds up around the sensor.
Step-by-step installation with photos (4 steps)
To fit the BoosterPlug, remove the right-hand side panel and plug the unit into the intake air temperature sensor connector.
- Remove the right-hand side panel
Undo the bolts on the right-hand side of the bike and remove the panel. You will work in the area around the airbox behind it.
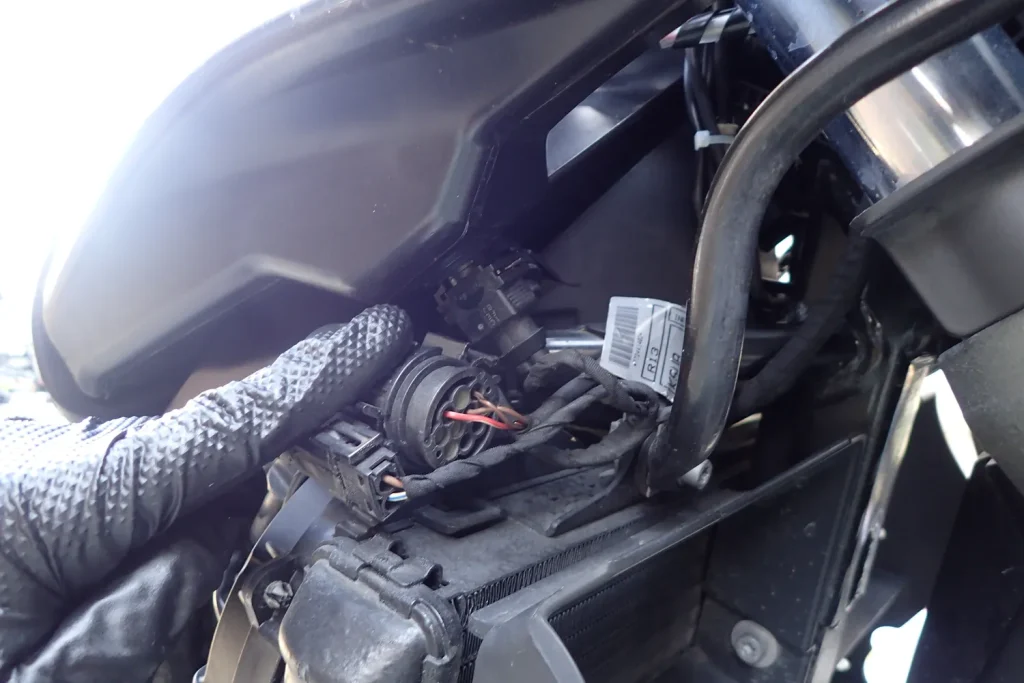
- Find the original intake air temperature (IAT) sensor connector
Find the original connector on the side of the airbox. As standard, the harness plugs straight into the sensor.
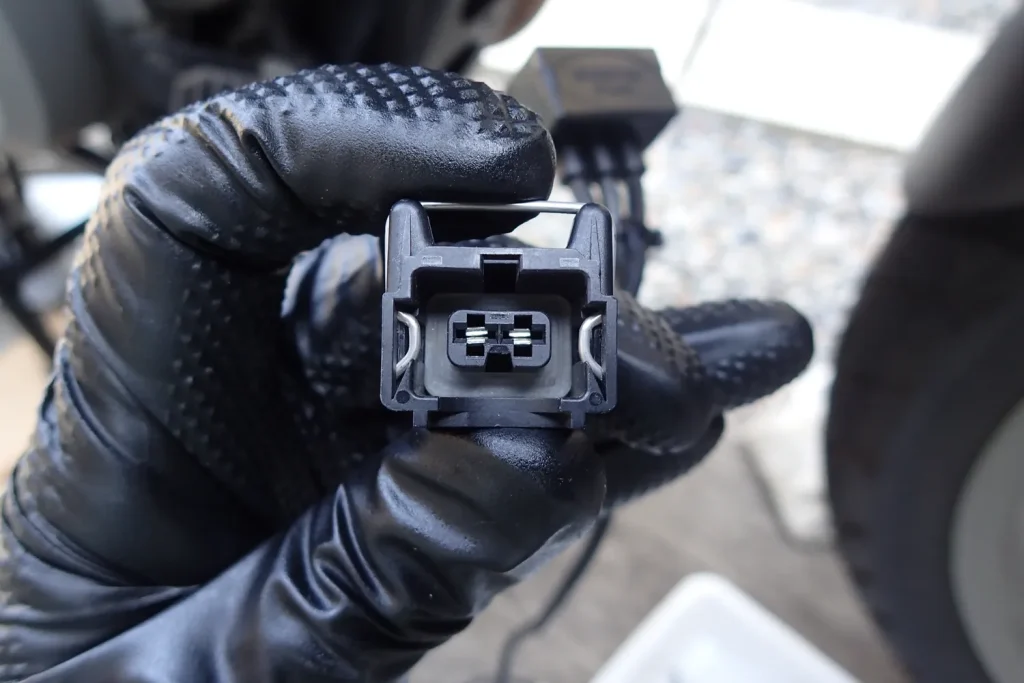
- Push in the metal locking clip and pull the connector off
The connector has a thin metal wire clip that stops it from coming off. Push this clip firmly inwards with your index finger to release the lock.
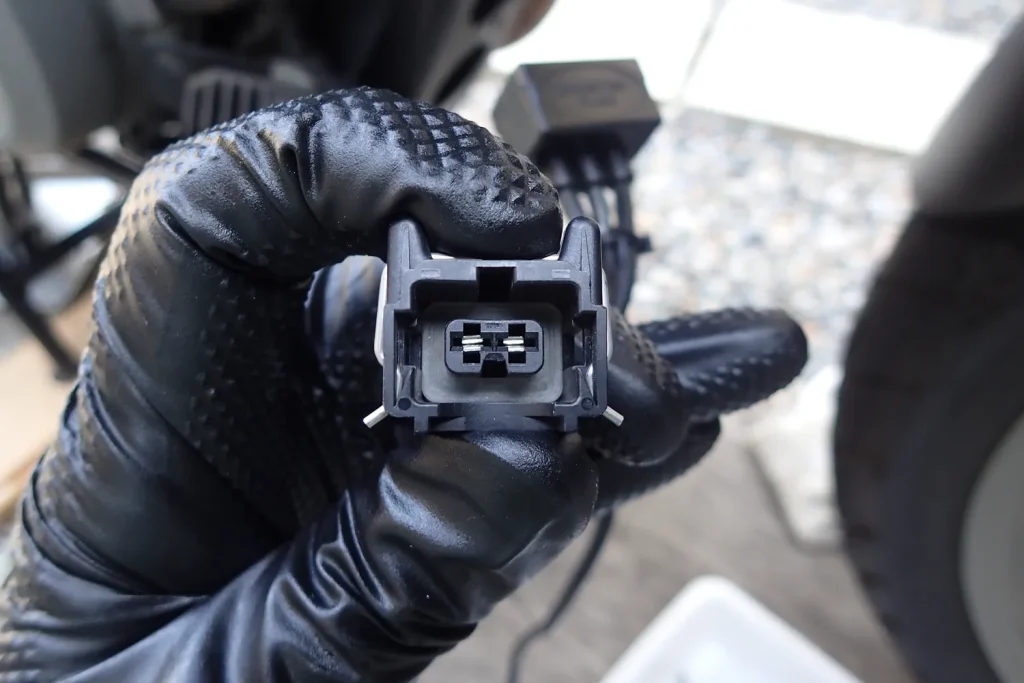
Space around the connector is tight and the wires are thin, so pulling on the cable could break a wire. Always hold the connector body and pull it straight off, carefully.
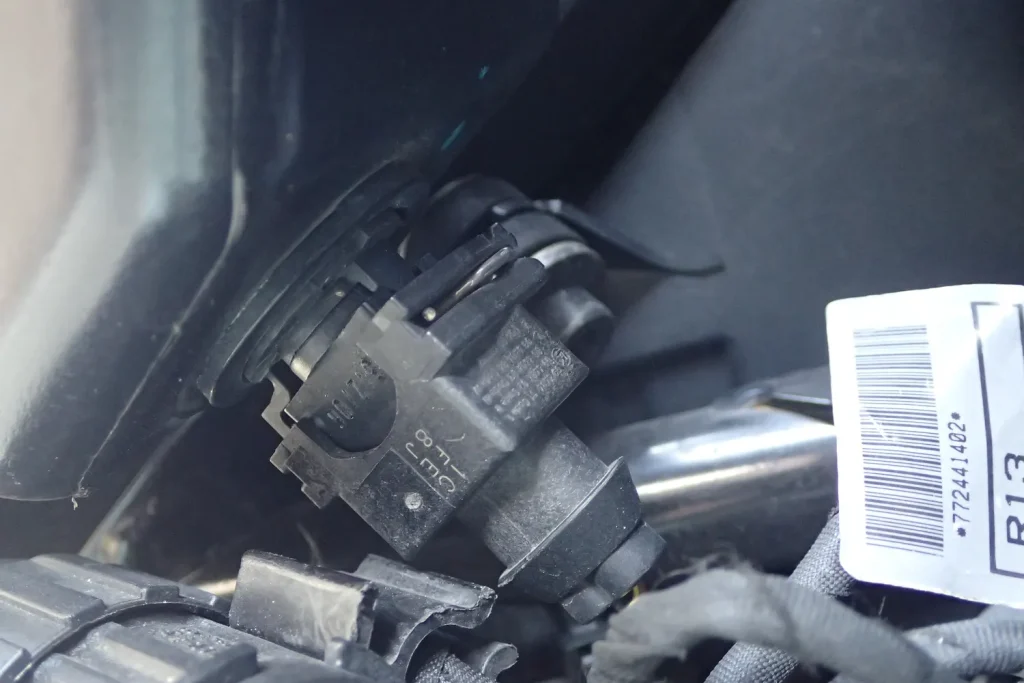
- Plug in the BoosterPlug
Connect the BoosterPlug between the sensor and the bike’s wiring harness. The connectors only fit one way, so you can’t plug them in wrongly.
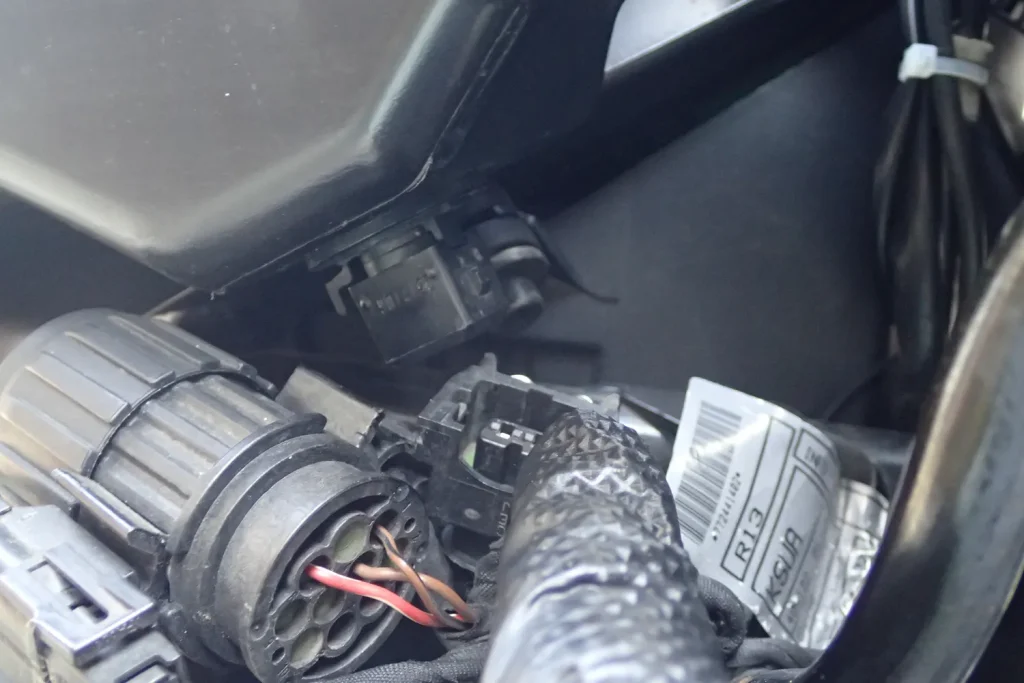
Where to put the ambient sensor and the BoosterPlug unit
Fix the BoosterPlug unit to the frame, away from moving parts around the steering head, and put the ambient temperature sensor where it gets fresh air.
First, choose a spot for the unit where it won’t touch the forks or the fork yokes (triple clamps) when you turn the handlebars to full lock in both directions, and fix it to the frame with cable ties.
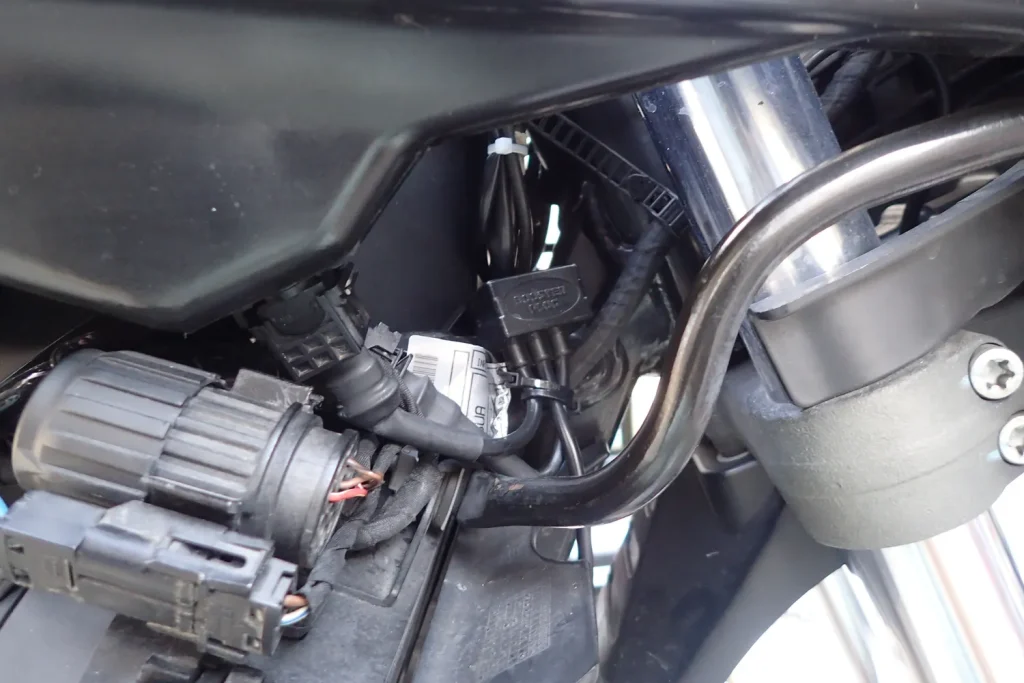
Next, the ambient temperature sensor. The extra fuel is based on the outside air temperature this sensor measures, so avoid these two places:
- Places where hot air from the engine hits it directly
- Places in direct sunlight
I routed the cable to the airbox air intake (the snorkel), which always takes in fresh air while riding.
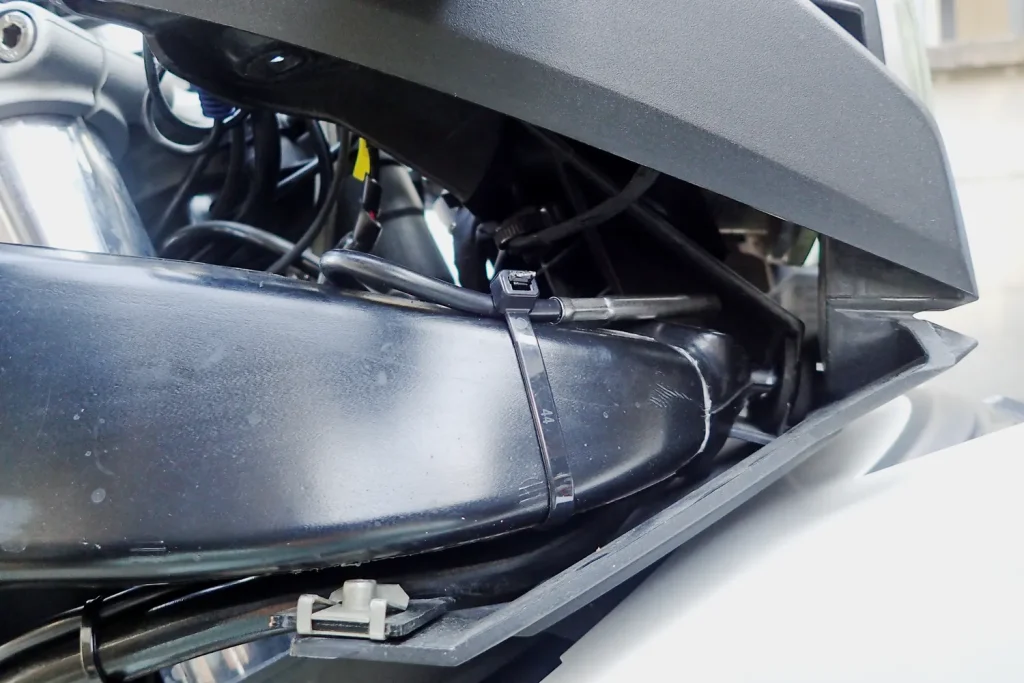
Watch out: cable ties on the tapered airbox snorkel
The front of the airbox snorkel tapers towards the front, so a cable tie alone might work loose with vibration.
I cable-tied the sensor directly to the snorkel. After finishing, I started to worry that the cable tie might slide forwards and loosen because of this shape.
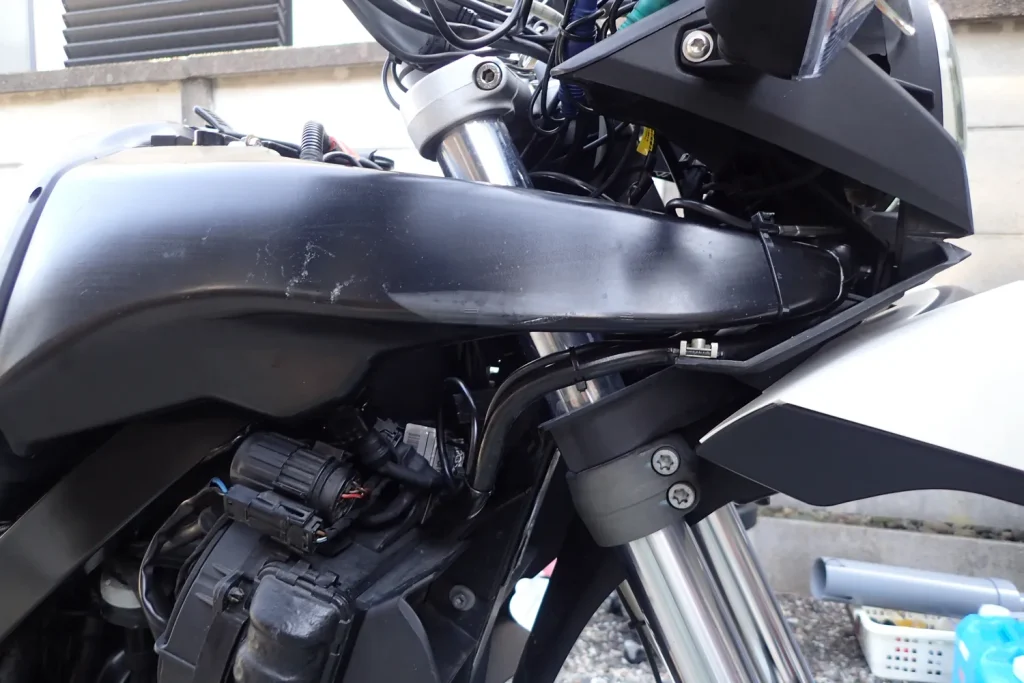
I have now ridden with it like this for over a year, and the cable tie hasn’t loosened (added October 2026). However, if the sensor did come off, it could get caught in the steering or other moving parts. If you are worried, the measures below will give you peace of mind.
| Measure | How | Benefit |
|---|---|---|
| Add an anti-slip layer | Wrap self-amalgamating tape once or twice around the snorkel where the tie goes | The rubber grip makes it harder for the tie to slide forwards |
| Use a mounting base | Stick an adhesive cable tie mount onto a flat surface | Holds well regardless of the tapered shape |
| Move the fixing point | Avoid the tip of the snorkel; run the cable along a thicker stay near the base of the box | Uses a step in the shape to stop it slipping off |
BoosterPlug on the G650GS: FAQ
Q1. Will the bike pass its roadworthiness test with it fitted?
My G650GS passed the Japanese roadworthiness inspection (shaken) with the BoosterPlug fitted. My guess is that, once the engine is warm, the O2 sensor feedback works at idle, so the emissions readings don’t change much. Test rules differ by country, so check the rules where you live.
Q2. Does fuel economy get much worse?
By my records, fuel economy got about 8% worse. According to the manufacturer, it makes the mixture about 6% richer, so some loss is unavoidable. I see it as the price of better rideability.
Q3. Does a warning light come on?
I have used it for over a year, and no warning light has ever come on.
Summary: fit it and feel the difference
Fitting a BoosterPlug to a BMW G650GS is a plug-in job with no wire cutting, and I felt the results were worth the cost.
As long as you unlock the thin connector carefully and secure the ambient sensor so it can’t fall off, even a DIY beginner can fit it.
I review how the low-speed torque, snatchy throttle and fuel economy changed after fitting it in a separate article:
Note: This is a record of work I did on my own bike. I’m not a qualified mechanic. The “about 6% richer” figure is the manufacturer’s claim. I bought my BoosterPlug in Japan; the product is BoosterPlug for BMW G650GS (BMW-0901).