A dedicated motorcycle dashcam has become an essential piece of safety equipment to protect riders against unexpected traffic accidents, hit-and-runs, and aggressive tailgating.
However, when installing the wildly popular, high-definition Daytona Mio MiVue M820WD system on a Honda X-ADV (2026 Model / Chassis: RH21), almost every garage mechanic encounters two universal headaches: front camera placement and cable harness length.
- "I refuse to drill holes into expensive OEM factory plastics..."
- "Using double-sided foam tape makes me nervous—summer heat and rain could cause the camera to drop off or peel the clear coat..."
- "The standard harness from the under-seat base unit cannot reach the handlebars..."
Here is the bottom line: by pairing the Kaedear Rotary Mirror Camera Bracket (KDR-YX401) with the genuine Daytona 1m Camera Extension Cable (Part No. 40861), you can execute a clean, professional front camera installation with zero fairing modifications and zero double-sided tape.
Below is a complete, mechanic-grade DIY installation guide detailing every step, safety consideration, and wiring layout to achieve rock-solid reliability on your X-ADV!
1. The Challenge: Front Camera Placement on the Honda X-ADV
Fusing the aggressive stance of an adventure bike with the comfort of a maxi-scooter, the Honda X-ADV features sharp, multi-layered front-end styling.
While many riders resort to sticking camera mounts onto the front plastics or beneath the windscreen with double-sided tape, doing so on the X-ADV introduces serious operational drawbacks:
| Mounting Method | Pros | Challenges & Risks on the X-ADV |
| Direct Fairing Tape (Double-Sided Tape) | Fast and simple installation | High risk of dropping off due to intense summer heat and road rain; aggressive adhesives risk peeling clear coat upon removal. |
| Drilling Plastics (Bolt-On) | Rock-solid mechanical retention | Drilling permanent holes into expensive OEM plastics destroys resale value and risks water ingress into electrical channels. |
| Under-Headlight Mount | Discreet, low-profile look | High risk of the front fender colliding with the camera when the front suspension compresses under heavy braking. |
| Mirror Pinch Bracket (Recommended) | Zero mods, high rigidity, zero drop-off risk | Zero bodywork modification. Elevates the lens to secure an ultra-wide forward field of view (FOV). |
To protect your plastics while ensuring permanent, vibration-proof retention, sandwiching a dedicated bracket beneath the factory mirror mount is the premier choice.
2. Solving the Wiring Gap: Why the Daytona 1m Extension (40861) is Mandatory
When outfitting an X-ADV with a dashcam, the standard practice is to house the main recording unit inside the under-seat luggage compartment (helmet box) to ensure maximum waterproofing and theft deterrence.
However, this immediately triggers a wiring shortfall.
The factory front camera cable bundled with the M820WD measures approximately 0.9 meters. To route from the under-seat compartment, down through the chassis frame, past the steering stem, and up to the handlebars, this stock cable is physically too short.
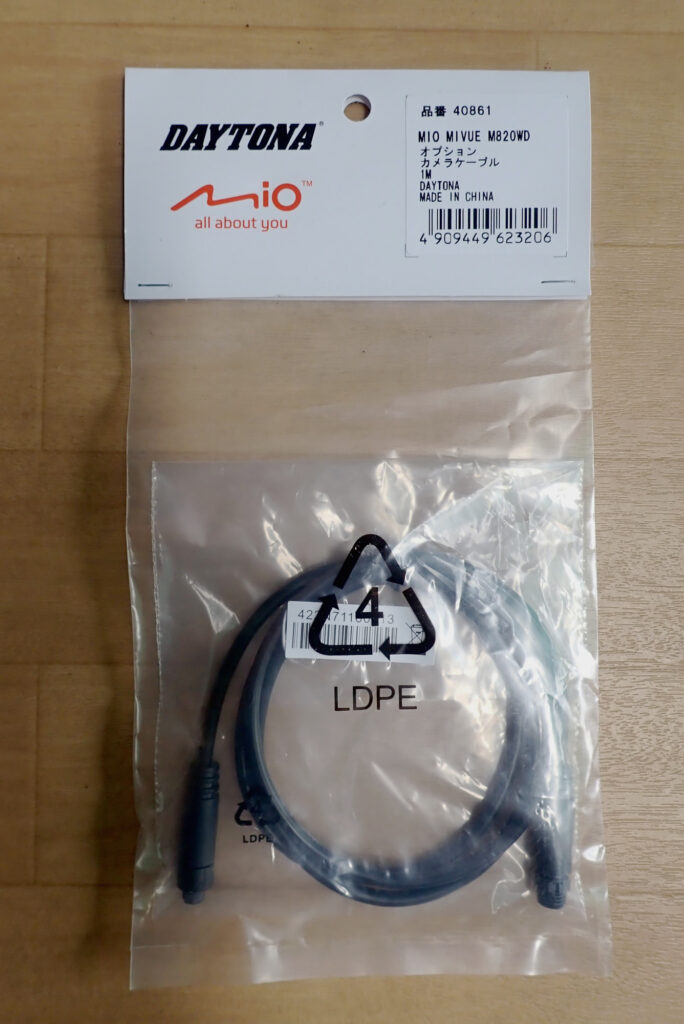
[Image 1: Daytona Mio MiVue M820WD packaging and the genuine 1m extension cable (Part No. 40861)]
That makes the genuine Daytona Camera Extension Cable 1m (Part No. 40861) an absolute necessity.
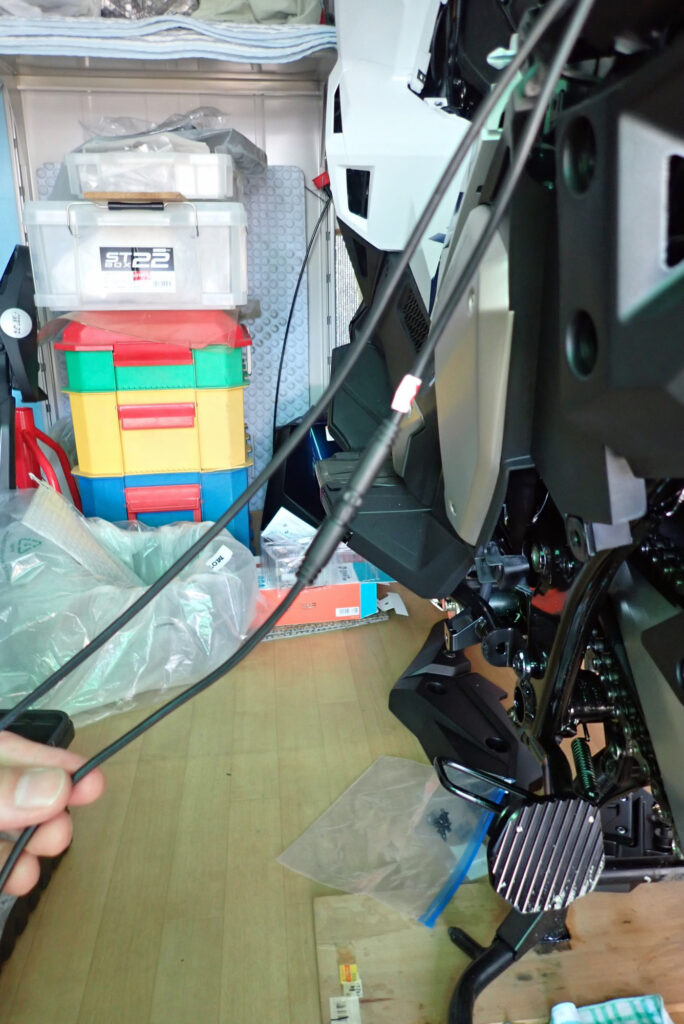
[Image 2: Close-up of the threaded screw-lock waterproof connector on the Daytona 40861 extension cable]
This OEM extension harness utilizes a heavy-duty, screw-locking connector engineered specifically for the M820WD. Push the terminal pins fully home and hand-tighten the threaded outer locking ring to lock out water ingress and prevent connection chatter from high-frequency road vibrations. This is a specialized, plug-and-play expansion part that generic aftermarket cables simply cannot match.
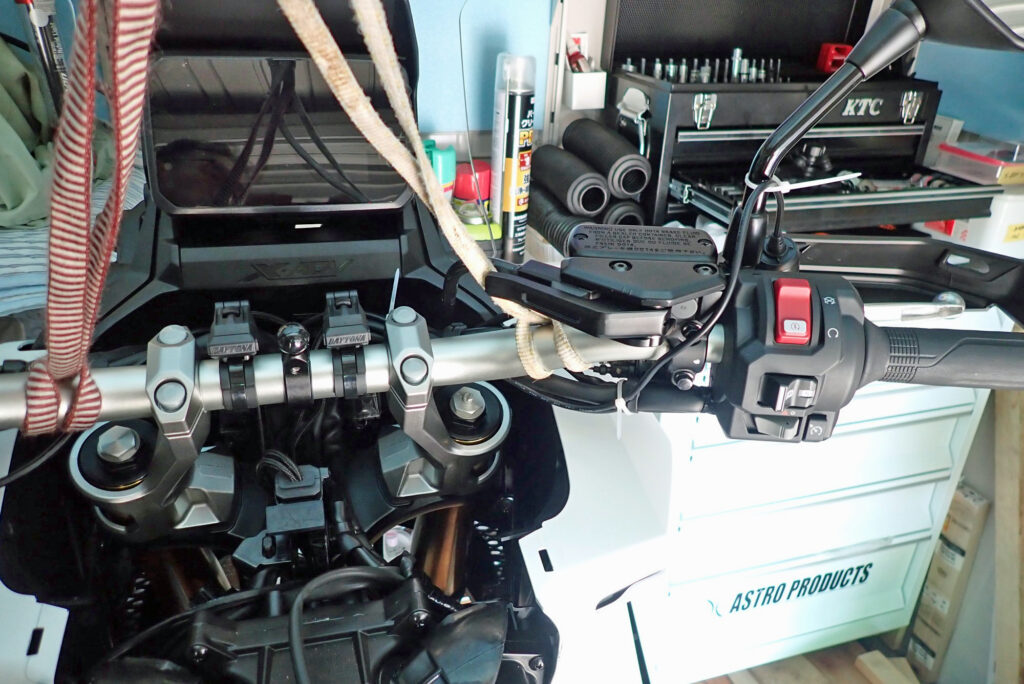
By splicing in this 1-meter extension, you can route harnesses from the under-seat bay straight to the right-hand mirror with zero tensile strain on the wiring.
3. Hardware Breakdown: Kaedear Rotary Mirror Camera Bracket (KDR-YX401)
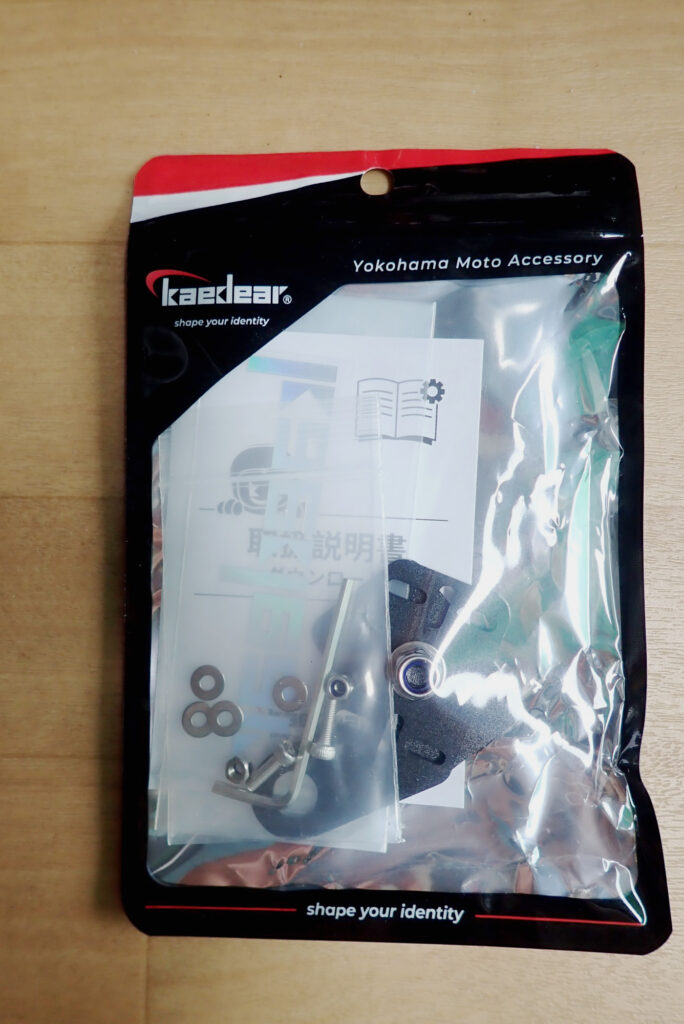
To anchor the front camera firmly beneath the right mirror stem, I selected the Kaedear Rotary Mirror Camera Bracket (KDR-YX401).
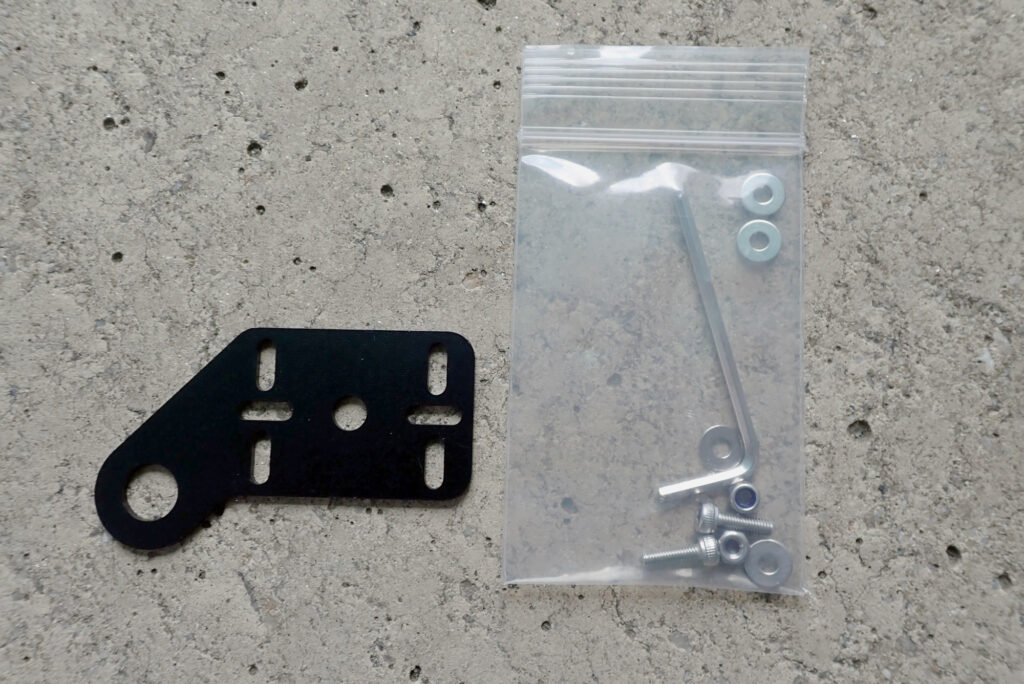
[Image 3: Kaedear KDR-YX401 rotary mirror camera bracket kit contents and hardware]
Key Specs:
- High-Rigidity, Corrosion-Resistant Aluminum Alloy: Thick aluminum plate that resists high-speed wind pressure and chassis shocks.
- Complete Hardware Included: Packaged with mounting bolts, nylon lock nuts, and hex keys.
- Universal Mirror Mount (M8/M10 Compatible): Slips directly over standard mirror mounting studs.
- Exceptional Cost-Performance: High-end build quality at an accessible price point.
Mechanic’s Detail: Why Skip the Included Rotary Plate?
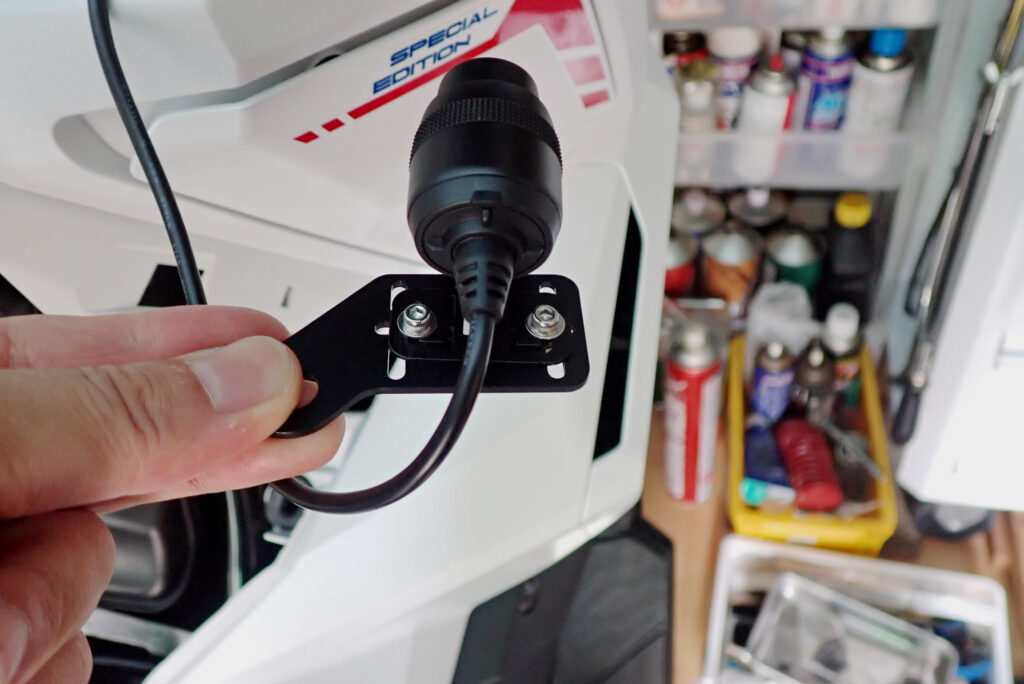
The Kaedear kit includes a circular "rotary plate" designed for multi-angle adjustment. However, on this build, I bypassed the rotary plate entirely and bolted the Daytona camera cradle directly to the main bracket arm.
[Image 4: Direct bolting the M820WD camera bracket to the Kaedear mirror stay without using the rotary plate]
Here is why:
- Direct Bolting Delivers Complete Field of View Control: The Daytona M820WD camera cradle incorporates an integrated vertical tilt mechanism. Pairing this built-in tilt with the horizontal pivot of the mirror bracket arm provides complete adjustability over your forward horizon.
- Eliminates Double-Sided Tape Failure Points: Using the rotary plate requires securing the camera mount with double-sided foam adhesive. To eliminate long-term adhesive breakdown from UV exposure, rain, and scorching engine heat, an all-metal, through-bolt mechanical connection is far superior.
Nylon Lock Nuts: Zero Vibration Loosening Without Liquid Threadlocker
The Kaedear bracket comes supplied with nylon-insert lock nuts (Nyloc nuts). When threaded down, the internal nylon collar deforms elastically over the bolt threads, preventing hardware from backing out under severe single- and twin-cylinder vibrations. This allows you to achieve a permanent mechanical lock without applying liquid threadlocker.
4. Step-by-Step Installation on the Honda X-ADV
Follow these steps to complete the installation cleanly and safely:
Step 1: Gather Required Tools
- 14mm Open-End Wrench (Mandatory for mirror lock nuts)
- Hex / Allen Keys (Included with the Kaedear kit)
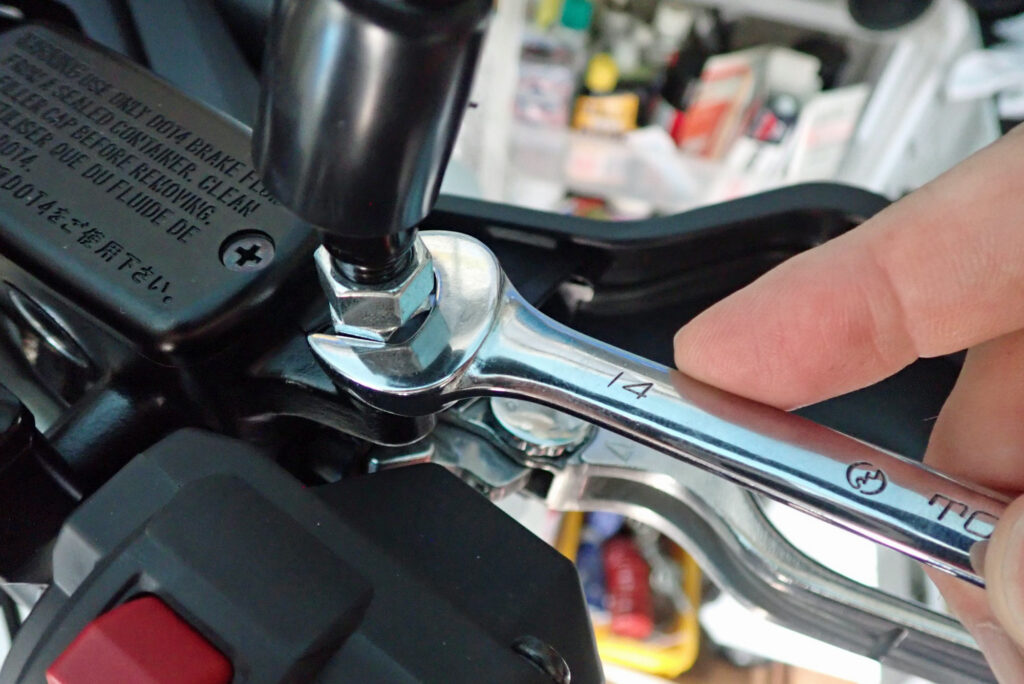
Step 2: Remove the Right-Side Mirror
The X-ADV mirror assembly uses a dual-nut shock-absorbing adapter design.
[Image 5: Peeling back the rubber boot on the right mirror stem and loosening the 14mm lock nut]
- Slide the protective rubber weather boot up the mirror stem.
- Engage the lower adapter bolt with your 14mm open-end wrench, loosen the fastener, and unthread the mirror assembly from the perch.
Mechanic's Caution: Honda mirror adapters can feature a mix of standard (right-hand) and reverse (left-hand) threads depending on the specific model year and side. Inspect the exposed thread pitch carefully before applying torque to avoid stripping the perch threads!
Step 3: Mate the Camera Cradle to the Kaedear Bracket
- Align the Daytona M820WD camera mounting foot over the pre-drilled hole on the Kaedear bracket arm.
- Insert the included socket-head bolt through the bracket and start the nylon lock nut on the reverse side.
- Check horizontal alignment and torque down securely using your hex key and a wrench.
Step 4: Connect the Extension Harness and Route Wiring
- Run the main camera harness forward from the M820WD unit mounted in the under-seat storage bay.
- Mate the harness to the Daytona 1m Extension Cable (40861), pushing the pins fully together before threading the waterproof collar down tight.
- Route the harness along the main frame backbone toward the handlebars.
- Turn the handlebars lock-to-lock (fully left and fully right) to confirm the harness has sufficient slack without binding, pinching, or snagging, then secure it using zip ties.
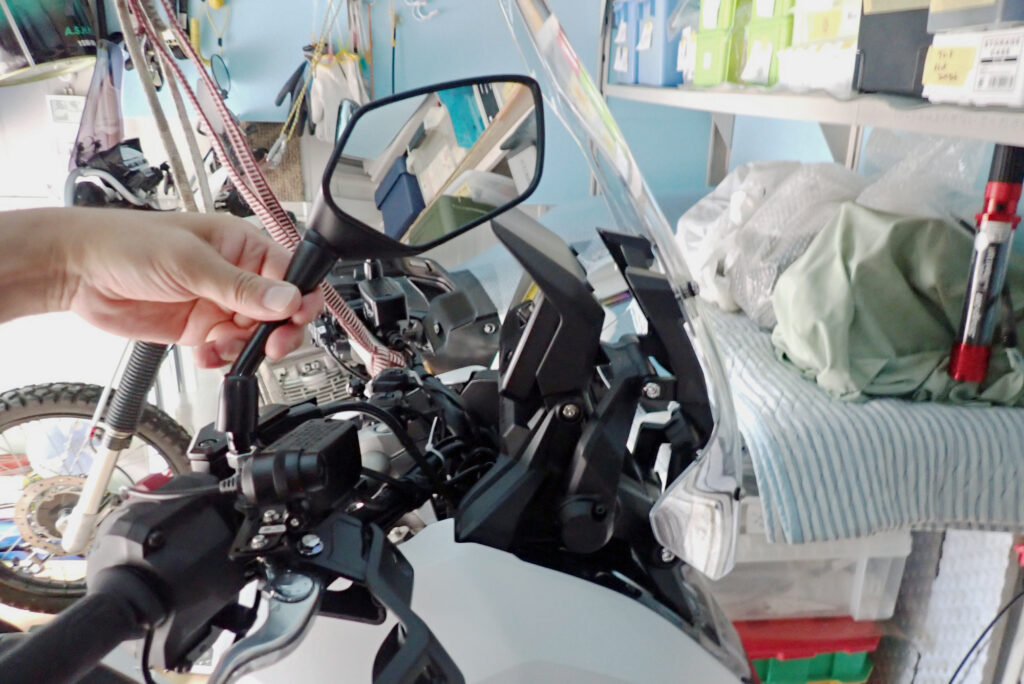
Step 5: Sandwich the Bracket Under the Mirror Stud
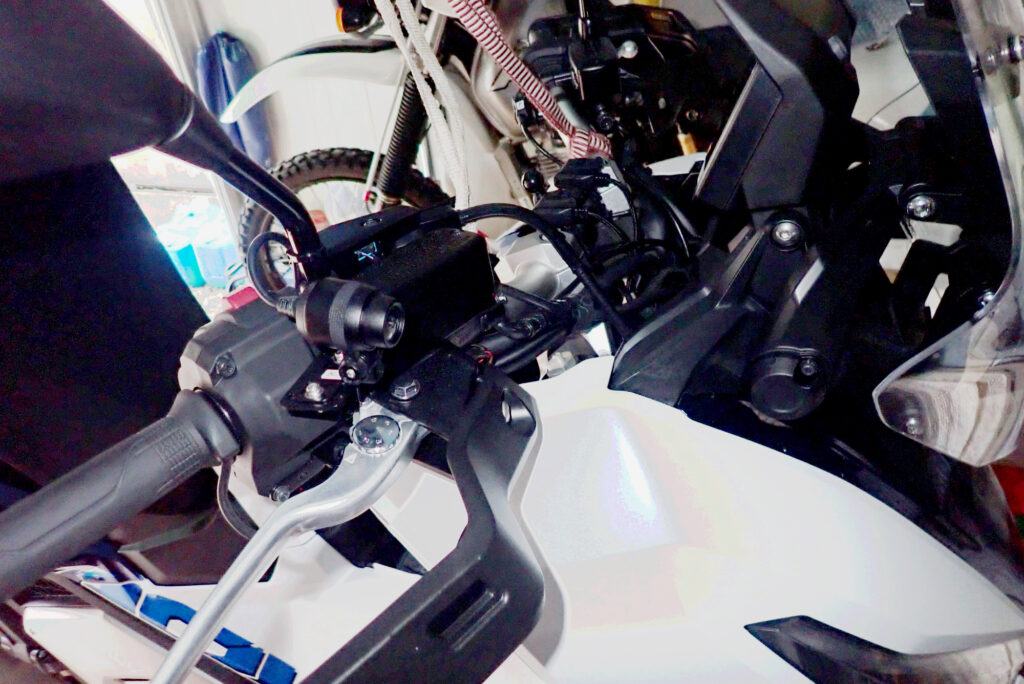
[Image 6: Kaedear bracket sandwiched securely beneath the right mirror stem on the handlebar]
- Position the mounting eyelet of the Kaedear bracket over the handlebar mirror hole.
- Thread the right mirror stem through the bracket and run it down into the perch adapter.
- Tighten the lower lock nut securely using your 14mm wrench.
- Confirm that the camera body and bracket do not contact the front brake lever or throttle housing across their full range of motion.
- Readjust your rear-view mirror angle, and the installation is complete!
The camera tucks cleanly beneath the right mirror, providing a factory-integrated look that appears straight out of the Honda genuine accessory catalog.
5. Pros & Cons (Real-World Workshop Review)
What Works:
- Zero Plastics Drilling / Zero Adhesive Tape: Keeps factory bodywork pristine, preserving your machine's resale value.
- High Rigidity & Zero Drop-Off Anxiety: Through-bolt mounting and nylon lock nuts eliminate worries about weather-degraded adhesives.
- Unobstructed, Elevated Horizon: Mounting directly beneath the right mirror gives the wide-angle lens an elevated vantage point to capture vehicle license plates cleanly.
- Stress-Free Wiring: The Daytona 1m extension harness ensures a factory-clean routing path from the seat compartment to the cockpit without taut wiring.
Things to Keep in Mind:
- 14mm Open-End Wrench Required: A standard adjustable wrench can be too bulky around the handlebar controls; a slim 14mm open-end spanner makes the job much smoother.
- Additional Cable Cost: The genuine Daytona extension cable requires an extra purchase outside the standard dashcam kit, but it is indispensable for an under-seat layout.
6. Recommended Checklist
Sourcing well-engineered components designed for motorcycle applications is the secret to executing durable DIY modifications.
Recommended Parts for This Project:
- Kaedear Rotary Mirror Camera Bracket (KDR-YX401): Corrosion-resistant aluminum stay with complete hardware.
- Daytona 1m Camera Extension Cable (Part No. 40861): Screw-locking waterproof harness essential for under-seat mounting.
- Daytona Mio MiVue M820WD Motorcycle Dashcam (Part No. 40860): Dual-channel front/rear cameras featuring Sony STARVIS sensors and smartphone connectivity.
7. Disclaimer
The installation steps and parts combinations documented here reflect work performed on the author's personal 2026 Honda X-ADV (Chassis: RH21).
Motorcycle maintenance and electrical modifications directly affect operational safety. Always work in a secure environment and proceed at your own risk. Fasteners on running gear and control perches must be verified for correct tightness after installation and checked periodically during routine maintenance. If you are not confident in your mechanical ability, consult a certified motorcycle service department.
Ride safe, and enjoy the ultimate motorcycle life!