Hello everyone, Boo here.
When you ride a bike that doesn't need the shaken (Japan's roadworthiness inspection; bikes up to 250 cc are exempt), isn't it easy to let maintenance slide?
Even without the inspection, regular checks and fluid changes are still necessary.
So today I'm changing the rear brake fluid on my Honda XR250 BAJA (the Japan-market XR250 / MD30). The vacuum method itself works on most bikes with a rear disc brake; the reservoir location described here is on my BAJA.

For the new brake fluid, I treated myself to A.S.H.

This is the rear end of the XR BAJA.
The rear brake reservoir is on the right-hand side of the bike, below the air box.

The reservoir is the part circled with a yellow dotted line in the middle of the photo.
Looking at the photo, the bolt is rusty and there's dirt on it. It makes me want to restore it.

The reservoir is held by a bolt with a 10 mm head, so loosen that bolt.

With the bolt out, ease the reservoir towards you.
The reservoir is connected to the rear brake master cylinder by a hose, so don't pull it hard.

Once the reservoir is moved, wrap it with a towel or similar in case brake fluid spills.
Here I've wrapped it in a towel and held it with masking tape.
Next, the brake caliper side.

Remove the rubber cap from the bleeder nipple.

Fit a spanner (wrench) to the bleeder nipple (8 mm across the flats).
You'll be loosening and tightening the nipple with the spanner, so think about the angle you fit it at.

Next, connect a hose to the bleeder nipple to drain the fluid.
I draw the fluid out by applying a vacuum to the bleeder nipple, so I've connected a vacuum pump as in the photo above.
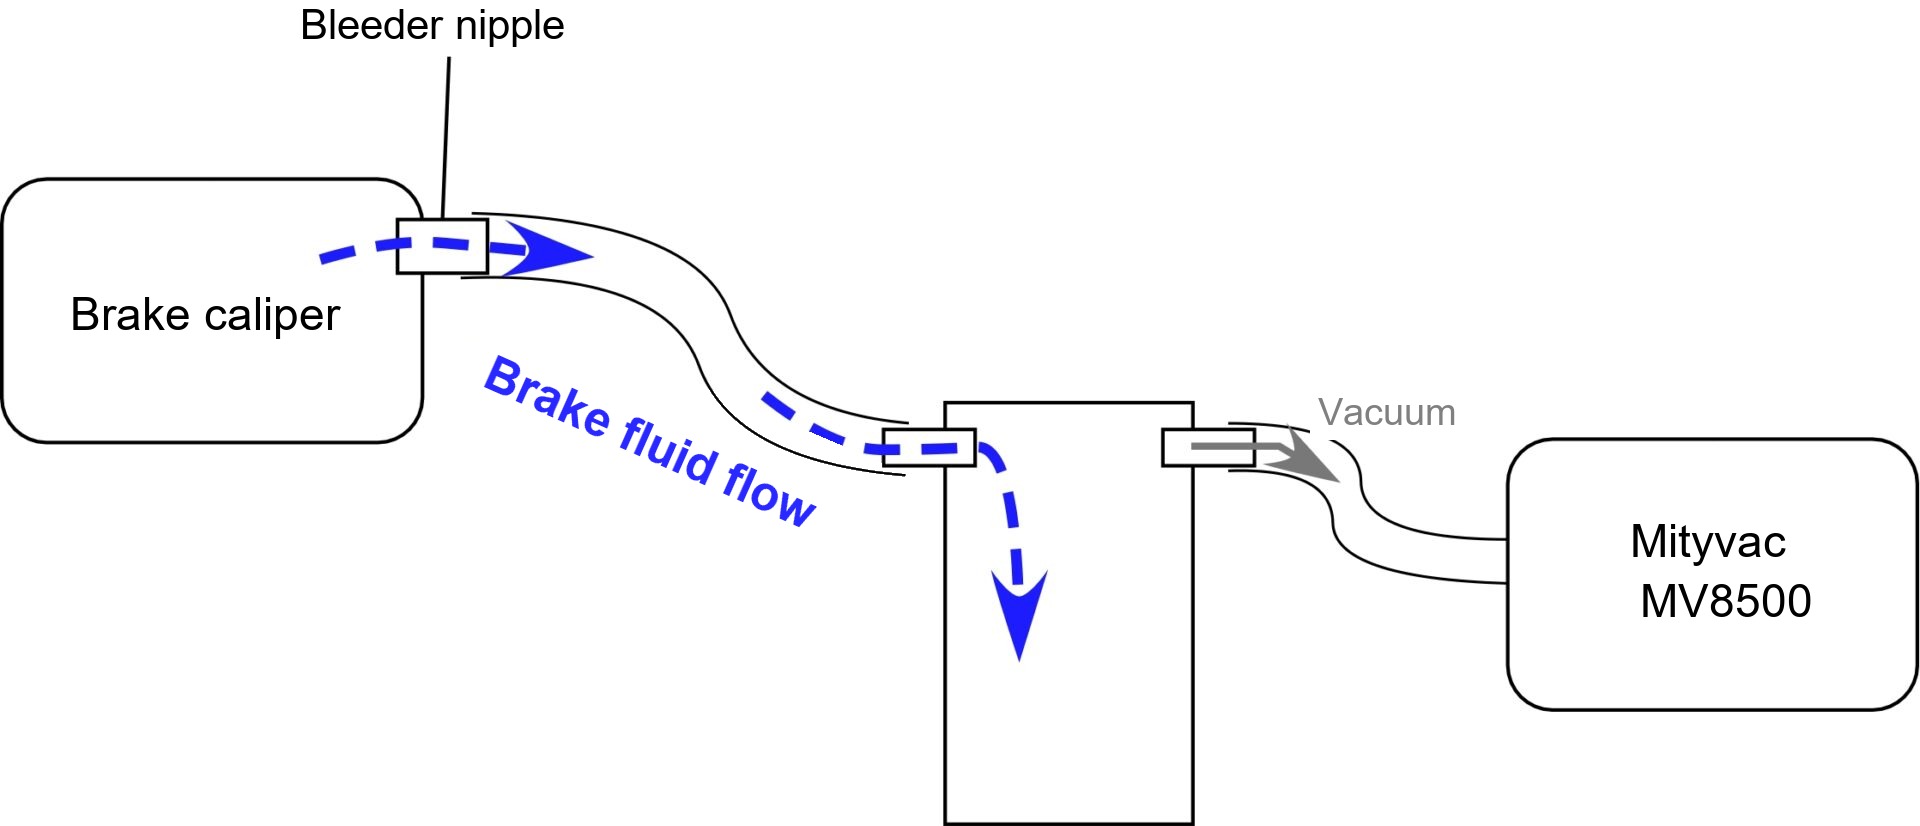
The diagram above shows how it works.
The Mityvac MV8500 creates a vacuum that pulls the fluid out of the brake caliper.
I'd like to write about changing brake fluid without the MV8500 another time.

With everything ready, it's time to take the cap off the reservoir.
Take the cap off very carefully so the reservoir doesn't tilt and spill fluid.

If only the cap comes off cleanly, you'll see an inner plate (I think that's what it is).
Sometimes the inner plate and the diaphragm (the black rubber part in the photo below) come away stuck to the cap (photo below).

Either way, take the cap off calmly and gently.
This stops the reservoir tilting and spilling fluid, and stops fluid on the diaphragm dripping onto the bike.

With the reservoir cap off, the fluid inside was a deep amber colour.
It's best to change it before it gets this dark.

Now squeeze the MV8500 handle several times to create a vacuum.

This is the MV8500's gauge.
You can see the needle has moved from ZERO to the minus (vacuum) side.

With the vacuum applied, loosen the bleeder nipple and the brake fluid is drawn out.
Once a little fluid has been drawn out, tighten the bleeder nipple before the vacuum drops to zero.
Then apply the vacuum again, loosen the bleeder nipple and drain more fluid.
Repeat this, and when enough fluid has been drawn out (without letting the reservoir run empty), top up with new brake fluid with the bleeder nipple closed.
After topping up, apply the vacuum again, loosen the bleeder nipple, and so on.
Repeat this several times. Once the old fluid in the reservoir, brake hose and brake caliper has been replaced with new fluid, the job is done.
You can tell whether the old fluid has been replaced by the colour of the fluid coming out.
When the fluid coming out is the same colour as the new fluid, the job is done.

Here's the reservoir after the brake fluid change.
The fluid is now clear.
Once you're this far, put everything back in the reverse order.

And there's one last important step.
Some brake fluid is left in the bleeder nipple, so soak it up with a twist of tissue.
One twist won't get all the fluid out of the nipple, so swap in fresh twists a few times to soak it all up.
If you skip this, the fluid left in the nipple can absorb moisture and cause rust, or spill and damage the bike.