"I want to install a USB power port, a dashcam, and auxiliary fog lights on my Honda X-ADV, but I don't want a messy rat's nest of wires crowding the battery terminals..."
"Is there a clean, reliable way to tap key-switched (ACC) power safely without cutting OEM wires?"
When outfitting a motorcycle with multiple electrical touring accessories, the most reliable and organized way to manage auxiliary power is using the Daytona D-UNIT WR (Water-Resistant Power Distribution Module).
However, cleanly integrating a D-UNIT into the Honda X-ADV presents two practical challenges: where to tap clean ACC ignition power without splicing factory wires, and how to route a bundle of thick accessory harnesses neatly into the underseat compartment.
In this comprehensive DIY guide, I’ll show you how to tap plug-and-play ACC power from inside the left rear tail cowl using a Kitaco harness, how to custom-notch the battery cover safely, and how to route and protect a bundle of 7 wires using corrugated conduit tubing!
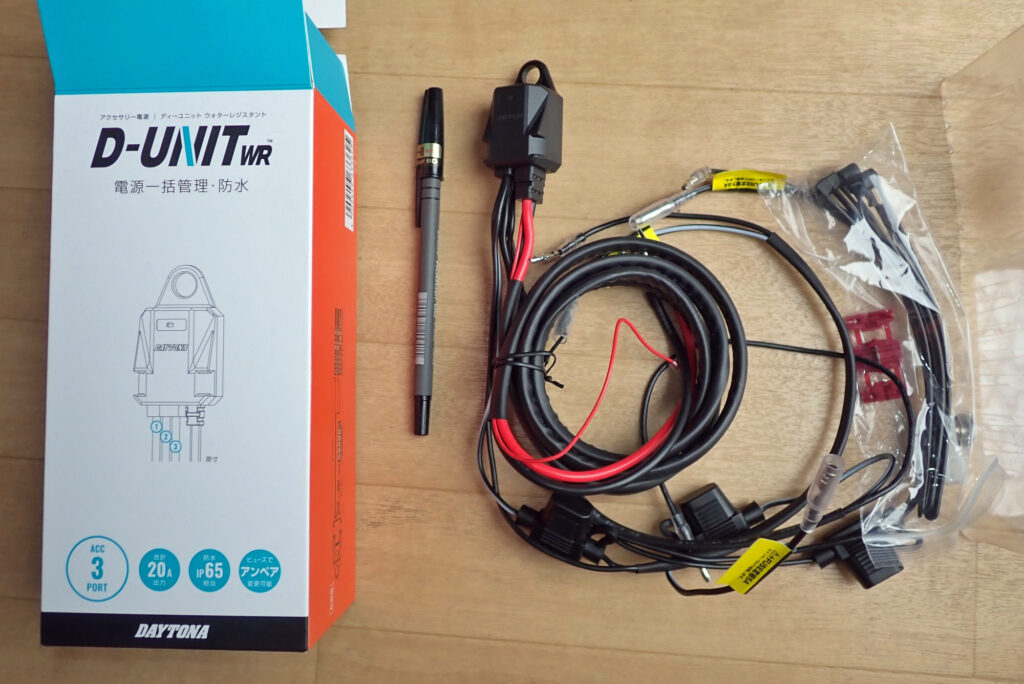
1. Why the Daytona D-UNIT WR (Waterproof) Is the Best Choice for the X-ADV
Wiring multiple accessories directly to battery terminals ("straight-to-battery" connections) introduces significant parasitic drain risks—forgetting to turn off a manual switch will leave you stranded with a dead battery.
Here are the key advantages of installing a Daytona D-UNIT WR:
- Key-Switched Synchronized Control across 3 Output Ports (Max 20A Total): Automatically powers on all connected accessories only when the ignition key is turned to ON, completely eliminating accidental battery drain.
- IP65-Equivalent Weatherproofing: Designed to withstand moisture, washing spray, and condensation under the seat or inside body panels.
- Independent Circuit Fuse Protection: Isolates each electrical accessory with its own mini-blade fuse, protecting other devices and the bike's main electrical system if one component shorts out.
- Ultra-Compact Footprint: Easily tucks into small open cavities in modern adventure chassis.
In this installation, we are connecting a dual-port USB charger and a two-channel motorcycle dashcam, while reserving an open fused port for future auxiliary LED fog lights.
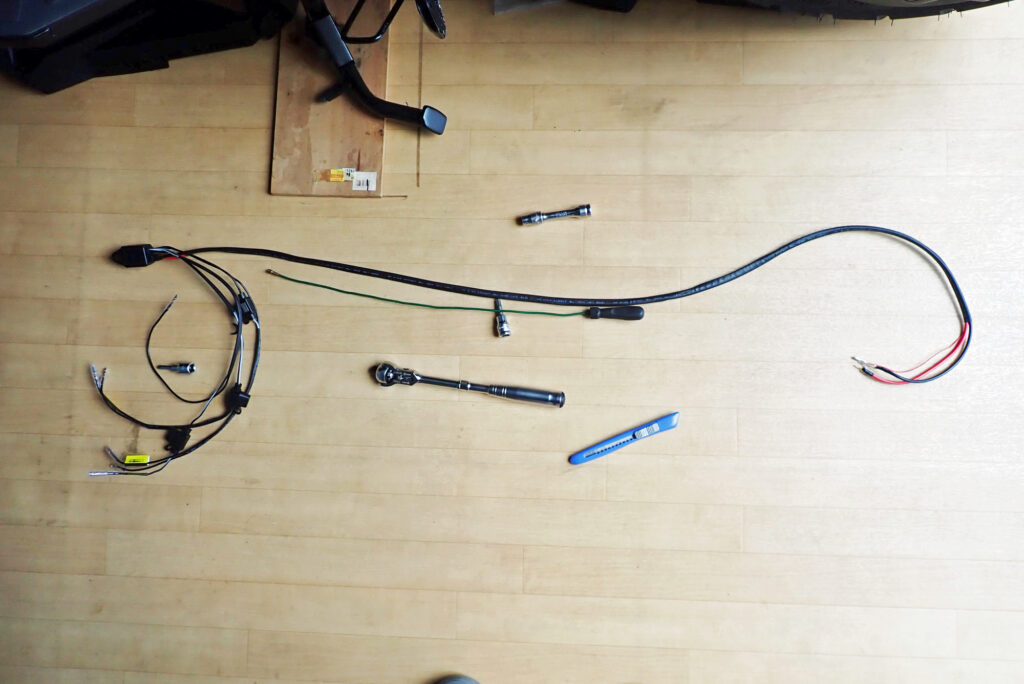
2. Tapping Clean ACC Power with a Kitaco Plug-and-Play Harness (Zero OEM Splicing)
To trigger the internal relay of the D-UNIT, you need an ignition-switched (ACC) 12V signal. Instead of tapping into taillight wires with unreliable T-taps (vampire clips), I used the Kitaco Power Extraction Harness for Honda Models.
Note: This harness utilizes the standard Honda 4-pin option connector shared across models like the GROM (JC61/JC75/JC92) and PCX (JF28/JF56/JF81).
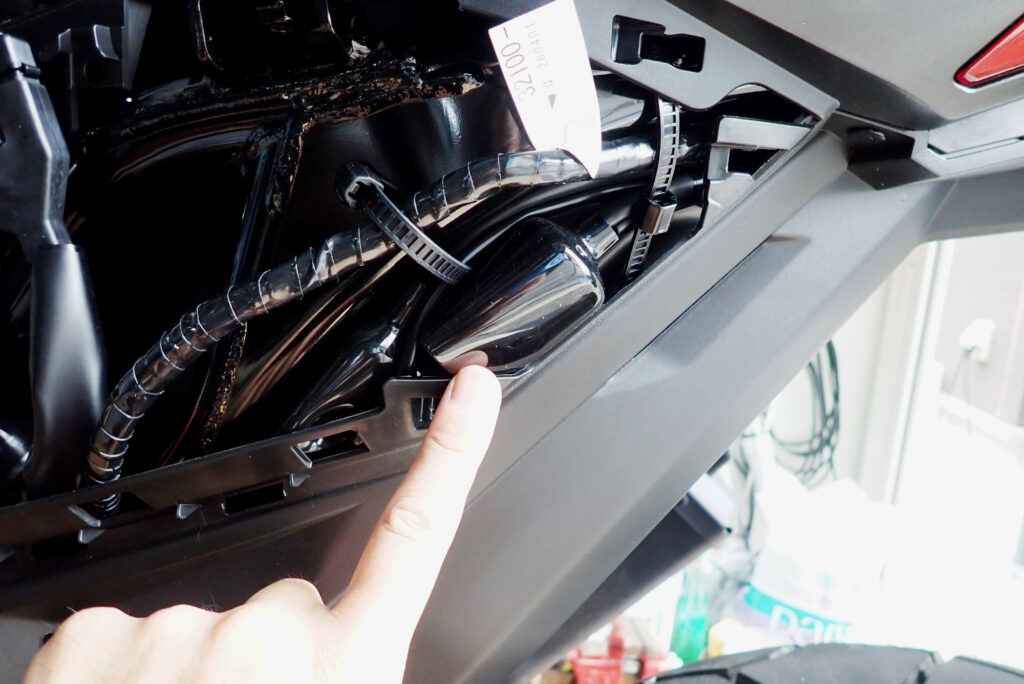
Coupler Location on the X-ADV
The target factory option coupler is tucked securely inside the left rear tail cowl (indicated by my finger in the photo above).
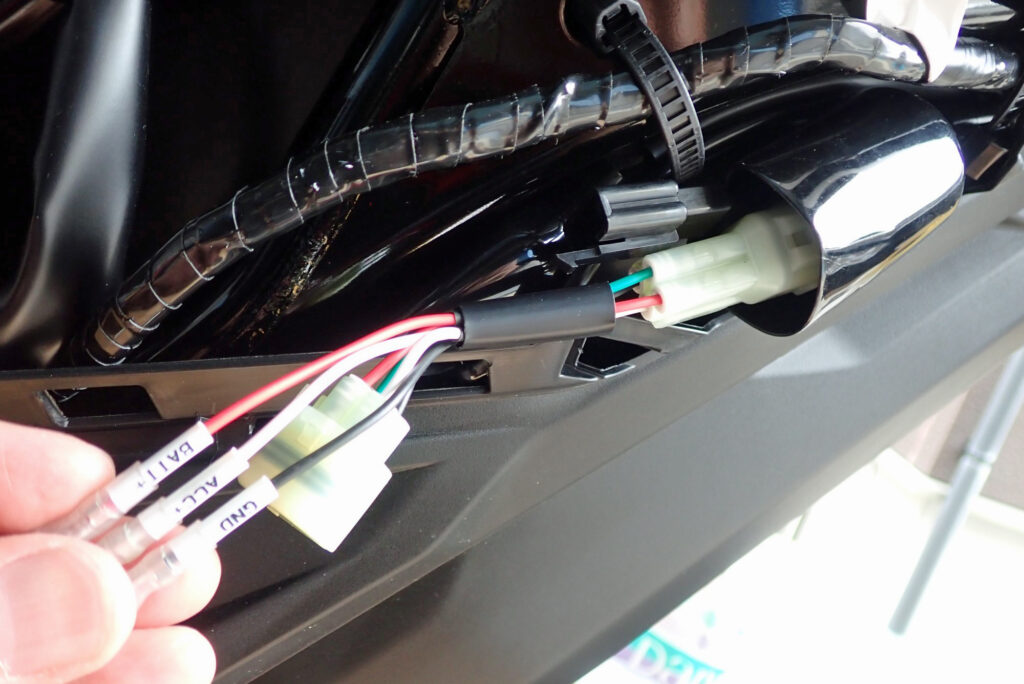
Simply unclip the factory coupler, plug the Kitaco harness inline, and you immediately get clean, fused ACC (+), Constant Battery (+), and Ground (-) leads terminated with Japanese-standard bullet connectors. Zero factory wire cutting, 100% reversible!
3. Routing & Protecting the Harness from Battery Box to Rear Cowl
Next, route the ACC trigger signal wire from the battery compartment back to the option coupler in the left rear cowl.
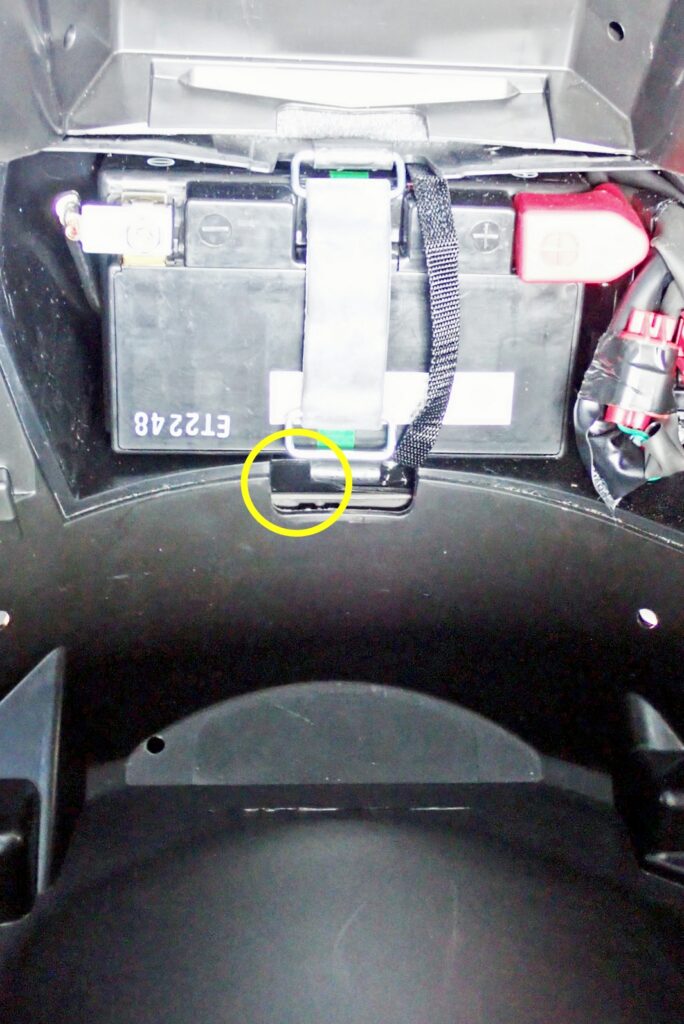
Pass the ACC trigger wire through the factory clearance slot located at the bottom of the battery tray.
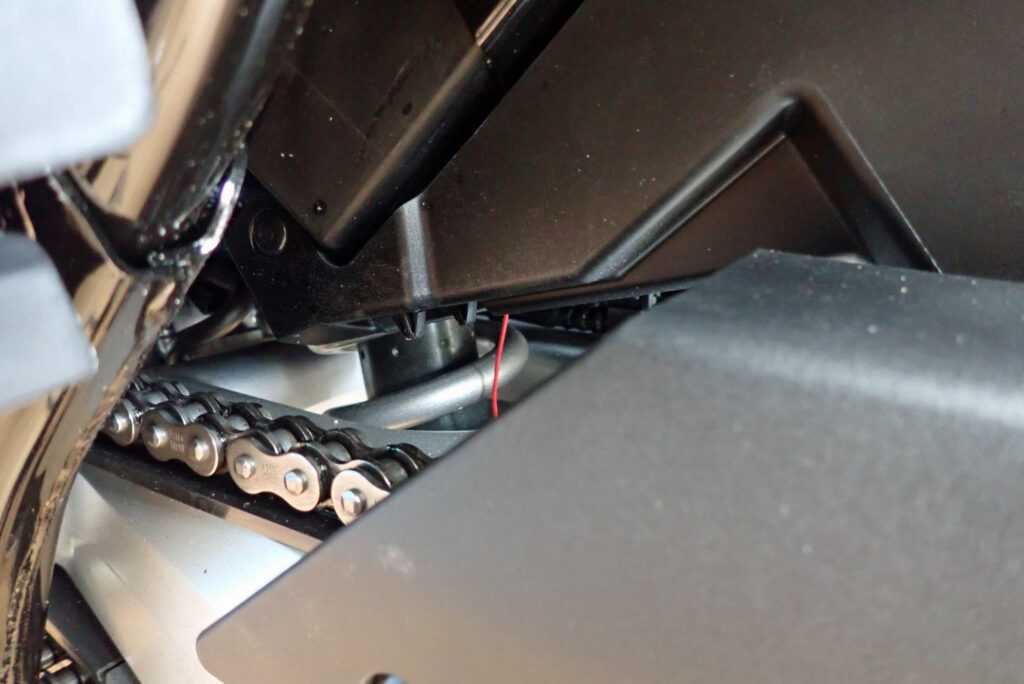
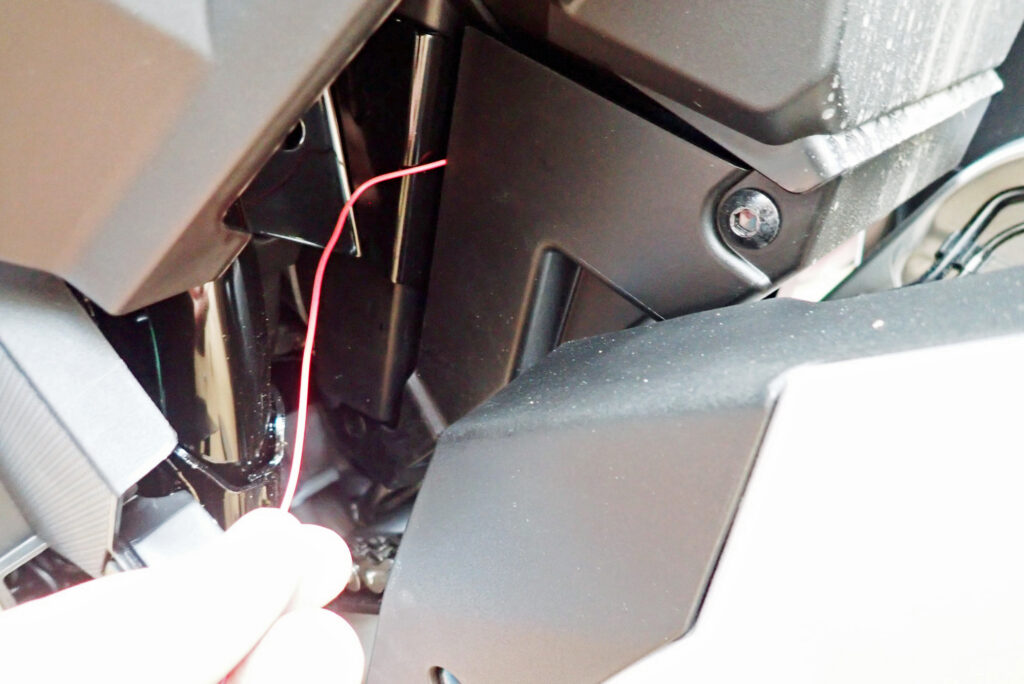
Guiding the wire downward through the inner chassis reveals the lead emerging near the rear shock absorber linkage area before heading up toward the rear cowl.
[Essential Tip] Protect Wires with Corrugated Conduit Tubing!
The area around the rear suspension is constantly exposed to road grit, chain spray, suspension movement, and chassis vibration. Always wrap the wiring harness in split corrugated conduit tubing and secure it tightly to the frame tubes with UV-resistant zip ties, ensuring it clears all moving suspension linkages and hot exhaust components.
4. Custom Notching the Battery Cover (Fitting 7 Accessory Wires)
The factory battery cover on the X-ADV fits flush against the compartment seal. Without modification, you cannot pass thick power cables and harness leads through without severely pinching the wires.
To resolve this, create a clean clearance notch in the bottom edge of the battery cover.
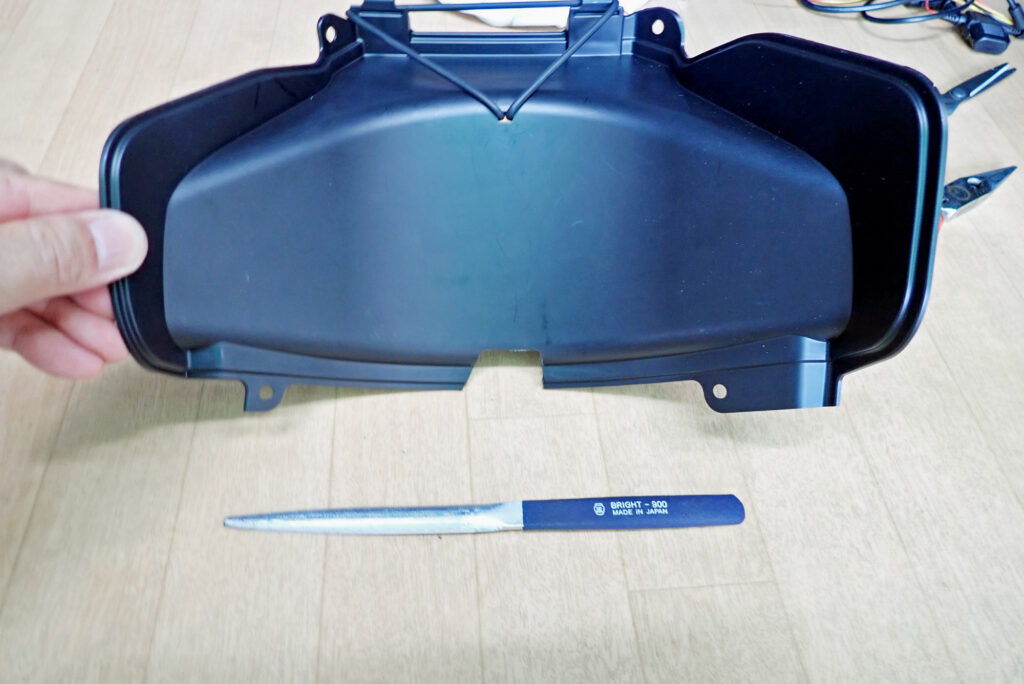
Modification Specs & Tools
- Tools Used: Rotary tool / die grinder + Precision needle file (Tsubosan BRIGHT-900)
- Notch Dimensions: Approx. 2–3 cm wide × 2 cm deep
This notch provides ample, pinch-free clearance for a total of 7 accessory wires:
| Wire Category | Count | Function / Destination |
| D-UNIT Main Power Leads | 2 | Heavy-gauge (+ / -) cables to battery terminals |
| ACC Switch-ON Trigger Wire | 1 | Switched 12V signal from Kitaco rear cowl harness |
| Dashcam Camera Cables | 2 | Signal cables for front and rear dashcam lenses |
| USB Power Outlet Cables | 2 | Power feed lines routed to handlebar cockpit |
| Total | 7 Wires | Route freely through the notch without cover binding |
Rough-cut the plastic opening using a rotary tool, then use a high-grade file (Tsubosan BRIGHT-900) to deburr and bevel the edges. A smooth, rounded radius prevents sharp plastic burrs from chafing through wire insulation over time.
5. Mounting the D-UNIT in the Underseat Compartment
Feed all harness leads from the battery box into the underseat luggage compartment and plug them into the D-UNIT distribution hub.
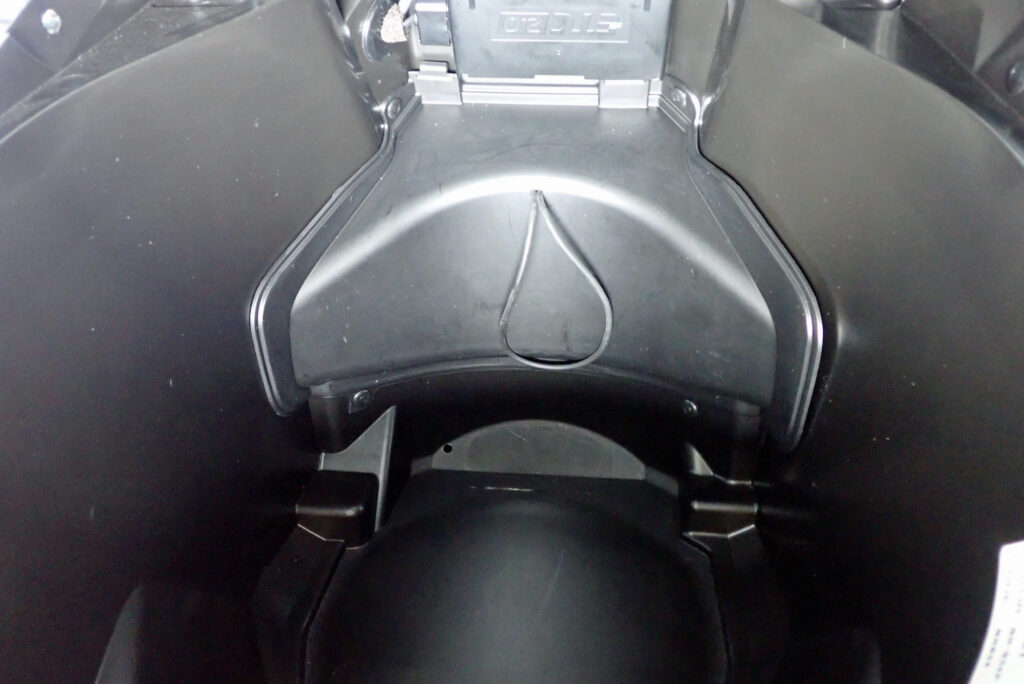
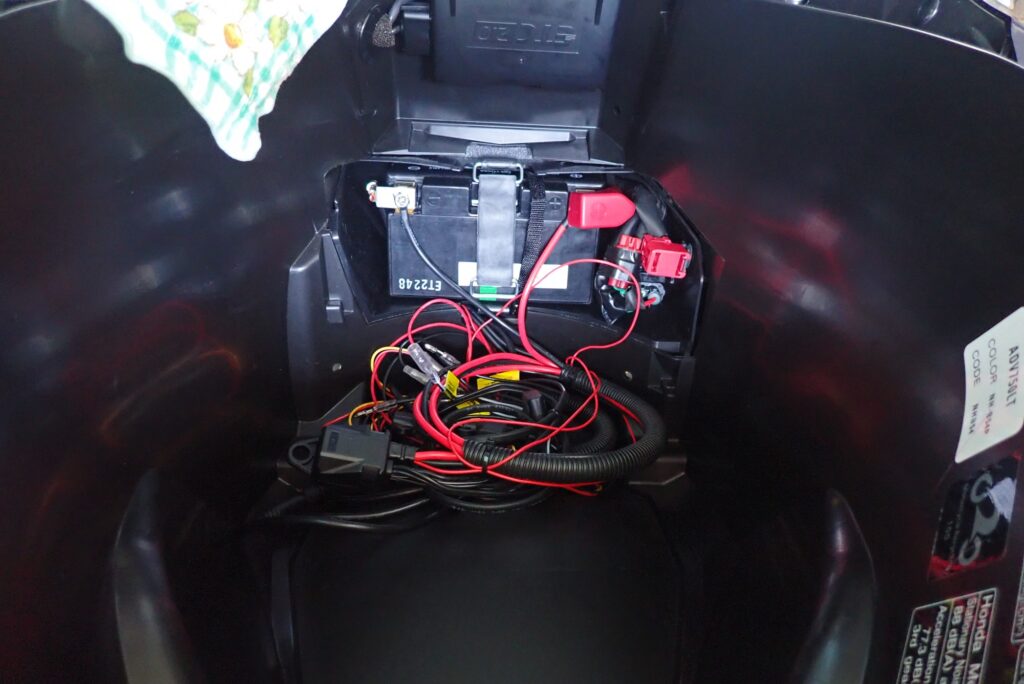
Position the D-UNIT body in the forward section of the underseat compartment near the battery partition. Neatly bundle excess harness lengths and fuse holders with zip ties to keep the bay tidy and rattle-free.
With everything connected, turning the ignition key to ON instantly powers on the USB charger and motorcycle dashcam, and turning the key to OFF completely isolates all accessories from the battery.
6. Recommended Gear & Tools for Honda X-ADV Electrical DIY
Here are the essential components and pro-grade tools used in this build:
1. Daytona D-UNIT WR Waterproof Power Distribution Hub (Part No. 16037)
IP65 waterproof rating, 3 switched ports with a 20A total output. The gold standard power hub for adventure and touring motorcycles.
2. Kitaco Power Extraction Harness for Honda (4-Pin Option Connector)
The cleanest way to tap ACC 12V power on Honda bikes without cutting factory wiring.
3. Tsubosan Precision File BRIGHT-900
A professional-grade Japanese file that cuts plastics and aluminum effortlessly with zero clogging, leaving smooth, factory-like beveled edges.
4. Amon Split Corrugated Conduit Tubing (5mm–7mm ID)
Heavy-duty wire loom tubing essential for protecting electrical harnesses against chassis friction and road debris.
Conclusion: Clean Electrical Architecture for Worry-Free Touring!
Here is a quick recap of installing the Daytona D-UNIT WR on the Honda X-ADV:
- Use a Kitaco Honda harness to tap clean ACC 12V power from the left rear tail cowl without splicing factory wires.
- Wrap all chassis-routed wires in corrugated conduit tubing to protect against suspension movement and debris.
- Notch the battery cover (2–3 cm × 2 cm) to allow 7 accessory wires to pass freely without pinching.
- The D-UNIT centralizes power distribution, safely protecting your battery and electrical gear across all your journeys.
If you are planning to add electrical accessories to your X-ADV, follow this setup for a clean, pro-grade, and reliable electrical hub!
Ride safe and enjoy wrenching!