"I want to mount side panniers on my Honda X-ADV and build the ultimate camping adventure tourer!"
"I’m looking into the GIVI PLO1188MK side case holder, but can I install it cleanly via DIY?"
One of the most effective touring modifications to maximize the luggage capacity of the Honda X-ADV and give it that rugged, adventure-ready stance is installing the GIVI PLO1188MK (PL ONE-FIT Side-Case Holder).
While the installation itself is straightforward if you follow the official manual, going through the DIY process revealed two critical checkpoints you must know before buying:
- This rack cannot be installed as a standalone unit—it requires the Honda OEM rear carrier or GIVI SR1188 top case rack.
- The clearance between the right-side rack stay and the stock OEM exhaust is razor-thin.
In this in-depth guide, I’ll walk you through the complete step-by-step DIY installation, share fitting tips from my own install, and examine the muffler clearance to ensure your build goes smoothly!
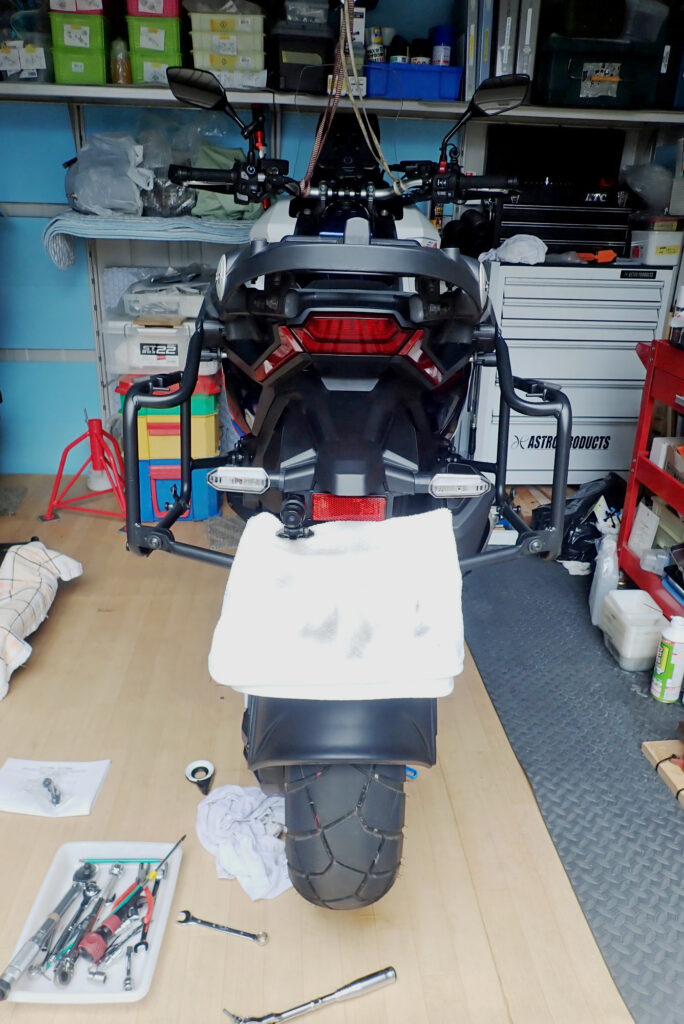
1. [Crucial Pre-Purchase Note] PLO1188MK Cannot Be Mounted Standalone!
First and foremost, the most important thing prospective buyers need to know is that this rack must be paired with either the OEM Honda rear carrier or the GIVI SR1188 top case rear rack.
The upper mounting stays of the PLO1188MK are designed to bolt directly into the frame stays of the GIVI SR1188 top rack. Consequently, if your bike is still equipped with the factory passenger grab bars and lacks a rear rack, you cannot mount this side carrier.
If you only plan to run side panniers without a top box, you still need either the SR1188 rack or the Honda OEM rear carrier as the structural anchor.
Note: When installing the SR1188 top rack, applying paint protection film to prevent fairing scratches is essential. Check out my previous guide for full details:
2. GIVI PLO1188MK Side Carrier DIY Step-by-Step Installation
Let's get into the step-by-step installation and key points to avoid assembly errors.
(You can also reference the official mounting manual on GIVI's website: GIVI Official PLO1188MK Product Page).
Step 1: Remove Lower Mounting Bolts & Insert Collar Spacers
Remove the two factory bolts located on the subframe area just above the pillion footpeg bracket.
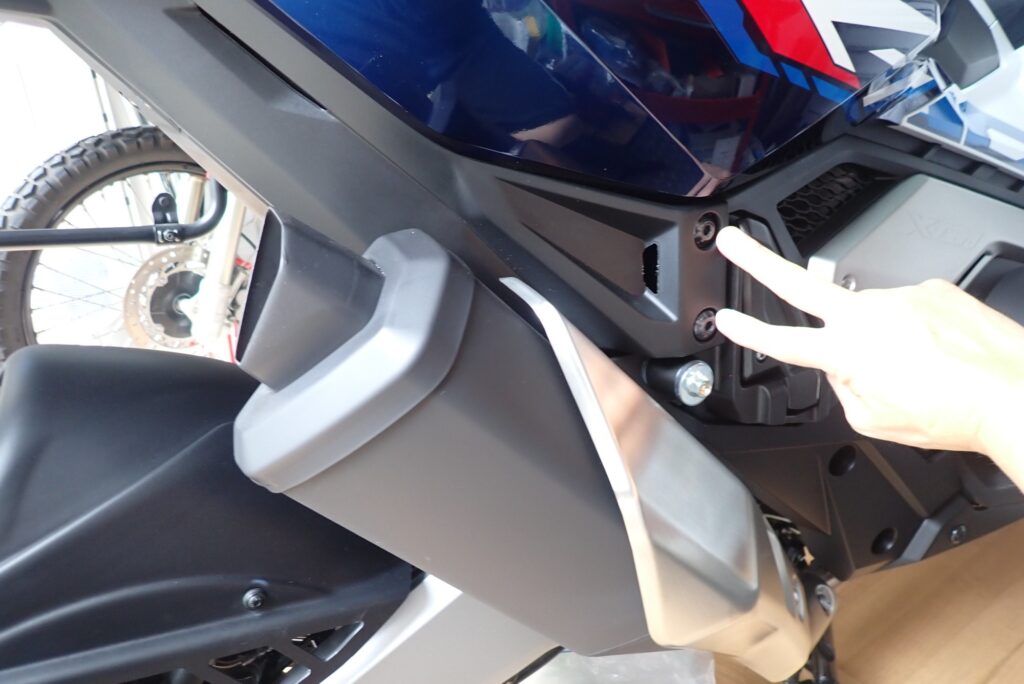
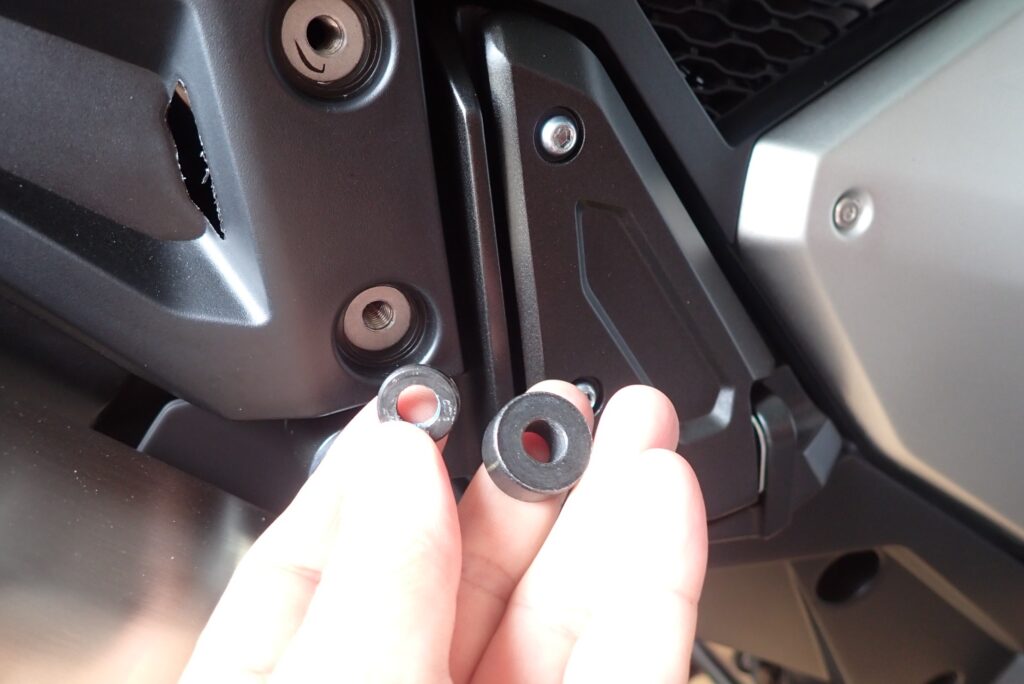
Insert the two dedicated collar spacers included in the kit into the recessed bolt holes. These spacers are crucial structural components that prevent excessive clamping force from crushing or cracking the plastic side fairings. Make sure each spacer is oriented and seated properly in its respective socket.
Step 2: Pay Attention to the Correct Washer Stacking Sequence
When threading the mounting bolts, follow the exact washer sequence shown below:
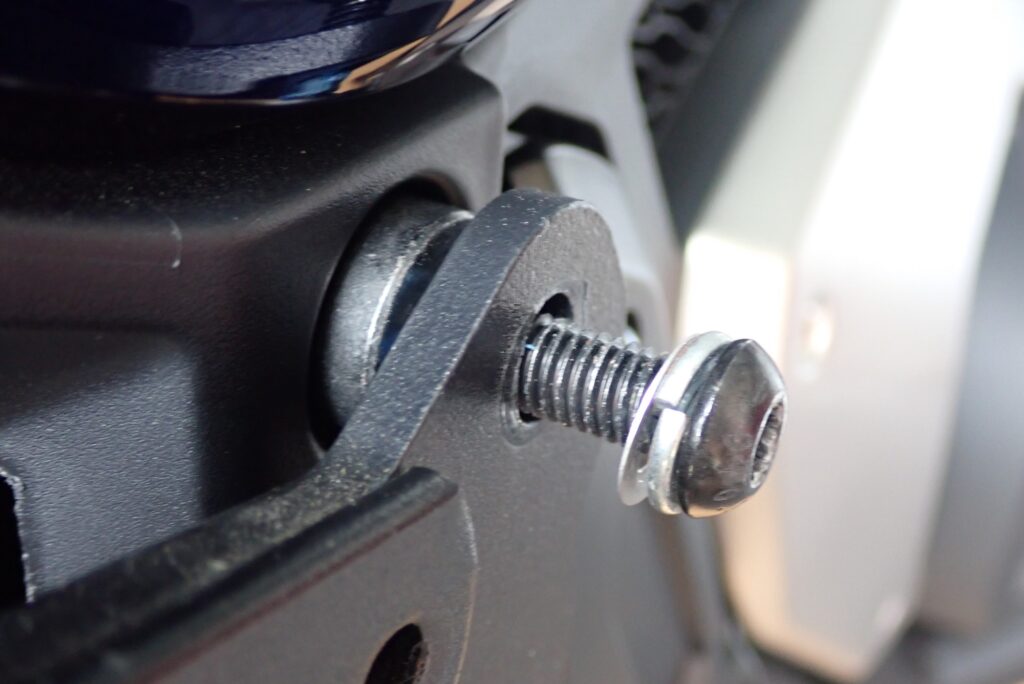
[Bolt Head] → [Spring Washer] → [Flat Washer] → [Rack Stay] → [Collar Spacer] → [Chassis Frame]
Position the spring washer directly under the bolt head to provide positive locking tension against road vibrations.
Step 3: Identify the 3 Anchor Points & Loose Test-Fitting (The Golden Rule)
The PLO1188MK mounts securely across three dedicated anchor points per side:
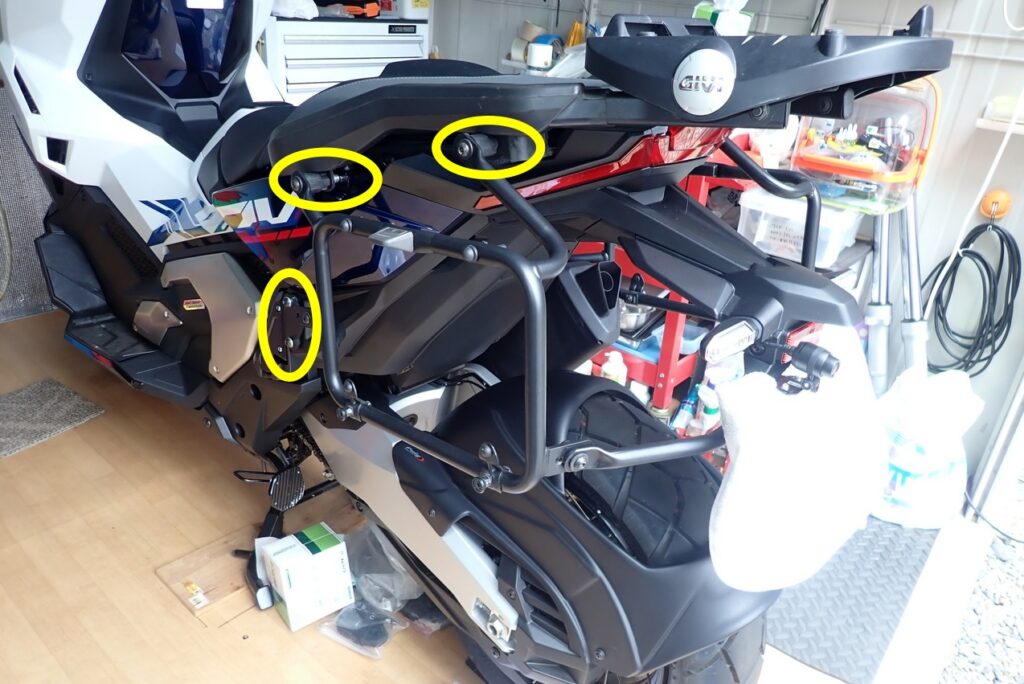
- Upper Rear: Connects to the GIVI SR1188 top rack stay
- Upper Front: Connects near the forward grab bar mount
- Lower Front: Connects to the pillion footpeg subframe bracket (where the collar spacers were inserted)
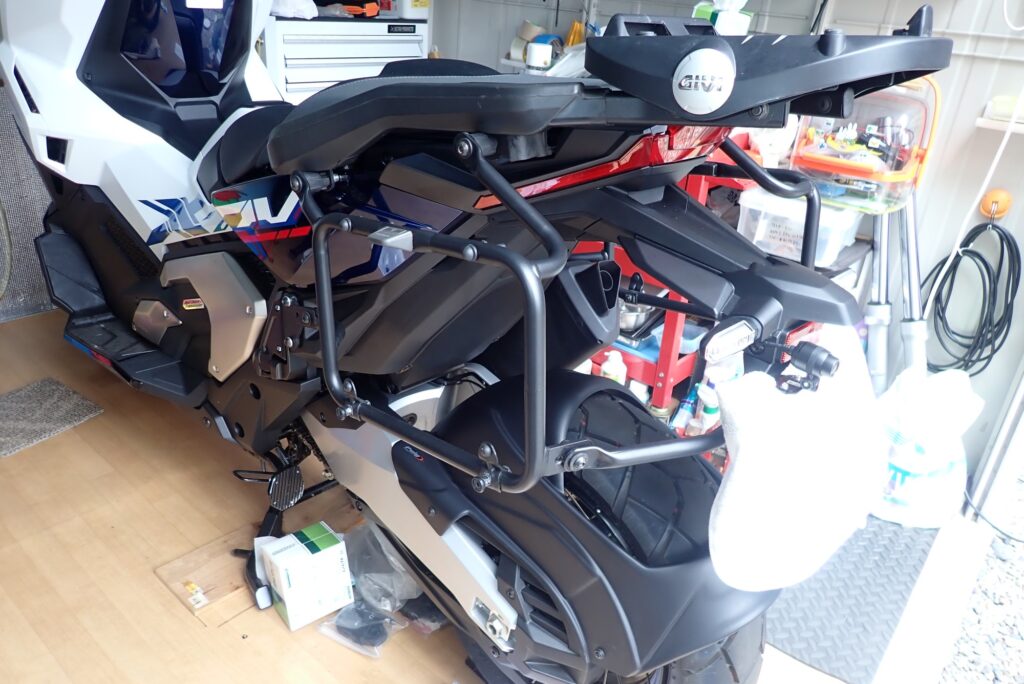
[Golden Rule: Never Torque Down Bolts Immediately!]
Tubular steel racks have manufacturing tolerances. If you torque down one point fully at the beginning, the remaining bolt holes will misalign. Always thread all bolts loosely by hand on both sides first. Once all hardware is loosely caught and the overall alignment is verified, torque each bolt down evenly to specification.
3. Final Torqueing, Aesthetics & Structural Rigidity Check
Torque all mounting bolts to proper specifications.
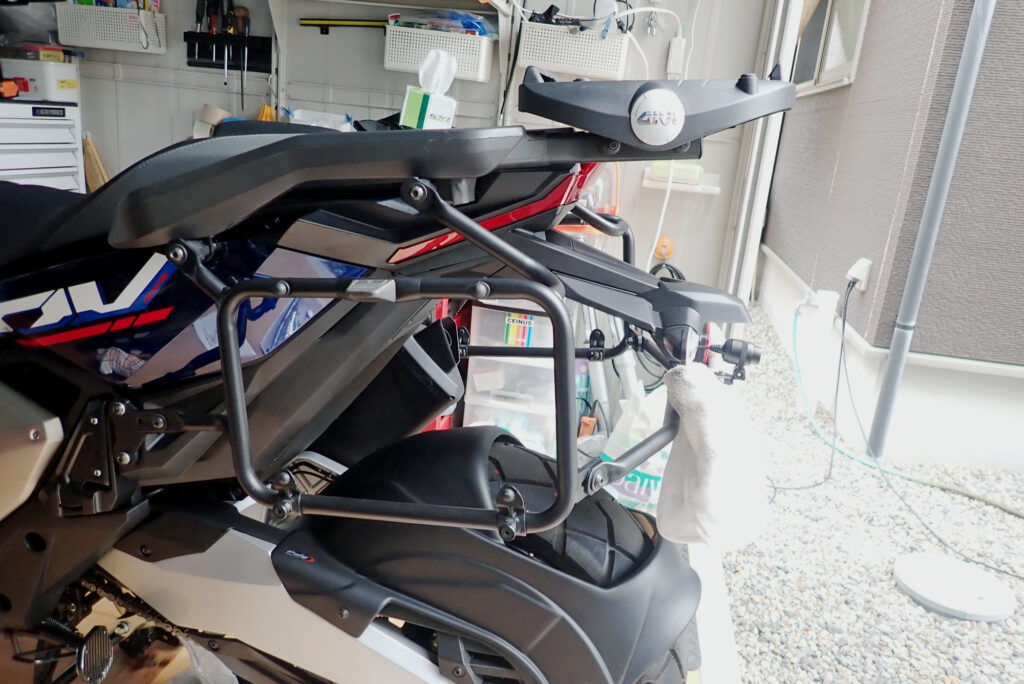
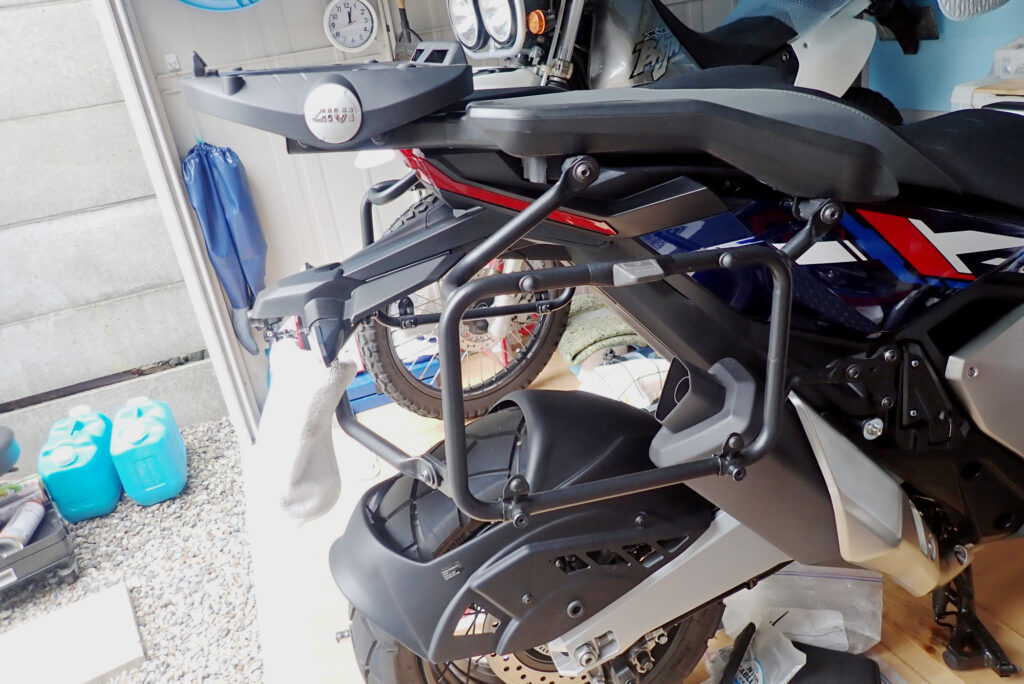
Viewing the motorcycle from the rear, the rack frames sit perfectly symmetrical. Grabbing the rack and shaking it firmly moves the entire bike on its suspension with zero flex—offering outstanding structural rigidity capable of supporting heavy adventure cases.
4. [Important Caution] Tight Clearance with the OEM Stock Exhaust!
After tightening all hardware, be sure to inspect the clearance between the right-side rack frame and the exhaust silencer.
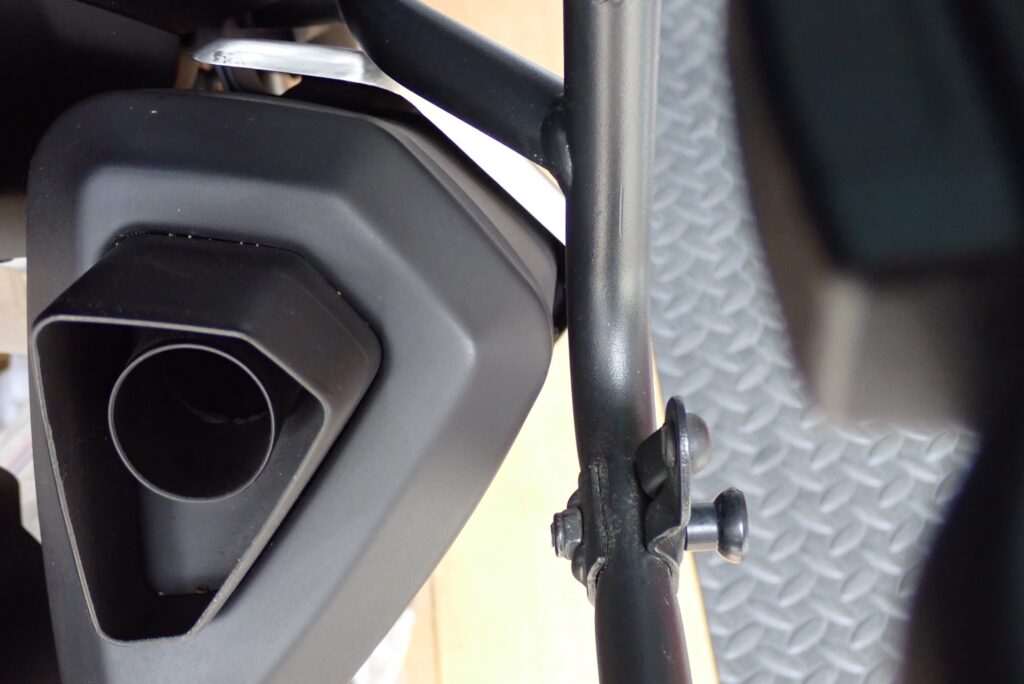
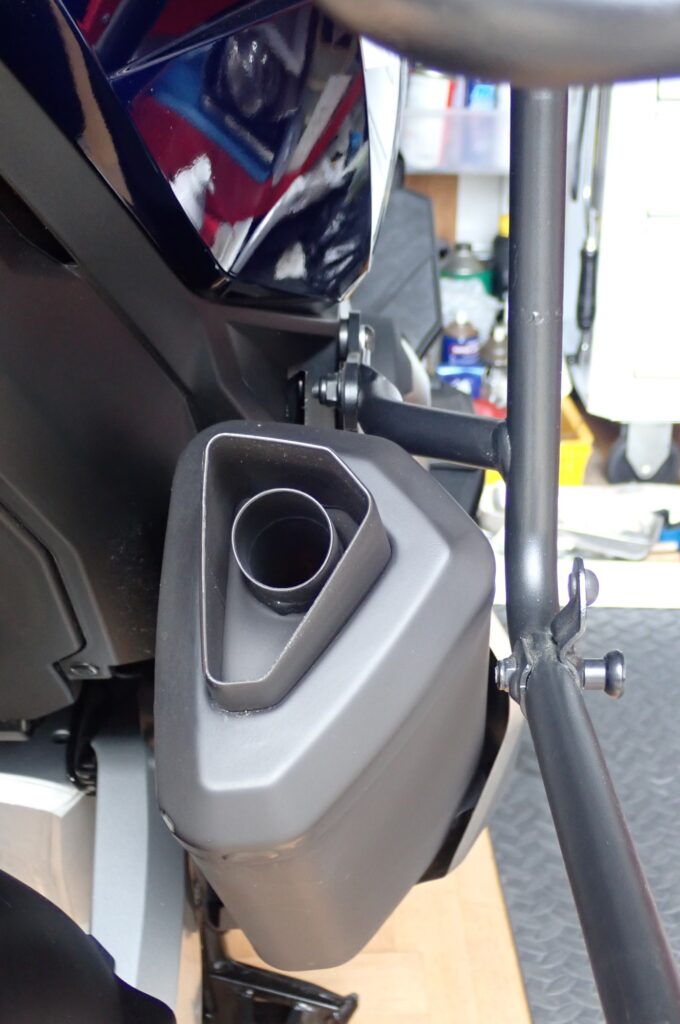
As seen in the photos, the gap between the silencer end cap (heat shield) and the inside of the rack stay is extremely tight—barely a finger’s width.
- With Stock OEM Exhaust: The rack does not touch the muffler, but during the loose-fitting stage, pull the stay slightly outward before final torqueing to maximize clearance.
- With Aftermarket Exhausts (Akrapovic, Termignoni, etc.): Depending on the muffler's outer diameter and upswept angle, the steel stay or mounted side case might interfere or suffer direct heat blast from exhaust gases. Prior measurement is essential if you run an aftermarket pipe.
5. Recommended Gear & Side Cases for Honda X-ADV
Here are the essential mounting brackets and popular side cases compatible with this setup:
1. GIVI PLO1188MK Side Case Holder (Honda X-ADV Specific)
The dedicated high-strength tubular steel rack designed to mount GIVI Monokey side cases.
2. GIVI SR1188 Rear Rack (Honda X-ADV Specific)
The top case rear rack needed to secure the upper mounting stays of the PLO1188MK if you don’t have the Honda OEM rear carrier.
3. GIVI Monokey Side Cases TRK35 / TRK33N (Trekker Series)
Heavy-duty aluminum-paneled adventure panniers that perfectly complement the rugged styling of the X-ADV.
4. GIVI Side Cases E23ND (23L Compact & Lightweight)
To avoid excessive weight that could upset the bike's low-speed handling balance and increase tip-over risks, I chose these lightweight, compact 23-liter cases for nimble everyday touring.
Conclusion: Build Your Ultimate Adventure Tourer with Confidence!
Here is a quick recap of the essential points when installing the GIVI PLO1188MK side carrier on a Honda X-ADV:
- Cannot be mounted alone: Requires the GIVI SR1188 top rack or OEM rear carrier as an upper anchor.
- Always insert the collar spacers at the lower frame mounts to prevent cracking the plastic fairings.
- Hand-tighten all bolts loosely first to prevent hole misalignment before final torqueing.
- Verify exhaust clearance carefully, especially if running an aftermarket silencer.
That completes the installation and clearance inspection! In the next article, I’ll mount the side cases for a test ride and share real-world impressions regarding handling, wind resistance, and touring usability.
Ride safe and enjoy wrenching!